How to Integrate Moesif and Recurly to Easily Monetize Your APIs
Building great apps and APIs is not an easy task. Even harder, is trying to monetize and create a sustainable business with them. As part of our mission to help companies create better products, we decided to put a bunch of effort towards helping businesses more easily monetize. Our no-code approach to billing is a simple and elegant way to very rapidly gain the capability to bill customers for usage. Easy monetization is the premise for our latest feature for generating revenue from your APIs. Our newest feature can be found under the Billing Meters screen in Moesif.
Why use a billing meter?
Metering usage of your product, and charging for that usage, is one of the most common ways to monetize technology products. Tallying-up usage, send the metrics to a billing provider, and then have the billing provider collect the funds.
For those who have implemented a usage-based billing scheme for their products, you know that the process can be quite complex. It involves gathering a lot of data, getting that data to the right place, collecting the funds owed, and, if the invoice isn’t paid, putting governance in place so that the user can no longer access the service. There’s a lot of coding, integration, testing, and support that goes into creating such billing systems.
Moesif makes this easy for you by collecting a vast array of metrics that can be billed upon, and then automatically rounding them up by user and/or company. With Moesif, all of the data you need to accurately bill is already there, which is incidentally why we believed creating a billing meter feature made a lot of sense. We have also done the work for you to create an integration between Moesif and Recurly. This means that with a couple of clicks, you’ll be able to bill customers for usage. You’ll have billing capabilities in a matter of minutes instead of days, or even weeks, depending on the complexity.
How to create and use a Billing Meter in Moesif
Once you’ve integrated your APIs with Moesif, monetizing them is very simple. There are a few steps after you’ve integrated with Moesif to get you to point when you can collect revenue. These steps include:
- Setting up plans and add-ons in Recurly
- Adding the Moesif webhook to Recurly
- Plugging the Recurly API details into Moesif
- Configuring the billing parameters in Moesif
- Activating the billing meter
All of these steps are very intuitive and take only a matter of minutes.

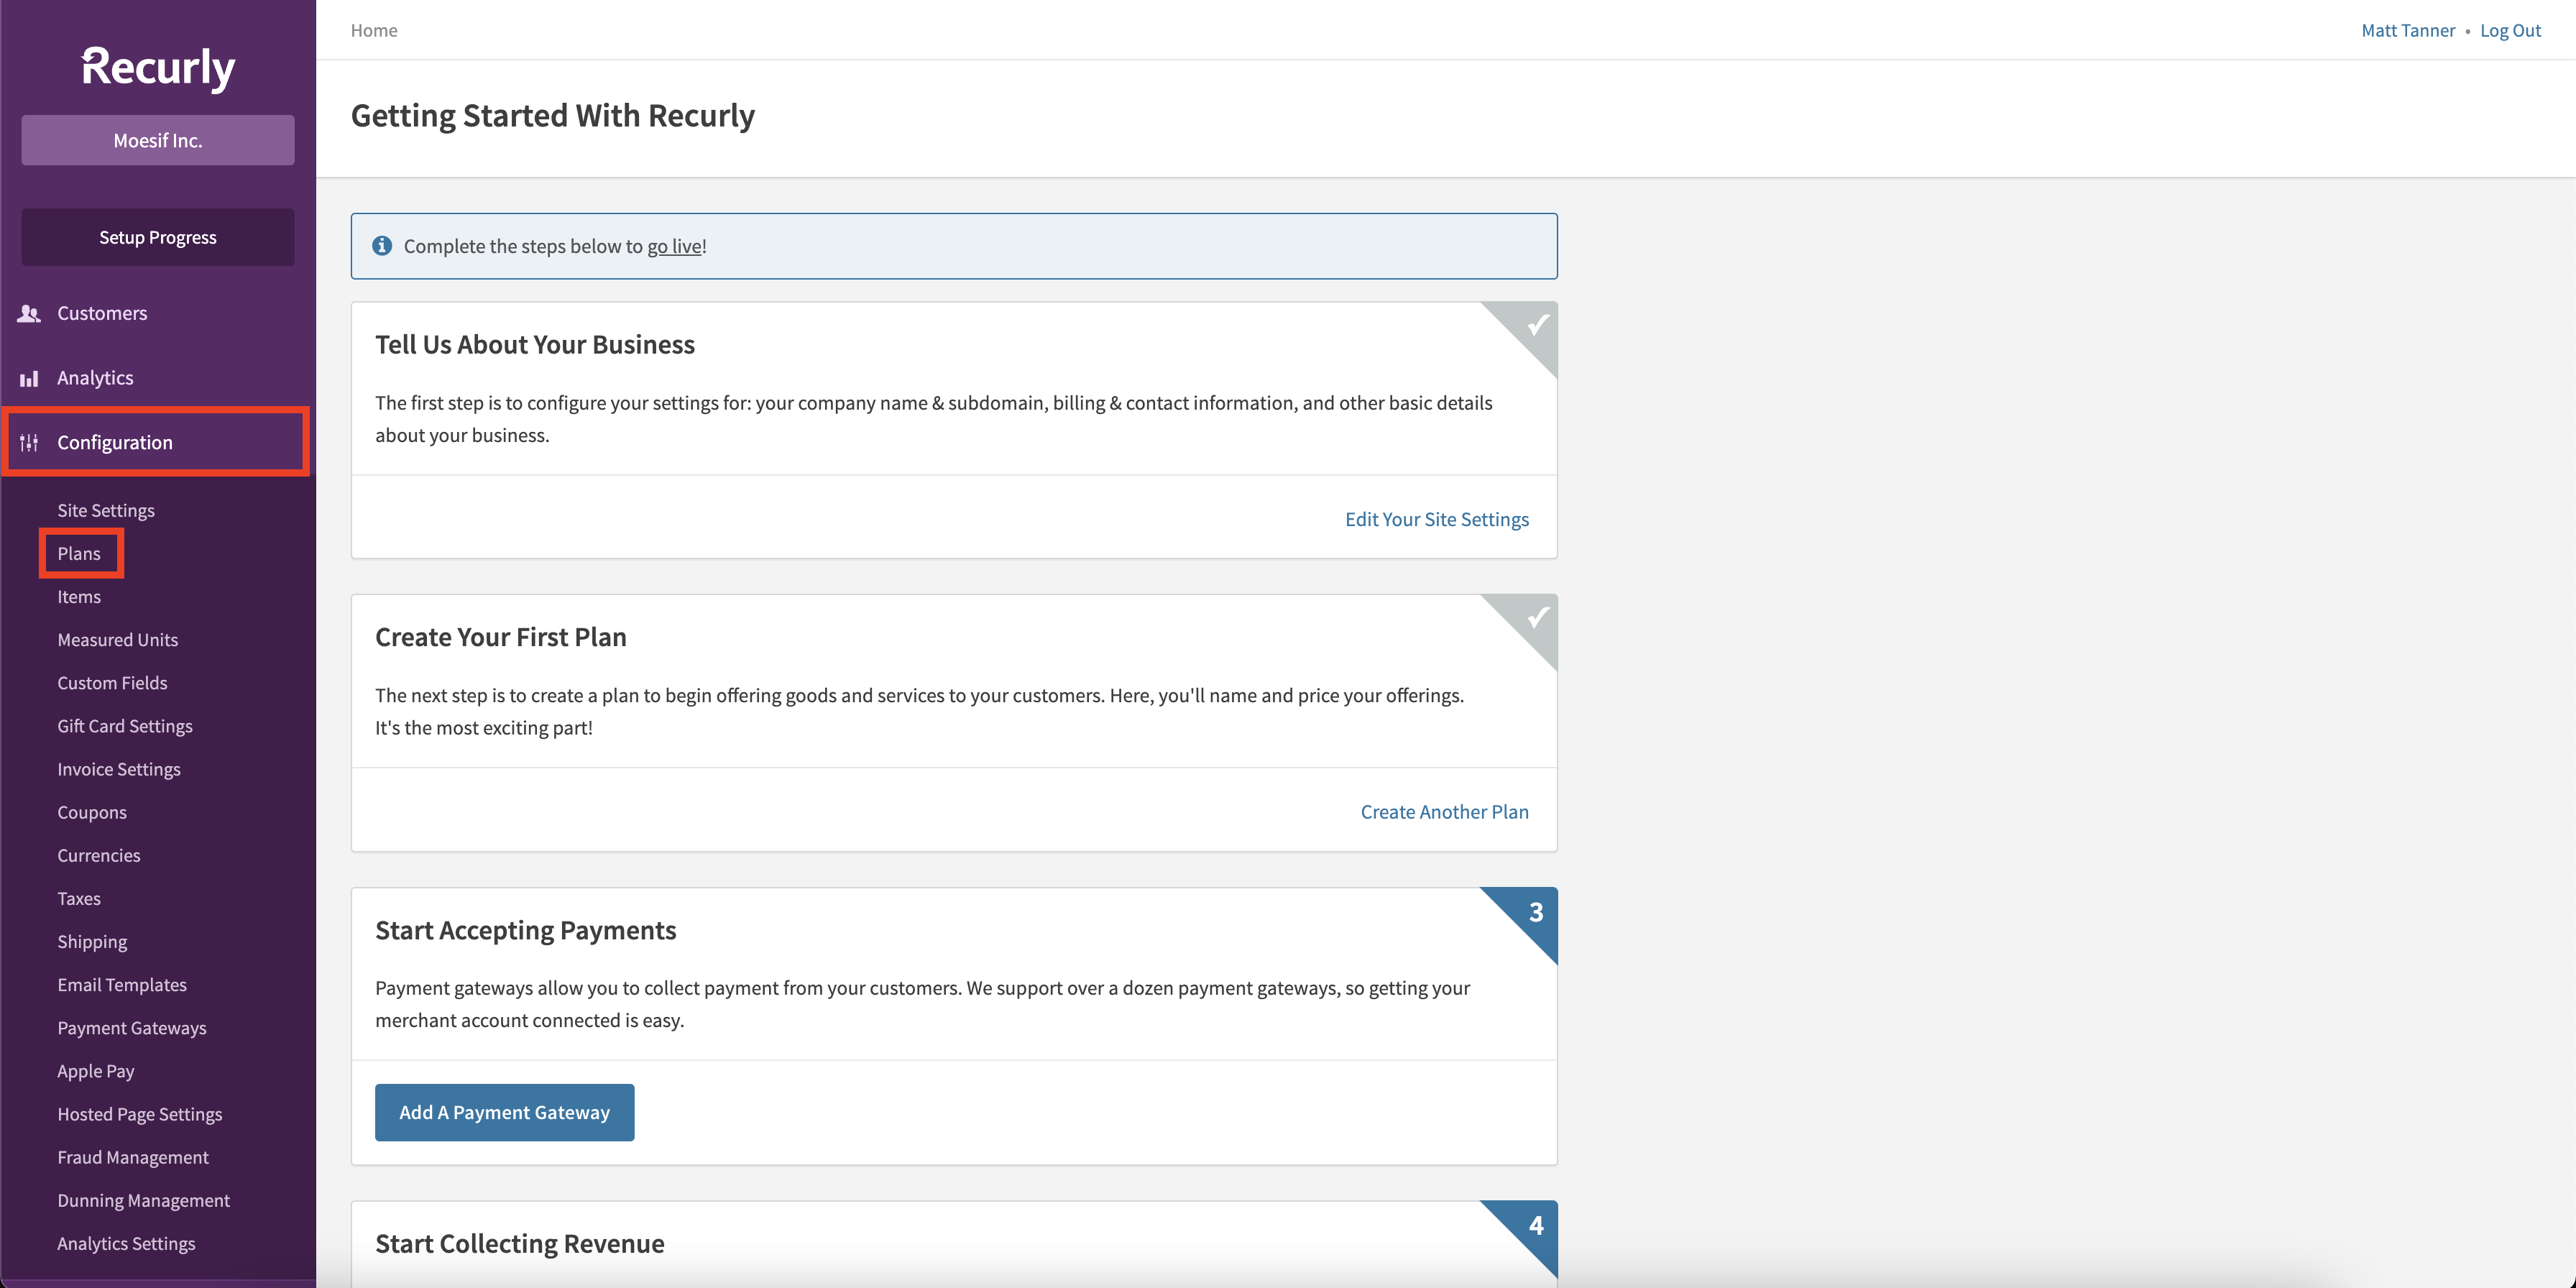
Setting up plans and add-ons in Recurly
The first step to monetizing is to actually set up some plans in Recurly for usage to be billed against. To set up a plan in Recurly you’ll need to use the left-side menu to click on Configurations and then Plans.
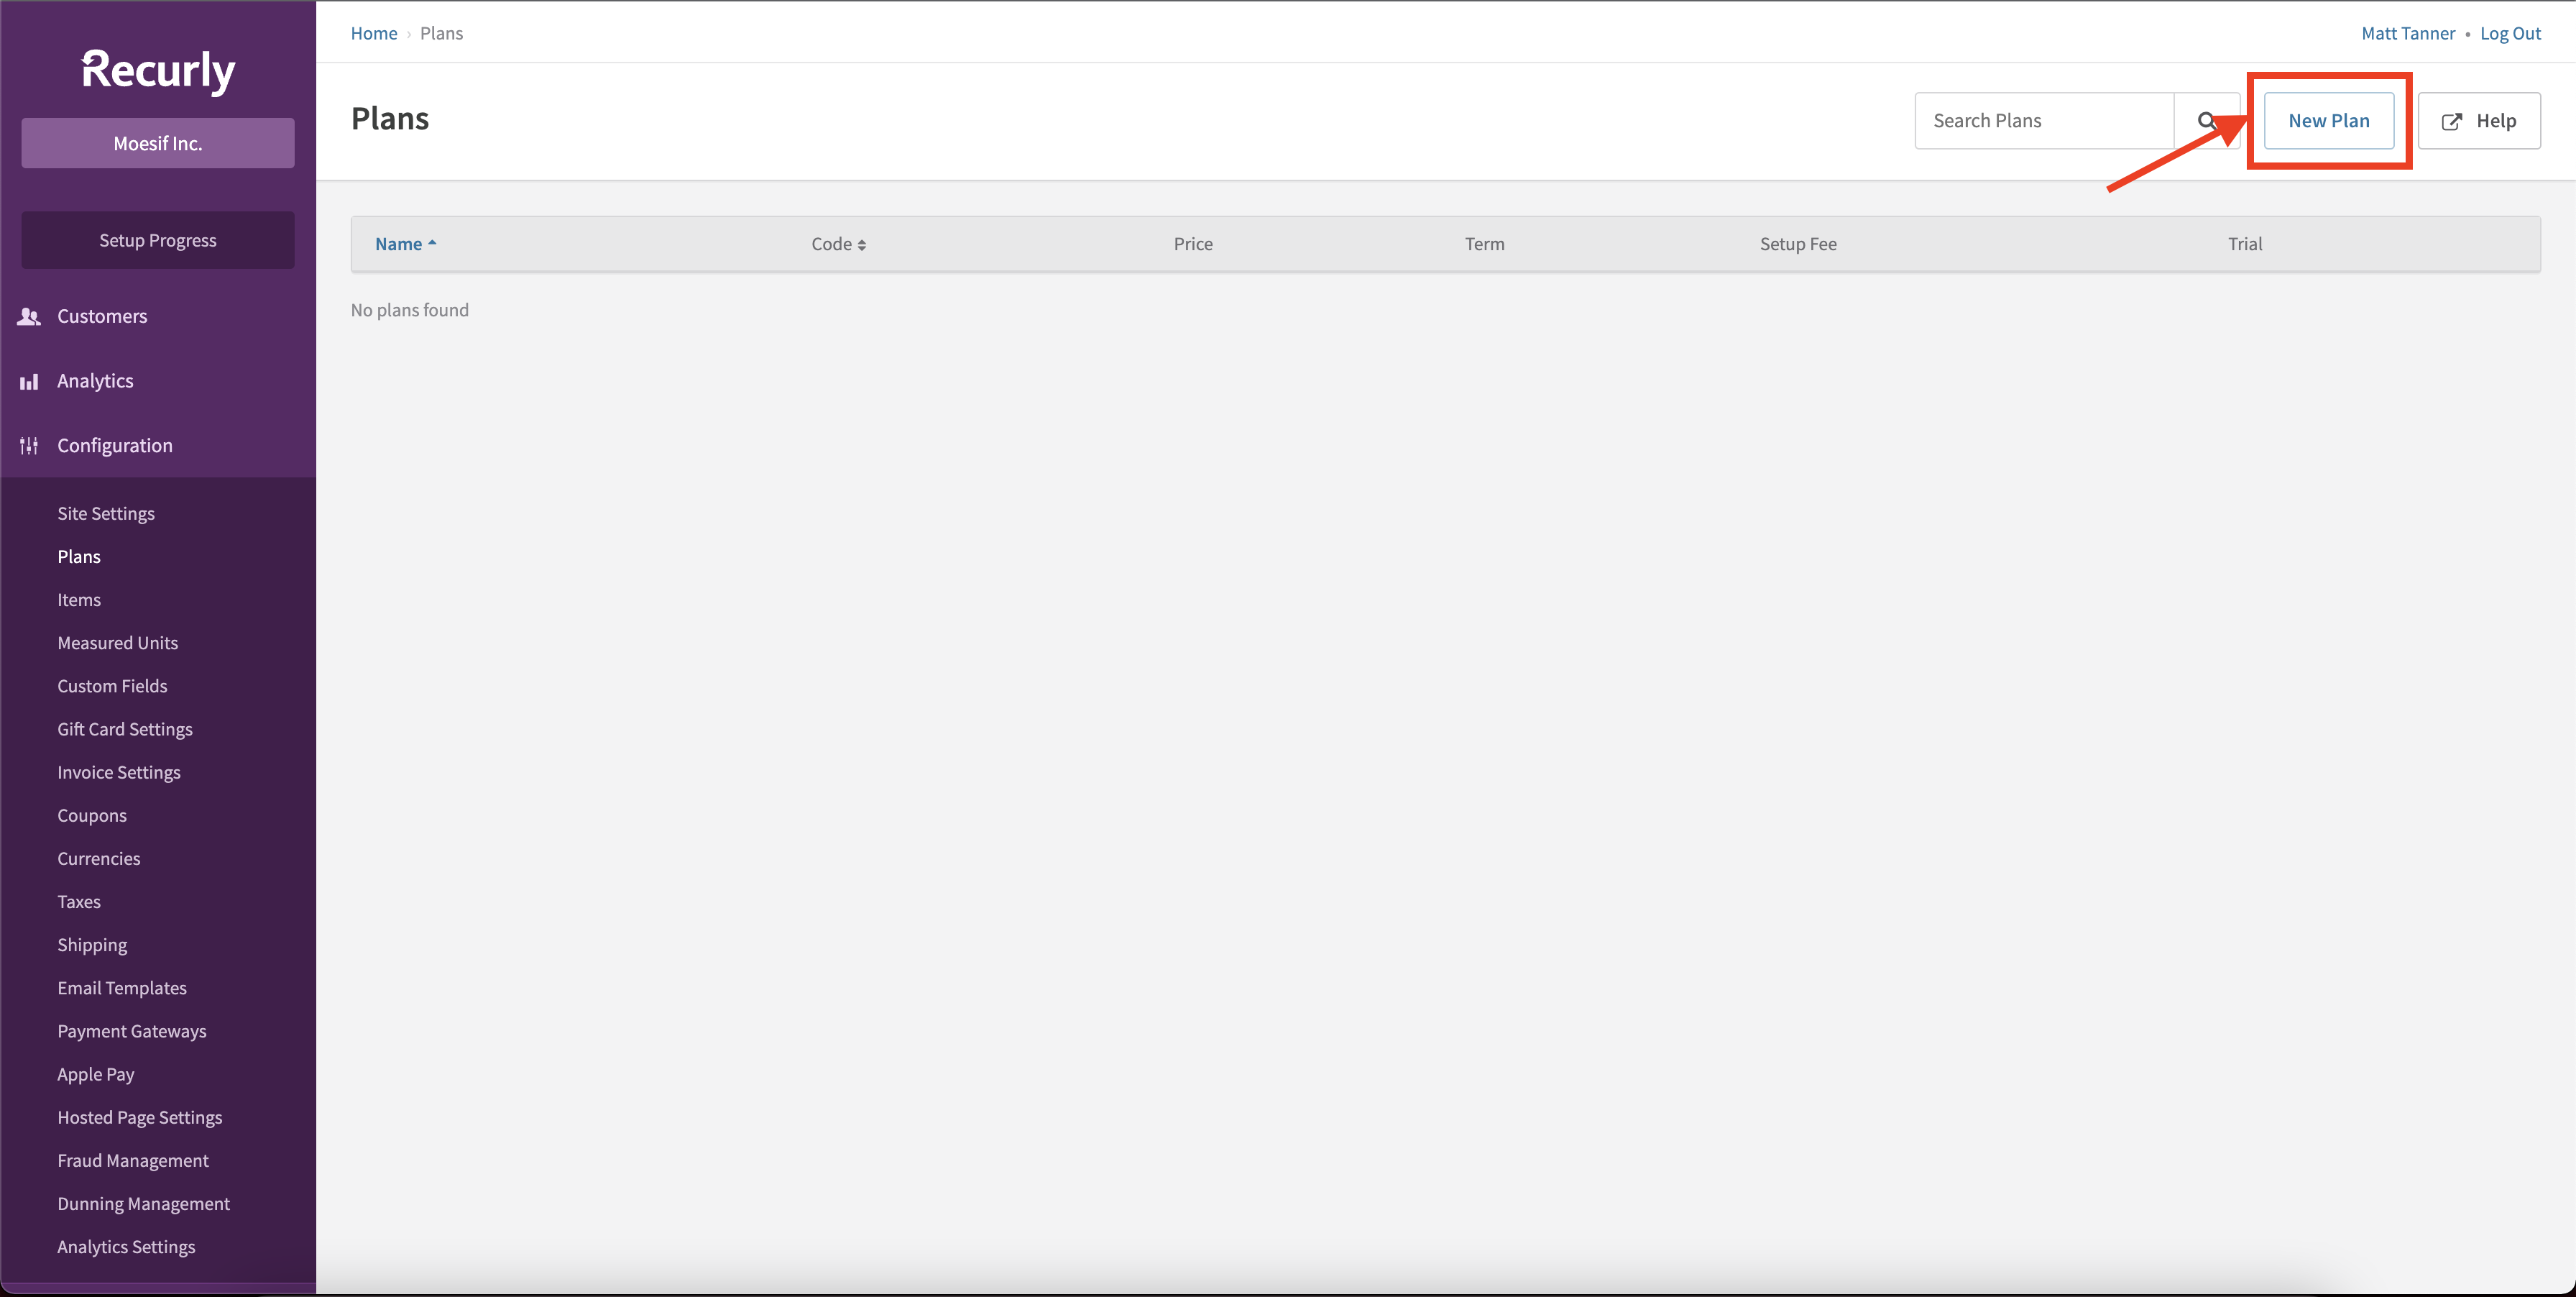
Once you are on the Plans screen, you can click New Plan in the top right of the screen to create a new plan.
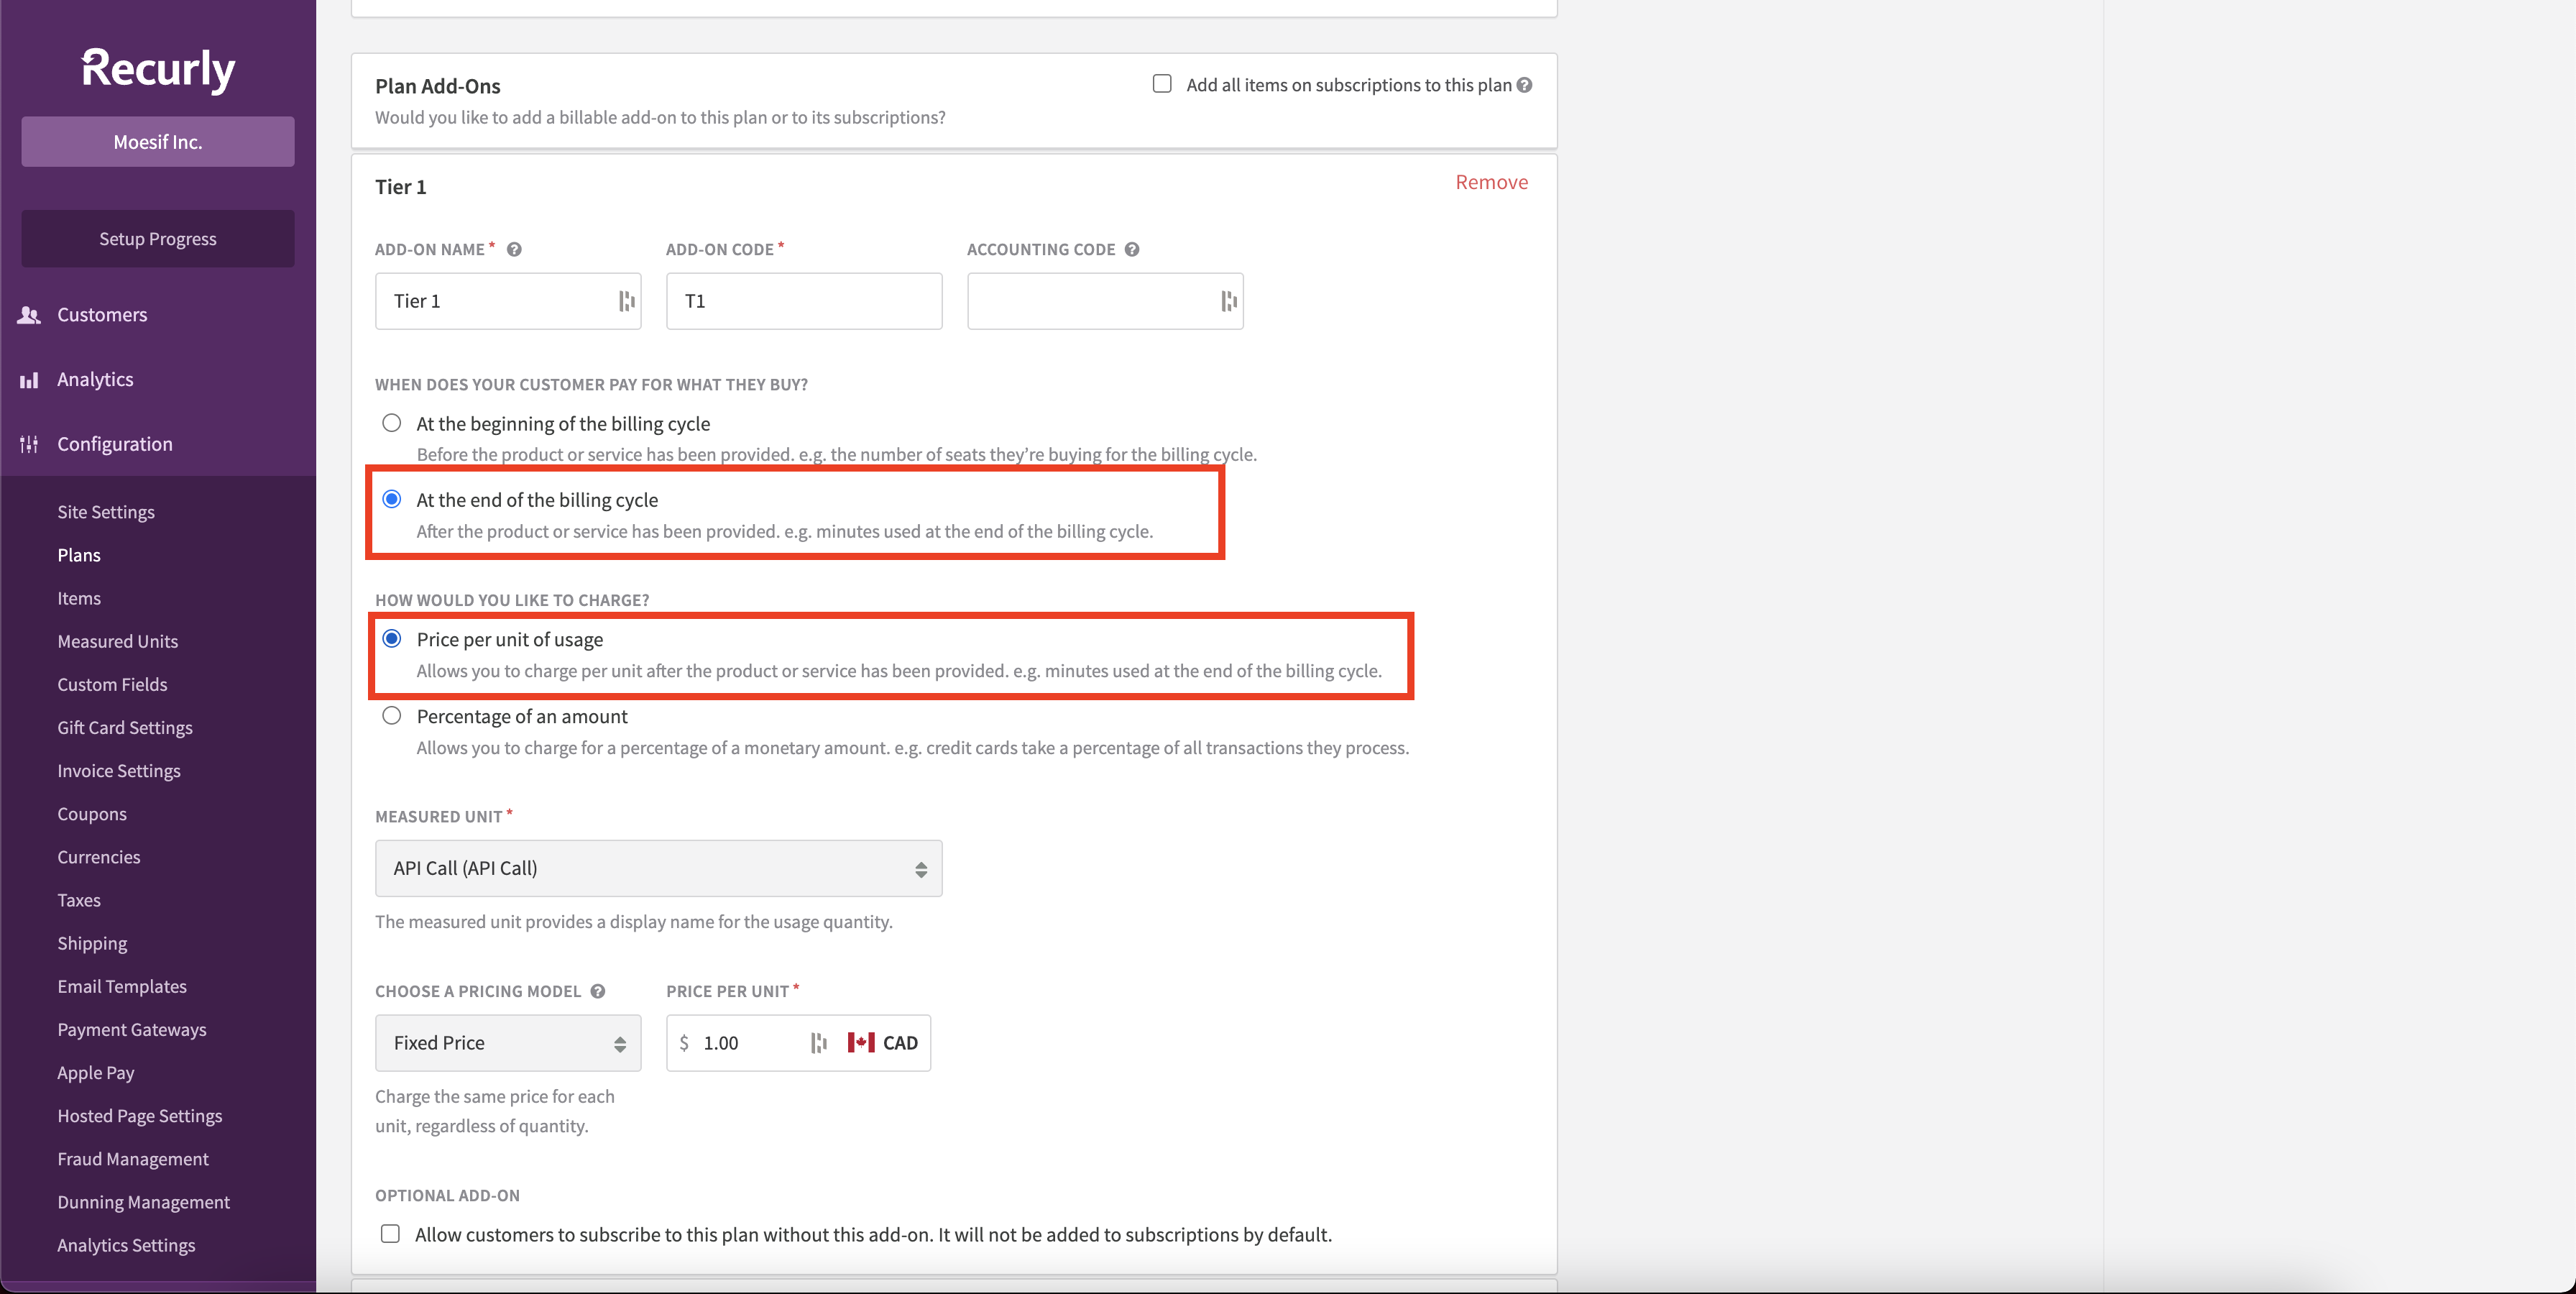
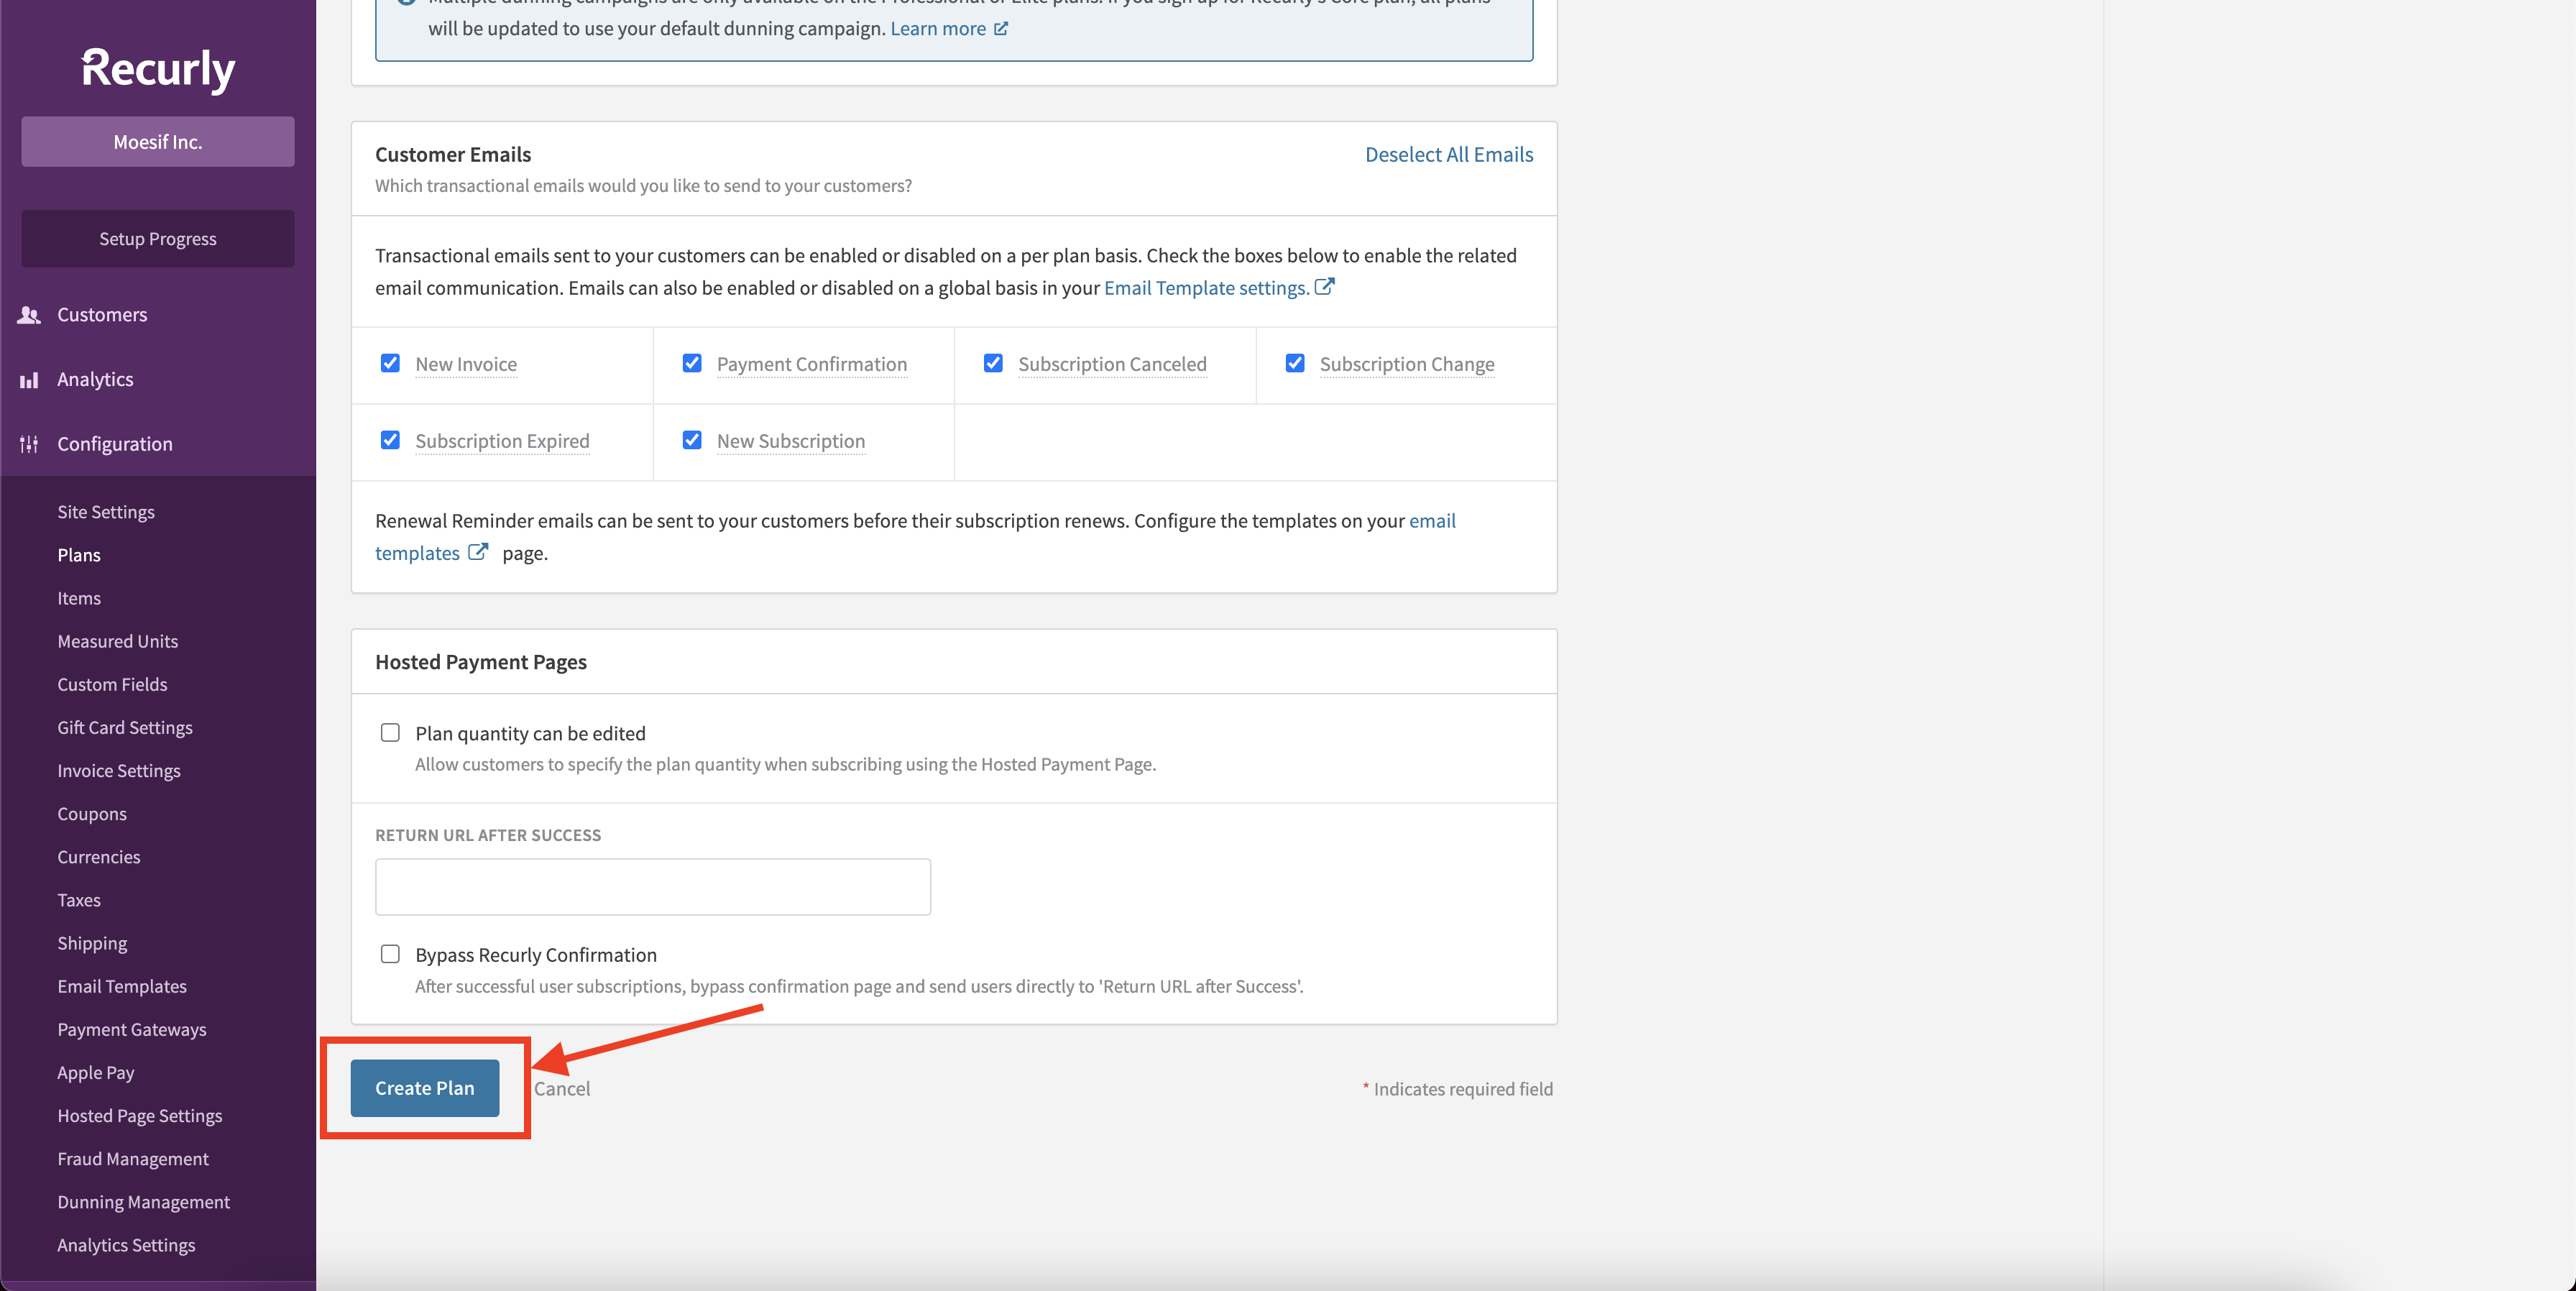
The plans can contain whatever configuration you need, but you must ensure that at least one Add-on is created. The add-on must be configured as:
- Customer to be billed at end of the billing cycle
- Charges are based on price per unit
Configuring this in a Recurly plan will look like this:
Once your plan is configured, click Create Plan at the bottom of the screen.
At this point, we now have a plan that we can integrate with Moesif and begin billing for usage.
Configuring Recurly in Moesif
Once your plans and add-ons are created, it’s time to begin to integrate Recurly with Moesif. To begin configuring Recurly in Moesif by going to the Billing Meters page and clicking the Edit Billing Provider dropdown in the top right corner of the screen.
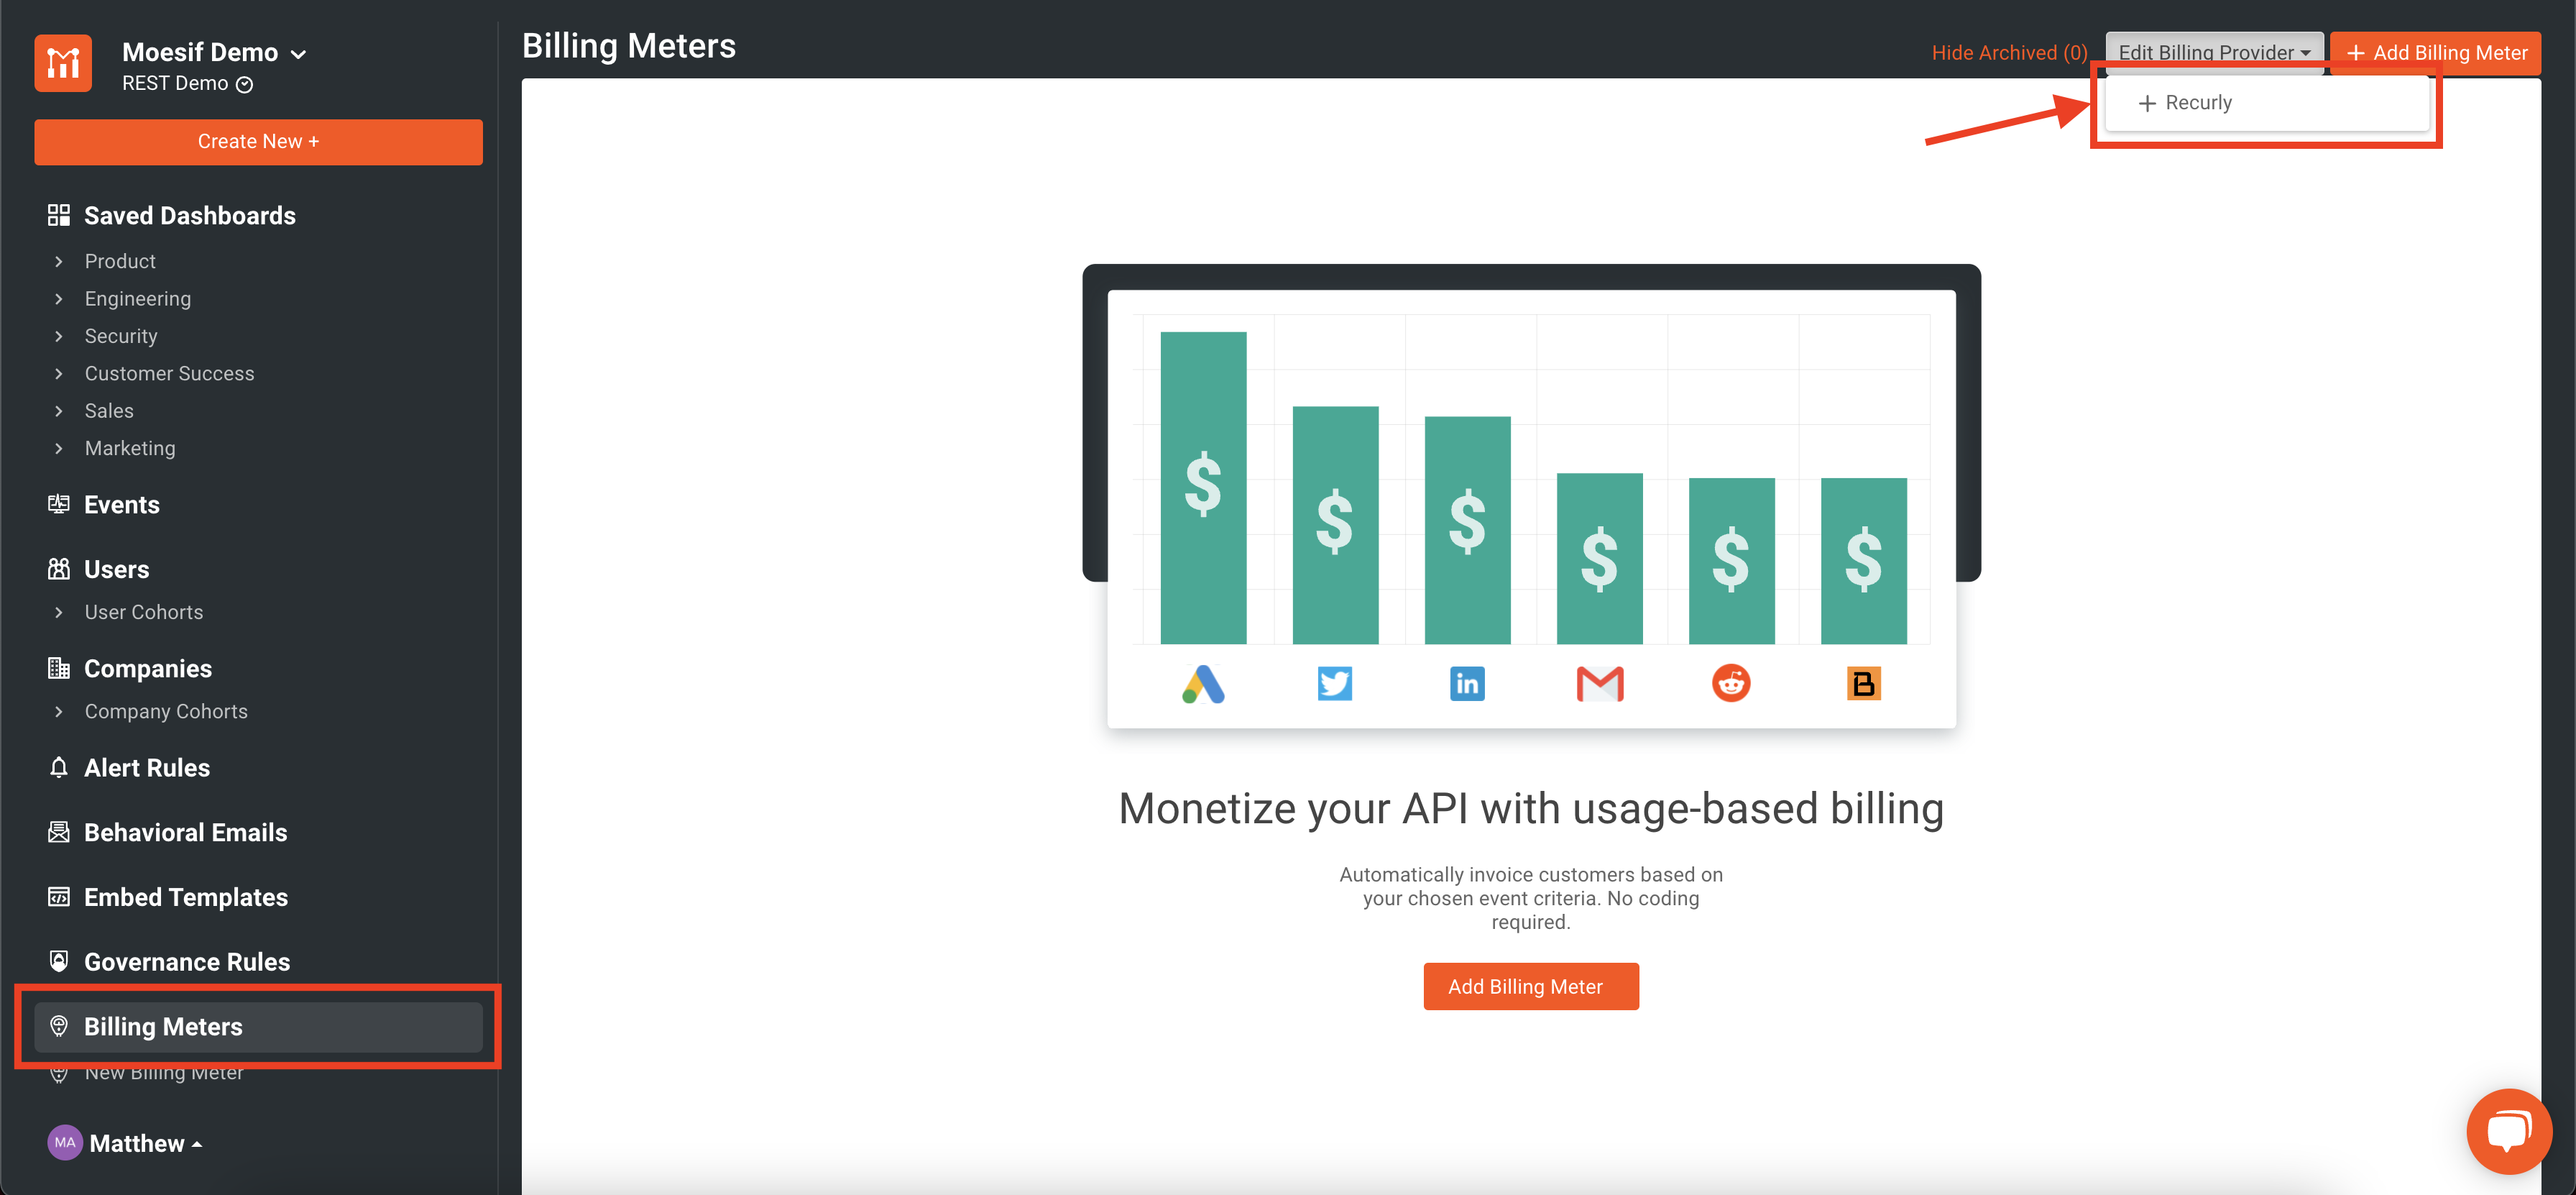
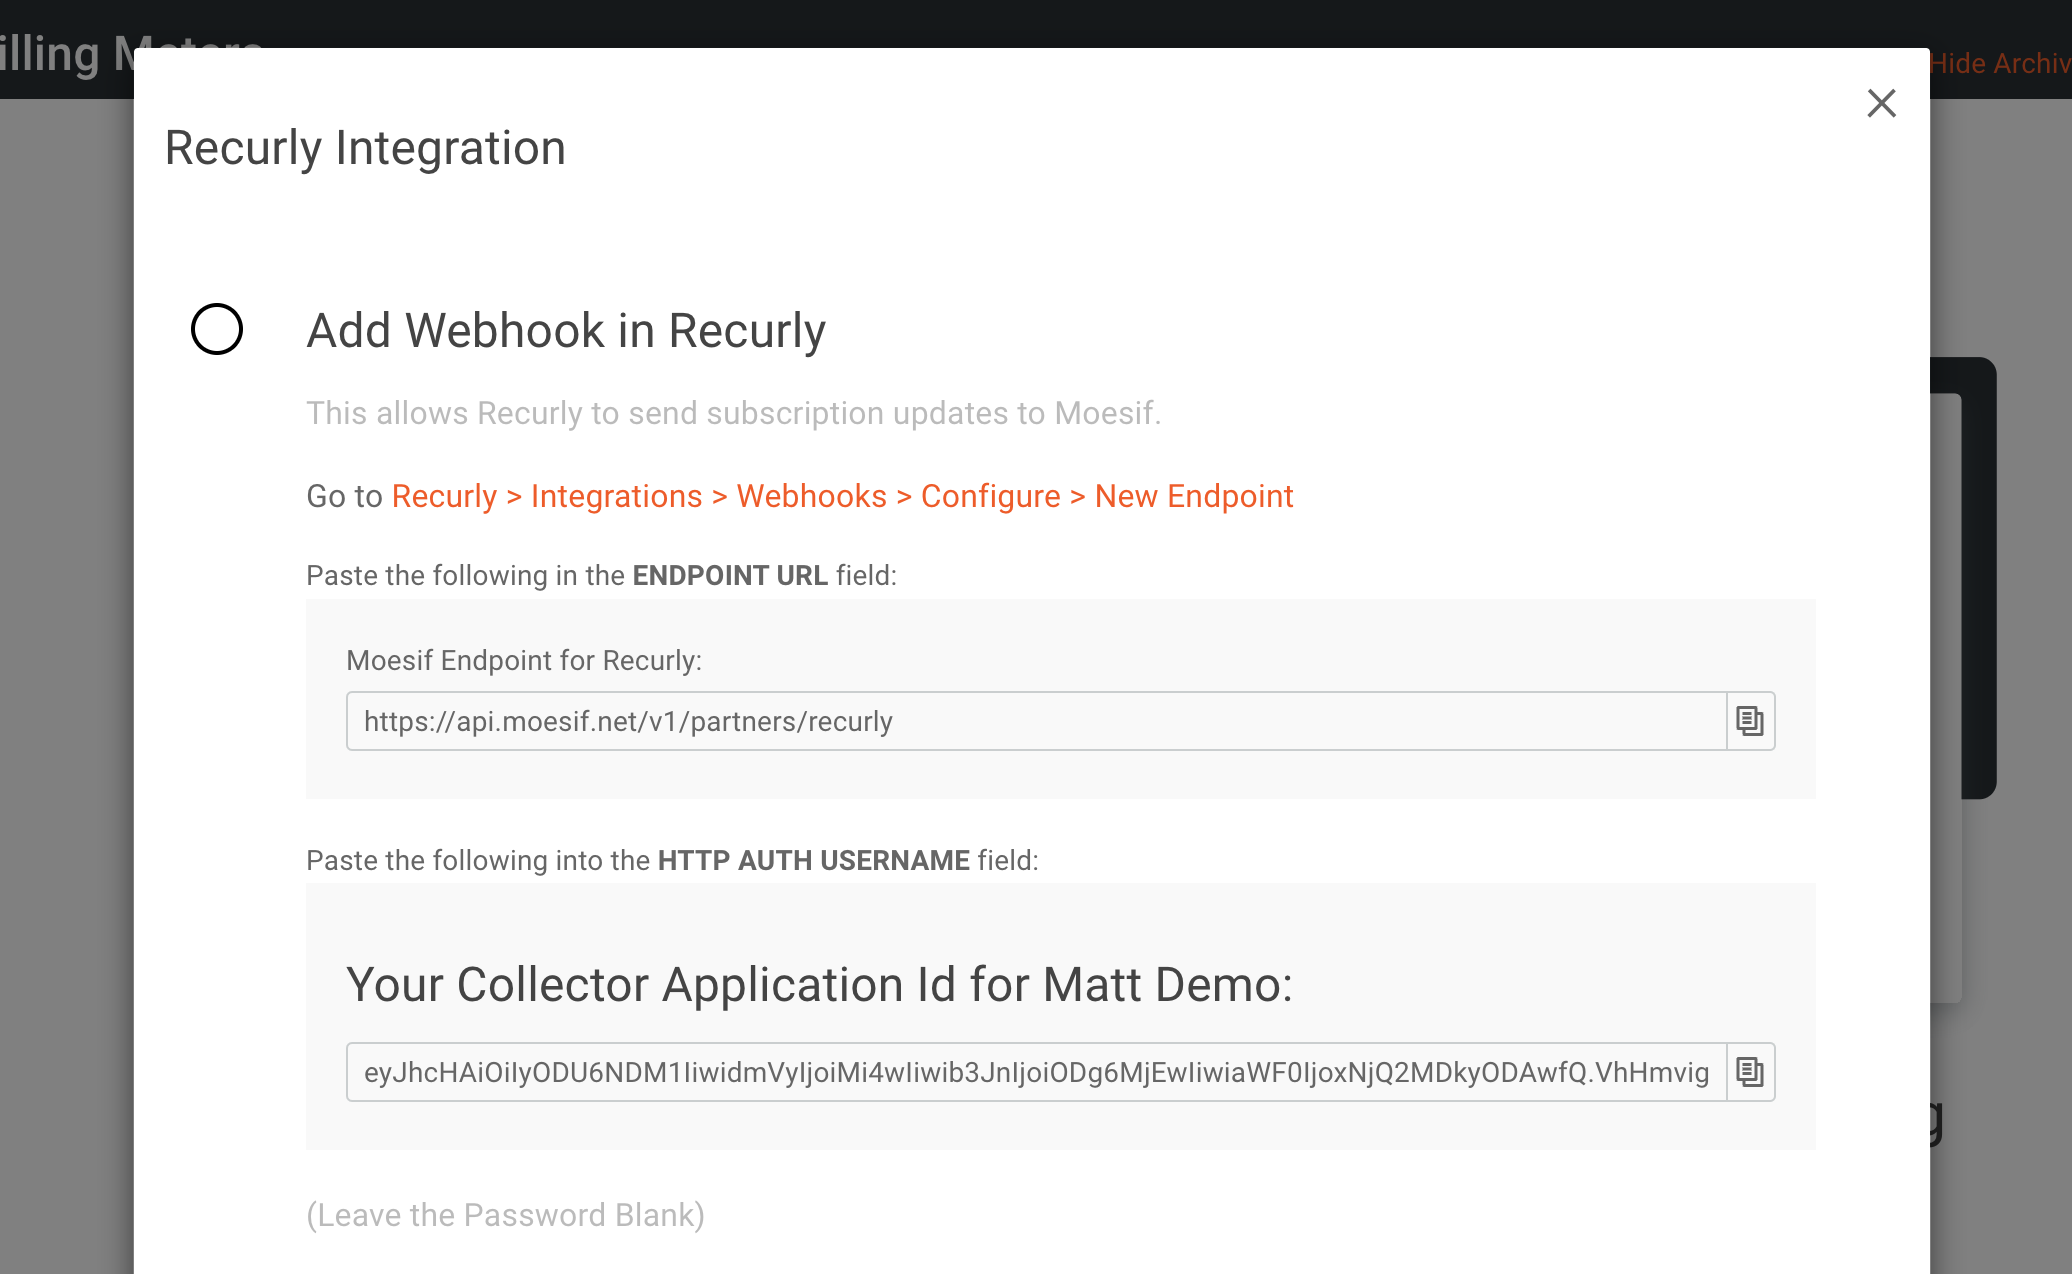
This will bring up the Recurly configuration screen walking you through the integration. From this screen, you can get all of the info needed to plug Recurly into Moesif. Each step for configuration is covered within the modal.
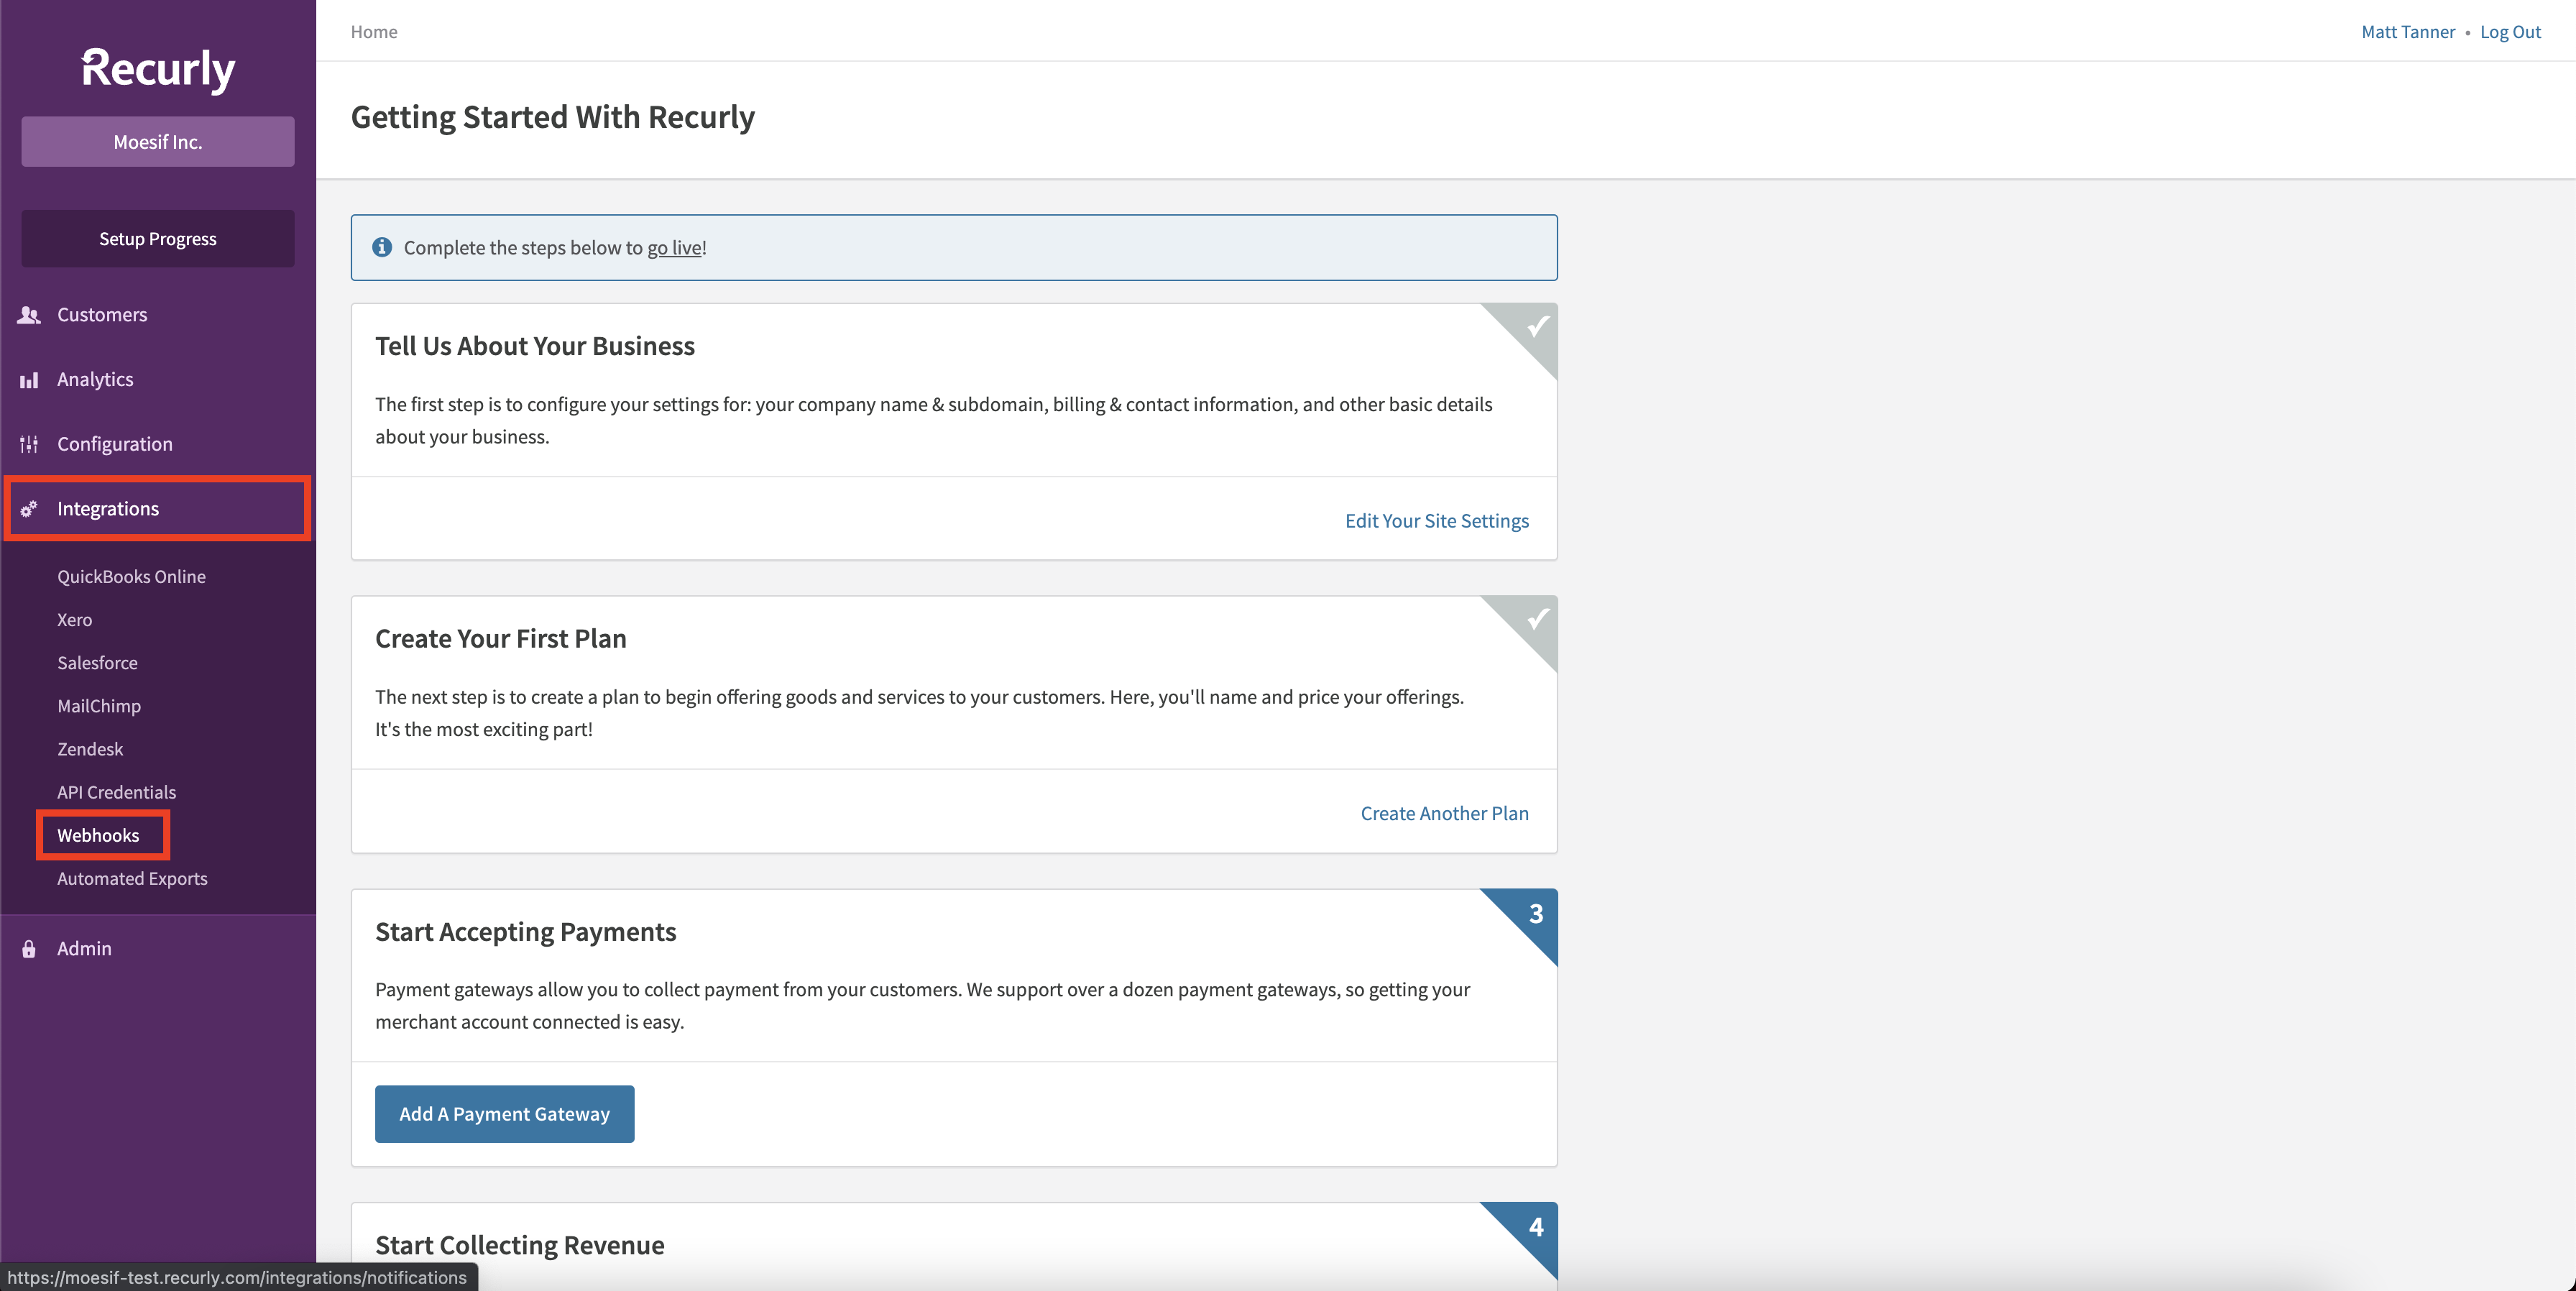
Adding the Moesif webhook to Recurly
The first step in the integration is to add the Moesif webhook into the configuration in Recurly. Adding this allows Recurly to send subscription updates to Moesif.
To add the Moesif webhook to Recurly, from the left-side menu in Recurly select Integrations, and then Webhooks.
This will bring you to the Webhooks page where you can view existing webhooks and add new ones. To add a new webhook we will click the Configure button in the top right corner of the screen.
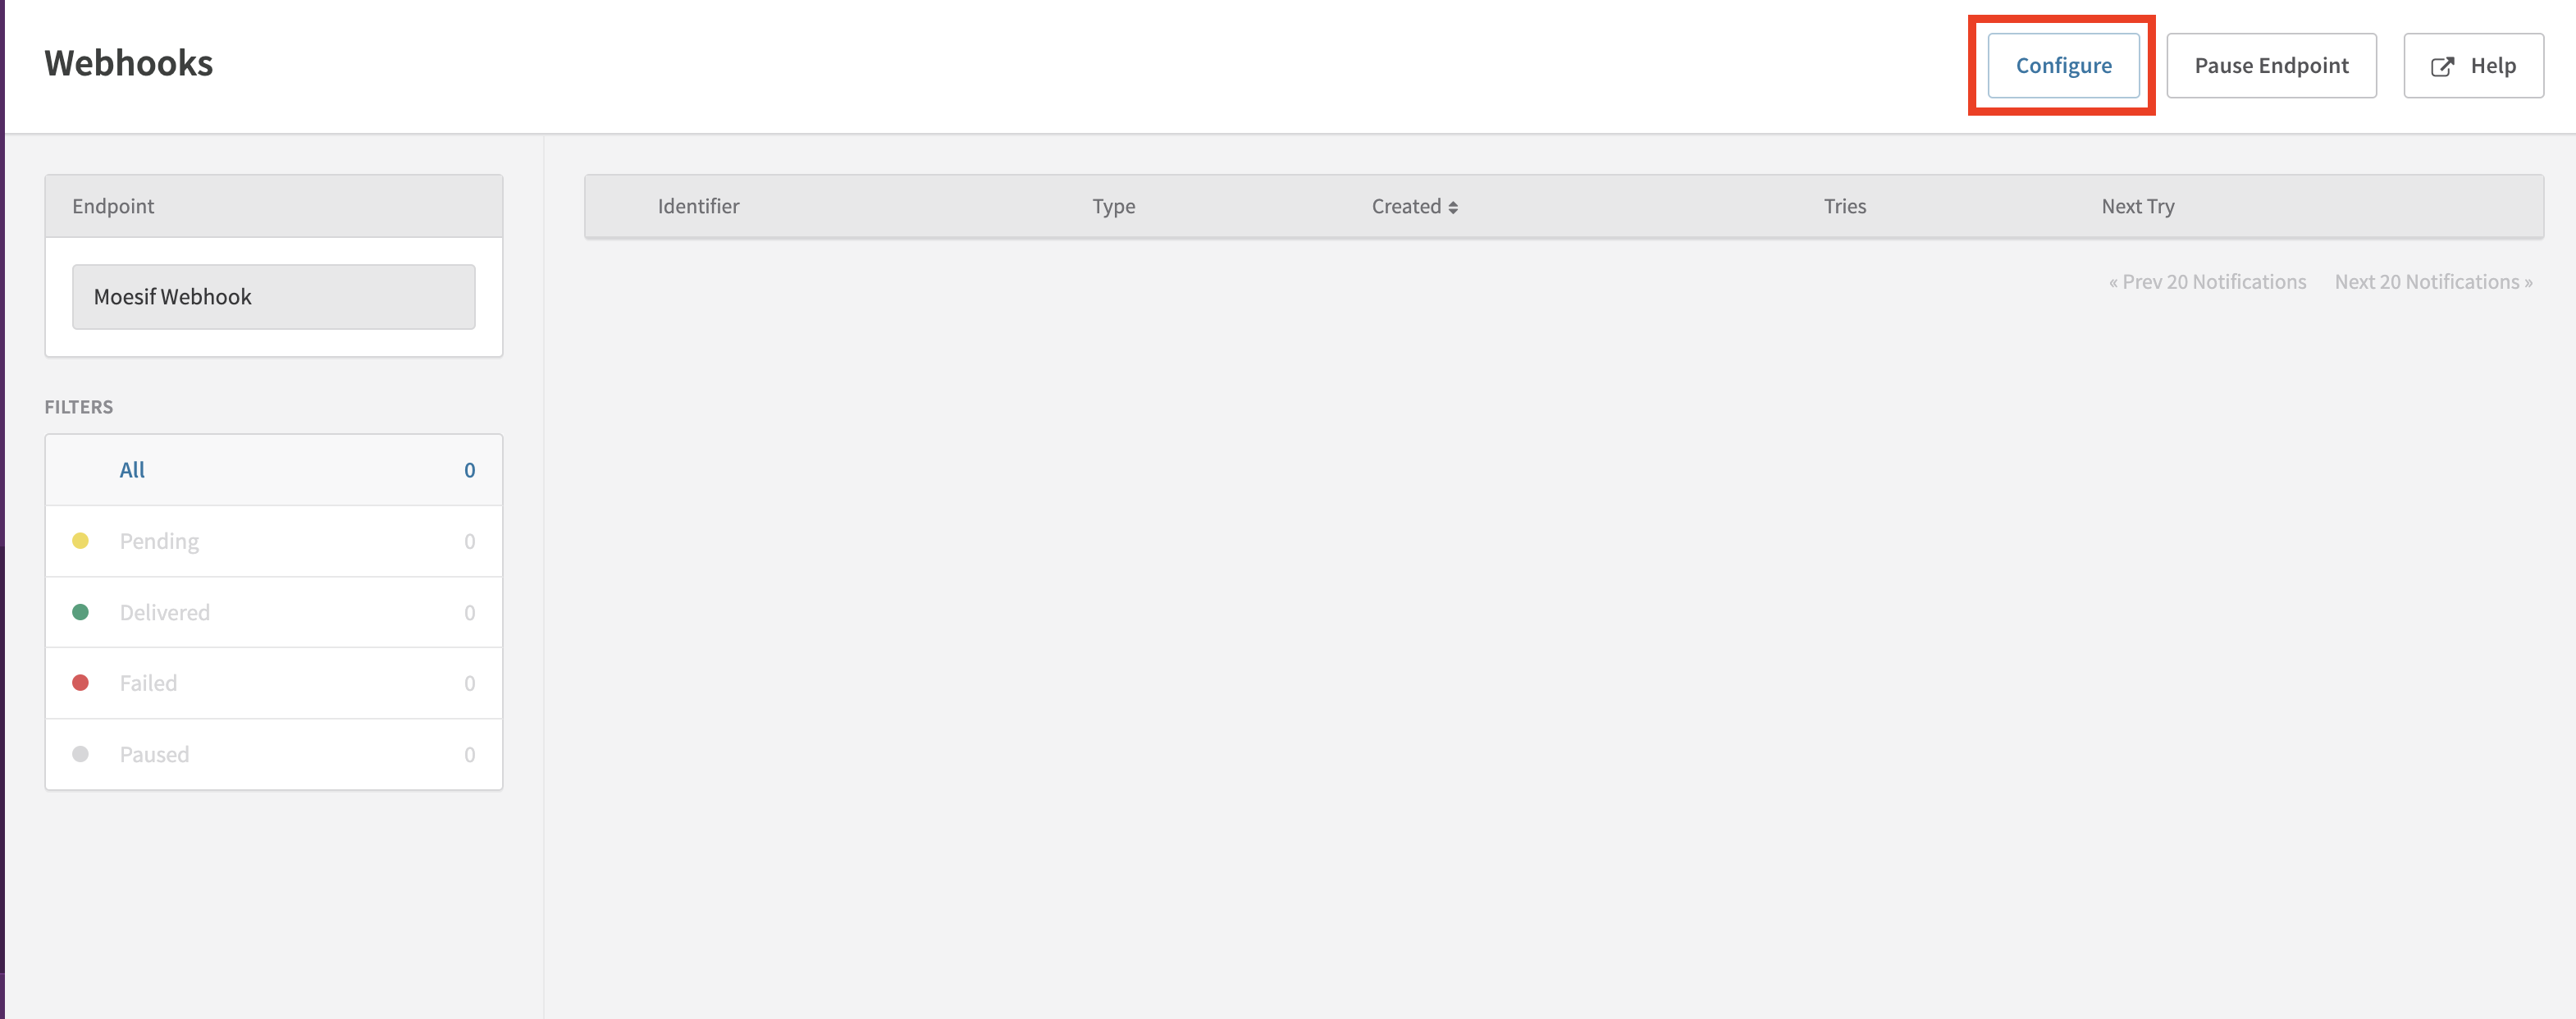
On the next screen, you’ll need to click the New Endpoint button in the top right corner of the screen.
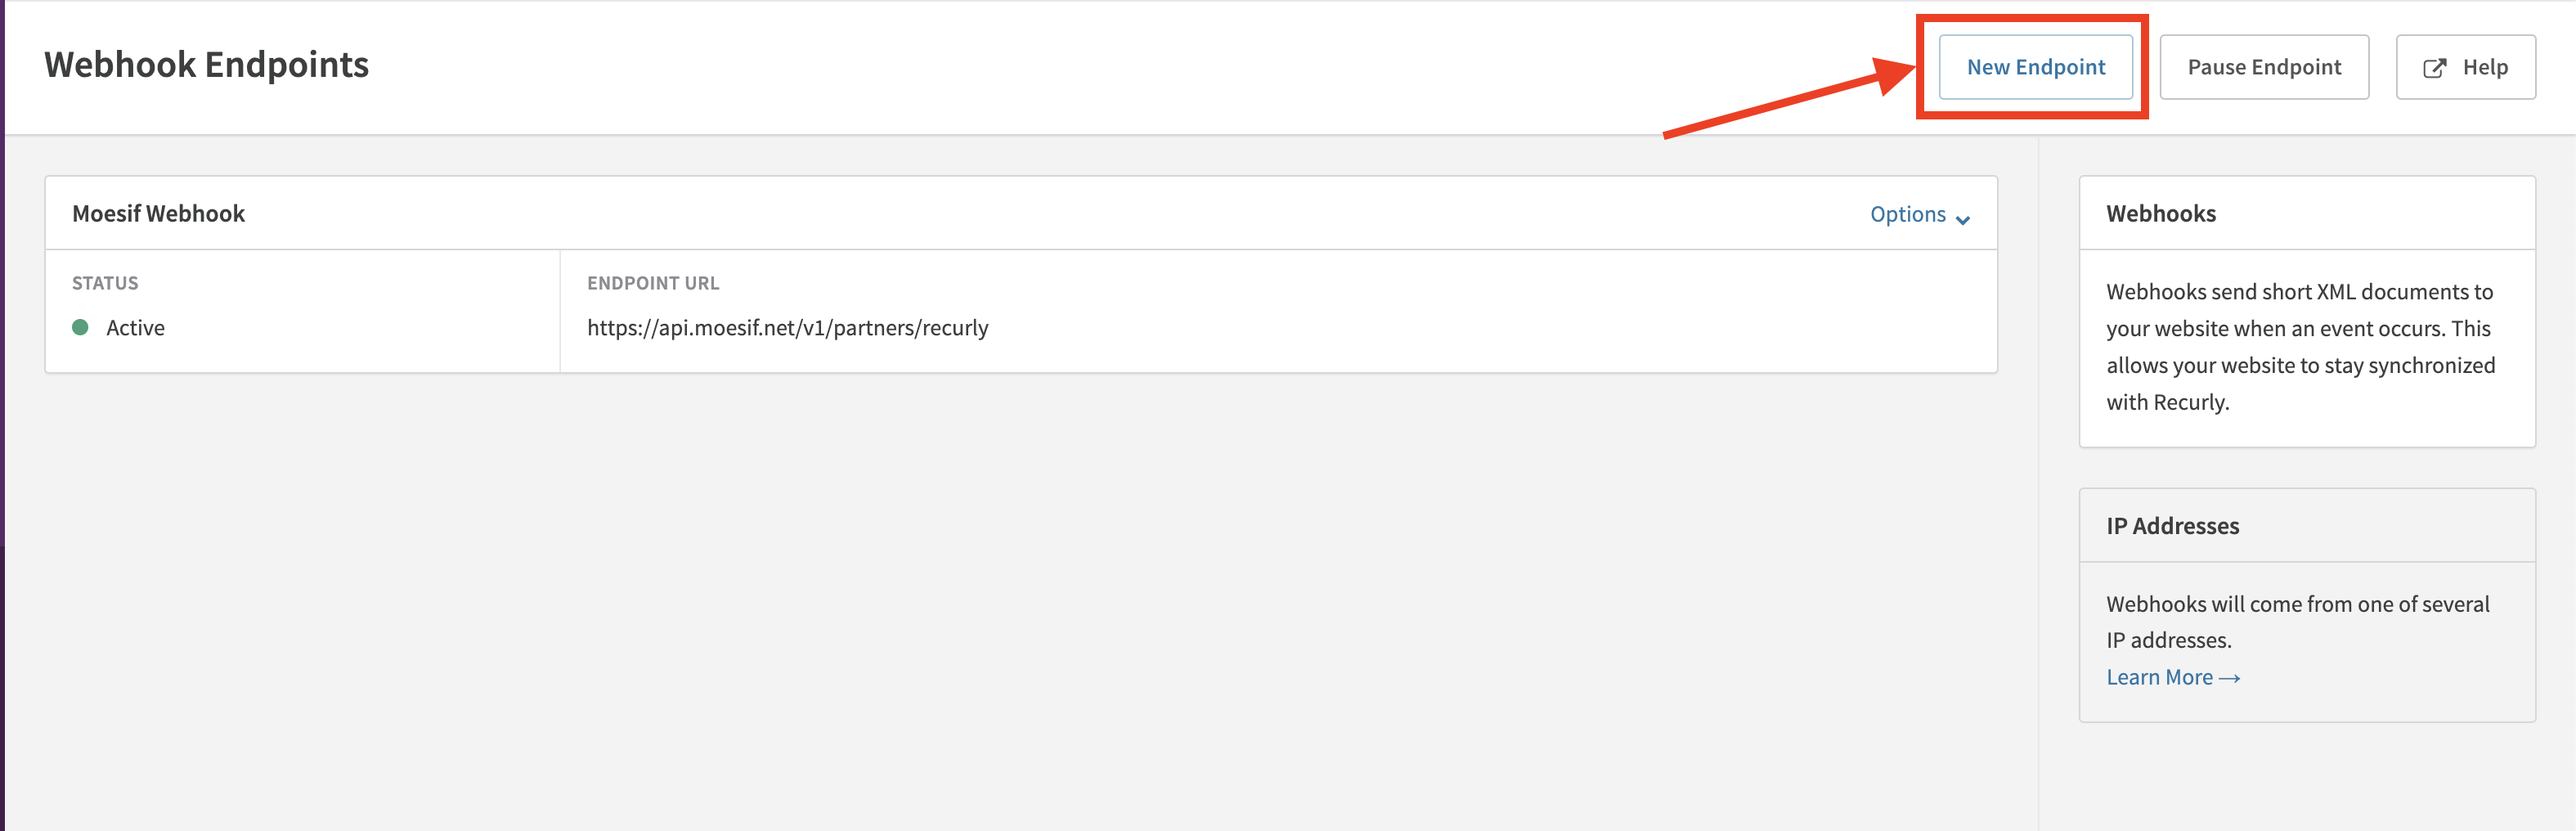
From here we will plug in our Moesif API endpoint URL into the ENDPOINT URL field and add our Moesif Application ID into the HTTP AUTH USERNAME field.
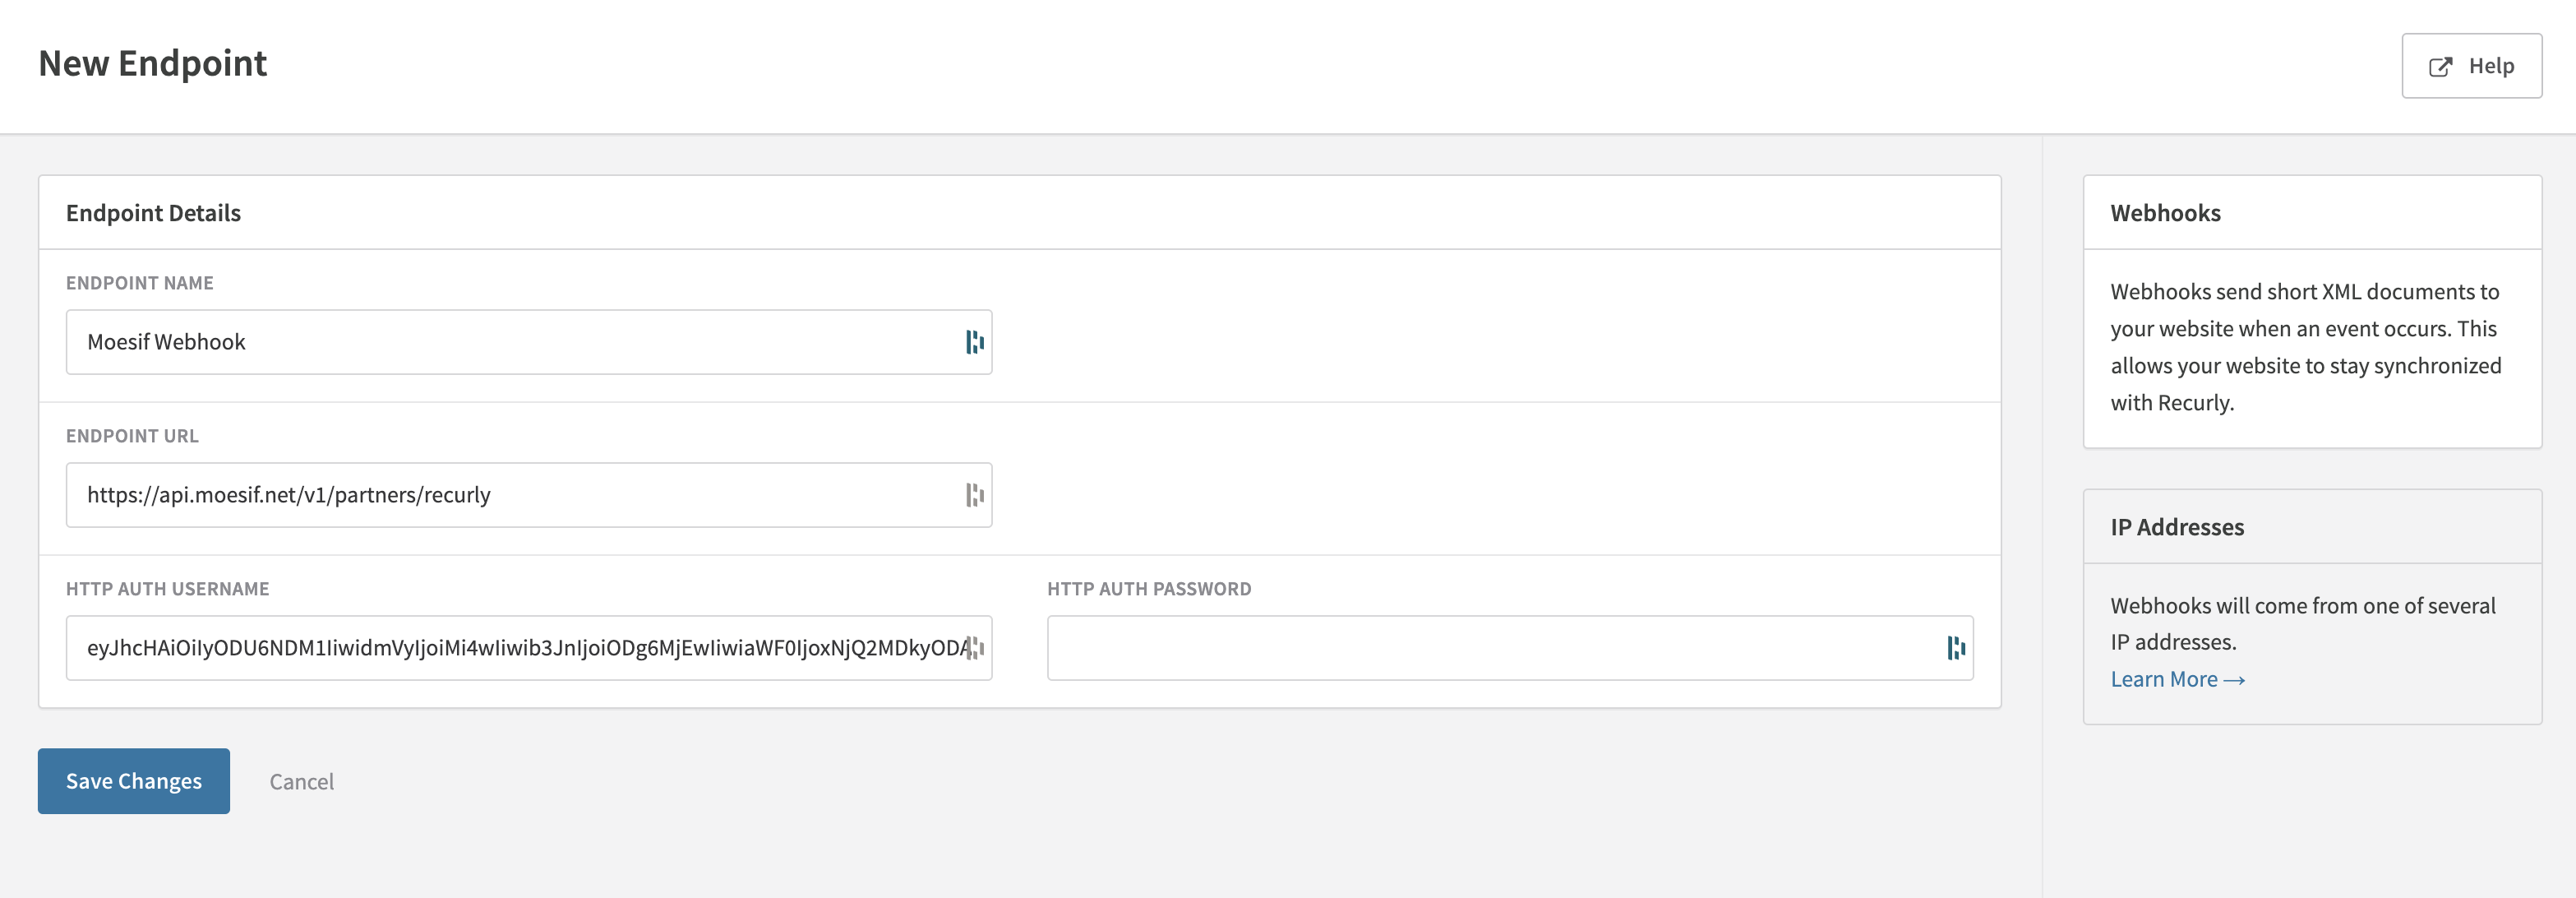
Nothing should be entered in the HTTP AUTH PASSWORD field.
These details can all be found on the Recurly configuration page in Moesif mentioned in the previous section.
Plugging the Recurly API details into Moesif
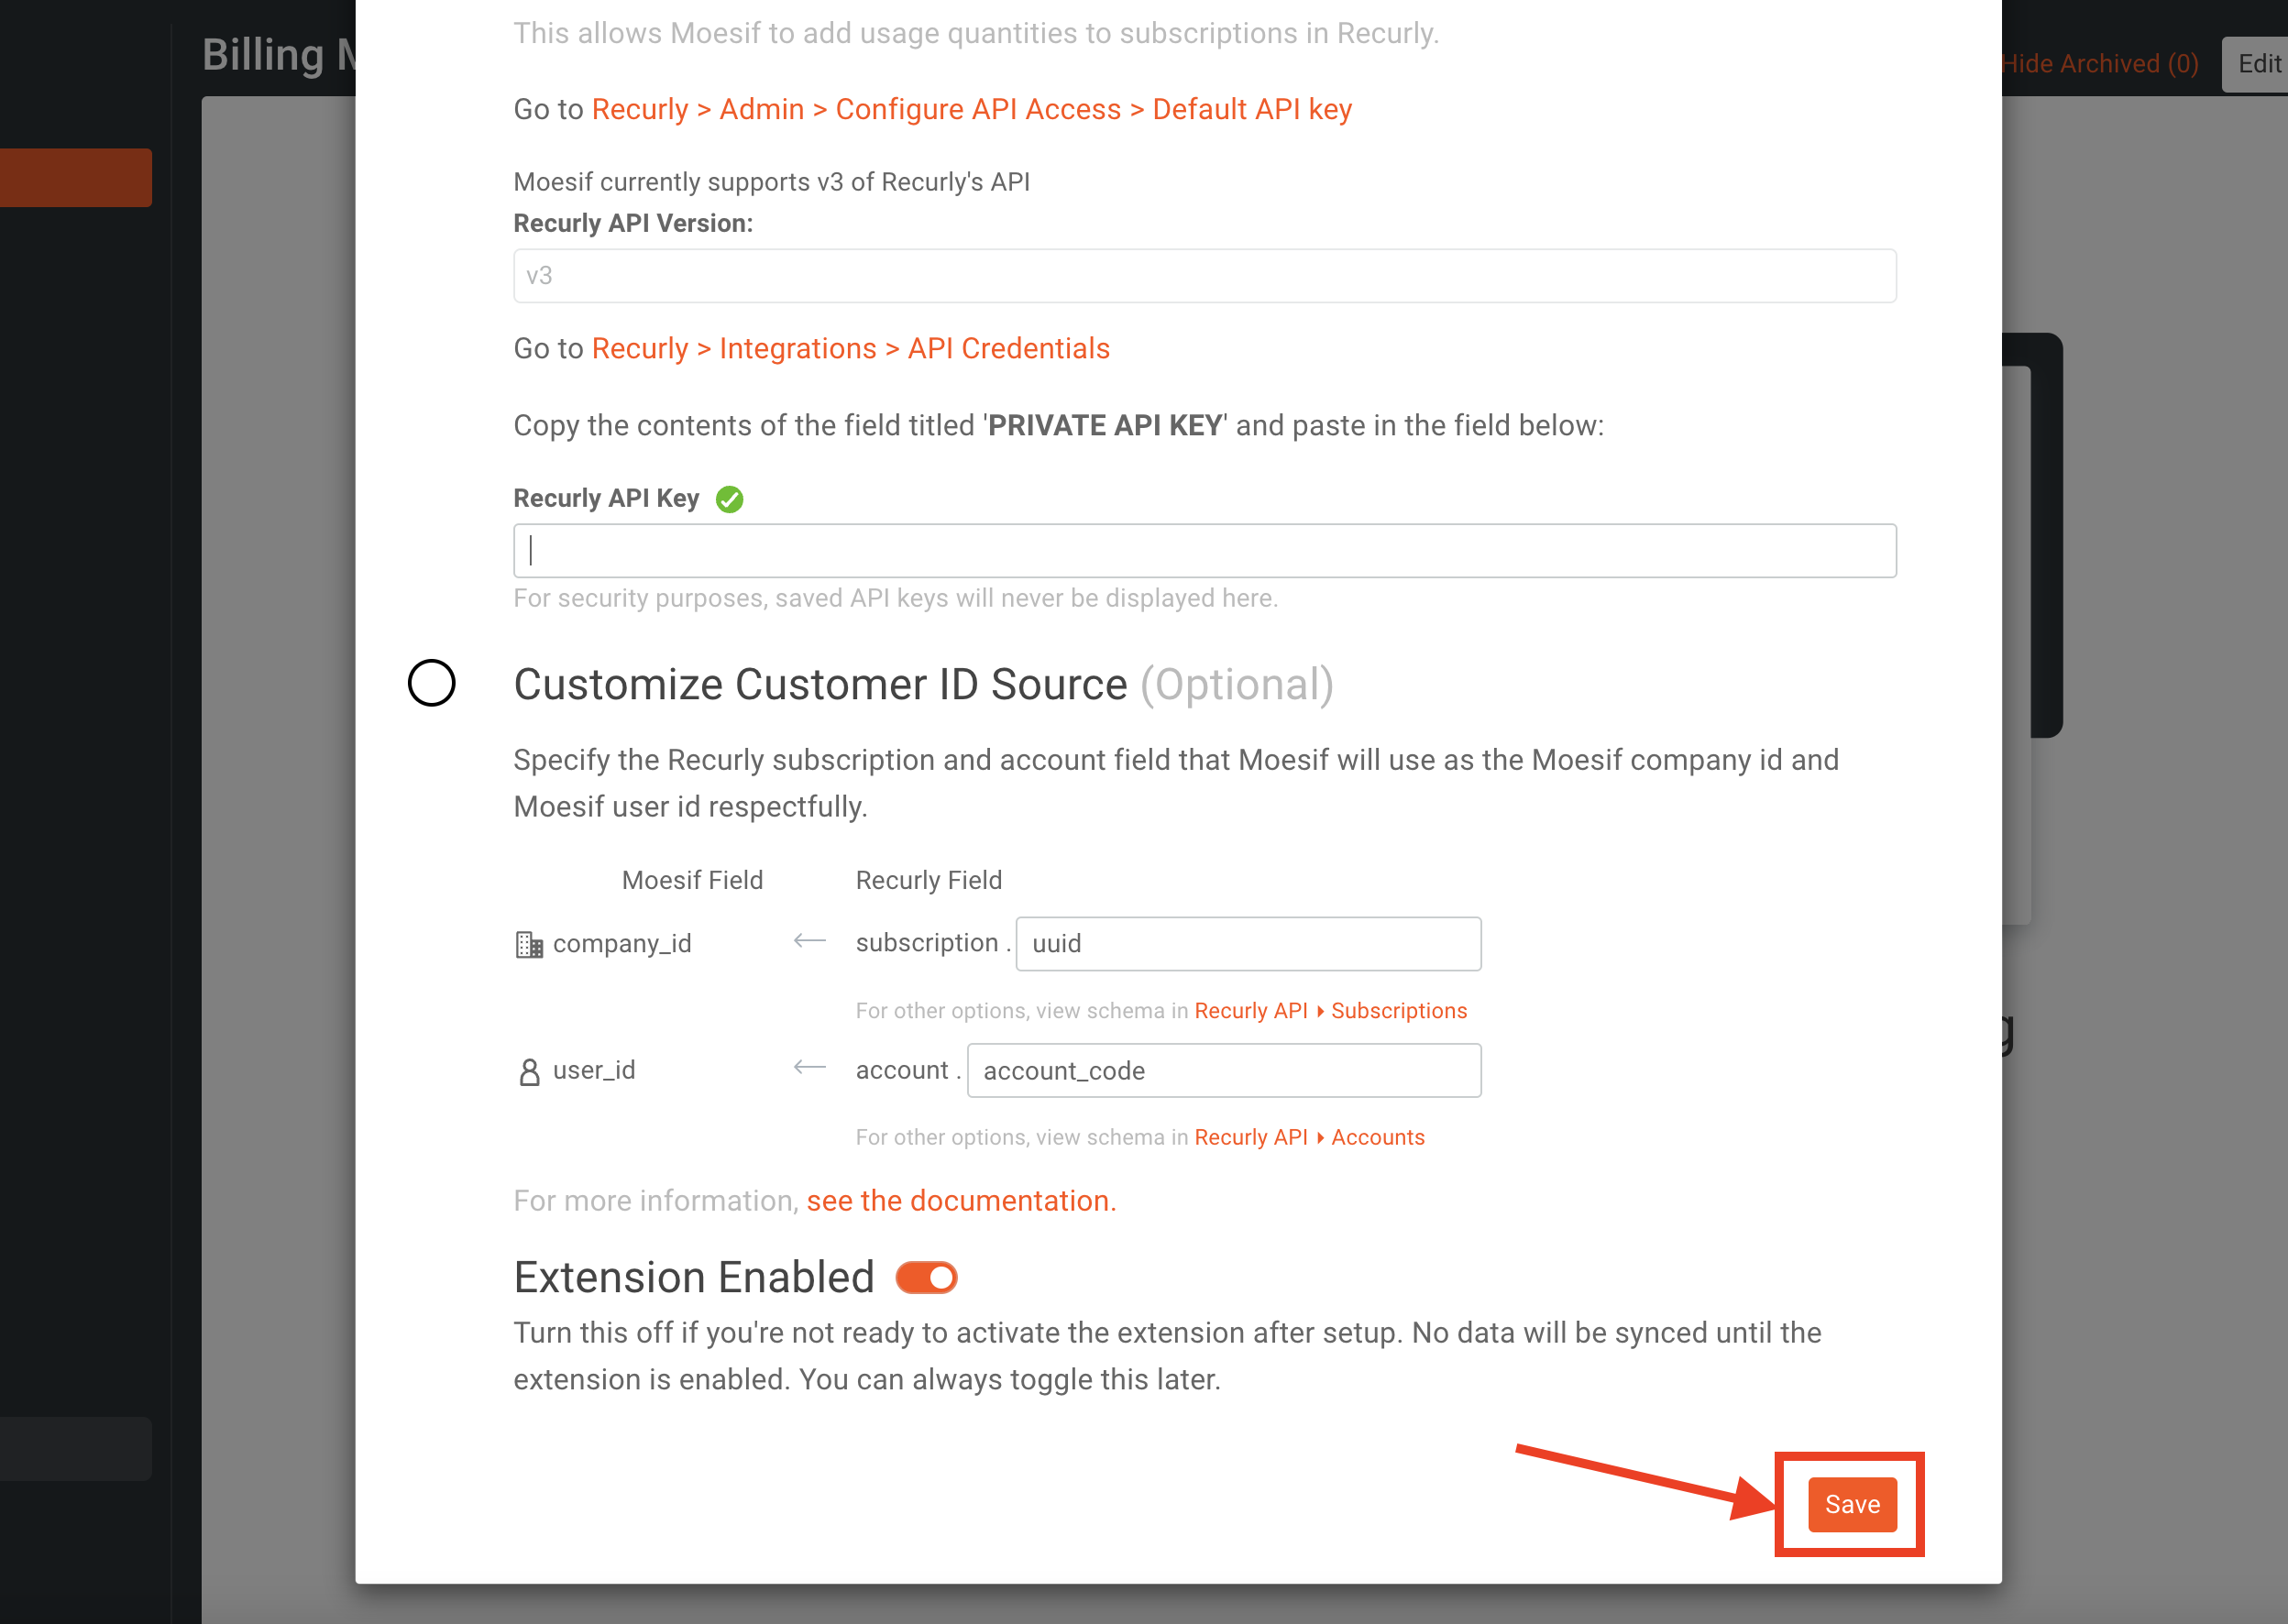
For Moesif to add usage quantities to subscriptions in Recurly, we need to add the Recurly API details into Moesif. This is done in the Recurly configuration screen in Moesif, the same screen we’ve been working with previously.
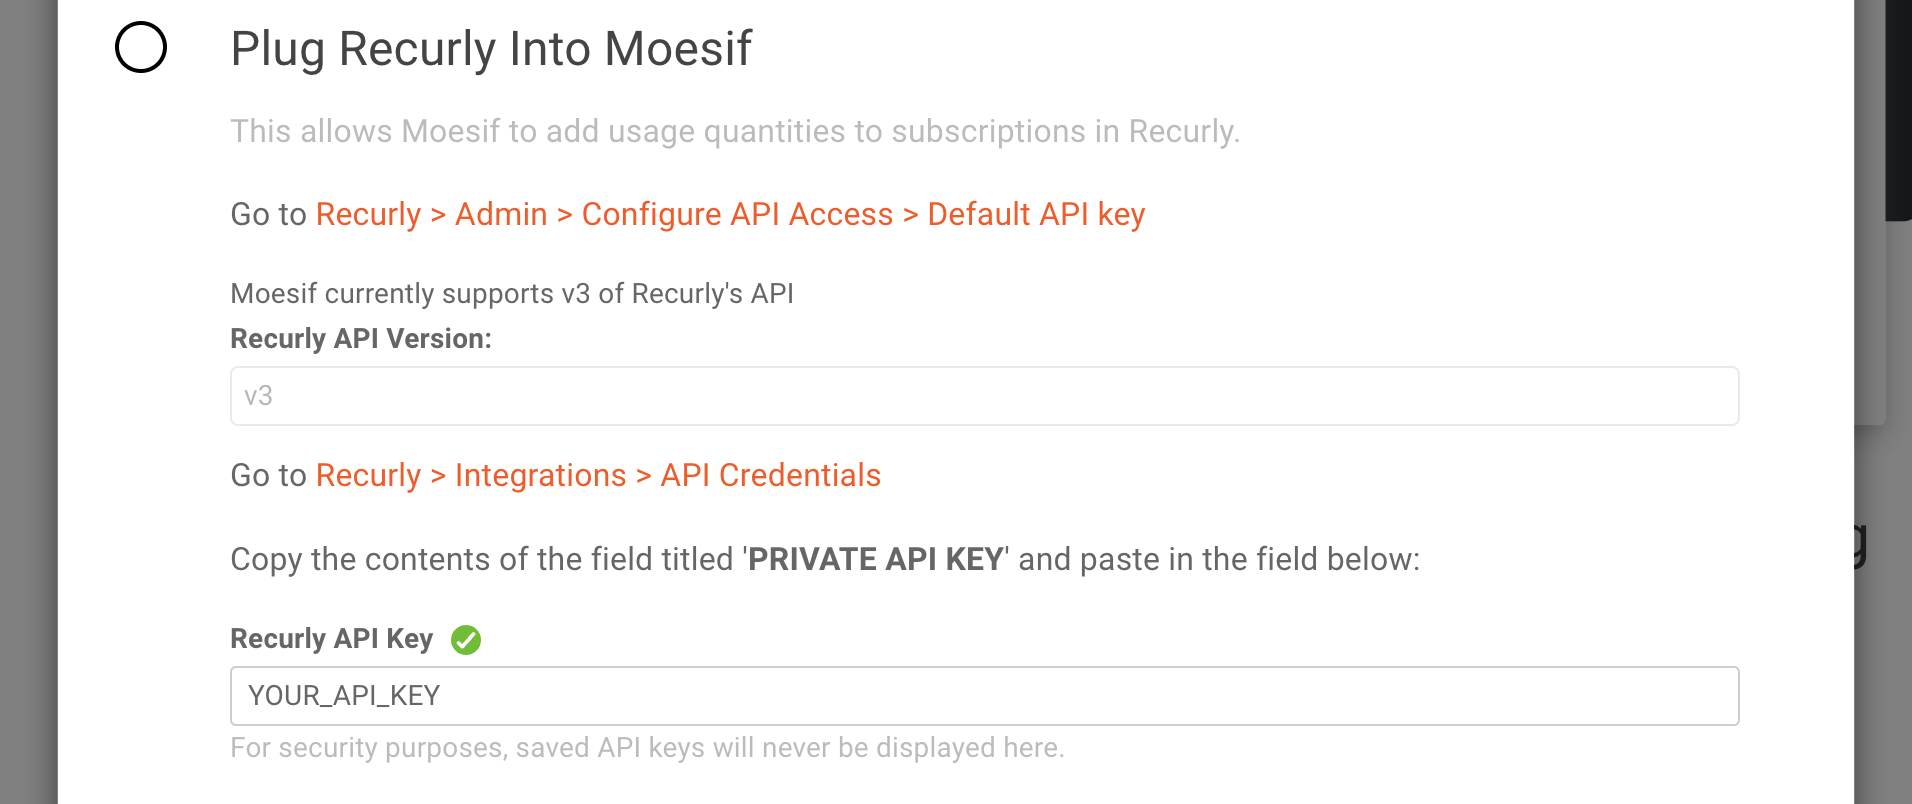
Currently, Moesif only supports v3 of the Recurly API so that value is default and uneditable for the Recurly API Version field.
For the Recurly API Key field, you’ll need to retrieve the API key from Recurly to plug it in. To do that, in the left side menu click on Integrations and select API Credentials. You’ll then be able to see the private key for your API in the Default API Key field on the screen.
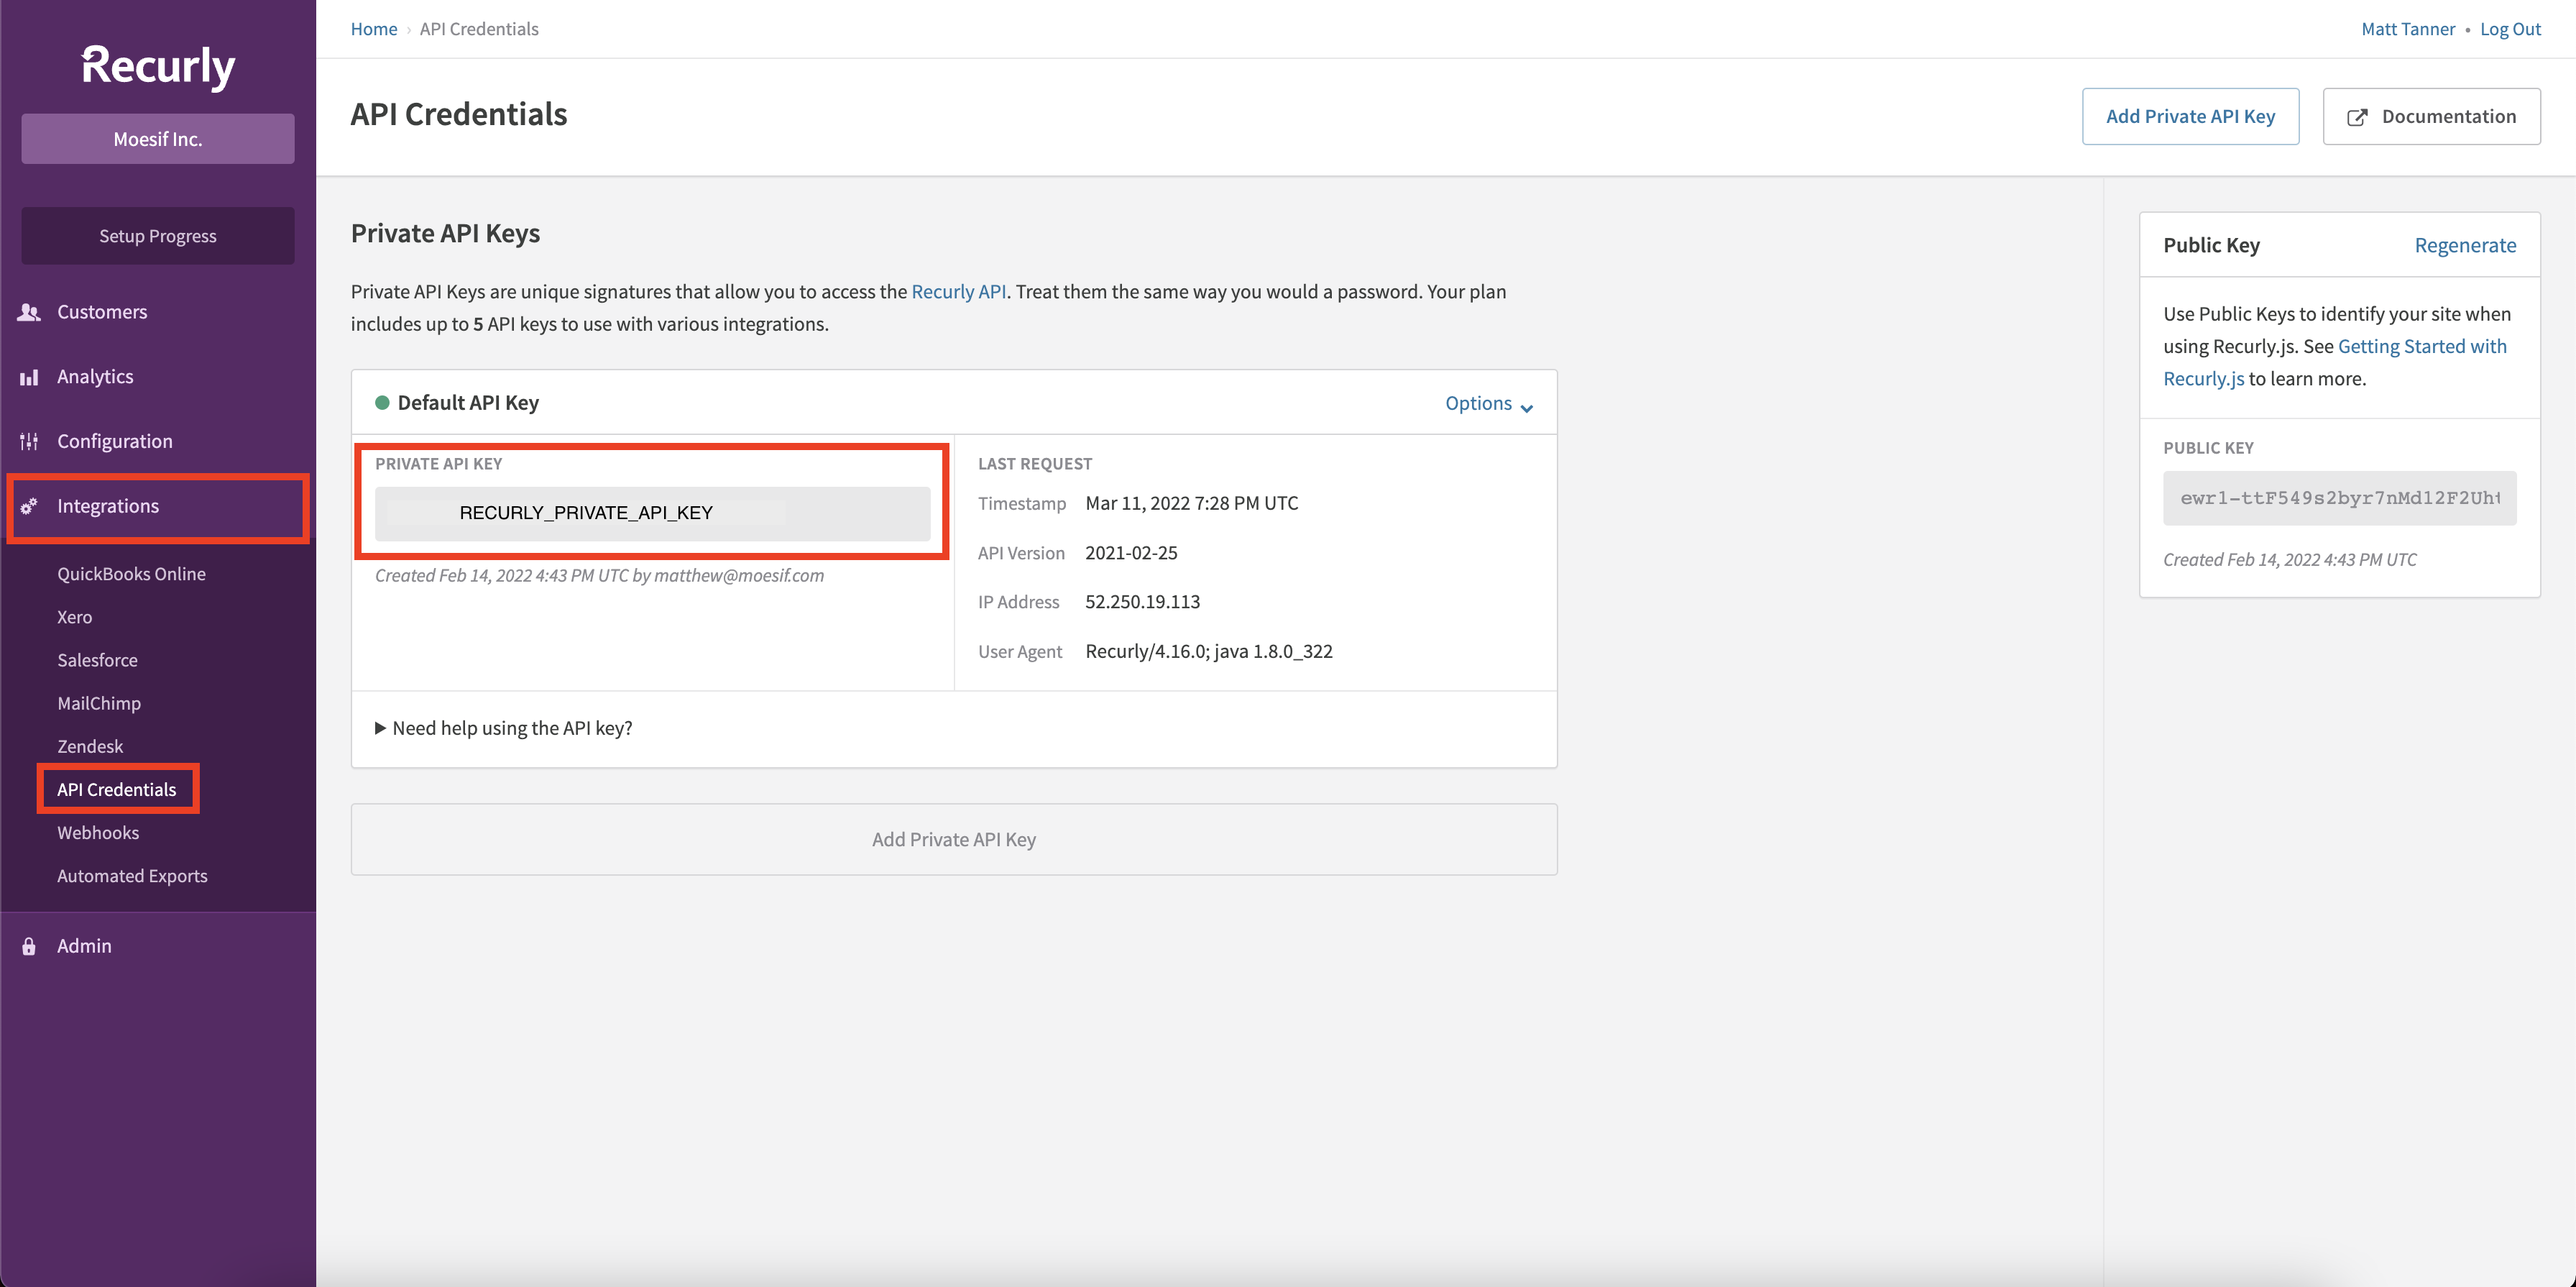
After copying the key from Recurly, you’ll paste this key into the Recurly API Key field back in Moesif. After doing this, back in Moesif you can scroll down to the bottom of the screen and click Save to save the configuration.
At this point, your Recurly integration is complete in Moesif and you can begin to use it.
Optionally, you have the ability to customize the Customer ID Source in Moesif as well. The default should work fine for most purposes but if you do need to customize it, it will allow you to specify how to map the Recurly subscription and account field to the company ID and user ID in Moesif.

Configuring the billing parameters in Moesif
Once the integration with Recurly is added, you can configure your billing parameters in Moesif. If you haven’t done so already, you’ll want to create a new Billing Meter. To do this, from Moesif you’ll need to click on the Billing Meter link in the left side menu as you did when you started the Recurly integration.
Once you’re on the Billing Meters screen, you’ll click the + Add Billing Meter button to begin creating a new billing meter.

Once on the Add Billing Meter screen, you’ll add in:
- Billing meter name
- Billing provider info
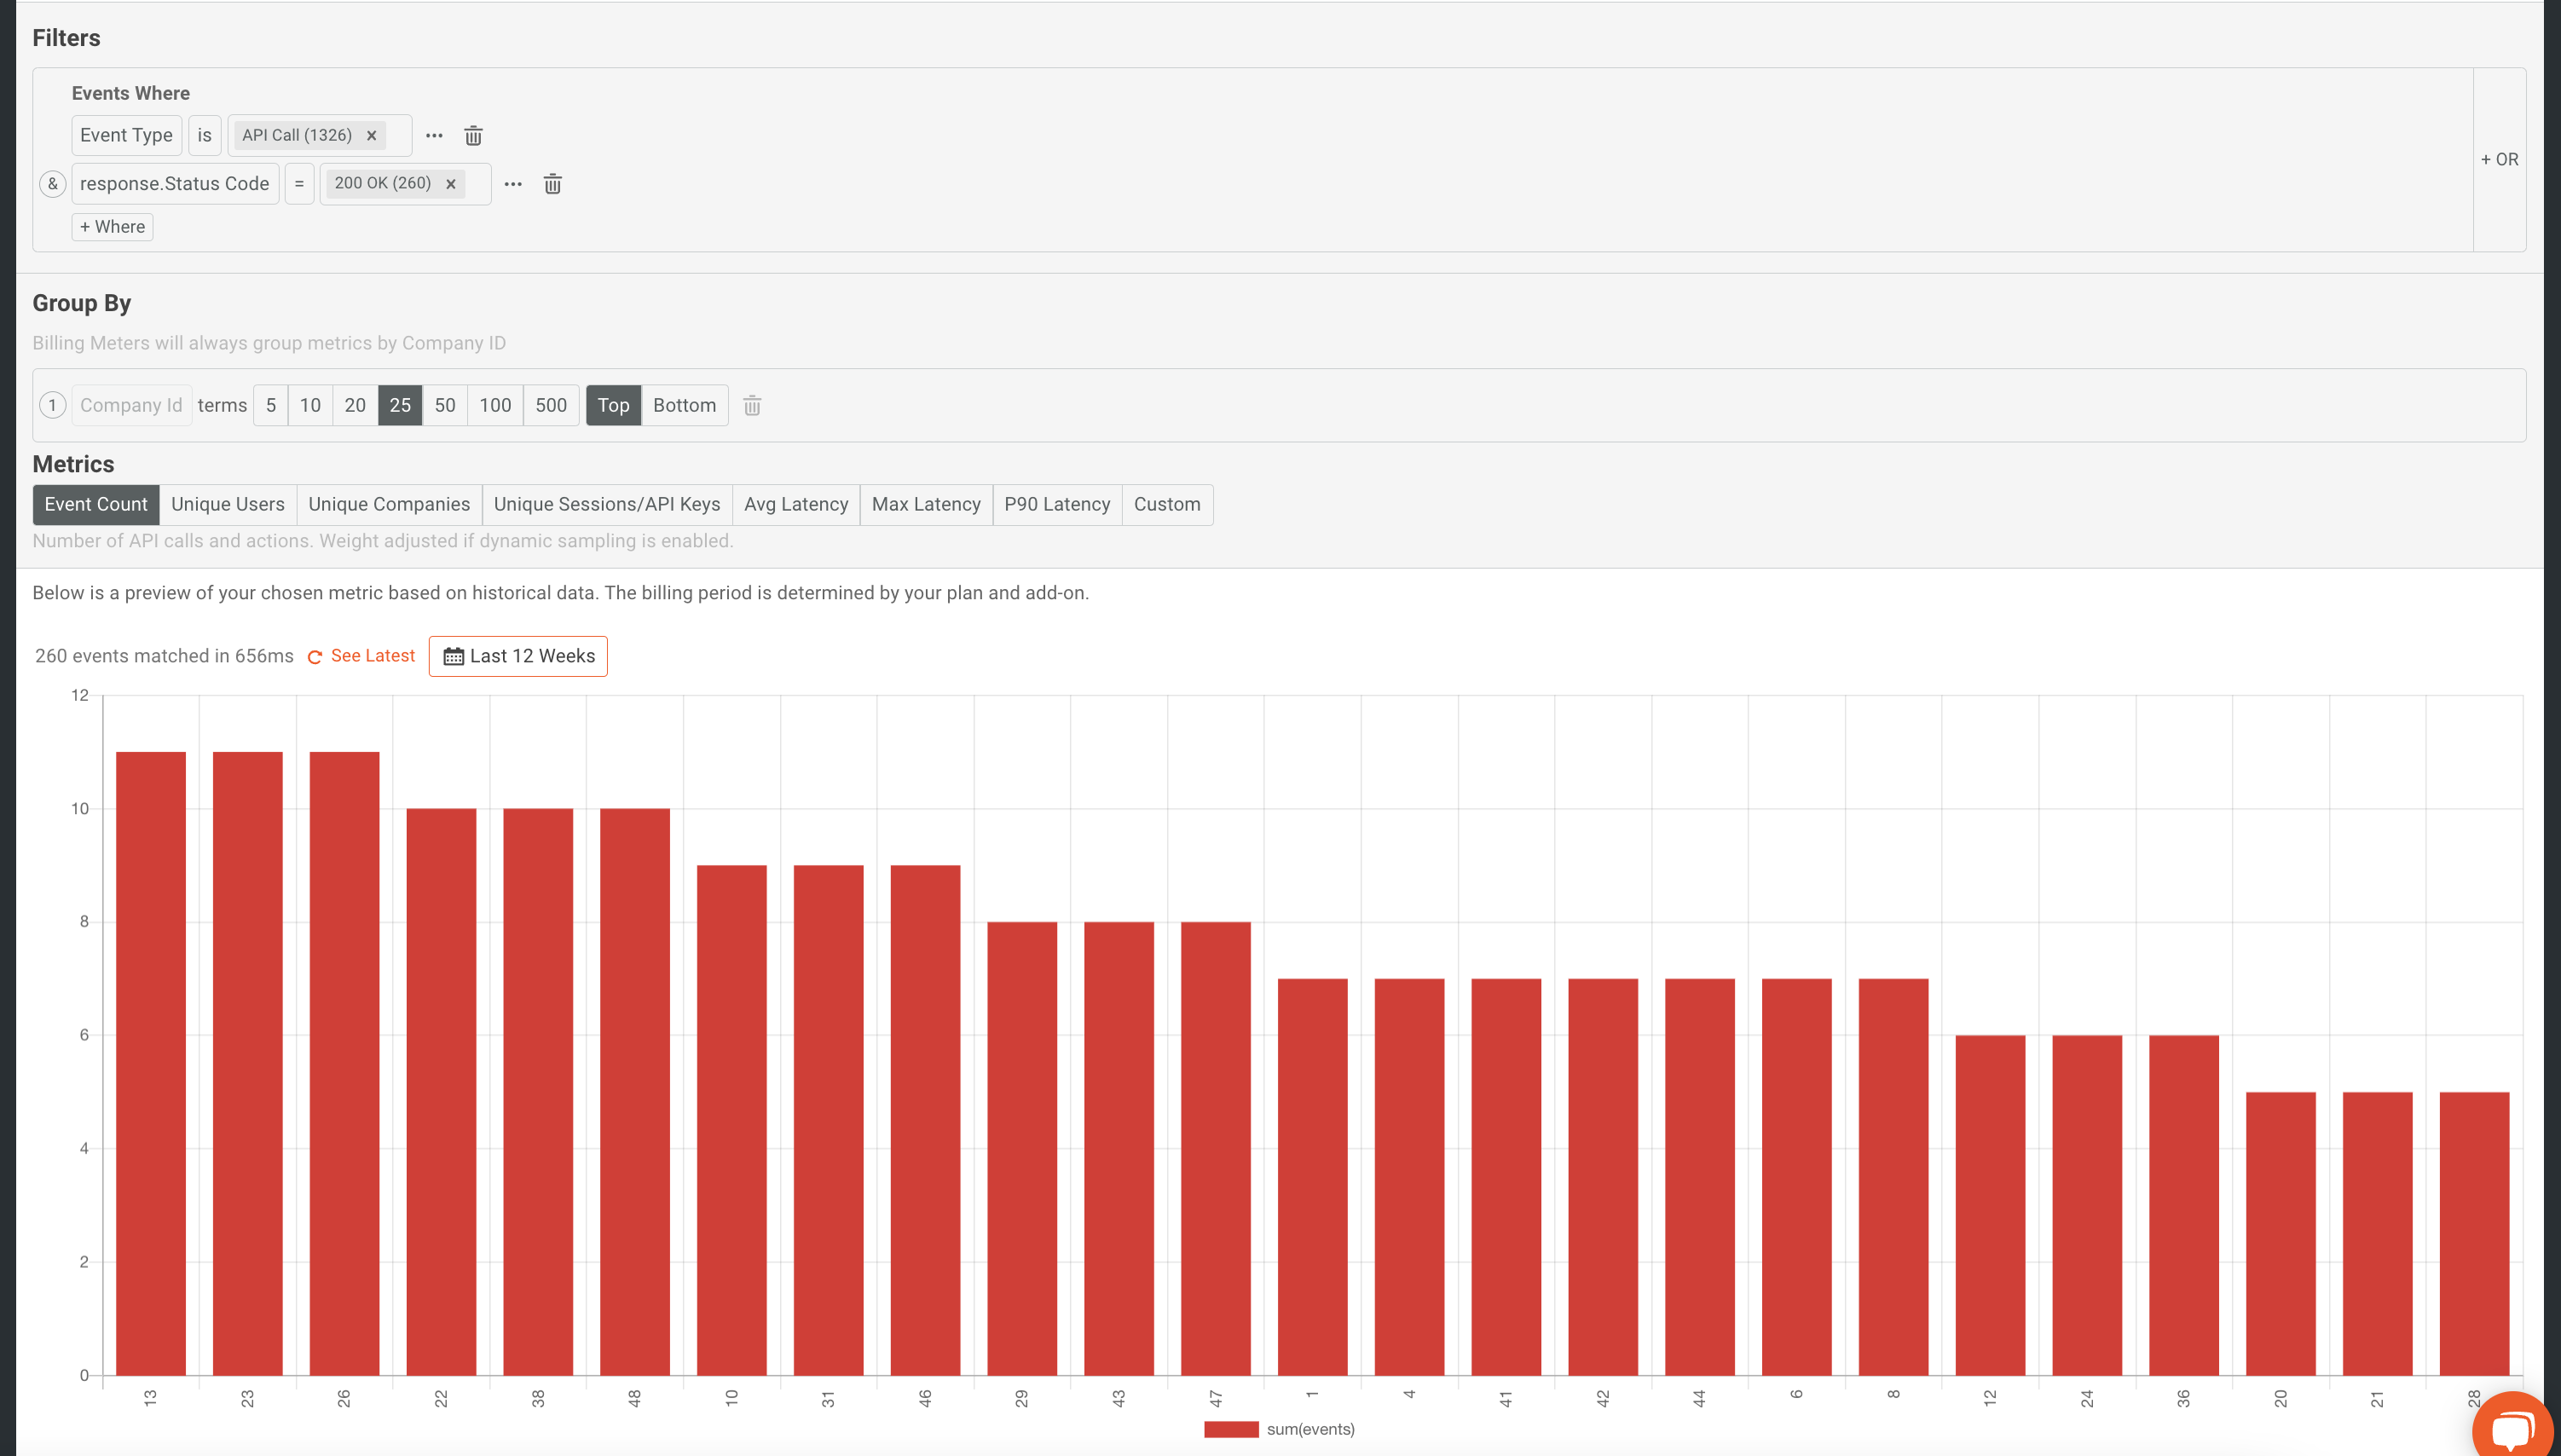
- Add the filter to specify what events to bill upon
In the below example I have set up a billing plan called “My Billing Plan” which uses Recurly as my billing provider. I’ve also decided to bill on any API call which has a response of 200 OK.
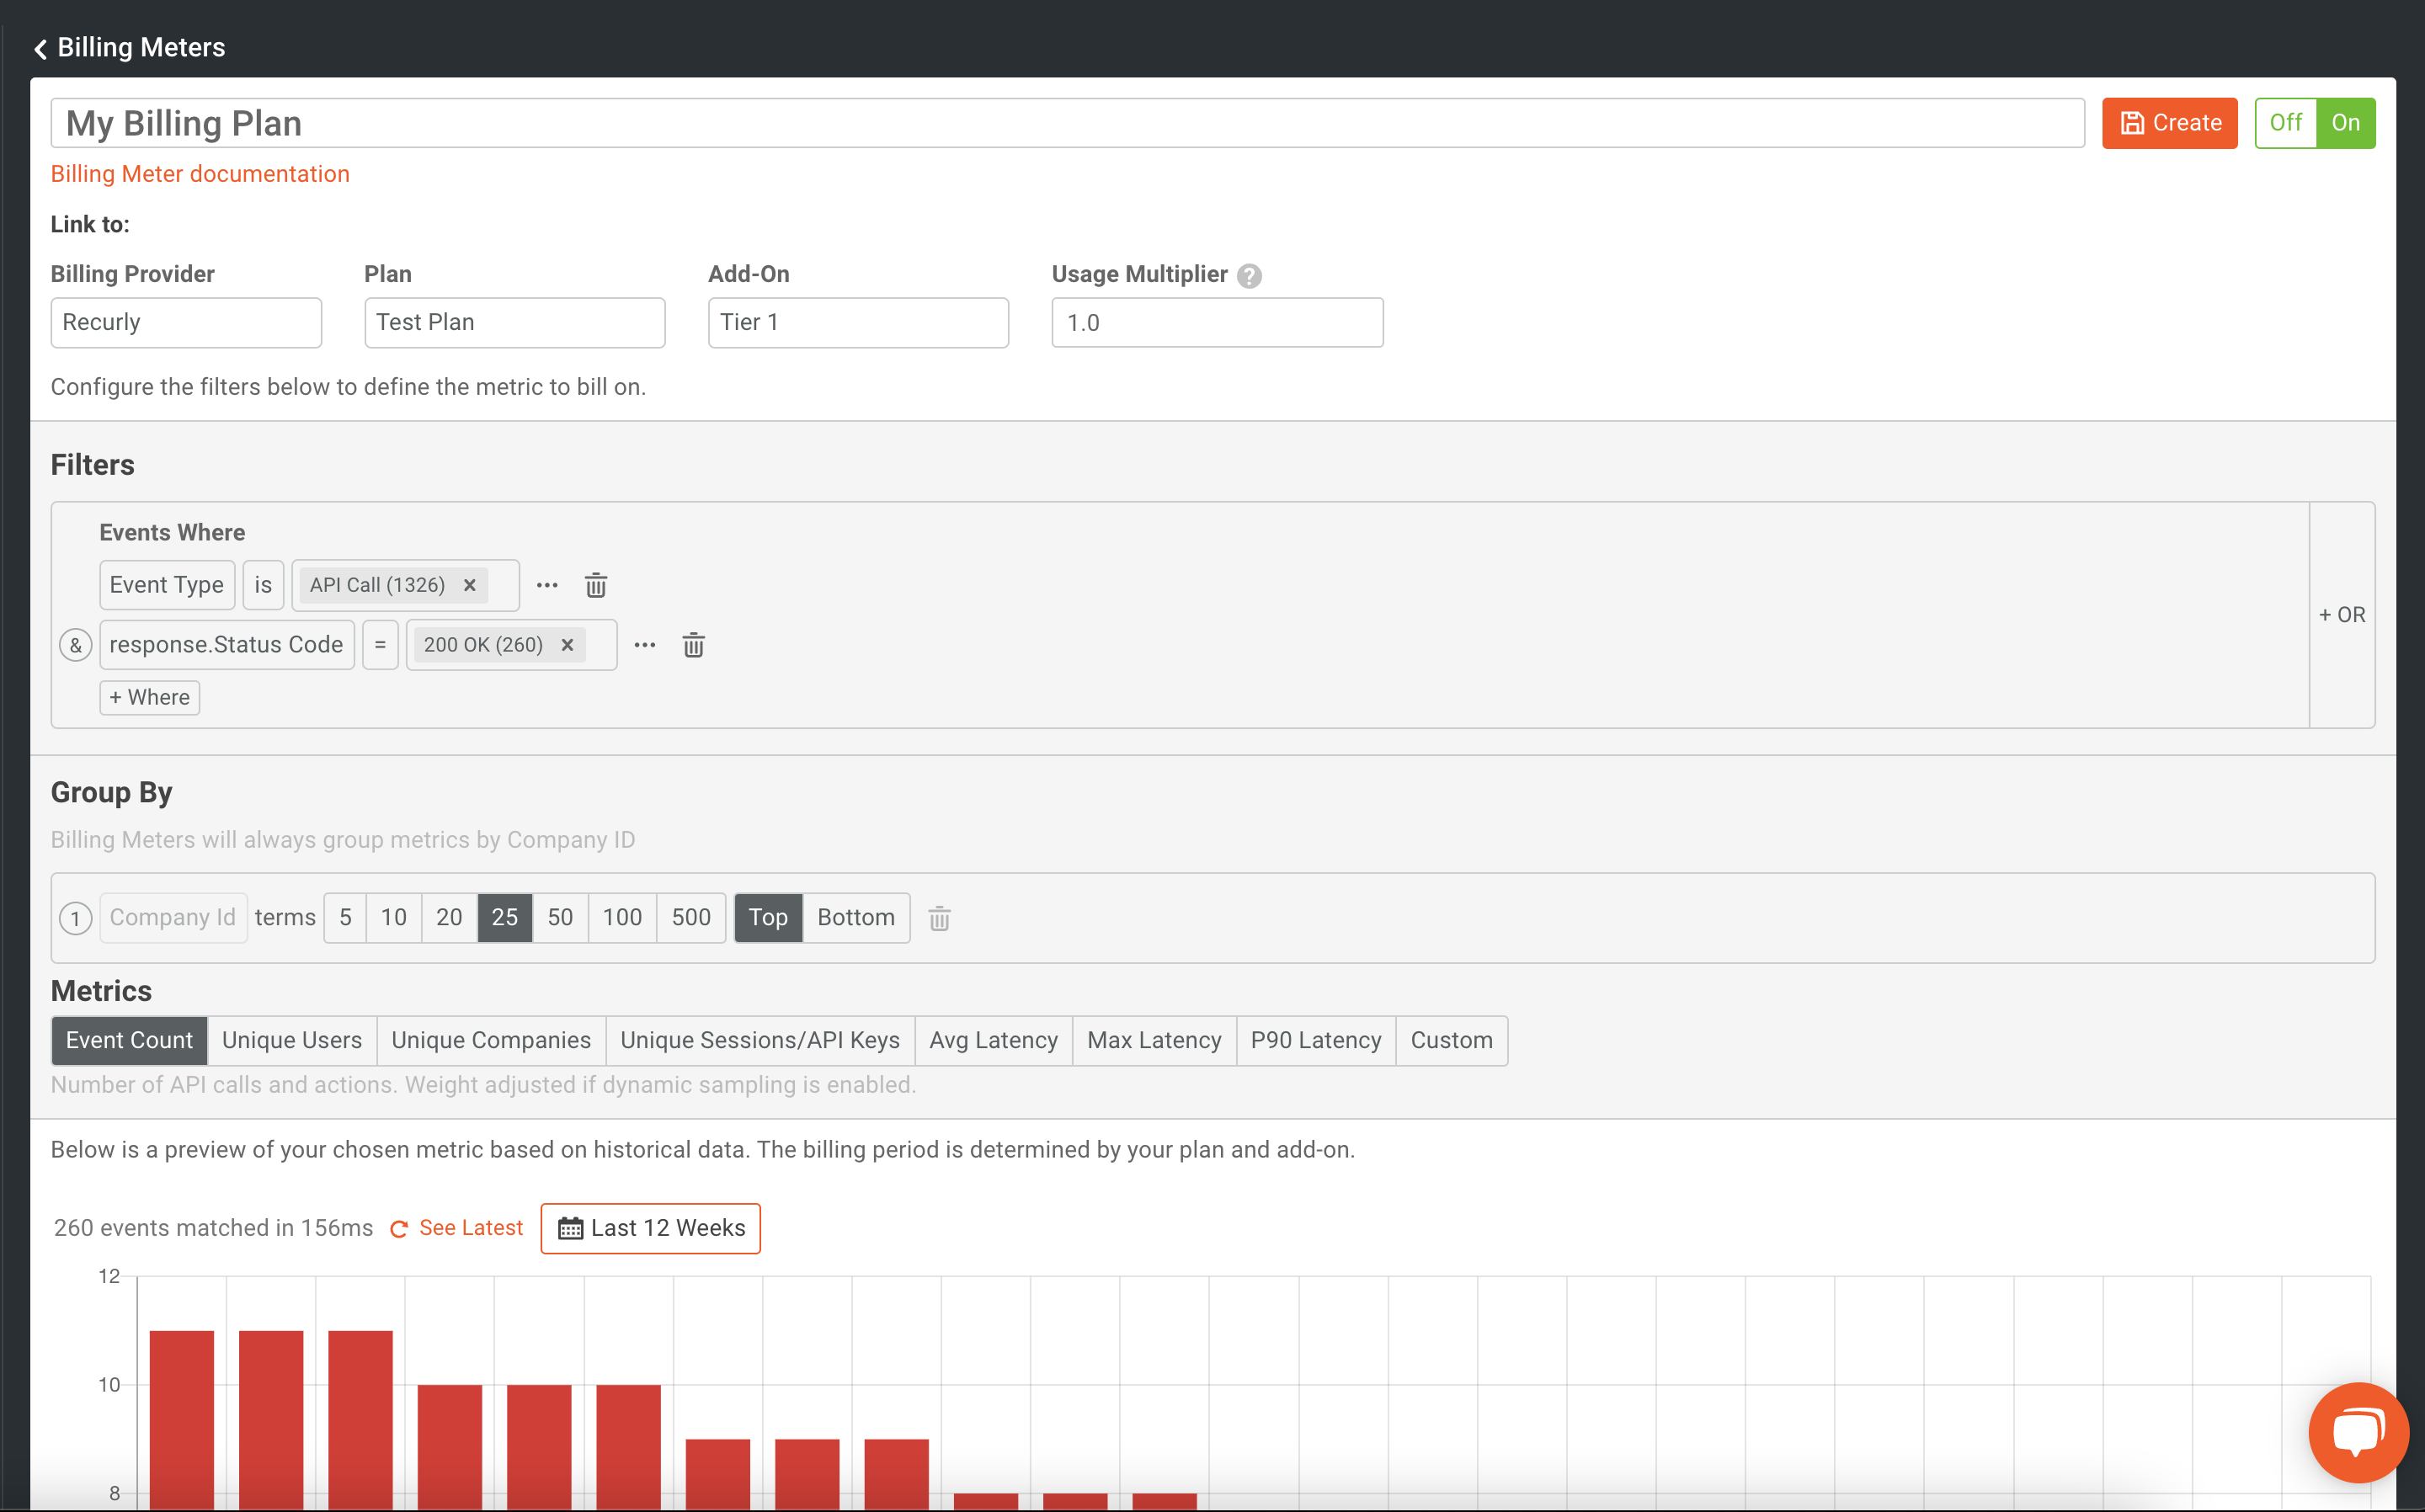
Once you have your details dialed in, you’ll see a visual representation of the filter output at the bottom of the screen. Although billing will only happen going forward, you will be able to see historically how your filter is working with existing data. This can help to make sure, especially with more complex filtering, that you have everything configured the way you require it.
Activating the billing meter
Our final step in monetization is to save and activate the billing meter. To do this we simply need to make sure that billing meter is turned on at the top of the configuration page.
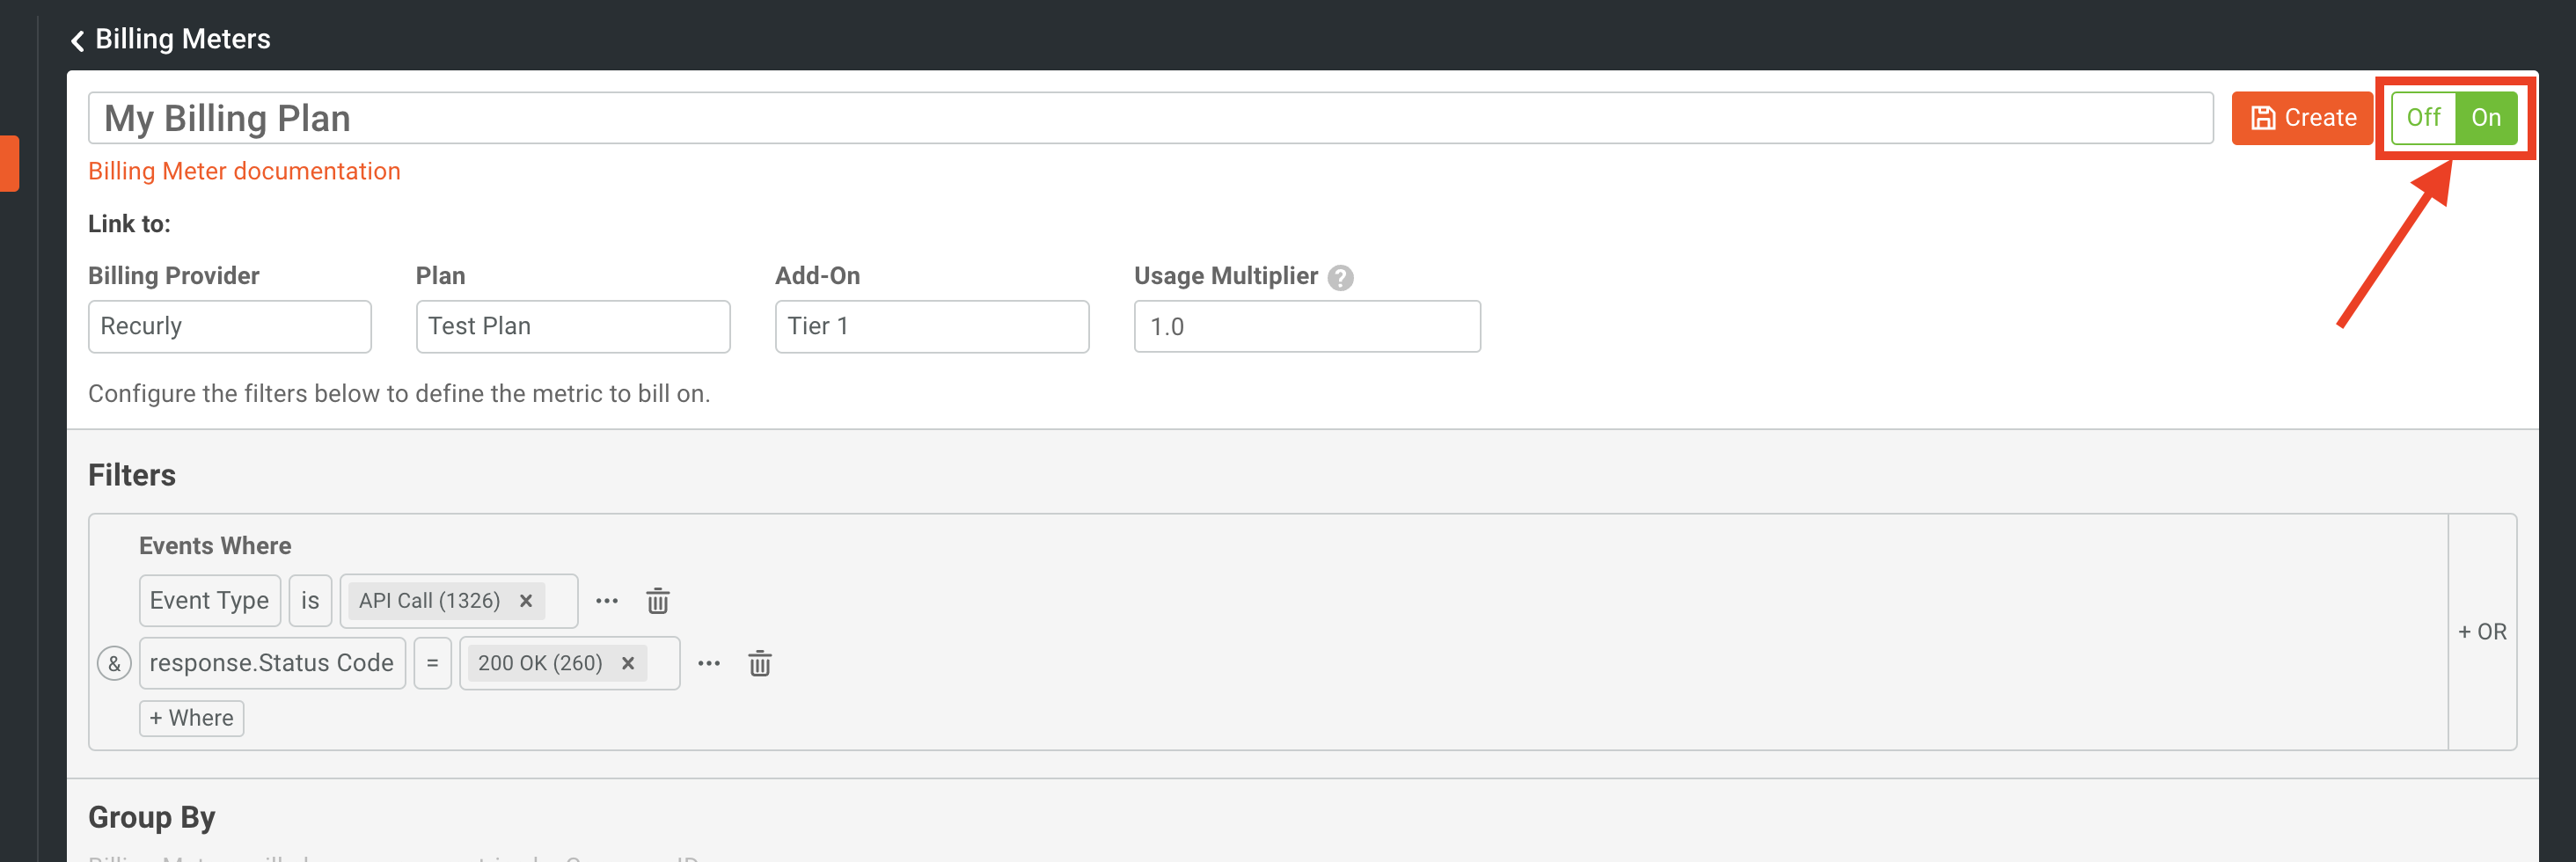
And lastly, we need to click Create at the top of the screen.

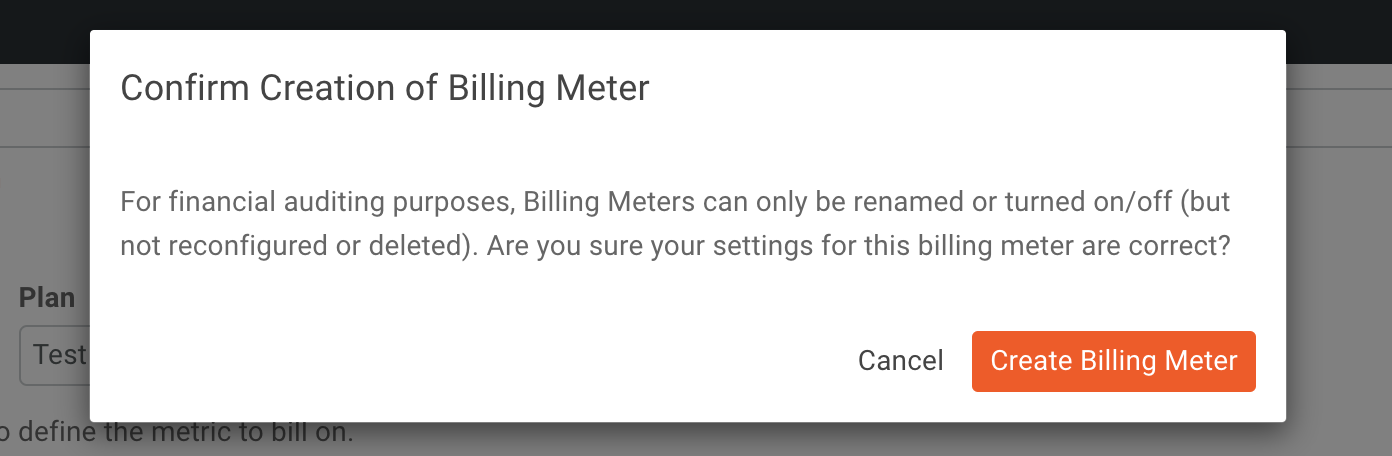
You’ll then be prompted to confirm the billing meters creation in the modal that pops up after clicking on the Create button.
It’s important to note that once a billing meter is created, the criteria for filtering can not be changed nor the billing provider details. Only the name can be changed as well as the status of the billing meter can be toggled on and off. This is for compliance and auditing purposes. Billing meters can also not be deleted but can be archived if no longer in use.
We should now see our new billing meter appear back on the Billing Meters home page.

Now, we have successfully created a billing meter that will begin to send usage data to Recurly. This integration is possible in a matter of minutes with no code required. For further info, you can also check out our docs.
Try it for yourself!
If you have an API, or any other part of your product you’d like to monetize, Moesif can help. As noted in the steps above, it is an easy and rapid way to bring in revenue from your products. If you are already monetizing your product and looking for a simpler solution, our billing features are a great way to simplify your setup and reduce support costs around your existing monetization efforts.
Moesif also offers many other great features which bundle well with our billing functionality, including funnel metrics and retention analysis, automated user behavior emails, custom metric dashboards, and governance capabilities. Sign up today to get started with billing and much more.


Related Articles

API Strategy
Leveraging AI For a Better API Strategy
Learn how to leverage AI to build and fortify your API strategy. Improve design, governance, documentation, and align APIs with business outcomes.
API Strategy
The 5 Best Mixpanel Alternatives of 2025
Learn about the best Mixpanel alternatives to determine the right analytics solution for your use case.

API Development
How to Leverage Moesif Effectively for API Observability
Effectively leverage Moesif for API observability through best practices for integration, event enrichment, custom actions, and engineering workflow integrat...
API Strategy
How to Build an Internal Chargeback Model for Your API and AI Usage Using Moesif
Use Moesif to implement internal chargebacks and enable precise API and AI cost attribution for better transparency and resource optimization.
