Heroku + Moesif: Unleashing Deep API Observability for Your Applications
With API-driven applications being increasingly common, understanding how your APIs are performing is crucial for success. That’s where the combination of Heroku and Moesif allows developers and their organizations to step up their observability game. In this blog, we will quickly examine how you can integrate Moesif with your Heroku app to begin monetizing and analyzing your API traffic. Let’s kick things off by taking a brief look at both platforms.
What is Heroku?
Heroku is a cloud-based Platform as a Service (PaaS) that enables developers to build, run, and scale applications entirely in the cloud. It abstracts away the complexities of infrastructure management, allowing you to focus on writing code and delivering features. Heroku supports many programming languages and frameworks, making it an excellent application development and deployment tool.
What is Moesif?
Moesif is an API observability and monetization platform that provides deep insights into how your APIs are used and delivers the capabilities to monetize them easily. It captures detailed information about API calls, including request/response payloads, latency, errors, and user behavior. With Moesif, you can:
- Monitor API Performance: Identify bottlenecks, track error rates, and optimize response times.
- Understand User Behavior: See how users interact with your APIs, which endpoints are most popular, and what features they’re utilizing.
- Debug Issues: Quickly pinpoint the root cause of errors and resolve problems impacting your users.
- Monetize Your API: Implement usage-based billing models and track revenue generated from your API.

Why Are API Analytics Important?
If your app contains APIs, then a specialized API observability platform must be used to truly understand how your APIs are used and what value they deliver. API observability is essential for several reasons:
- Improved Performance: Identify and fix performance issues before they affect your users.
- Enhanced User Experience: Understand how users use your API and tailor it to their needs.
- Data-Driven Decisions: Make informed API development, pricing, and business-level decisions based on usage data.
- Increased Revenue: Monetize your API effectively by understanding usage patterns and identifying growth opportunities.
API observability allow you to examine not only the engineering side of the puzzle but also derive a large number of business insights.
Adding Moesif to Your Heroku Application (Step-by-Step)
When using Heroku and Moesif together, the process is straightforward and can be done directly through the Heroku CLI and UI. Below, we will go through how to add Moesif to your Heroku instance, including the steps in the UI or Heroku CLI, depending on your preferred approach.
Add Via CLI
First, we will look at installing the Moesif Add-On through the CLI. For this, we assume that you:
- Have a Heroku account and an app running on Heroku
- You have the Heroku CLI installed and logged into the application you want to add Moesif to.
With these prerequisites handled, you can proceed.
Install the Add-on
Moesif can be attached to a Heroku application via the CLI:
heroku addons:create moesif
Once the command is executed, you should see something similar to the following:
-----> Adding moesif to sharp-mountain-4005... done, v18 (free)
A MOESIF_APPLICATION_ID config var is added to your Heroku app’s configuration during provisioning. It contains the write-only API token that identifies your application with Moesif. You can confirm the variable exists via the heroku config:get command:
heroku config:get MOESIF_APPLICATION_ID
This will print out your Moesif Application ID to the console, confirming it is correctly set in the config file.
Add Via UI
Alternatively, you can install the Moesif Add-On through the Heroku Dashboard UI. For this, we assume that you:
- Have a Heroku account and an app running on Heroku
- Are logged into the Heroku Dashboard for the app you’d like to add Moesif to
With these prerequisites handled, you can proceed.
Install the Add-On
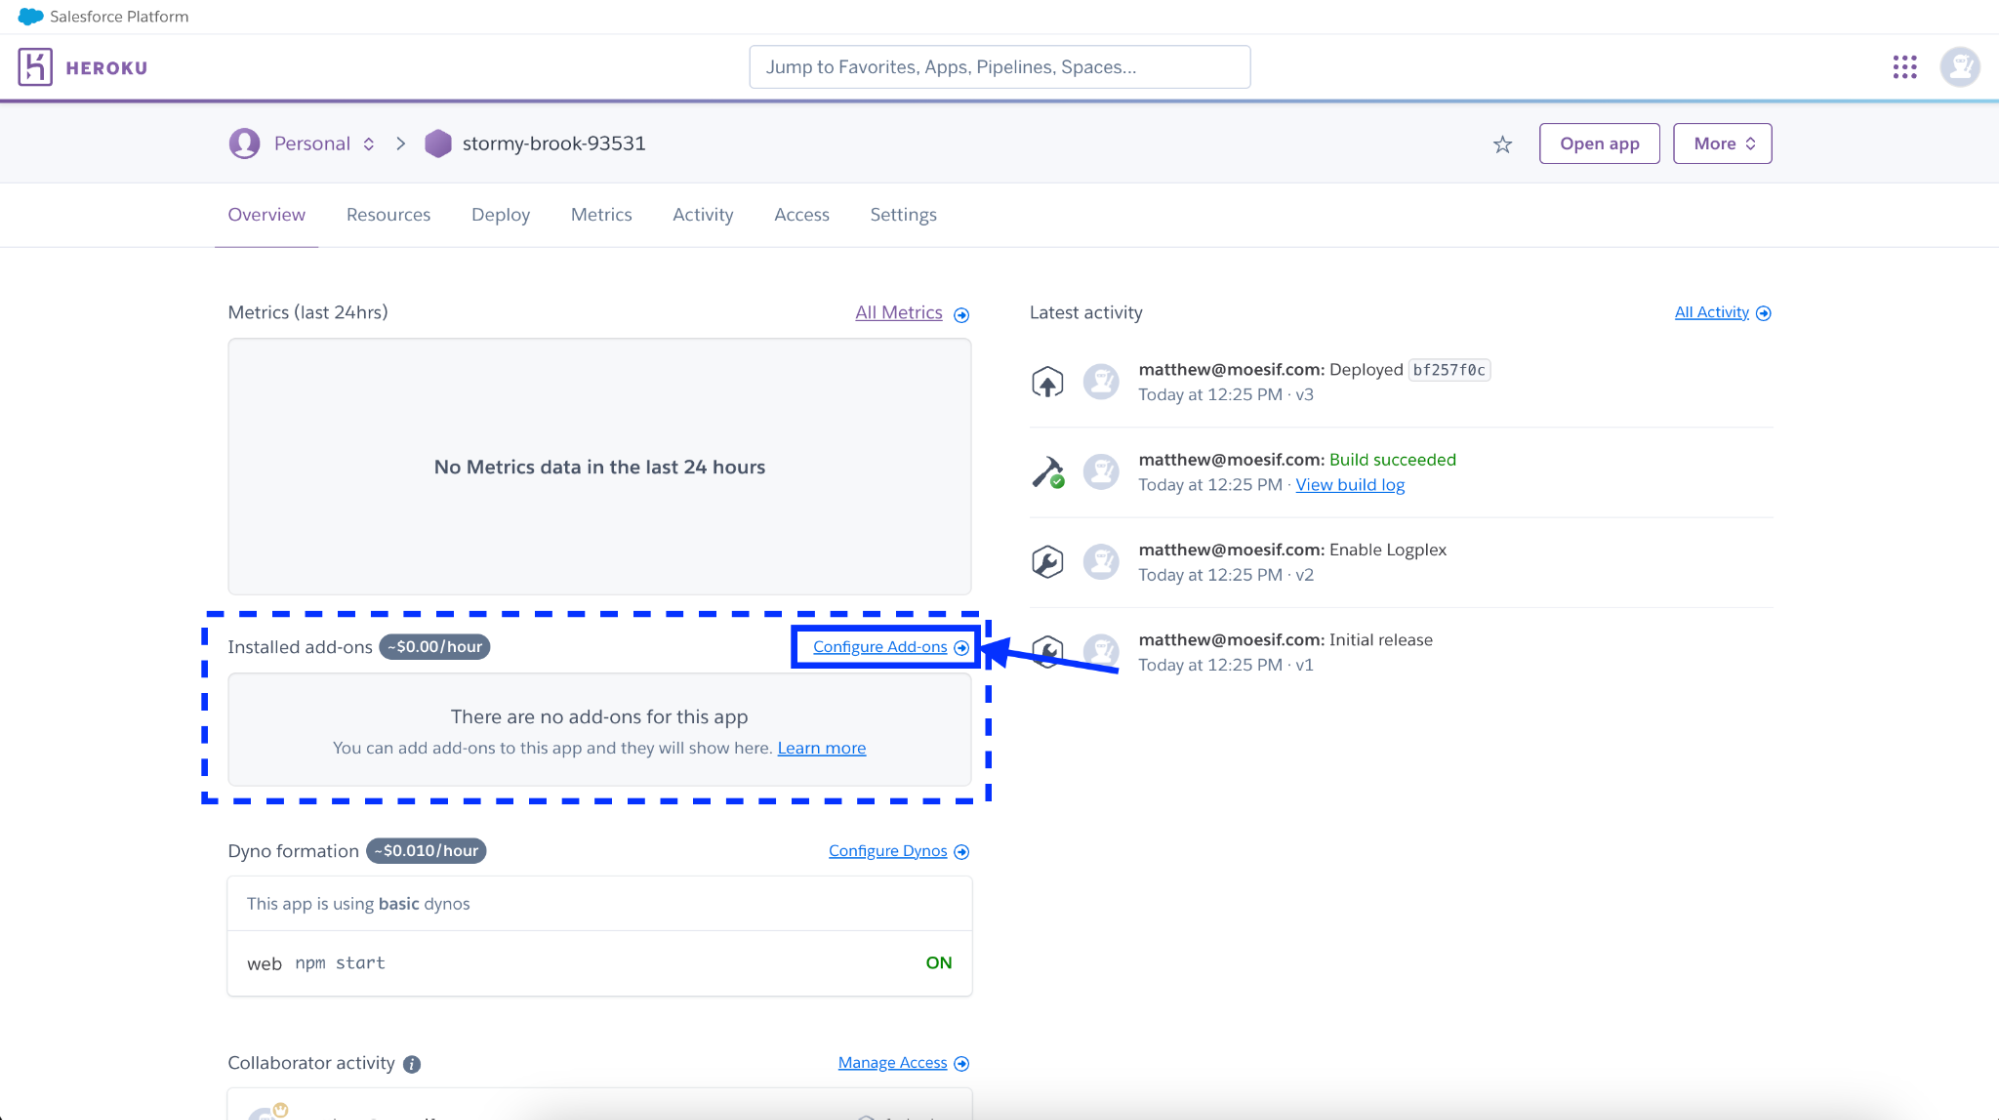
While logged into the dashboard for the app you want to add Moesif to, on the Overview page, click the Configure Add-ons button.
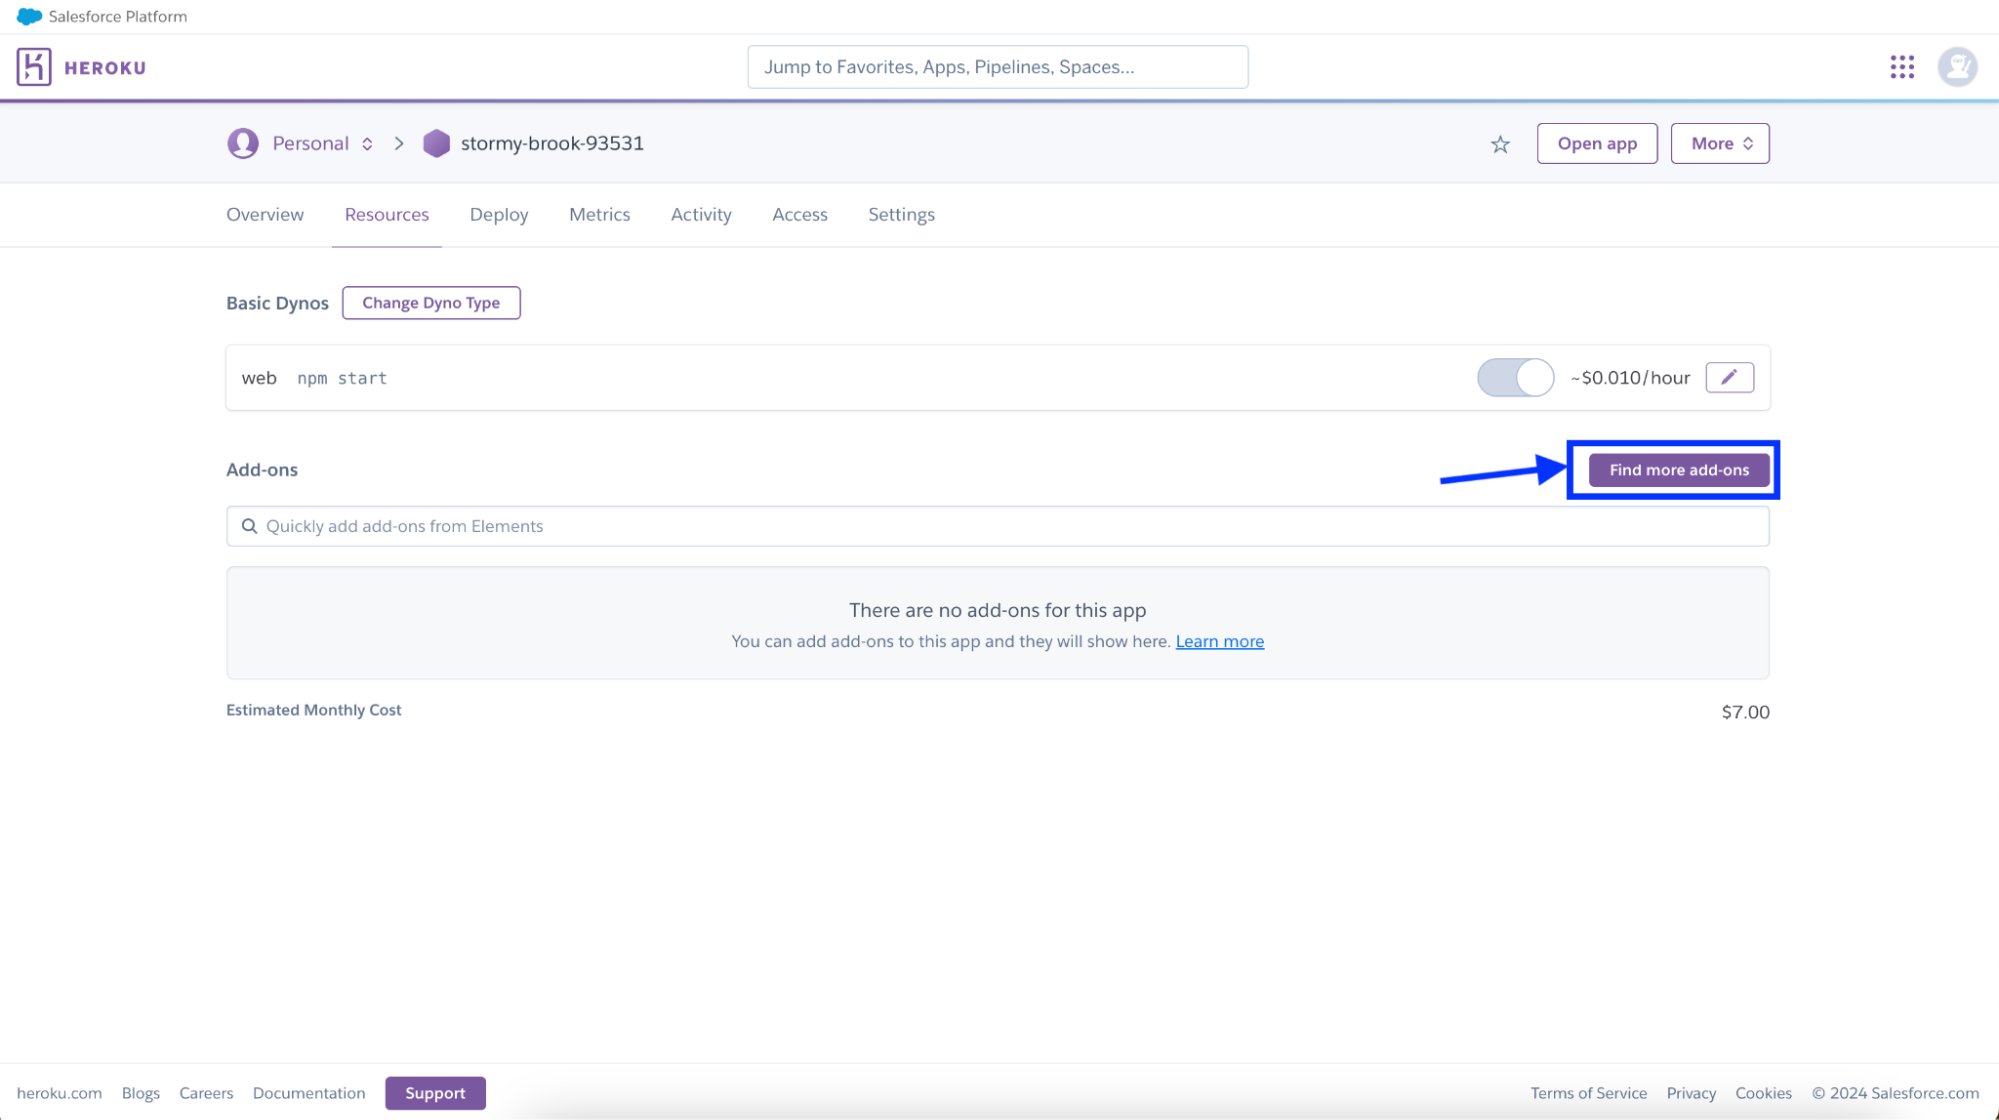
This will then bring you to the Resources screen to view your current add-ons. In this instance, we have none. From here, click the Find more add-ons button.
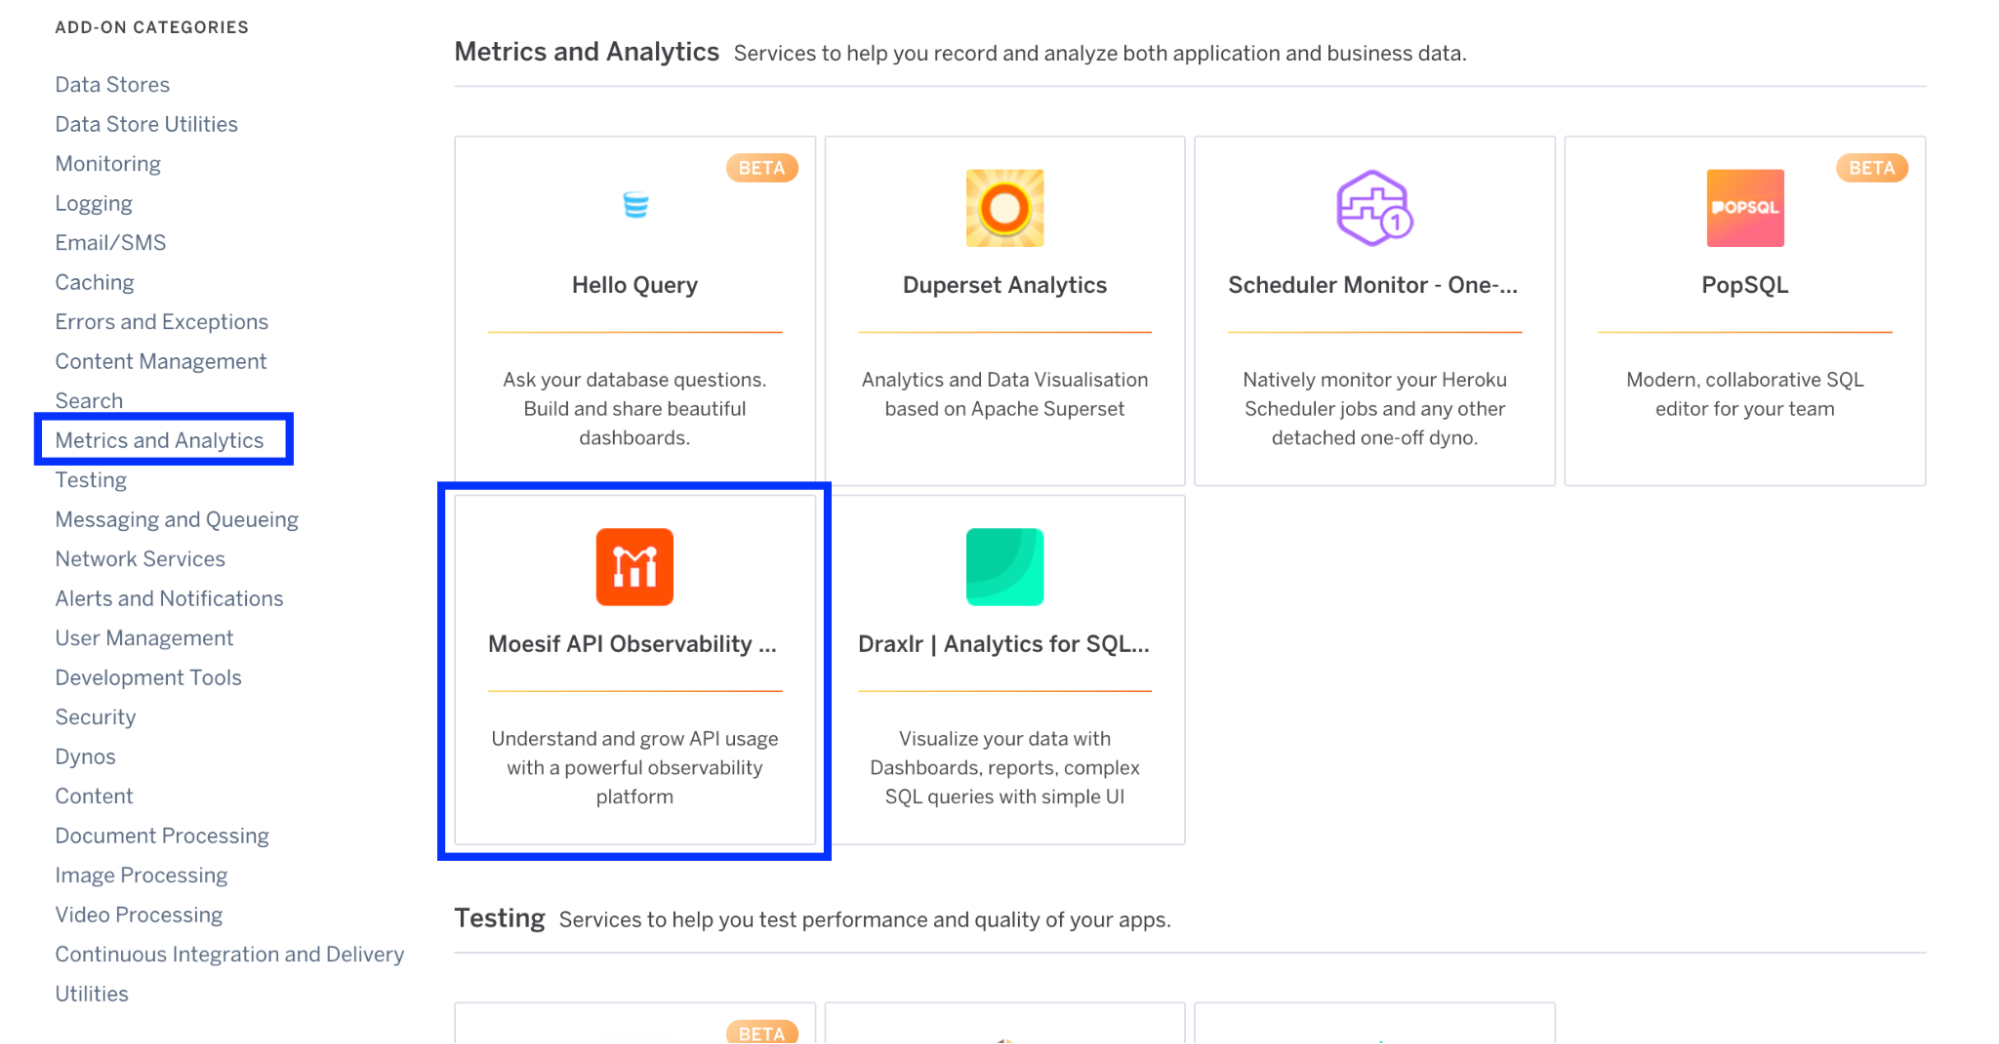
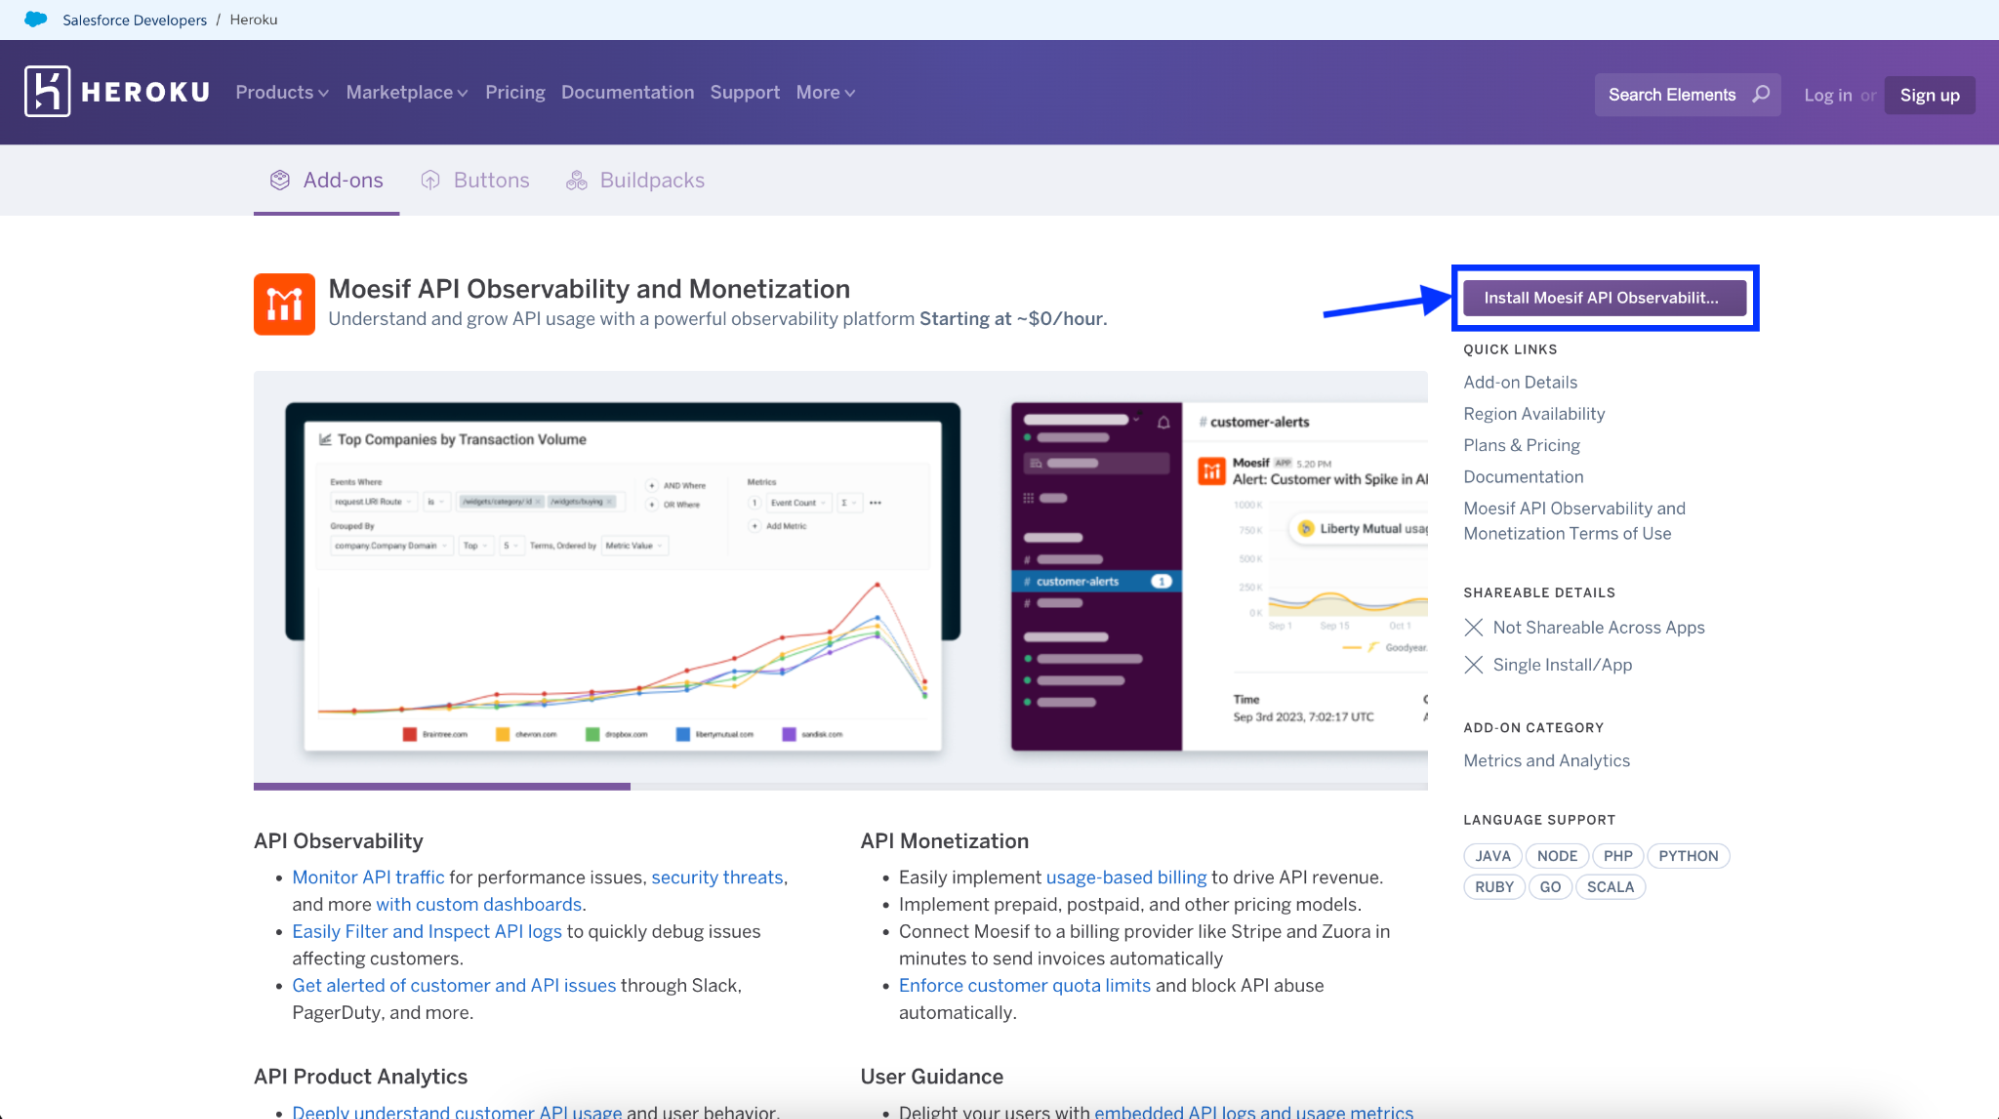
On the next screen, where all available add-ons are listed, click Metrics and Analytics on the left-side menu. Locate the Moesif API Observability entry and click on it.
On the Moesif API Observability and Monetization overview page, click Install Moesif API Observability in the top-right corner.
Next, you’ll be prompted to confirm the installation and submit the order. To confirm and install, click the Submit Order Form button to add Moesif to your Heroku app and activate your subscription.
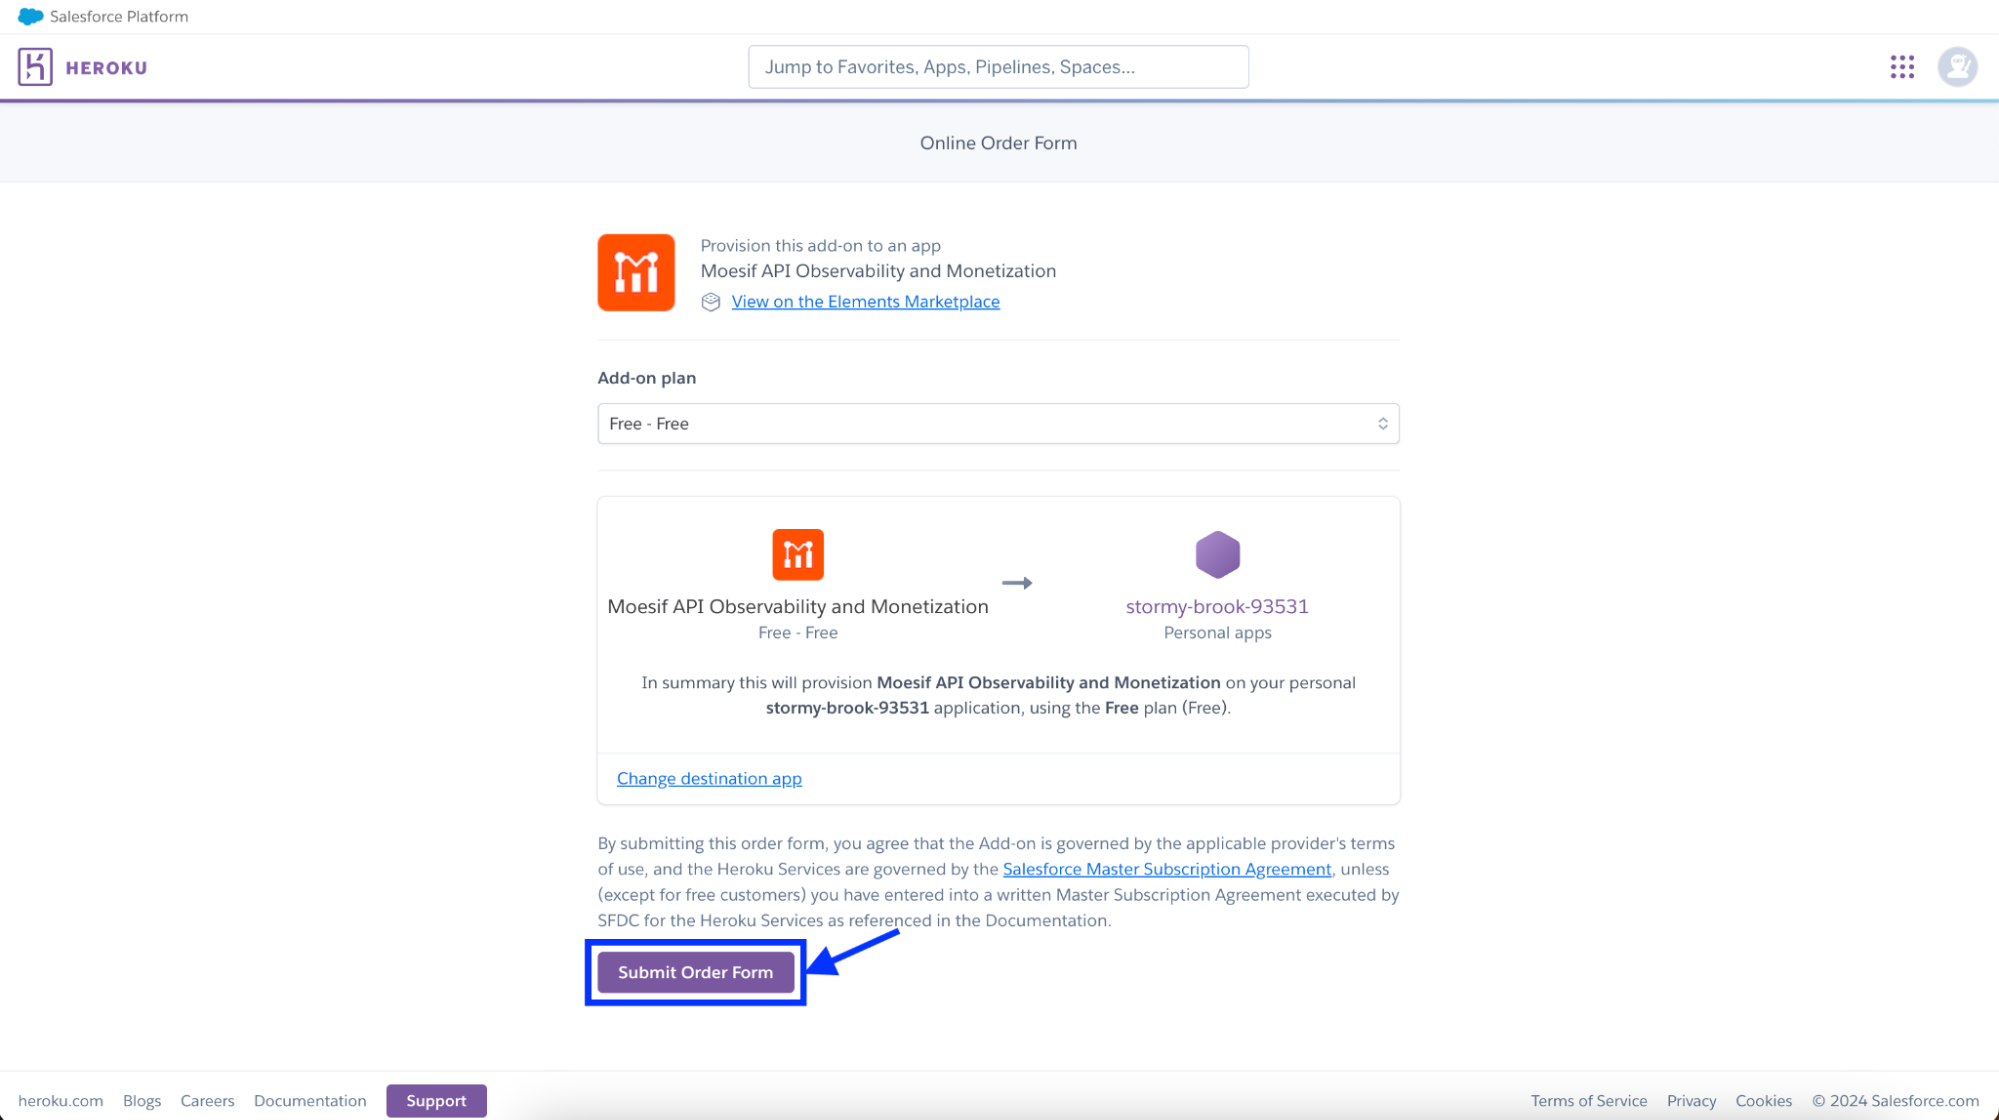
Once complete, you’ll see that Moesif has been added to your Heroku instance and is ready for further configuration.

Install the server integration
With Moesif installed on our Heroku instance and subscription activated, we need to add Moesif to the application running on Heroku. To do this, go to your Heroku dashboard and open Moesif from under “Installed add-ons”
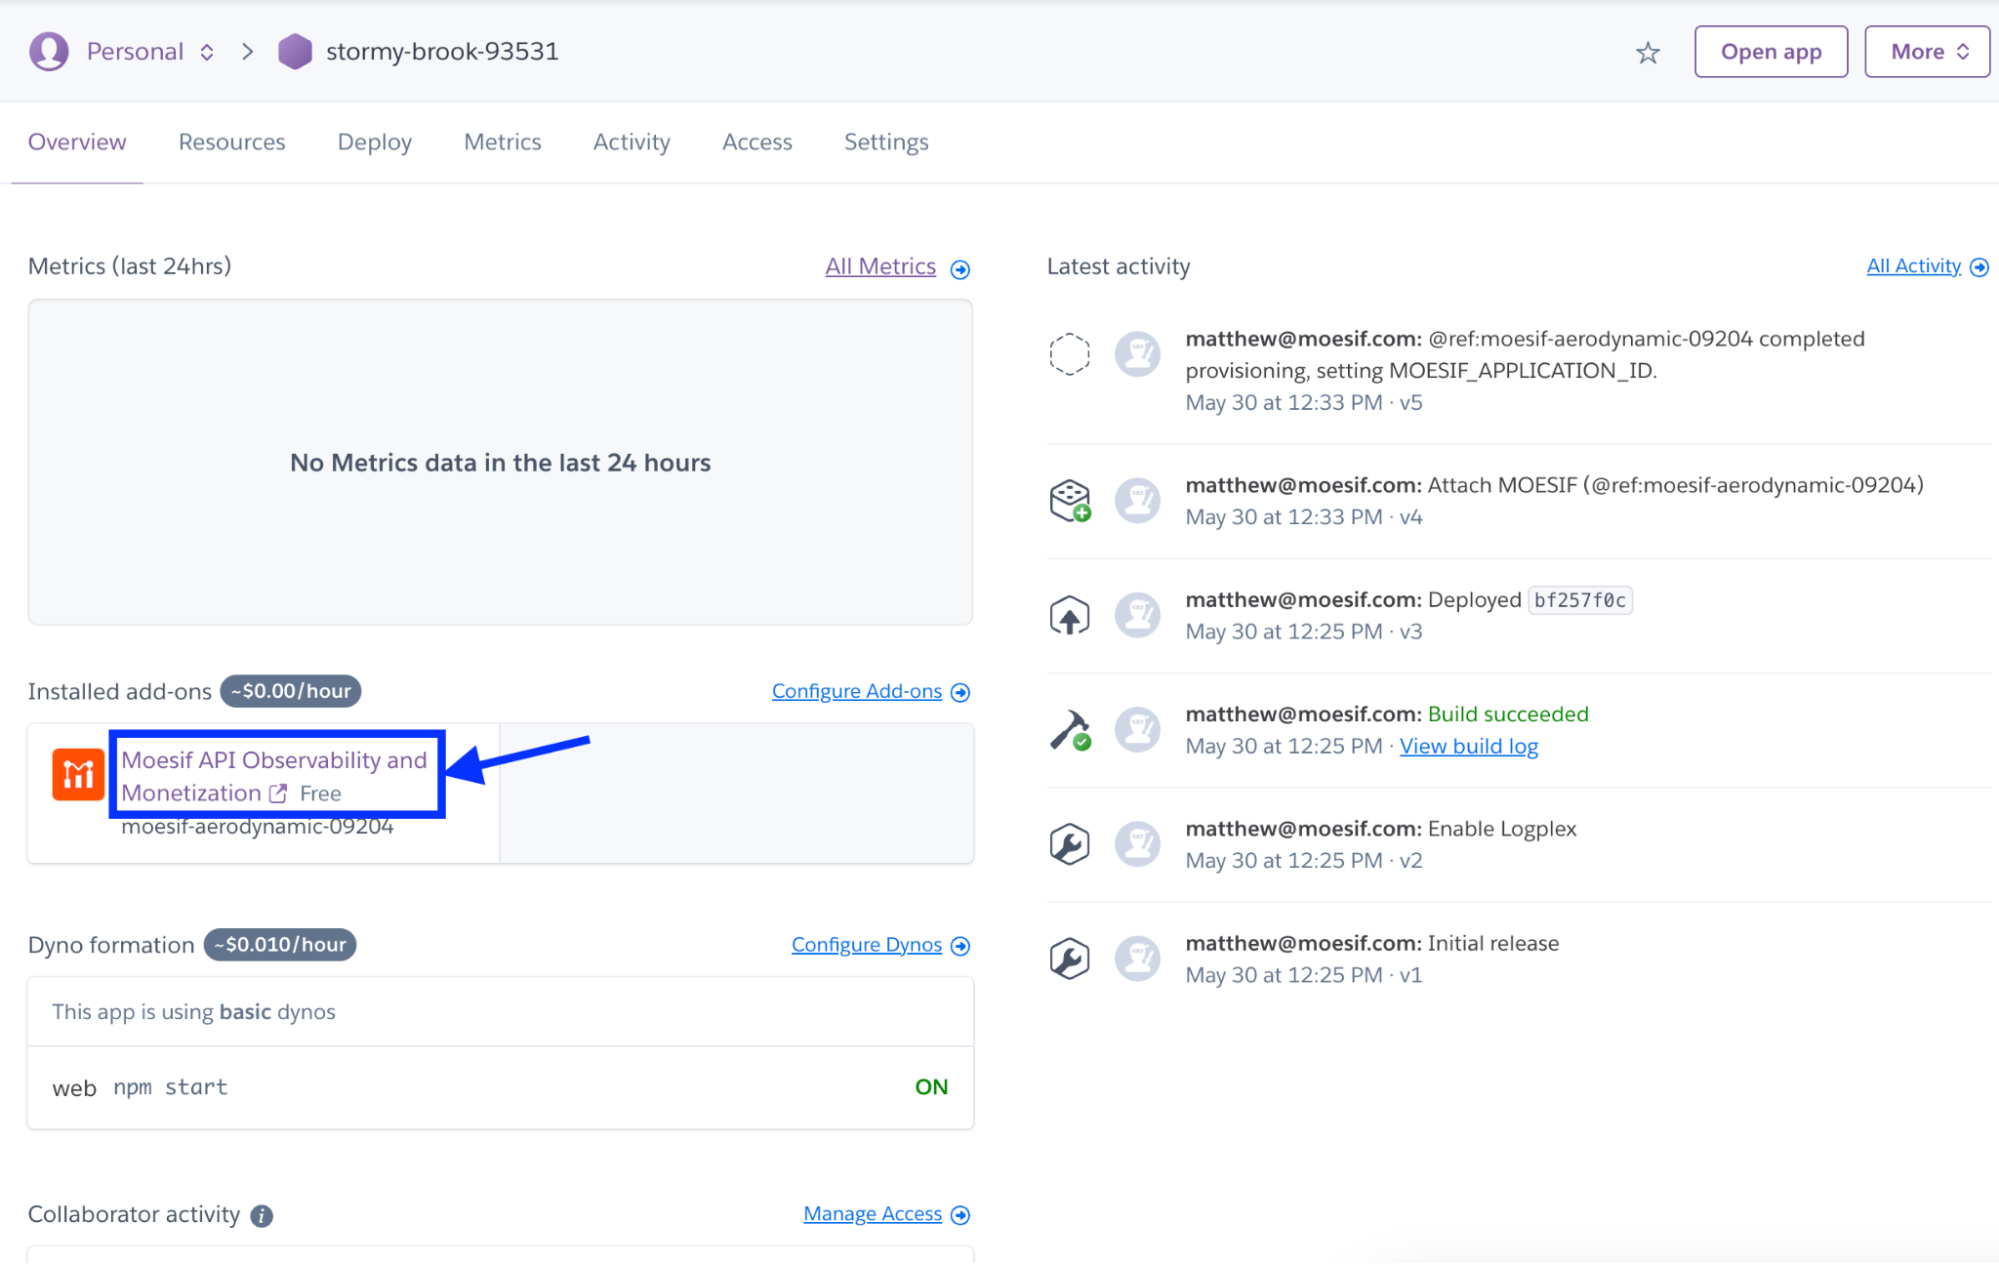
Once inside the Moesif application, the onboarding flow that appears will walk you through adding the Moesif SDK to your code.
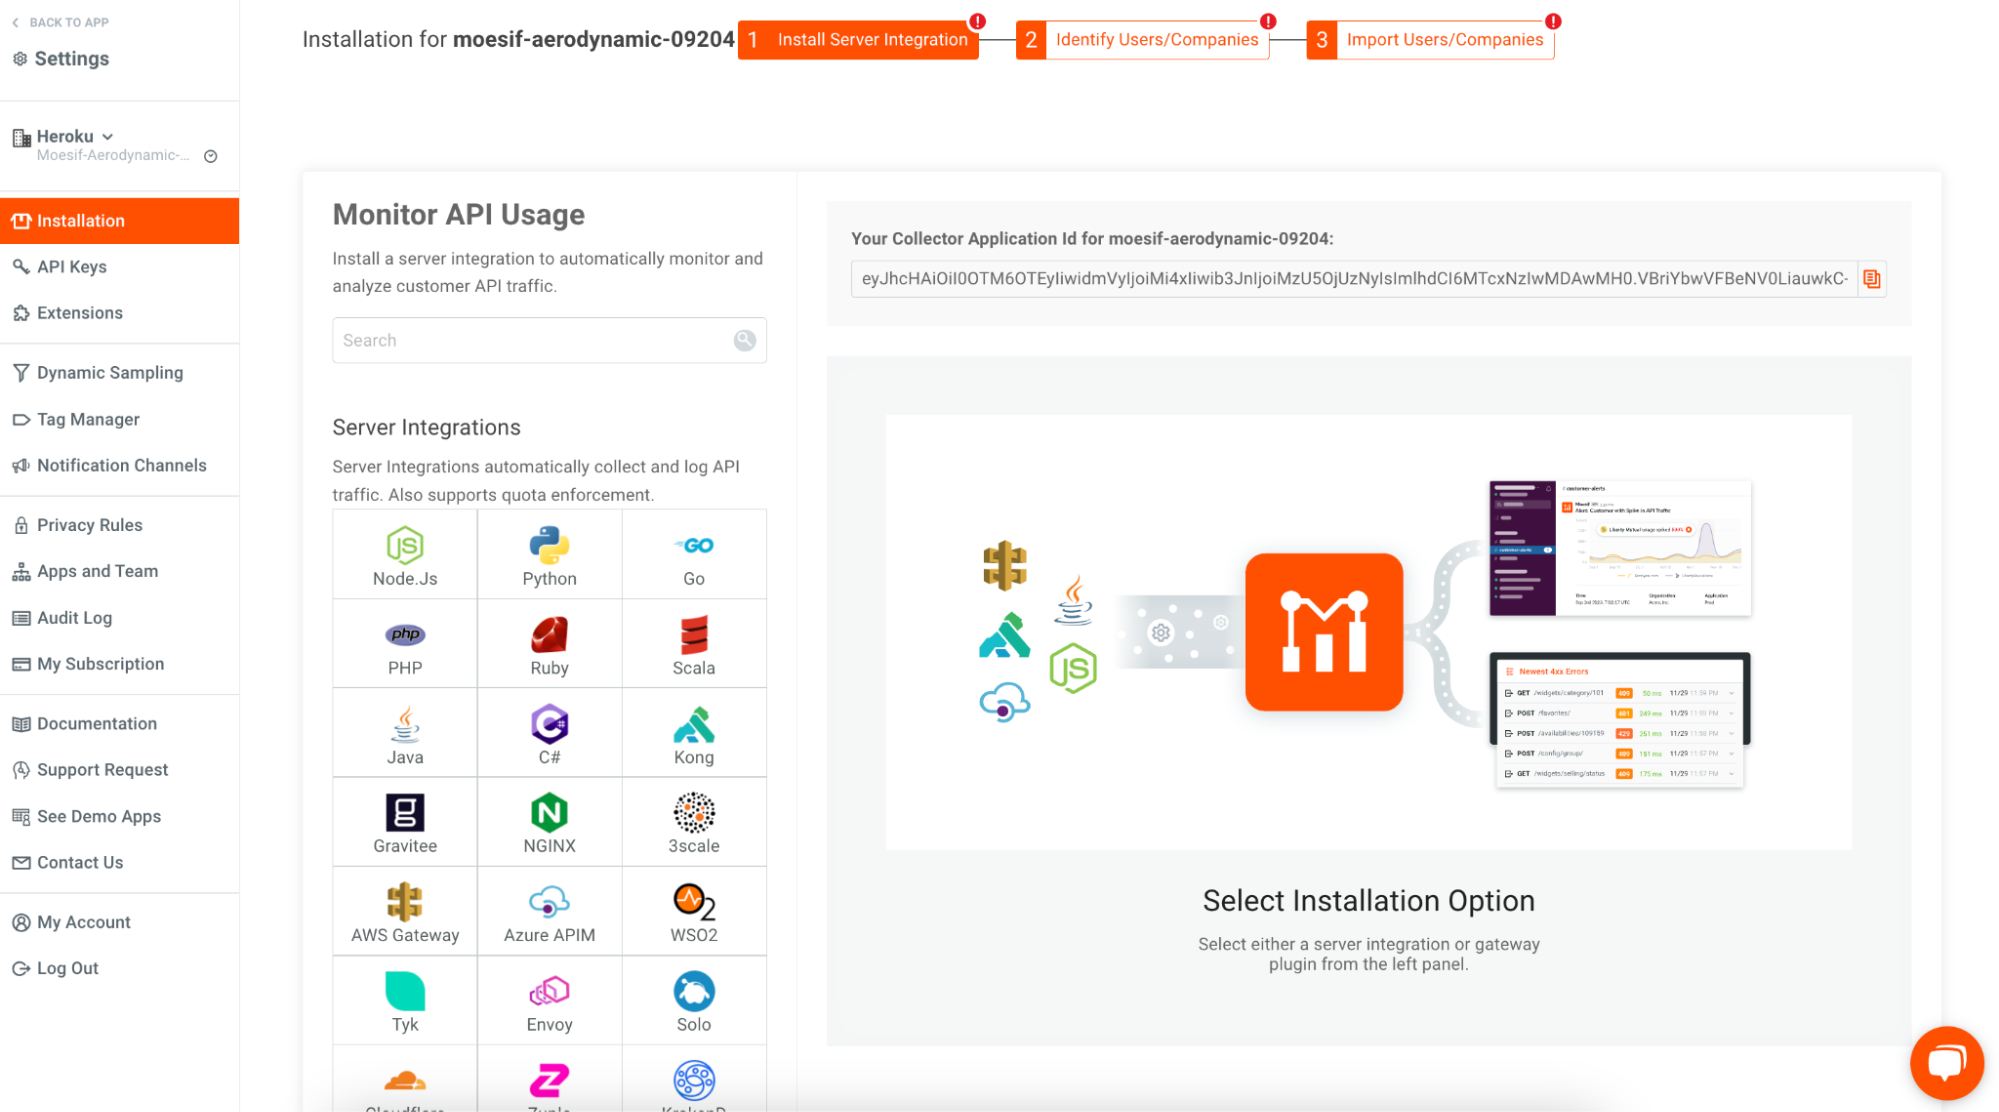
When initializing the SDK, use the environment variable MOESIF_APPLICATION_ID for the application ID. For example, in a Node application, you’d grab the Moesif Application ID by using process.env.MOESIF_APPLICATION_ID. This would be retrieved from the app config variables.
Local setup
After you provision the add-on, you must replicate your config variables locally so your development environment can operate against the service.
Use the Heroku Local command-line tool to configure, run, and manage process types specified in your app’s Procfile. Heroku Local reads configuration variables from a .env file. To view all of your app’s config vars, type heroku config. Use the following command for each value that you want to add to your .env file:
heroku config:get MOESIF_APPLICATION_ID -s >> .env
Credentials and other sensitive values should not be committed to source control. If you’re using Git, you can exclude the .env file by adding it to the gitignore file with:
echo .env >> .gitignore
For more information, see the Heroku Local article.
Using Moesif Dashboards
Once everything is configured, events should begin to flow into Moesif. These events can be used for analytics and monetization directly within the Moesif platform.
Key Moesif Features to Leverage:
- Live Event Log: See individual API calls in real-time.
- Time Series Metrics: Track API traffic, latency, errors, and more over time.
- Funnels and Retention: Analyze user journeys through your API.
- Alerting: Get notified of critical API issues.
- Monetization: Drive revenue from your API calls using post-paid and pre-paid billing
Check out our docs and tutorials pages for all the ways you can leverage Moesif.
Open Through The Heroku CLI
To open Moesif, you can the following command via the Heroku CLI:
heroku addons:open moesif
Or, from the Heroku Application Dashboard, select Moesif from the Add-ons menu.
Once logged in, you’ll have full access to the Moesif platform, which includes everything needed for extensive API observability and monetization.
Try It Out
Want to try out Moesif for yourself? You can do so by following the directions above and creating an account through Heroku or sign-up directly. Powerful API analytics and monetization capabilities are just a few clicks away.


Related Articles

API Strategy
Leveraging AI For a Better API Strategy
Learn how to leverage AI to build and fortify your API strategy. Improve design, governance, documentation, and align APIs with business outcomes.
API Strategy
The 5 Best Mixpanel Alternatives of 2025
Learn about the best Mixpanel alternatives to determine the right analytics solution for your use case.

API Development
How to Leverage Moesif Effectively for API Observability
Effectively leverage Moesif for API observability through best practices for integration, event enrichment, custom actions, and engineering workflow integrat...
API Strategy
How to Build an Internal Chargeback Model for Your API and AI Usage Using Moesif
Use Moesif to implement internal chargebacks and enable precise API and AI cost attribution for better transparency and resource optimization.