Using Moesif, Kong, and Stripe to Monetize Your AI APIs - Part 1: Integrating The Platforms
This is the first part of a four-part series about AI API monetization.
As the wave of AI sweeps through the technology landscape, many have hopped on board. Interestingly enough, and often overlooked, is that many AI capabilities are served through APIs. Fancy user interfaces integrate with the actual mechanisms where the magic happens: the APIs. So, when generating revenue through AI platforms, the APIs drive the revenue.
This leads to the challenge of controlling access to the APIs, metering API usage, and charging customers for said usage. The overarching term for this is API monetization, but unlike simpler forms of API monetization that only charge based on API calls, AI platforms generally tend to charge on things such as “tokens used” and other AI-specific metrics that are metered upon. Luckily, platforms exist that can expedite this process and make it simple to implement. We will focus on Moesif, Kong, and Stripe to implement API monetization for AI APIs.
We will use each platform to fulfill a specific role in the setup. Kong will be used to control the access to our APIs and be used for its API management capabilities. Then, we will integrate Moesif with Kong to add metering capabilities, allowing us to send usage over to Stripe, where payment can be collected, or a balance can be burned down based on usage.

The AI API
In almost all cases, you will have your AI service exposed through an API or leverage existing AI services that will be the backbone of your API functionality. Regardless, we will use OpenAI’s /chat endpoint in our example to demonstrate how to monetize an AI API. This will give us an accurate depiction of an AI API. Many companies use OpenAI-compatible API Specifications to allow for drop-in replacement for OpenAI APIs.
In our example, we will create a single endpoint called /ai/chat that will be very similar to OpenAI’s chat endpoint. Well, exactly like it, since it is leveraging that endpoint under the hood! The request and response for the API can be seen below:
POST Request Payload
{
  "model": "gpt-3.5-turbo",
  "messages": [
    {
      "role": "system",
      "content": "You are a helpful assistant."
    },
    {
      "role": "user",
      "content": "Hello!"
    }
  ]
}
Response Payload
{
  "id": "chatcmpl-123",
  "object": "chat.completion",
  "created": 1677652288,
  "model": "gpt-3.5-turbo-0125",
  "system_fingerprint": "fp_44709d6fcb",
  "choices": [{
    "index": 0,
    "message": {
      "role": "assistant",
      "content": "\n\nHello there, how may I assist you today?",
    },
    "logprobs": null,
    "finish_reason": "stop"
  }],
  "usage": {
    "prompt_tokens": 9,
    "completion_tokens": 12,
    "total_tokens": 21
  }
}
For a complete reference for the API we will be using, you can check out the OpenAI Chat Completion docs.
For our monetization efforts, our only genuine concern regarding metering is the response fields for prompt_tokens and completion_tokens. These two fields will give us the input and output token counts for the prompt and response, respectively. For the rest of the tutorial, you can either follow along using your own AI API or use the OpenAI Chat Completion one that we will be using throughout; either will work as long as you have a field in the response that outlines how many input and output tokens have been consumed in the query.
Protecting the API with Kong Konnect
With an API ready to go, it’s time to integrate it with Kong Konnect. Alternatively, you can follow similar steps using Kong Enterprise, the on-premise offering. We will use Konnect in this demonstration to ensure ease of deployment. For this next part, we will assume that you have the following prerequisites:
- An active Kong Konnect account
- An active Control Plane
- An active Data Plane (in this tutorial, we are running the data plane in Docker on Mac)
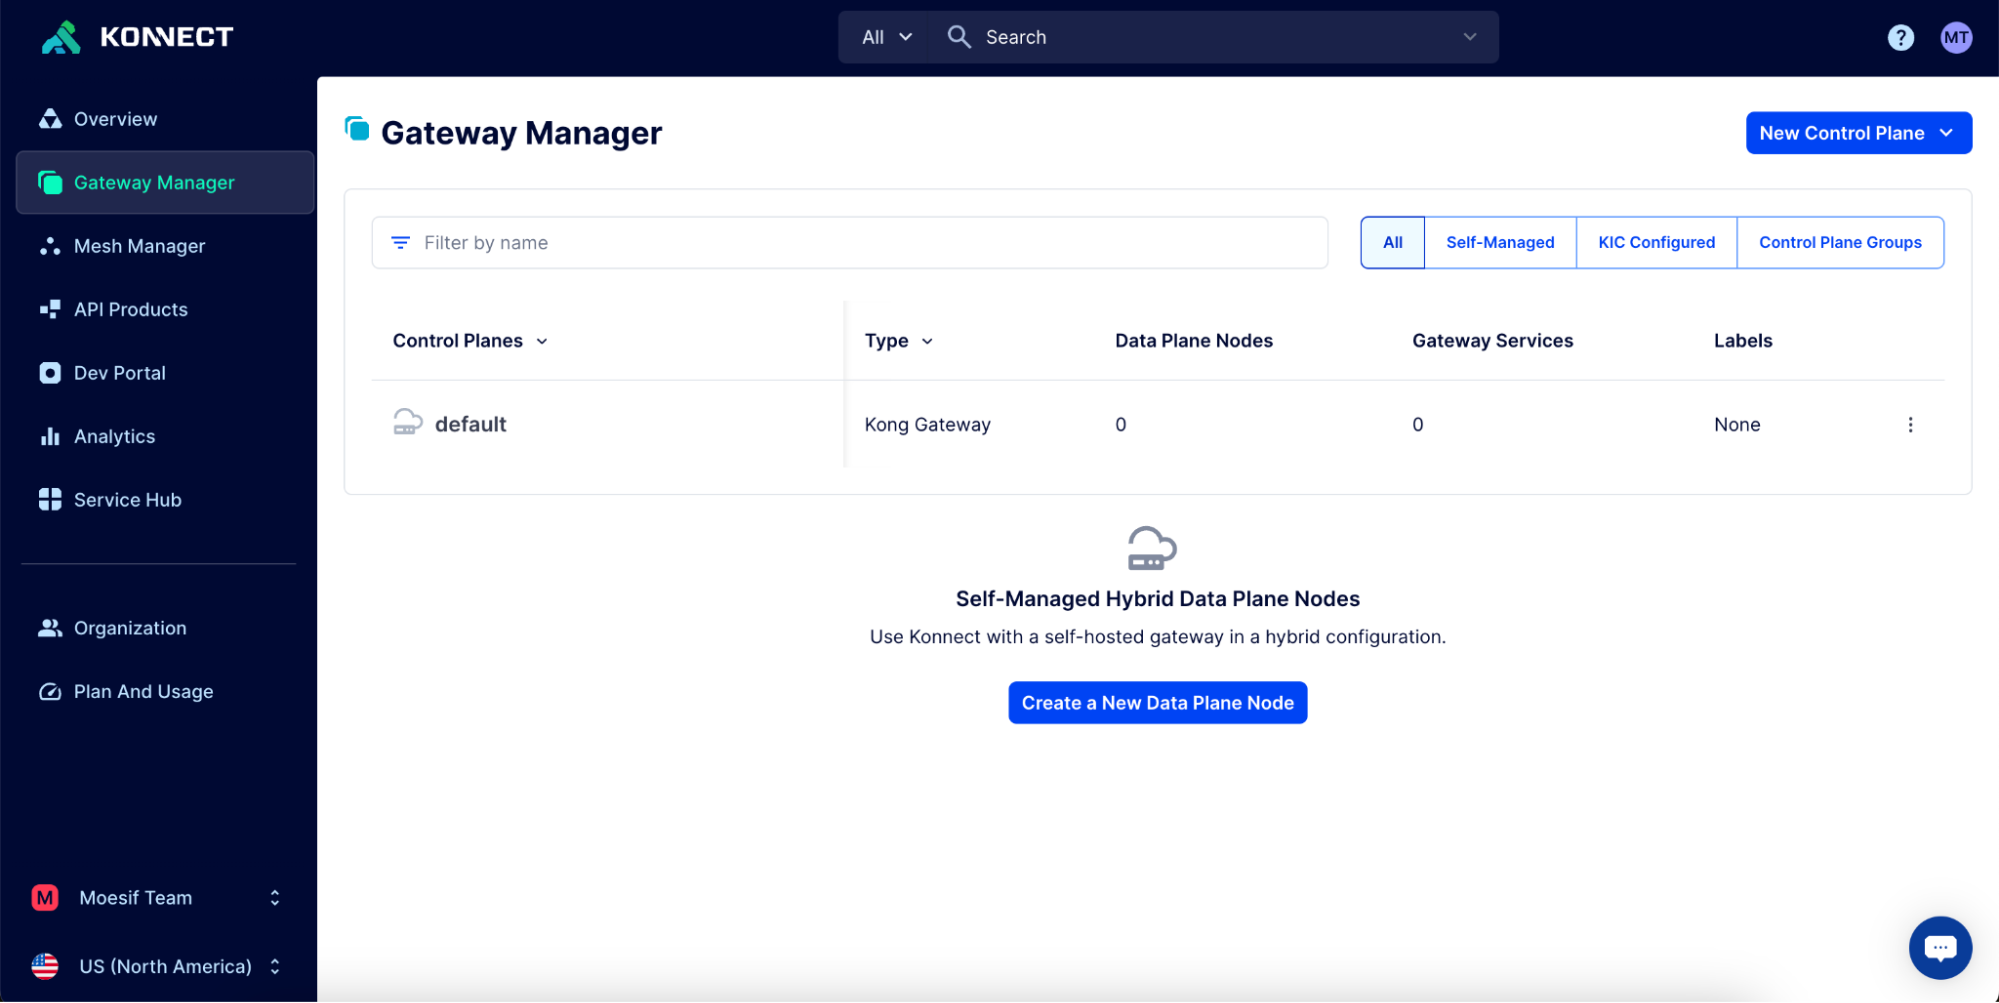
With these prerequisites in place, we can move on to the first step: creating the API service in Konnect. To do this, select the Control Plane on the Gateway Manager screen to which you want to add the service. For example, I will choose the Default control plane I created in this demo.
Create a Service in Kong Konnect
Once you’ve clicked the desired Control Plane, the next thing to do is to select Gateway Services from the left side menu. On the Gateway Services screen we will:
- Click on the New Gateway Service button
- On the New Gateway Service screen, we will add:
- “AIService” as the value in the Name field
- Choose Full URL and add “https://api.openai.com/v1/chat/completions” as the value in the Upstream URL field
- Click the Save button to save the new service.
Create a Route in Kong Konnect
Next, we will add a route for the service to be used. To do this, click on the Routes menu item on the left side of the screen and do the following:
- Click on the New Route button
- Add “AIRoute” into the Name field
- Select the “AIService” from the Service dropdown
- Under Protocols, select the “HTTP, HTTPS” option
- Under HTTP / HTTPS Routing Rules, add the following:
- In the Paths input, add “ai/chat”
- Under Methods, select “POST”
- Click Save at the bottom of the screen
Test the Route/Service For Connectivity
At this point, we’ve now set up a service and a route. Let’s try testing it to see if we get a response. Since I am running the Konnect Data Plane locally using Docker, I will send a simple cURL command to my terminal.
curl --location --request POST 'localhost:8000/ai/chat'
The response I received is from the upstream OpenAI Chat Completions API:
{
  "error": {
    "message": "You didn't provide an API key. You need to provide your API key in an Authorization header using Bearer auth (i.e. Authorization: Bearer YOUR_KEY), or as the password field (with blank username) if you're accessing the API from your browser and are prompted for a username and password. You can obtain an API key from https://platform.openai.com/account/api-keys.",
    "type": "invalid_request_error",
    "param": null,
    "code": null
  }
}
Automatically Adding The Header To The Upstream Request
Now, I would like to make it so that the OpenAI API can be used without the user needing to pass the required bearer token manually. I will use Kong’s Request Transformer plugin to automatically attach my OpenAI bearer token to the server for each upstream request.
To enable the Request Transformer plugin, we will select Plugins in the Gateway Manager menu on the left. From here, we will:
- Click the New Plugin button
- On the Select a Plugin screen, scroll or search for “Request Transformer” in the list. Once you’ve located the Request Transformer plugin, click Enable
- On the Configure plugin: request transformer screen:
- Select the Scoped radio button
- Under Gateway Service and Route inputs, add our AI service and route we created, respectively.
- Under Plugin Configuration, ensure that “http” and “https” are added in the Protocols
- Under Add.Headers, add in your Authorization key in this format:
Authorization: Bearer sk_my_api_key. Replacing the value with your actual key
- Click Save to save the configuration
Now, when you send out a request to the API you should no longer receive the API key error that was experienced earlier.
With this response, we can verify that our service is successfully being routed through Kong Konnect and to the upstream API, the OpenAI endpoint, or your own if you’ve added your own AI service/API into the Gateway Service that we created earlier.
Add Key-Auth to The Endpoint
Next, we will add an API key requirement to our request process. To do this, we will leverage Kong’s built-in Key-Auth plugin.
In this demo, we will enable the plugin globally, but if you have routes that you want to exclude from requiring an API key, you could add the plugin on a route-by-route basis.
To enable the Key-Auth plugin, in the Gateway Manager menu on the left, we will select Plugins. From here we will:
- Click the New Plugin button
- On the Select a Plugin screen, scroll or search for “Key Authentication” in the list. Once you’ve located the Key Authentication plugin, click Enable
- On the Configure plugin: key authentication screen:
- Select the Global radio button, if not already selected by default
- Ensure that “http” and “https” are added to the Protocols
- Check off the Key in Header option (leaving others elected if there is a preference)
- Under Key Names, ensure there is an entry for “apikey”
- Click Save to save the configuration
We will run the previous cURL command and should receive an error message showing that an API key is needed to process the request.
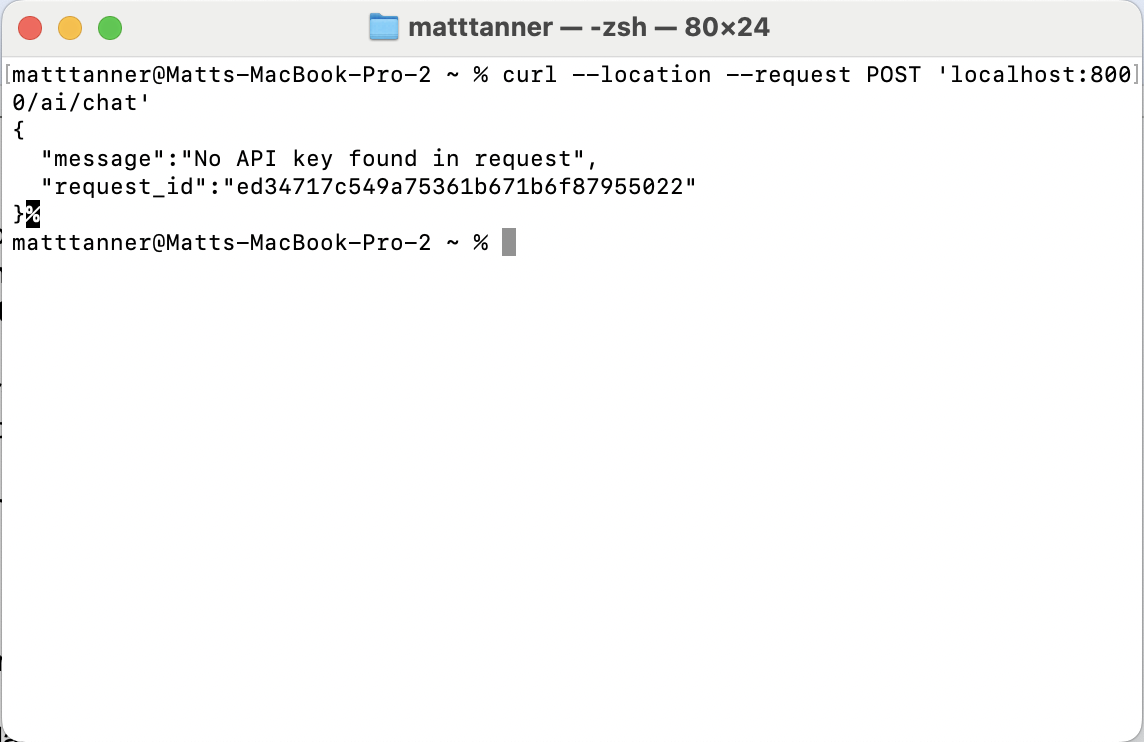
We will leave this as is for now since we will later create a consumer in Kong so API keys can be generated and used to access the API. At this point, we can be happy with knowing that our API endpoint is protected via API key, so unauthorized access is not possible.
Add Rate Limiting and Quotas For Security
Although optional, it’s always a good idea to include rate limiting and quotas to ensure that services can’t be inadvertently or maliciously inundated with traffic.
Later, we will add quotas for pre-paid API users, which will be done through Moesif, not Kong’s quota and rate-limiting functionalities.
Like the other plugins we have enabled, we will select Plugins to enable the Rate Limiting plugin in the Gateway Manager menu on the left. From here, we will:
- Click the New Plugin button
- On the Select a Plugin screen, scroll or search for “Rate Limiting” in the list. Once you’ve located the Rate Limiting plugin, click Enable
- On the Configure plugin: rate limiting screen:
- Select the Global radio button if not already selected by default
- Ensure that “http” and “https” are added to the Protocols
- In the Limit By field, set the value to “consumer”
- In the Seconds field, add “10” as the value
- Optionally, add values to Day, Hour, Minute, and Month based on your specific rate-limiting needs
- Click Save to save the configuration
With the basic configuration we implemented above, each consumer we create in Kong will be limited to 10 requests per second. In this example, this is an arbitrary number, but you should adjust this plugin to match your expected volume of requests, balancing a wide enough rate limit while still preventing denial-of-service attacks.
Integrate Moesif and Kong
Now that Kong is configured, we can integrate it with Moesif to extend our API monetization functionality. For this, we will use the Kong-Moesif plugin
Add the Kong-Moesif Plugin to Your Konnect Data Plane(s)
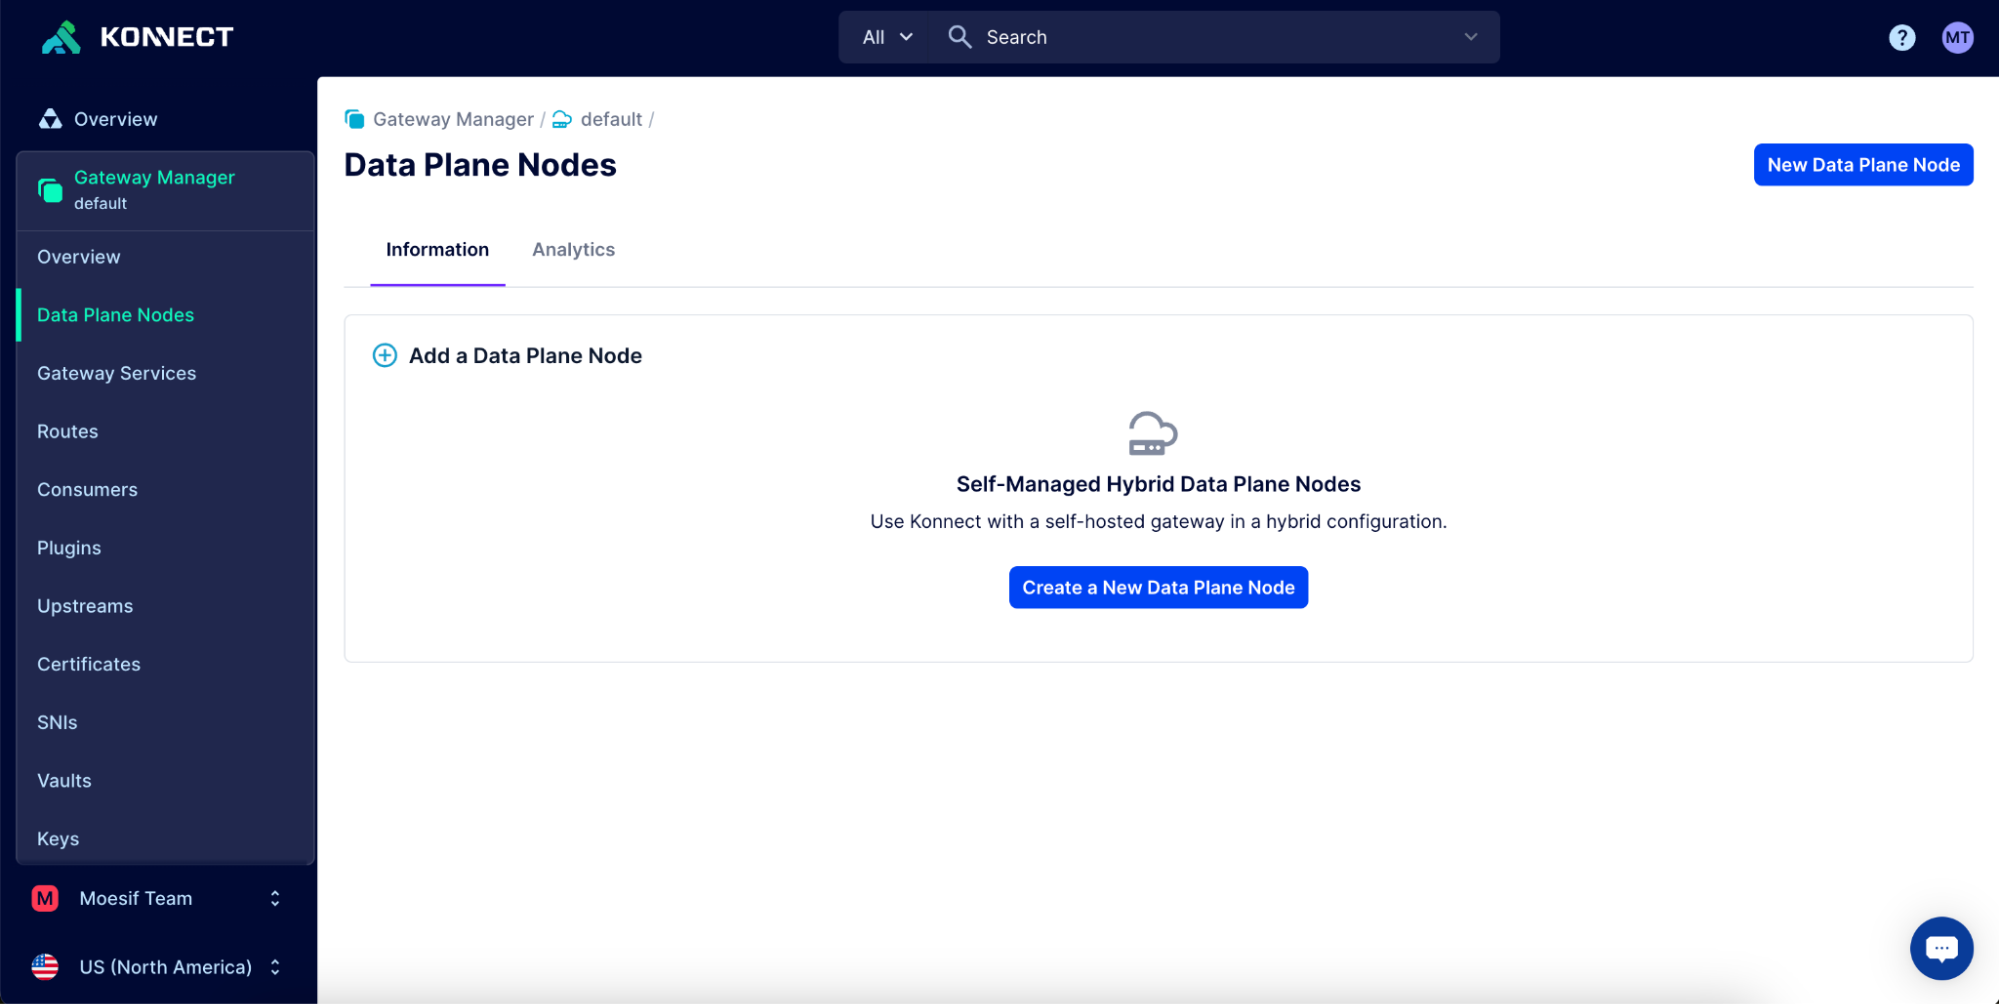
First, we must bring up a new Konnect Data Plane with Moesif installed and enabled. For this, in the Konnect UI, click on Data Plane Nodes in the left-side menu, and on the screen that appears, click Create a New Data Plane Node.
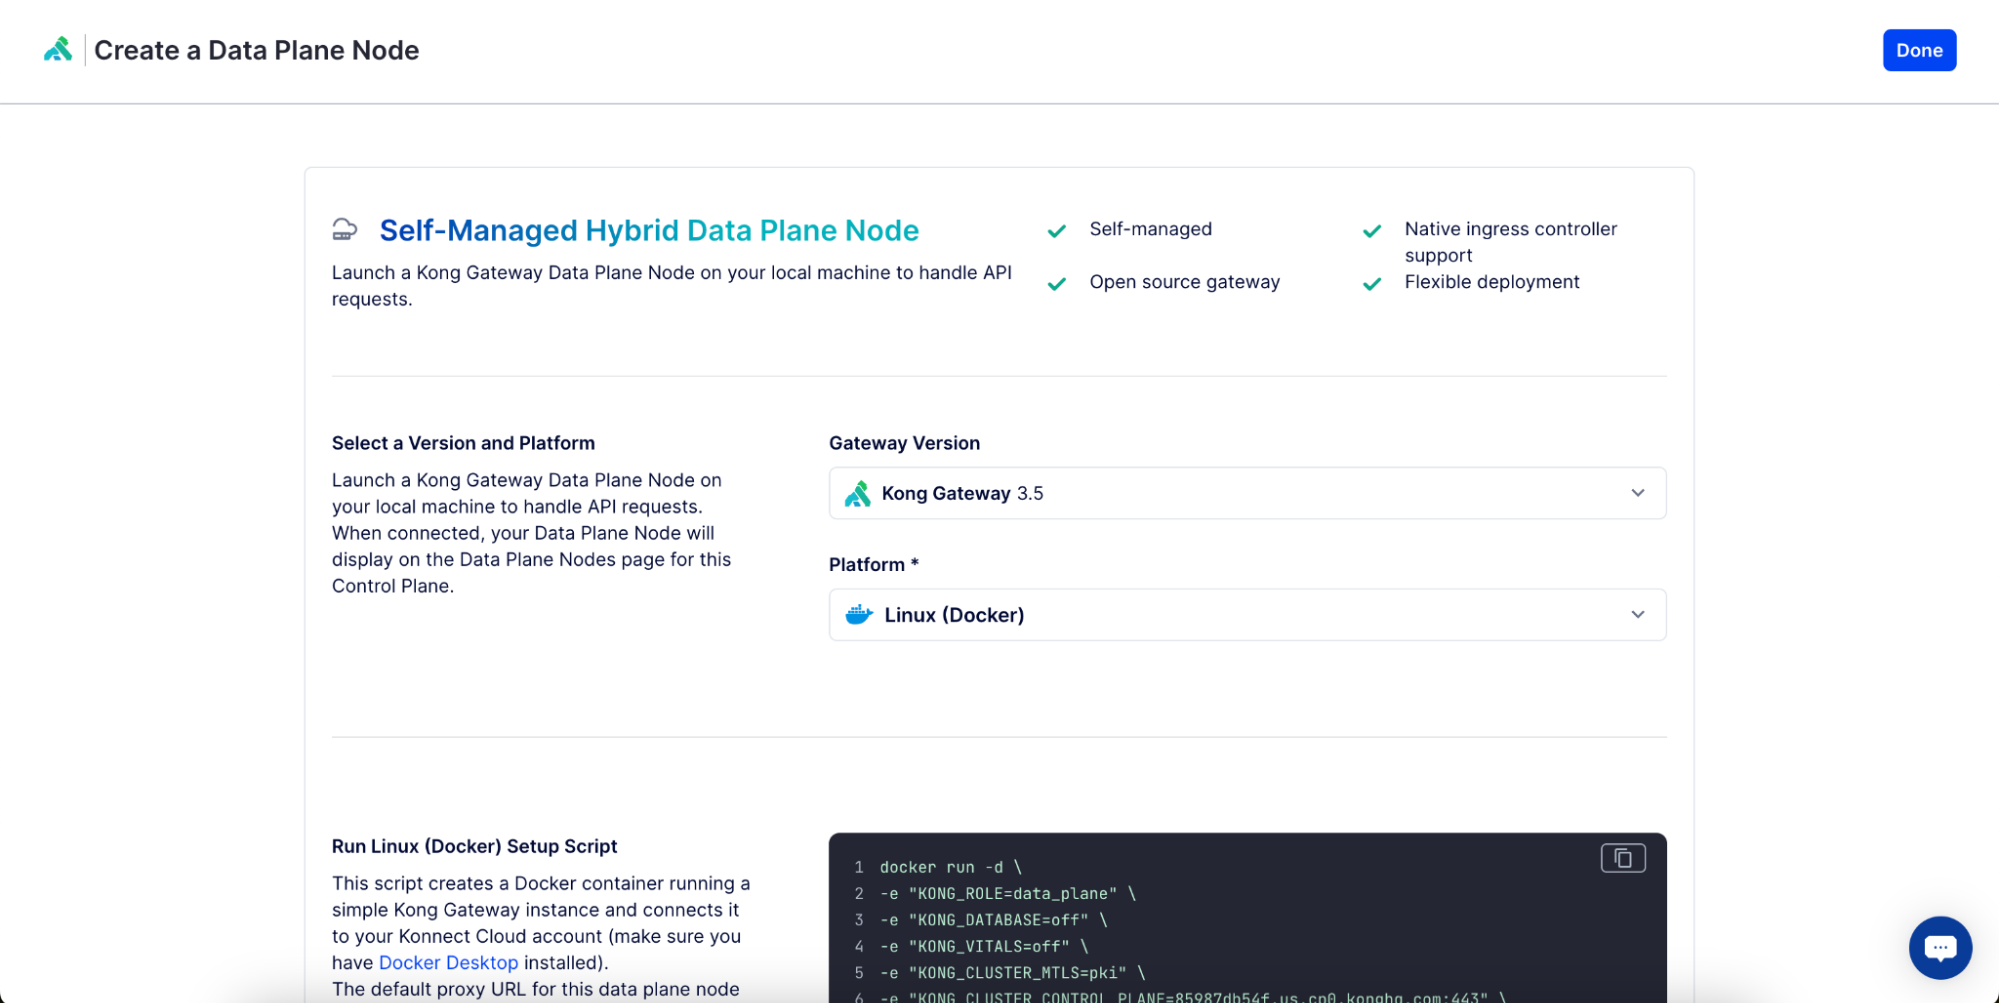
On the next screen, we will select the applicable Gateway Version (the default is fine if you have no particular version you want to run) and choose our platform as Linux (Docker). This will allow us to run the gateway on our local machine or another server using docker.
With these options selected, scroll down to the setup script pane and click Generate certificate. This will create a docker command we can run in our terminal. Let’s copy the docker command.
Next, we will add a few lines to the command to install and enable the Moesif plugin. Bring up a text editor (or you can do this directly in the terminal) so that we can edit the initial command output in the Konnect UI.
In a text editor, paste the Konnect docker command and add the following:
-v "/{PATH_TO_DIR}/kong:/tmp/custom_plugins/kong" \
-e "KONG_PLUGINS=bundled,moesif" \
-e "KONG_LUA_PACKAGE_PATH=/tmp/custom_plugins/?.lua;;" \
The {PATH_TO_DIR} is the path to the Kong-Moesif plugin repository on your local machine (or server). You’ll need to ensure you’ve downloaded the repository and fill in this argument in the command.
The amended command will look like this:
docker run -d \
-e "KONG_ROLE=data_plane" \
-e "KONG_DATABASE=off" \
-e "KONG_VITALS=off" \
-e "KONG_CLUSTER_MTLS=pki" \
-e "KONG_CLUSTER_CONTROL_PLANE=85987db54f.us.cp0.konghq.com:443" \
-e "KONG_CLUSTER_SERVER_NAME=85987db54f.us.cp0.konghq.com" \
-e "KONG_CLUSTER_TELEMETRY_ENDPOINT=85987db54f.us.tp0.konghq.com:443" \
-e "KONG_CLUSTER_TELEMETRY_SERVER_NAME=85987db54f.us.tp0.konghq.com" \
-e "KONG_CLUSTER_CERT=-----BEGIN CERTIFICATE-----
123certhere-123
-----END CERTIFICATE-----" \
-e "KONG_CLUSTER_CERT_KEY=-----BEGIN PRIVATE KEY-----
123privatekey-123
-----END PRIVATE KEY-----" \
-e "KONG_LUA_SSL_TRUSTED_CERTIFICATE=system" \
-e "KONG_KONNECT_MODE=on" \
-v "/Users/user/Documents/GitHub/kong-plugin-moesif/kong:/tmp/custom_plugins/kong" \
 -e "KONG_PLUGINS=bundled,moesif" \
-e "KONG_LUA_PACKAGE_PATH=/tmp/custom_plugins/?.lua;;" \
-p 8000:8000 \
-p 8443:8443 \
kong/kong-gateway:3.5.0.1
As you can see, we’ve added additional commands to the initial docker script to install and enable the Moesif plugin on the Konnect data plane instance.
If you’re running multiple data planes, you must run this command on each.
Then, run the amended docker command in a terminal to bring up the data plane instance and enable Moesif. Once the command has executed successfully, you should see a response in the UI showing “Data Plane Node has been found.”.
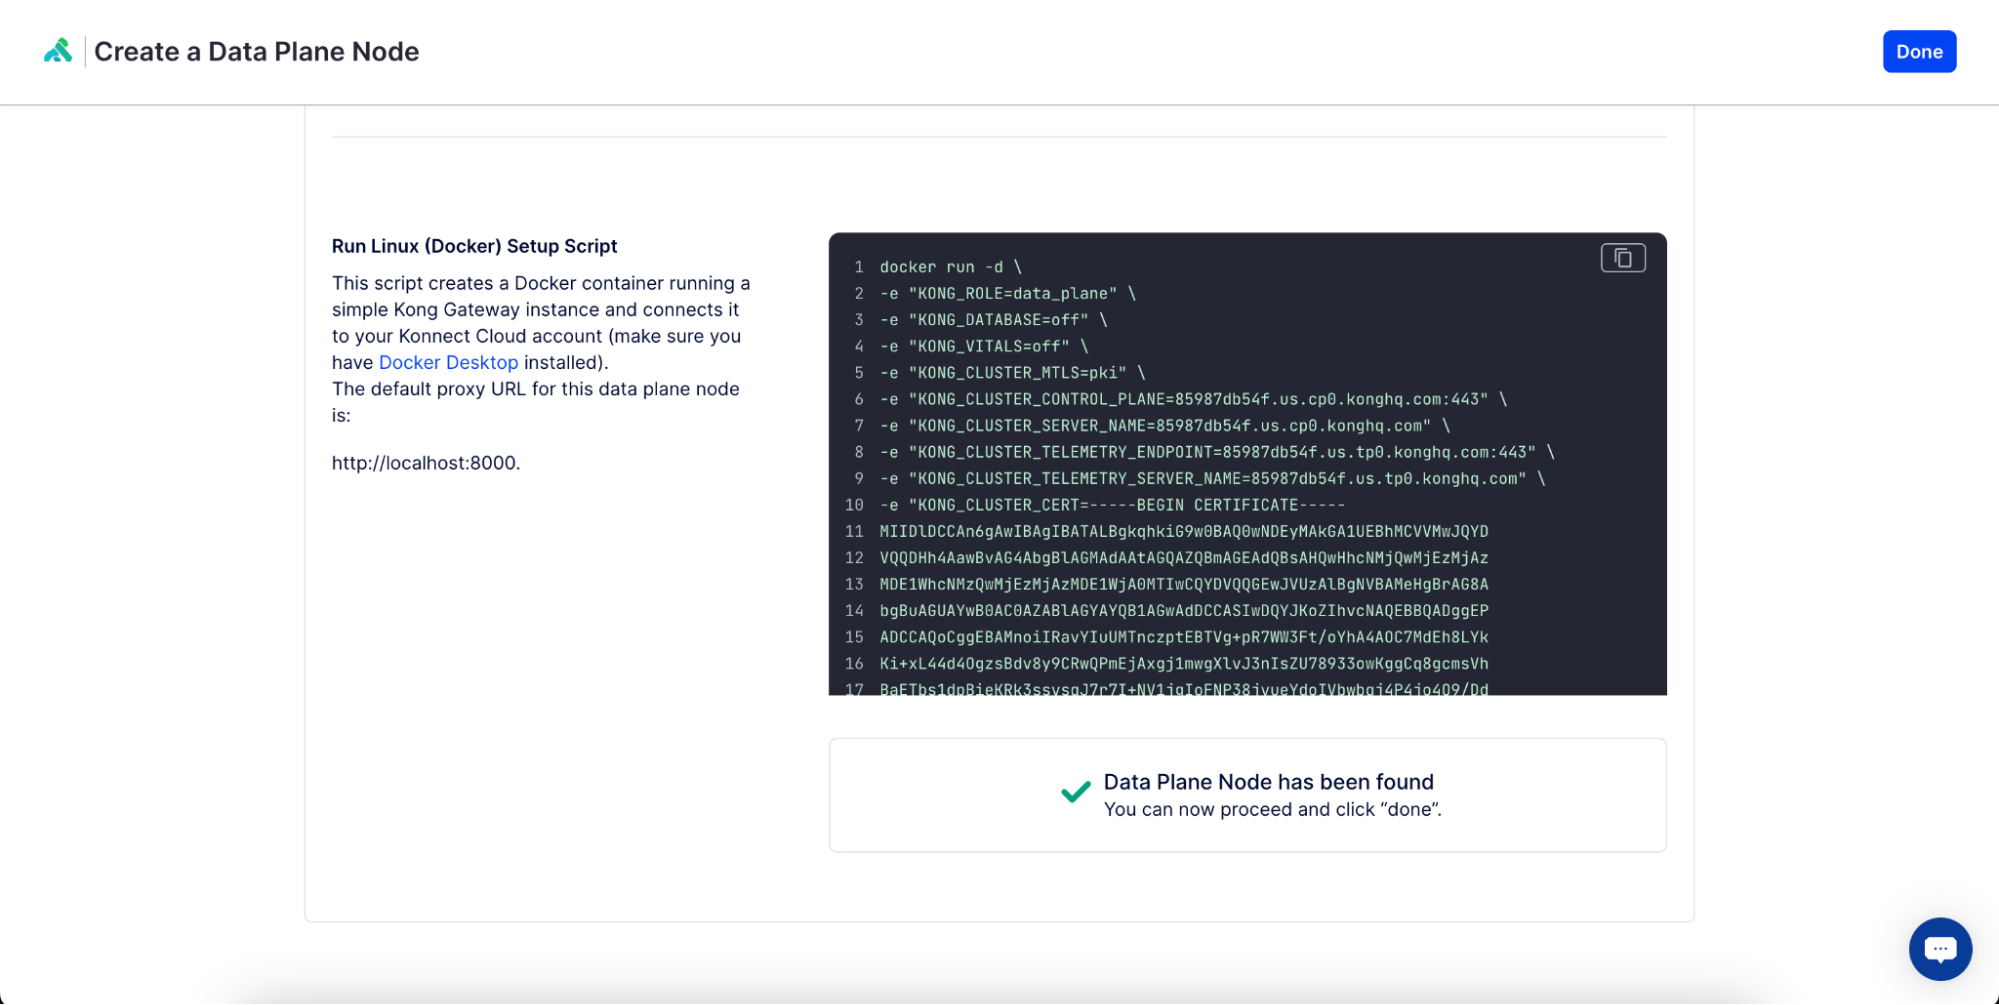
Then, click Done in the top right corner of the screen. We now have our data planes up and running with Moesif enabled.
Add the Kong-Moesif Plugin to the Konnect Control Plane
Next, we will add our Moesif plugin to the control plane. This will allow us to configure the plugin in the Konnect UI and have that config cascaded out to each data plane running the Moesif plugin. To do this, go to the Gateway Manager menu option in Konnect and click on default (or another control plane if you’ve already created one).
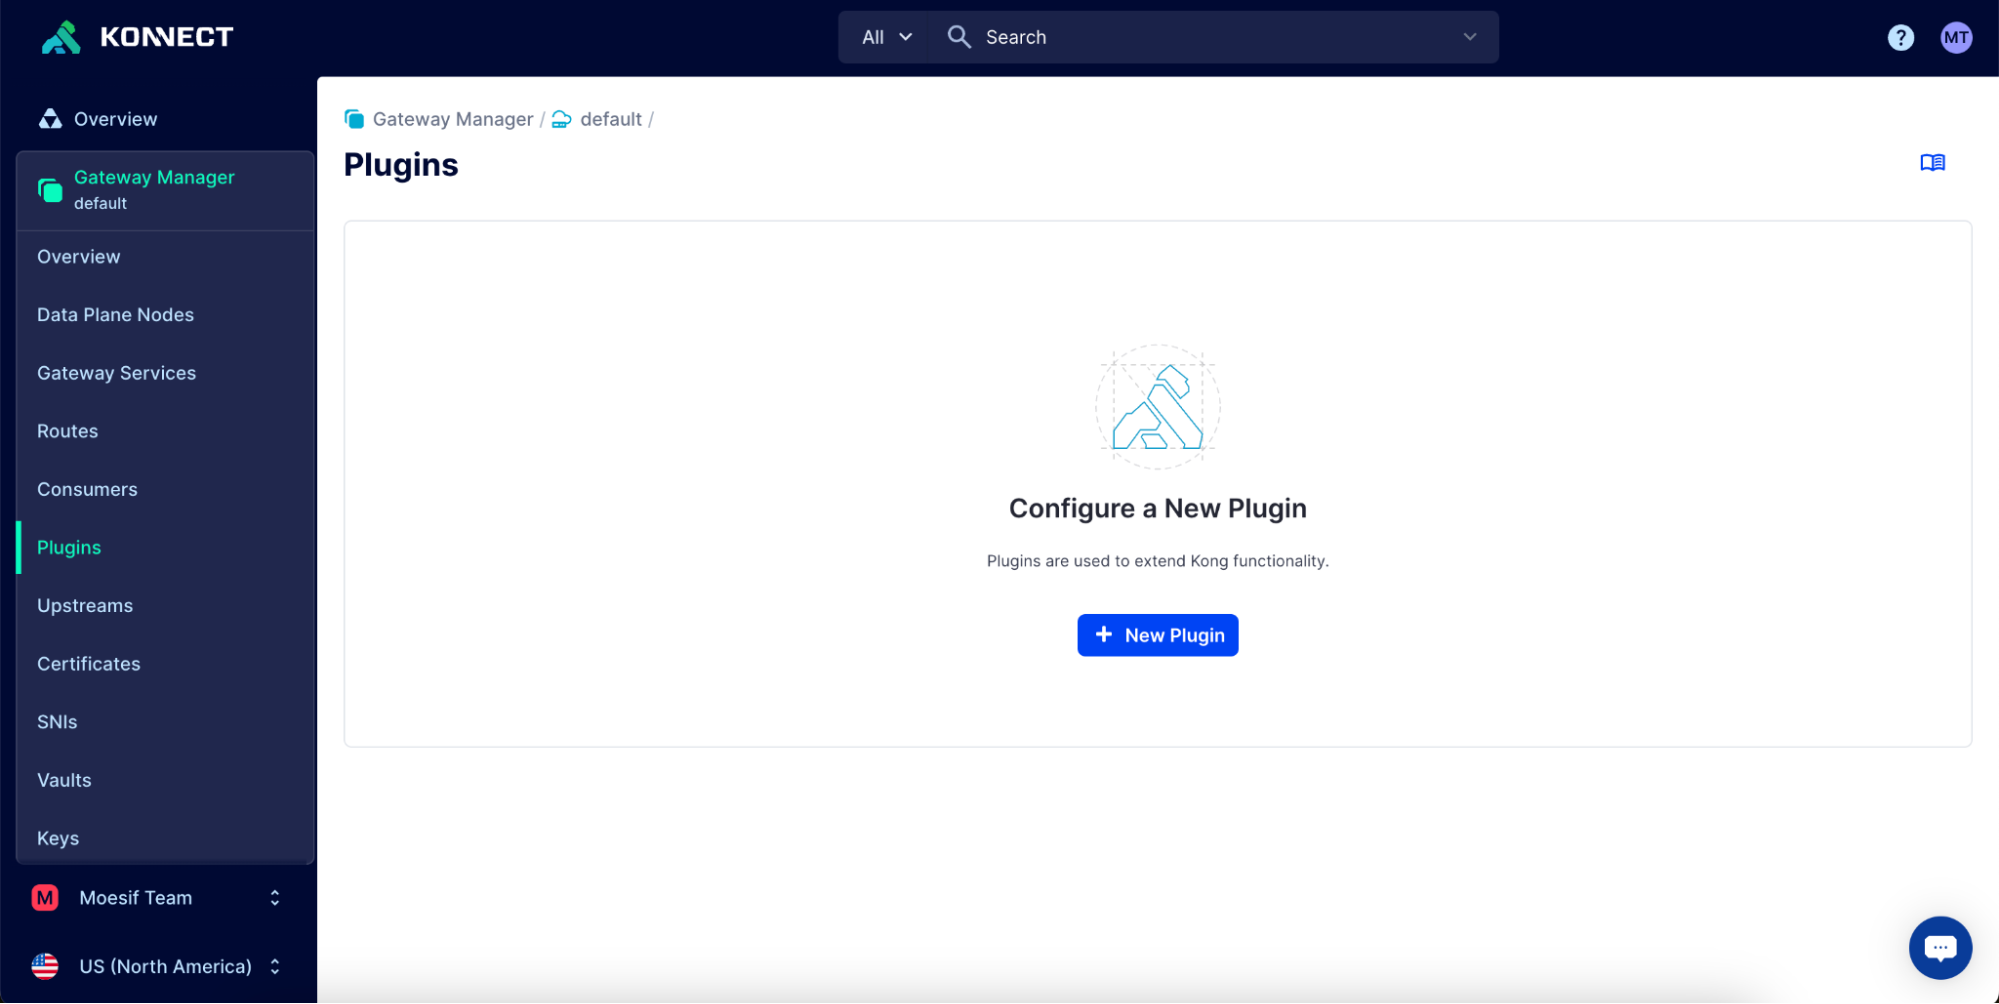
Then, navigate to the Plugins page from the side menu and click New Plugin.
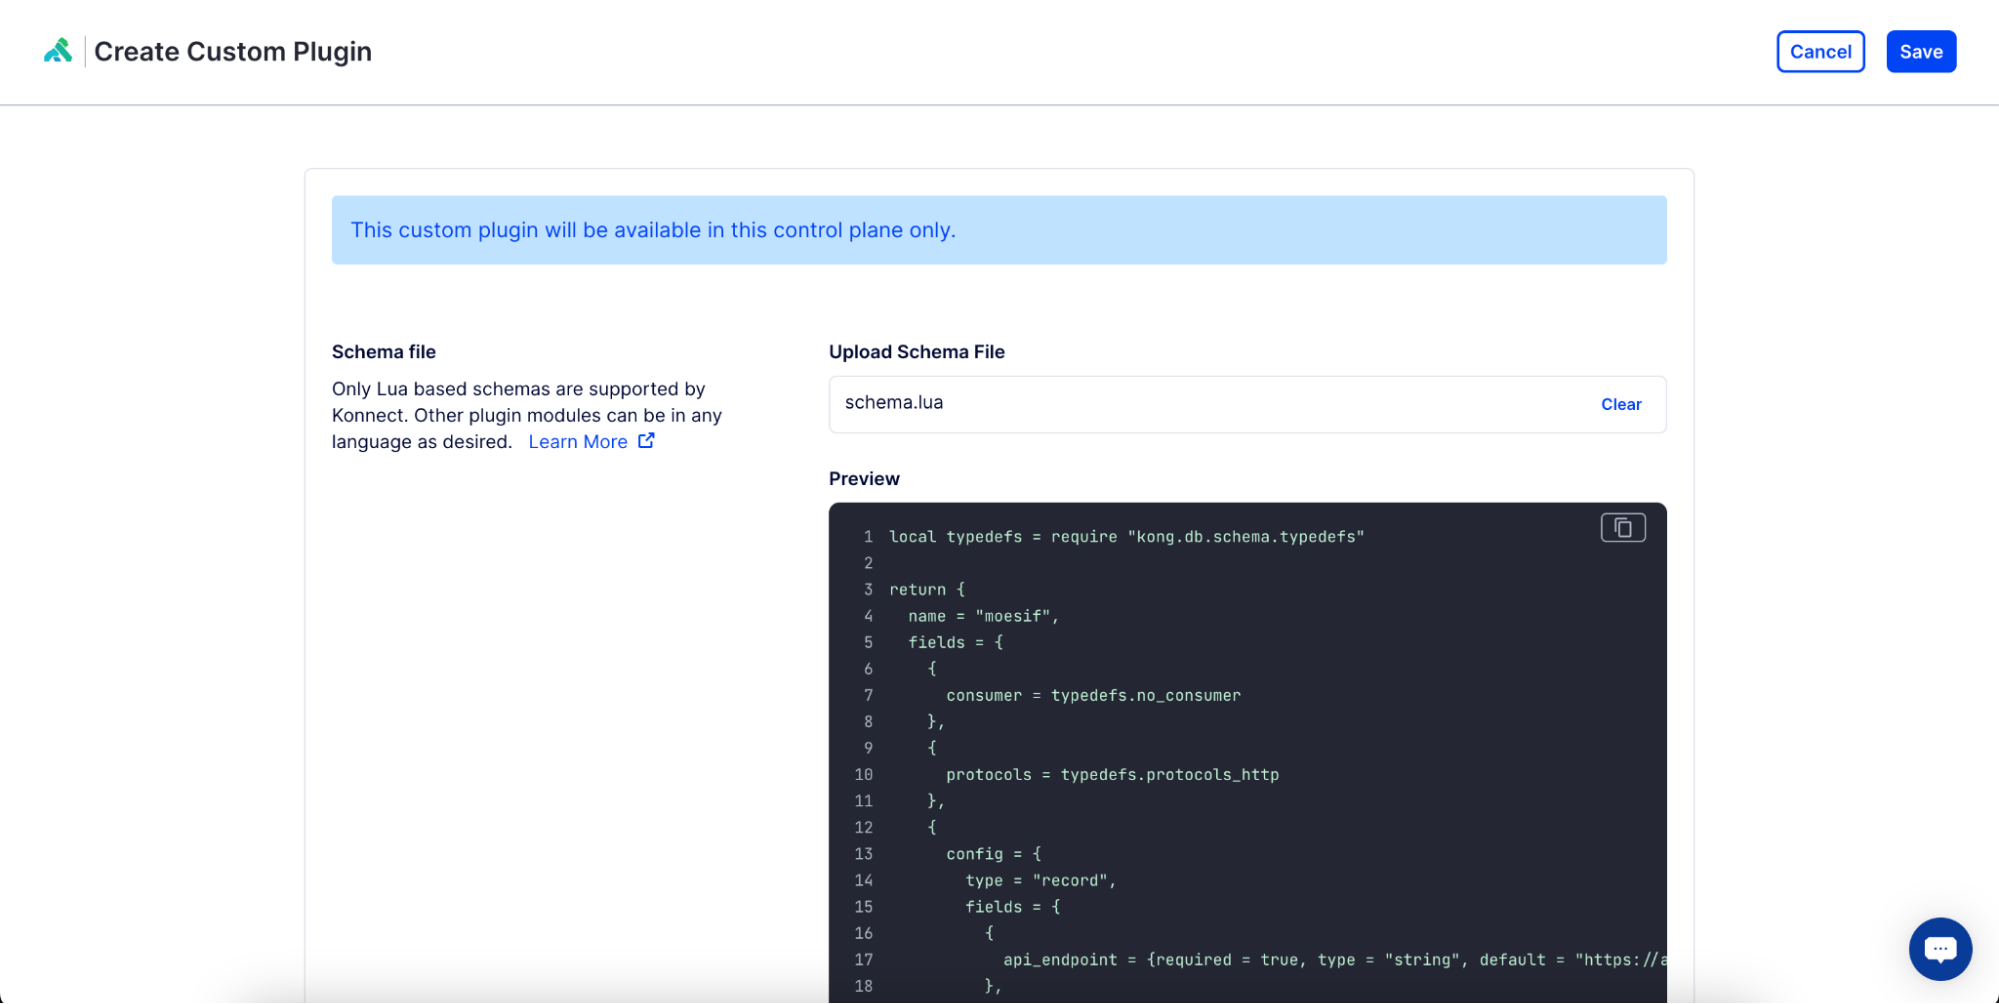
Then, select Custom Plugins.
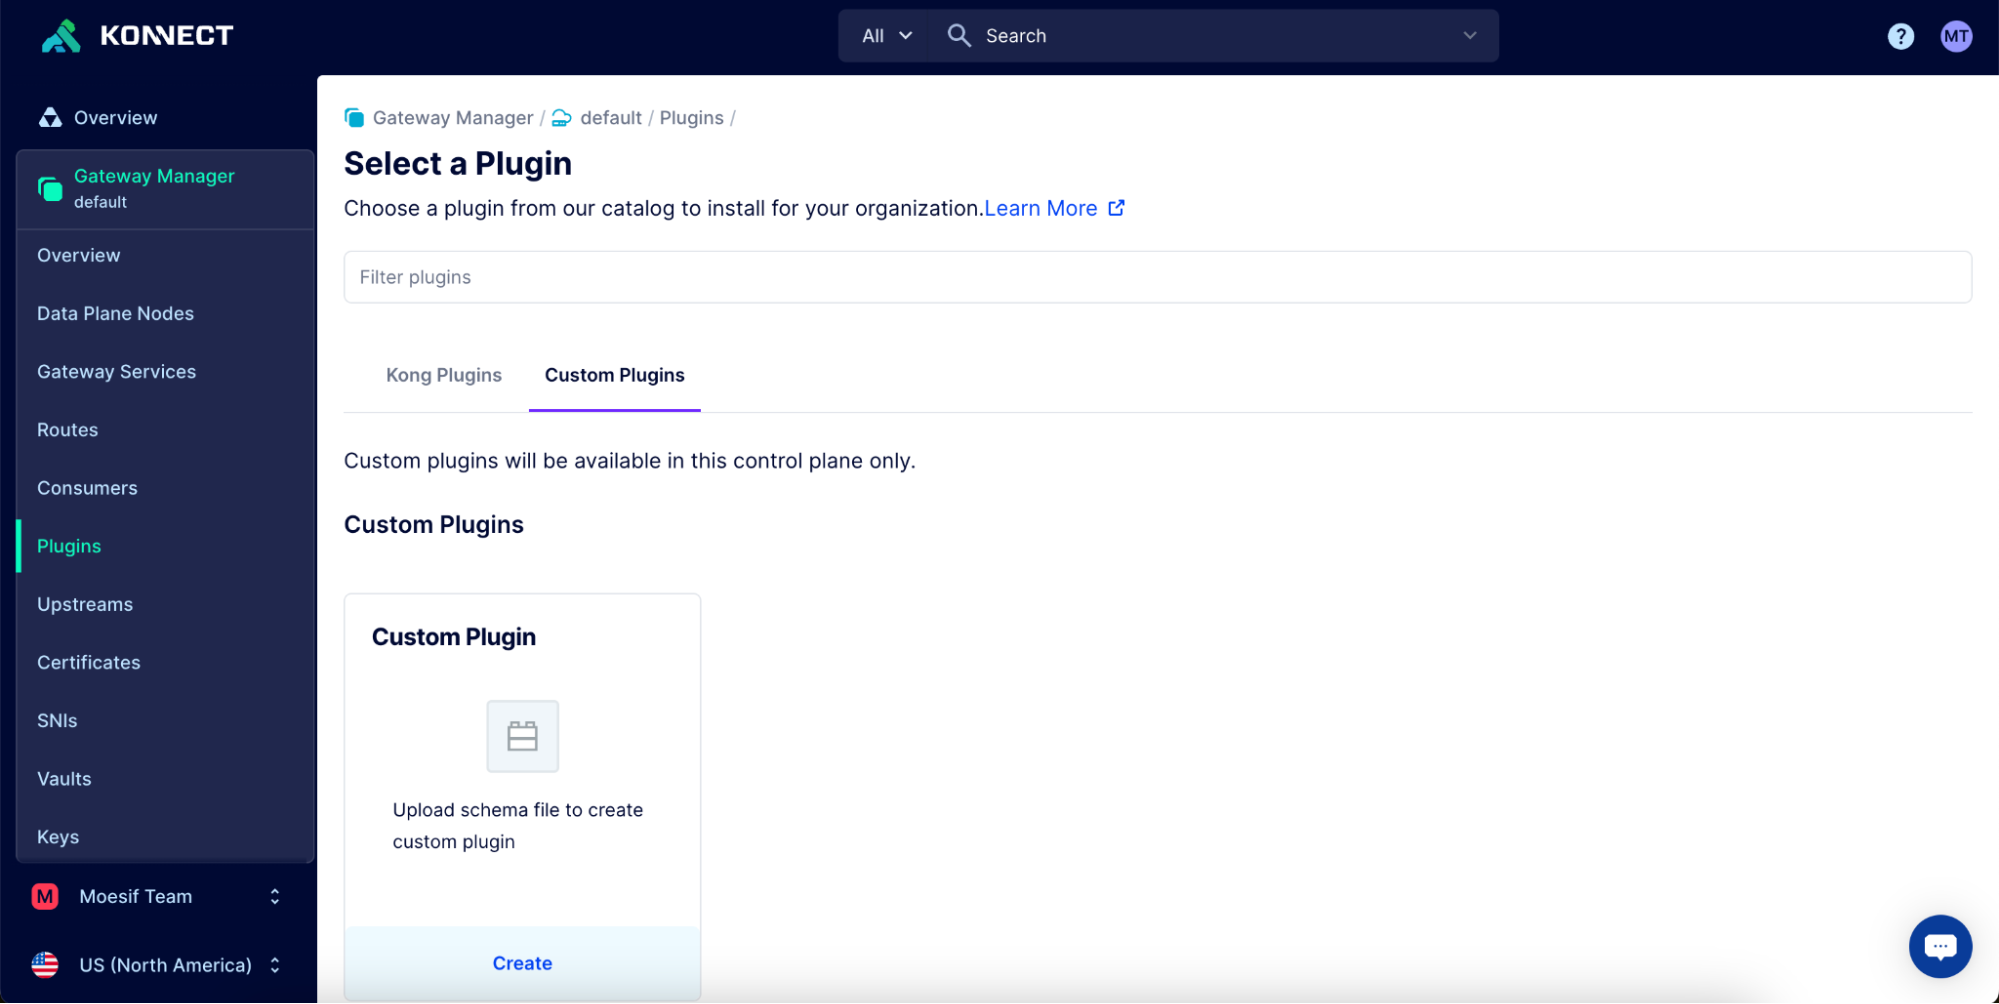
Next, we will upload the schema.lua file to define the custom plugin. This can be found in the Kong-Moesif plugin repo under kong/plugins/moesif/schema.lua. Alternatively, you can download the schema.lua file for the Moesif Plugin directly. Add the file to the Upload Schema File input and click Save in the top right corner.
On the Custom Plugins page, locate the Moesif plugin and click enable to enable the plugin on the control plane.
On the Moesif config page that appears, let’s add our application ID into the application ID field.
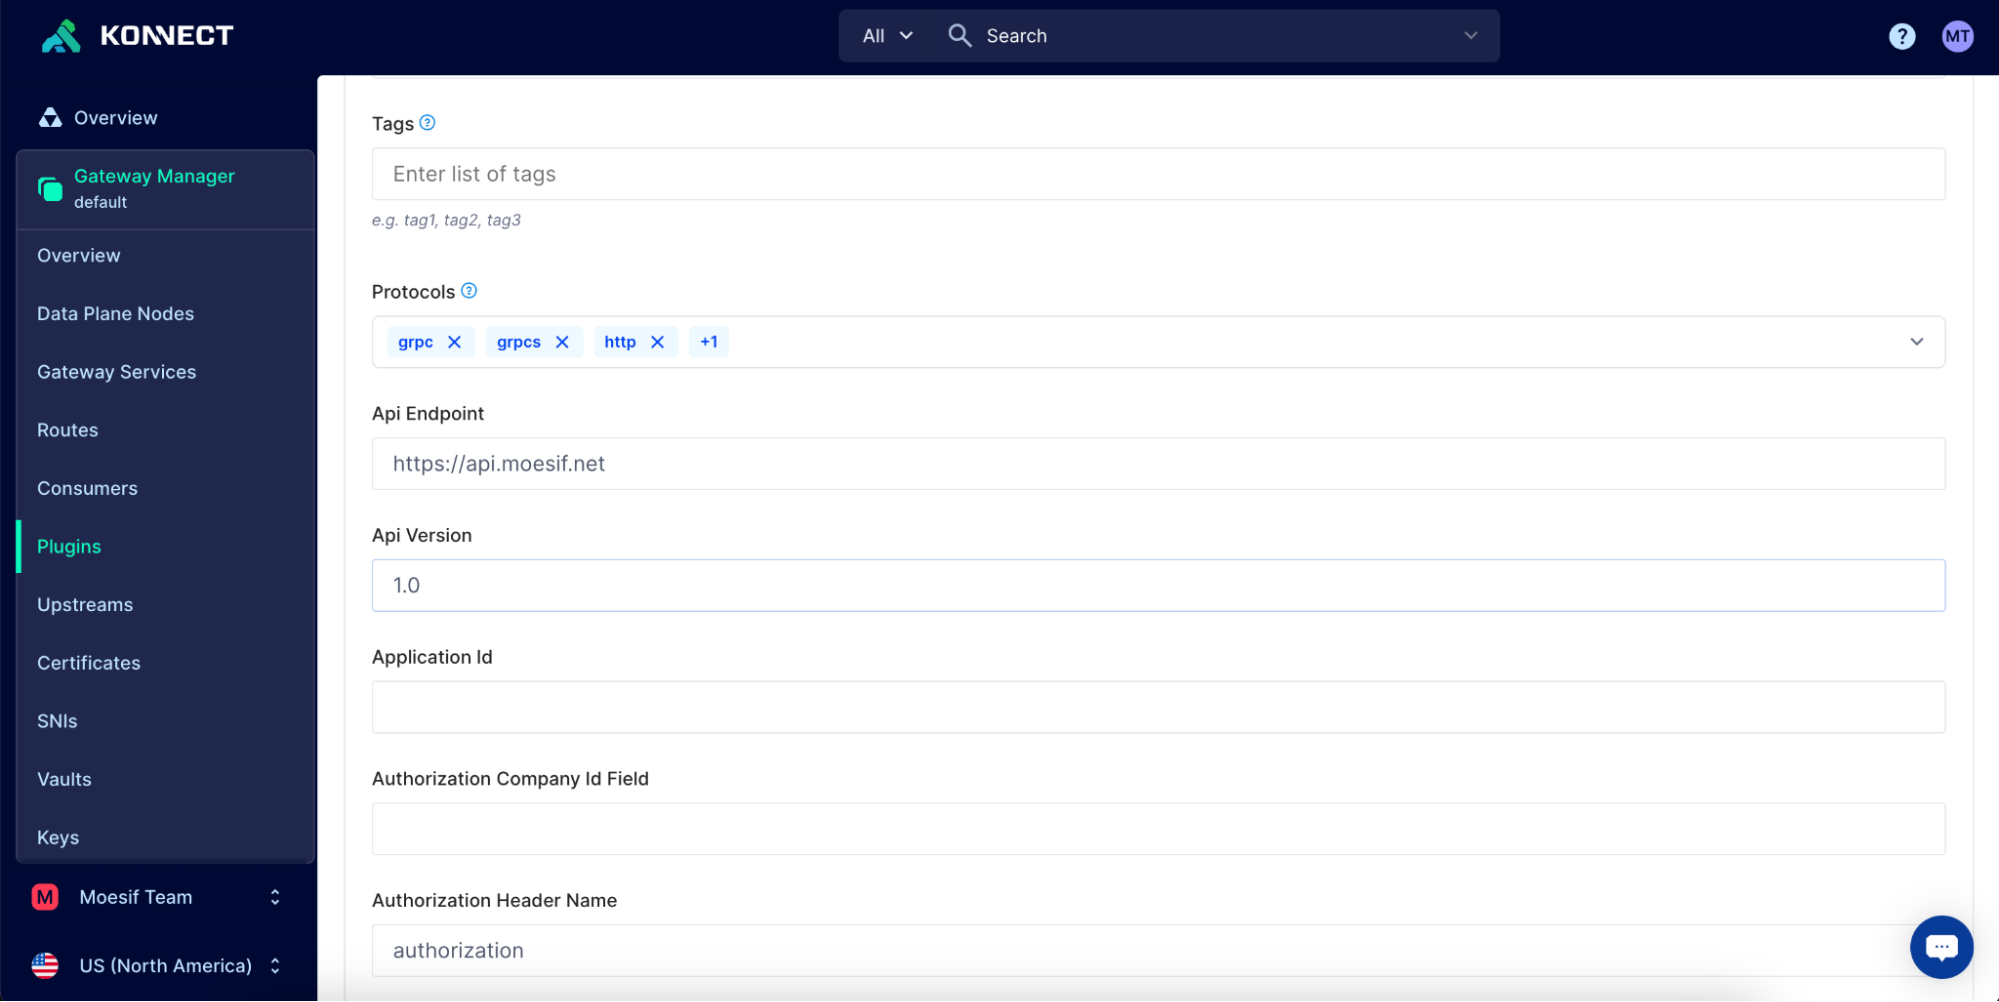
To get the required value, you can retrieve your Moesif Application ID from Moesif by going to Settings > API Keys.

Copy the value in Your Collector Application Id for {App Name} and back in the Konnect UI, add the value to the configuration in the Application Id input. Once complete, scroll to the bottom of the screen and click Save.
At this point, Moesif and any configuration set in the control plane will be propagated to the plugin installed on each data plane.
Integrate Moesif and Stripe
Once we integrate Kong with Moesif, we will receive API traffic analytics in Moesif from our Konnect instances. Each API call will be tracked in the system, which is how we will calculate usage. Once usage is calculated, we will need a way to report it to Stripe. Luckily, Moesif integrates directly with Stripe very quickly, and once this is done, API usage is reported to Stripe.
To configure Stripe in Moesif, click on the Settings menu at the bottom left of the screen (this will be shown as your username), and then click Extensions in the menu. On the Extensions screen, do the following:
- Find the Stripe Integration in the Extensions Gallery and click Configure.
- In the modal that appears, follow the instructions for adding the Moesif Stripe webhook into Stripe.
- On the Developers screen in Stripe, select Webhooks and then Add Endpoint in the top right corner of the screen.
- Add in the Webhook URL and click Select Events. You’ll want to select all customer., customer.subscription., and invoice.events. Then, click Add Events.
- Lastly, once returned to the original Add Endpoints screen, click the Add Endpoints button at the bottom of the screen.
- Once the webhook is added, we will add our Stripe API key to Moesif following the next set of instructions in the modal back in Moesif.
- In Stripe, go to the Developers screen and click API Keys.
- Copy a private key for your API in either the Secret key or a generated Restricted keys field on the screen. Either key can be used.
- In Moesif, paste the API key into the Stripe API Key field
- Scroll to the bottom of the screen in Moesif and click Save.
You can optionally customize the ID mapping in Moesif. The default should work fine for most purposes and is what we will use in this example. However, if you need to customize it, you can specify how to map the Stripe customer objects to company entities in Moesif. For more info on this, check out our docs on Setting the Id Mapping for Stripe.
Conclusion
At this point, we have all of the wiring in place to begin monetizing our APIs. Our Kong Konnect instance can now proxy traffic to our upstream AI API. That traffic can then be reported and tracked in Moesif, and once it is metered in Moesif, we can report it to Stripe.
In the next part of this tutorial, we will cover how to set up a Billing Meter in Moesif that will actually meter the usage based on the configuration we specify and then report that usage to Stripe. After this, we will also use Moesif’s Governance Rule feature to block users from accessing the API if they have run out of pre-paid credits.
Next Steps
Review setting up PAYG billing in Part 2 of this three part series on monetizing AI APIs with Kong, Moesif, and Stripe.


Related Articles

API Strategy
Leveraging AI For a Better API Strategy
Learn how to leverage AI to build and fortify your API strategy. Improve design, governance, documentation, and align APIs with business outcomes.
API Strategy
The 5 Best Mixpanel Alternatives of 2025
Learn about the best Mixpanel alternatives to determine the right analytics solution for your use case.

API Development
How to Leverage Moesif Effectively for API Observability
Effectively leverage Moesif for API observability through best practices for integration, event enrichment, custom actions, and engineering workflow integrat...
API Strategy
How to Build an Internal Chargeback Model for Your API and AI Usage Using Moesif
Use Moesif to implement internal chargebacks and enable precise API and AI cost attribution for better transparency and resource optimization.