How to Set Up Monitoring and Analytics for Strapi the Headless CMS, with Moesif

Strapi is a headless CMS based on Node.js. Headless means that it makes all of its content available via an HTTP API, so you can easily build your user-facing frontend around it. Since it’s a fully-fledged CMS, it brings an administration frontend out-of-the-box, making publishing and maintaining content straightforward - even for those without a technical background. Since everything in Strapi works via an API, it’s perfect for Moesif API monitoring.
In this how-to guide, we’ll look into integrating a Strapi CMS with Moesif API monitoring and analytics.
Prerequisites
To follow this how-to, you need a Strapi installation and a Moesif account.
Installing and Wrapping the Moesif SDK
The Moesif SDK for Node.js comes as middleware for frameworks like Express and Koa. Since Strapi is built on top of the Koa framework, this makes integration very easy. You need to write a small wrapper around the Moesif middleware to make it behave like a custom middleware for Strapi and configures it according to your requirements.
The first step is to install the NPM package moesif-nodejs as a new dependency.
$ npm i moesif-nodejs
Next, you need to create a new JavaScript file inside your Strapi project at ./middlewares/moesif/index.js.
It should have the following content:
const moesif = require("moesif-nodejs");

const middleware = moesif({
  applicationId: "<MOESIF_APP_ID>",
  // Optional hook to link API calls to users
  identifyUser: (request, response) => {
    if (request.state.user) return request.state.user.id;
    return null;
  },
});

module.exports = (strapi) => ({
  initialize() {
    strapi.app.use(middleware);
  },
});
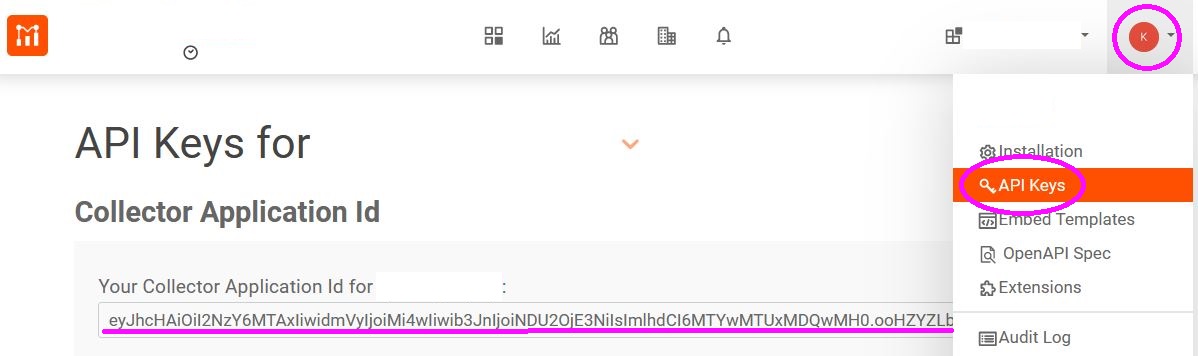
You need to replace <MOESIF_APP_ID> with your key. This key can be found in the Moesif console by clicking on the user menu at the top right corner and choosing “API Keys.”
A custom Strapi middleware needs to expose an object with an initialize method, so you need to wrap the Moesif middleware with a bit of glue code here.
Note: If you are using Strapi’s Users & Permissions plugin, you will find the user object in the state of the request after authentication. If you look at the
identifyUserfunction passed to the Moesif middleware, you get an idea of how to extract user-specific data. The same holds for theidentifyCompanyfunction you can supply to configure the Moesif middleware.

Configuring Strapi to Load the Middleware
Now that we have created the Moesif middleware, we have to tell Strapi that it should load it. To do so we have to create a configuration file at ./config/middleware.js and add the following config code into it:
module.exports = {
  settings: {
    moesif: { enabled: true },
  },
};
The moesif setting in this example corresponds to the directory ./middlewares/moesif here.
Viewing Strapi Events in the Moesif Console
If you set up everything correctly, you can now see the Strapi HTTP events in the Moesif console. Just navigate to “Events” and then “Live Event Log.”
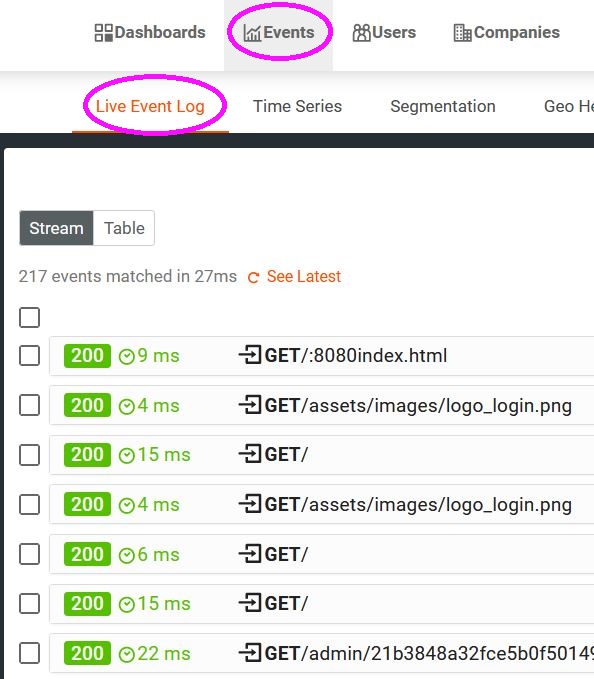
As you can see in the screenshot, even the admin requests are in the event log so that you can keep track of every interaction with your Strapi installation.
Summary
The Strapi CMS is a low-code solution, which means it lets you do many things without coding, but you can still add code when you need more customization. This approach makes Strapi easy to use for your non-technical team members, and allows you to add customized functionality like Moesif API monitoring and analytics when needed.
And since Moesif API monitoring and analytics comes with a wonderful graphical user interface, non-technical team members can work independently right from the start.


Related Articles

API Strategy
Leveraging AI For a Better API Strategy
Learn how to leverage AI to build and fortify your API strategy. Improve design, governance, documentation, and align APIs with business outcomes.
API Strategy
The 5 Best Mixpanel Alternatives of 2025
Learn about the best Mixpanel alternatives to determine the right analytics solution for your use case.

API Development
How to Leverage Moesif Effectively for API Observability
Effectively leverage Moesif for API observability through best practices for integration, event enrichment, custom actions, and engineering workflow integrat...
API Strategy
How to Build an Internal Chargeback Model for Your API and AI Usage Using Moesif
Use Moesif to implement internal chargebacks and enable precise API and AI cost attribution for better transparency and resource optimization.