Getting Started with Python and GraphQL - Part 1
Since it’s introduction by Facebook, GraphQL is in contention as an alternative to REST APIs. Recently Github has also announced GraphQL support to one of their APIs. Because GraphQL is not simply a evolutionary replacement for REST, this blog will help cover basics of GraphQL and develop GraphQL APIs with Python Django and Graphene.
Intro to GraphQL
What is GraphQL?
GraphQL is a strongly typed query language that describes how to request data. GraphQL declares everything as a graph. You request what you want, and then you will get what you expected. Nothing more, nothing less.
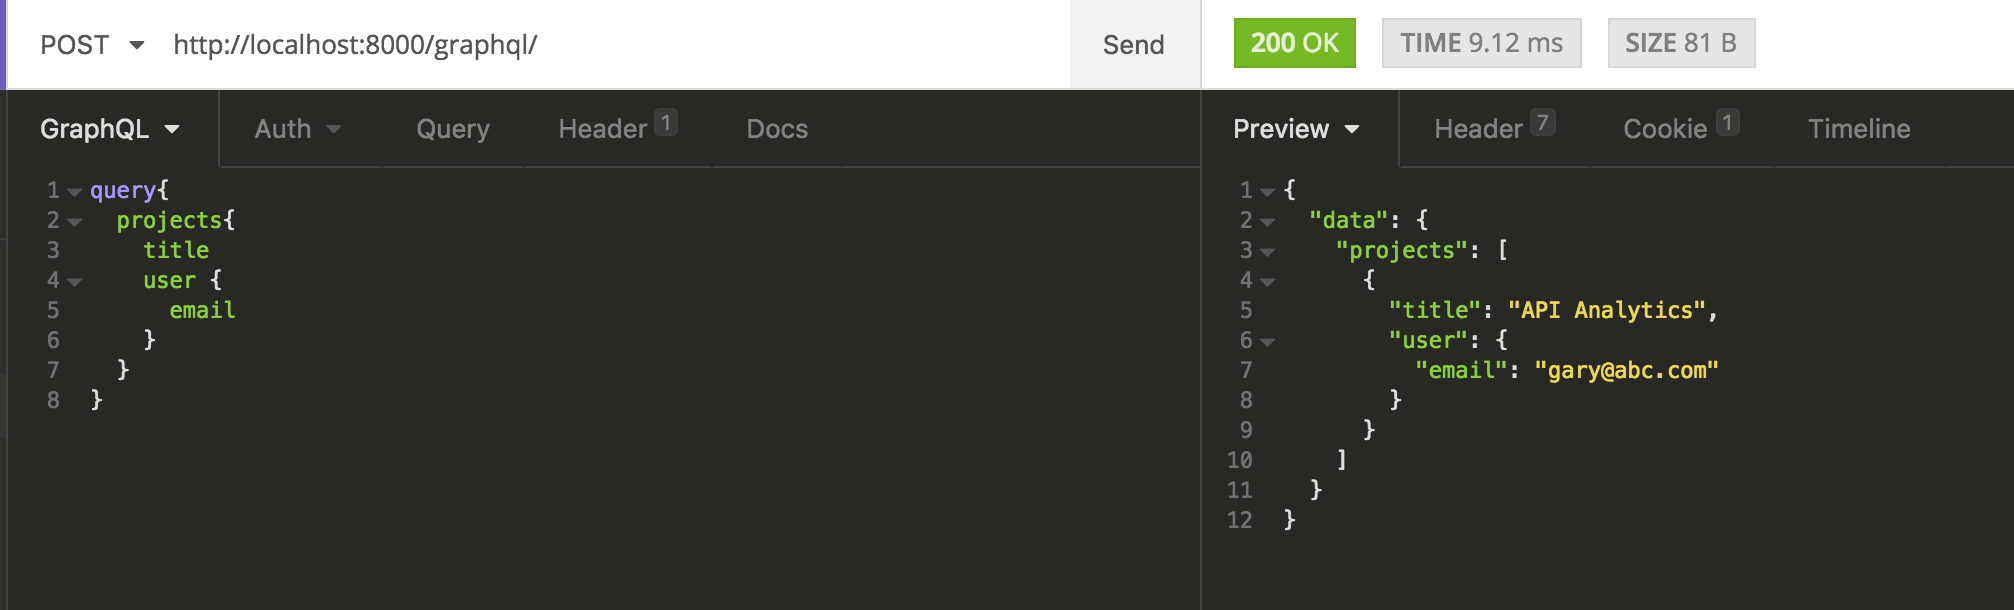
Consider a database with two tables projects and user. Projects contains fields title and project_name while user contains fields user_name and email.
Now, what if you want to know the Project’s title and User email associated with that project? What would be your first instinct? Unless the API endpoint was already created, you would probably make an HTTP call to GET /projects and then GET /users. On the client side, you could do the join after receiving both queries. Some REST API’s may provide some flexibility such as GET/projects?include=user. However, such queries need to be incorporated in the design of the API ahead of time. What if your query was more obscure such as get the manager’s email of the user associated with the project? GraphQL allows you to declare exactly what entities and related entities you need for your query and can be done in a single client to server reducing the “chattiness” of the API and round trip trip latency.
Being a strongly typed query language, it allows you to determine what data is needed, thus avoiding problems associated with under-utilized data.
GraphQL is sometimes represented as a revolutionary way of API comprehension. Instead of working with strictly defined endpoints (as in case of REST API), the necessary data is received through single client/server round trip which ensures a smooth workflow between frontend and backend teams. In other words, the client can specify exactly what it needs, rather than having the server create contrived queries of what the client will probably be querying.
Sounds exciting, isn’t it? If you’re currently using REST API and curious to know if migrating to GraphQL would solve your business problem, check out this in-depth analysis of REST vs Graph architecture.
Getting Started
Before proceeding, make sure you have Python 3.6 installed.
What we are going to build?
In this blog, we will create sample project using Django and Graphene. Graphene is a GraphQL framework for Python. The project will have following features:
Eventscreation which havenameandurlfields- Search and filter
Eventsdata
Creating your local environment
While working with Python, we would recommend to use virtual environment to keep all the project’s dependencies isolated from other projects.
conda create -n graphql python=3.6 anaconda # Create the environment
source activate graphql # Activate the environment
Installing dependencies
pip install django==2.0.2 graphene==2.0.1 graphene-django==2.0.0 django-filter==1.1.0
Configuring Graphene Django
On the {django_project_name}/settings.py, add the following:
INSTALLED_APPS = (
    # At the end of all the default packages
    'graphene_django',
)
Add at the bottom of the file:
GRAPHENE = {
    'SCHEMA': '{django_project_name}.schema.schema',
}
Creating an Event app
On the {django_project} root, create the events app
python manage.py startapp events
Next, we need to define the layer between database and Django.
# Defining Event model
class Event(models.Model):
    name = models.TextField(blank=True)
    url = models.URLField()
Finally, we need to configure Django to use new events app on {django_project_name/settings.py} file:
INSTALLED_APPS = (
    # After the graphene_django app
    'events',
)
Creating database table
python manage.py makemigrations
python manage.py migrate
Open Django shell python manage.py shell and create some data.
from events.models import Event
Event.objects.create(name='API Analytics', url='https://www.moesif.com/')
Event.objects.create(name='Trove Marketplace', url='https://www.trove.com/')
Introducing Insomnia/GraphiQL
We could use Insomnia a REST client or GraphiQL a graphical interactive in-browser GraphQL IDE to run the queries.
Creating your first schema
When starting with GraphQL - one of the first question we had is how do we build our GraphQL Server? As GraphQL has been released as a specification, we can build the server with any programming language.
A schema is a collection of objects that may contain multiple fields. Each field is calculated through resolvers that returns a value. Resolvers functions for a field will access the database and returns an object.
A schema is strictly typed and describes all possible data that can be received. GraphQL query schema and the structure of your database are not connected.
Create the file {django_project_name}/schema.py for schema.
import graphene
import events.schema

# Query for getting the data from the server.
class Query(events.schema.Query, graphene.ObjectType):
    pass

# Create schema
schema = graphene.Schema(query=Query)
Creating your first query
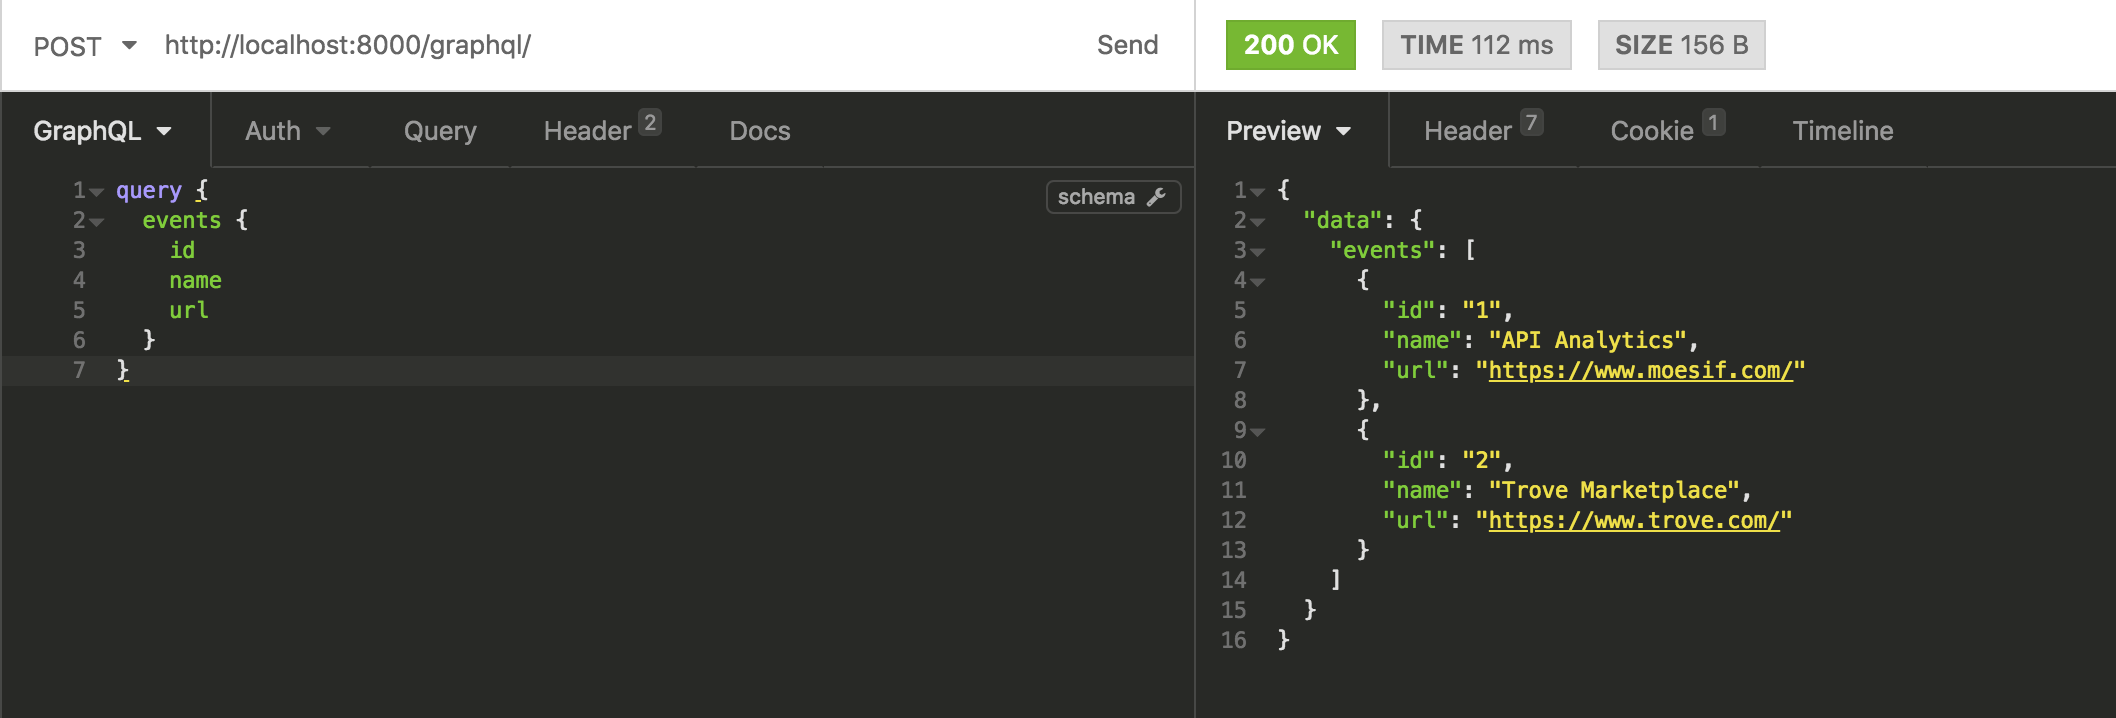
GraphQL query language is all about selecting fields on objects.
We start with “root” object and select events field on that. From the object returned by events we would select id, name and url fields.
Creating your first mutation
The process of sending data to the server is called mutation.
Defining mutations is similar to how we defined the query. We can define the data that you could send to the server. The mutation method will create an event on the database using the data sent by the user.
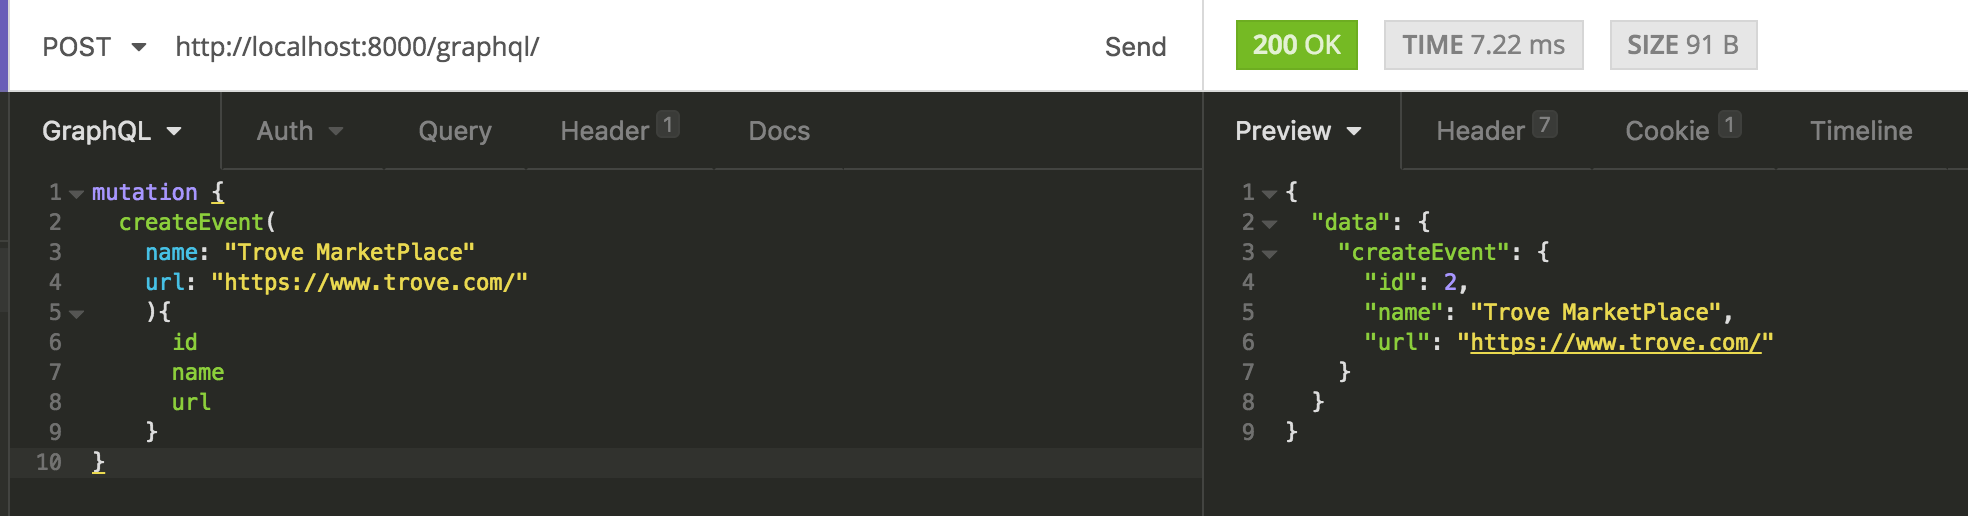
Try to query the data again, you would see the new event created.
Query and Mutation defines the entry point for a GraphQL API. Every GraphQL service has a query type and may or may not have mutation type.
Searching and Filtering
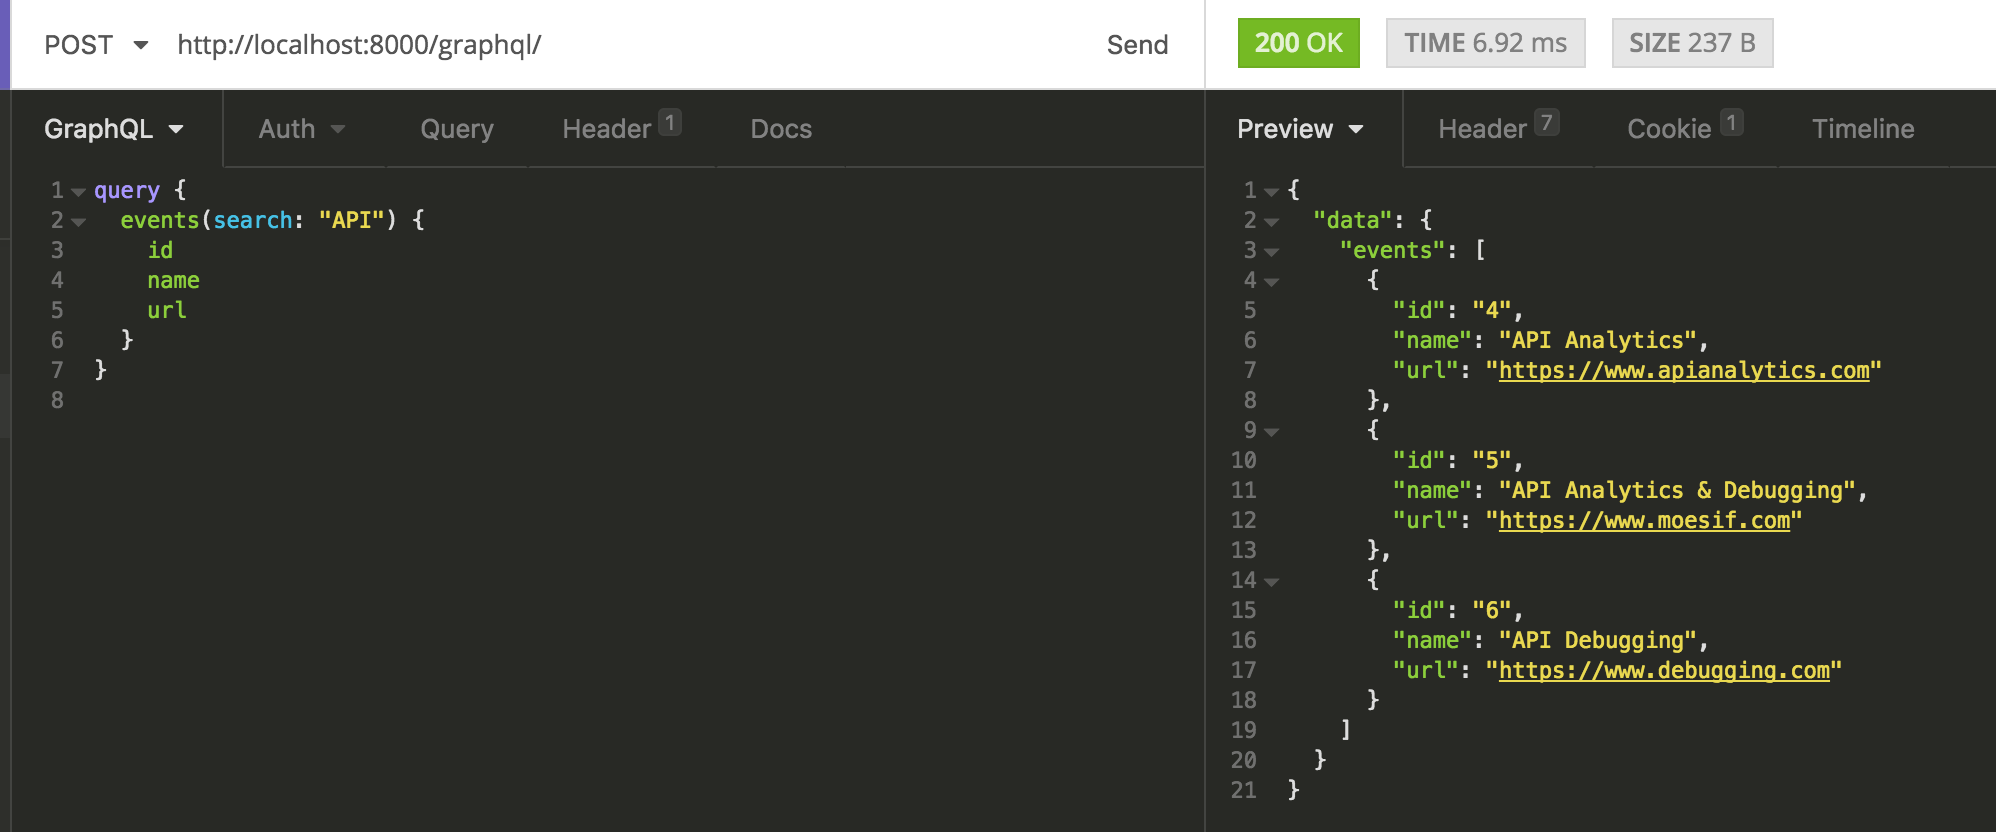
Once we have the data, we could search and filter based on the requirements. We could search for first/last ‘n’ records, skip ‘n’ records or search for any term.
Last n records with only event Id and name fields:

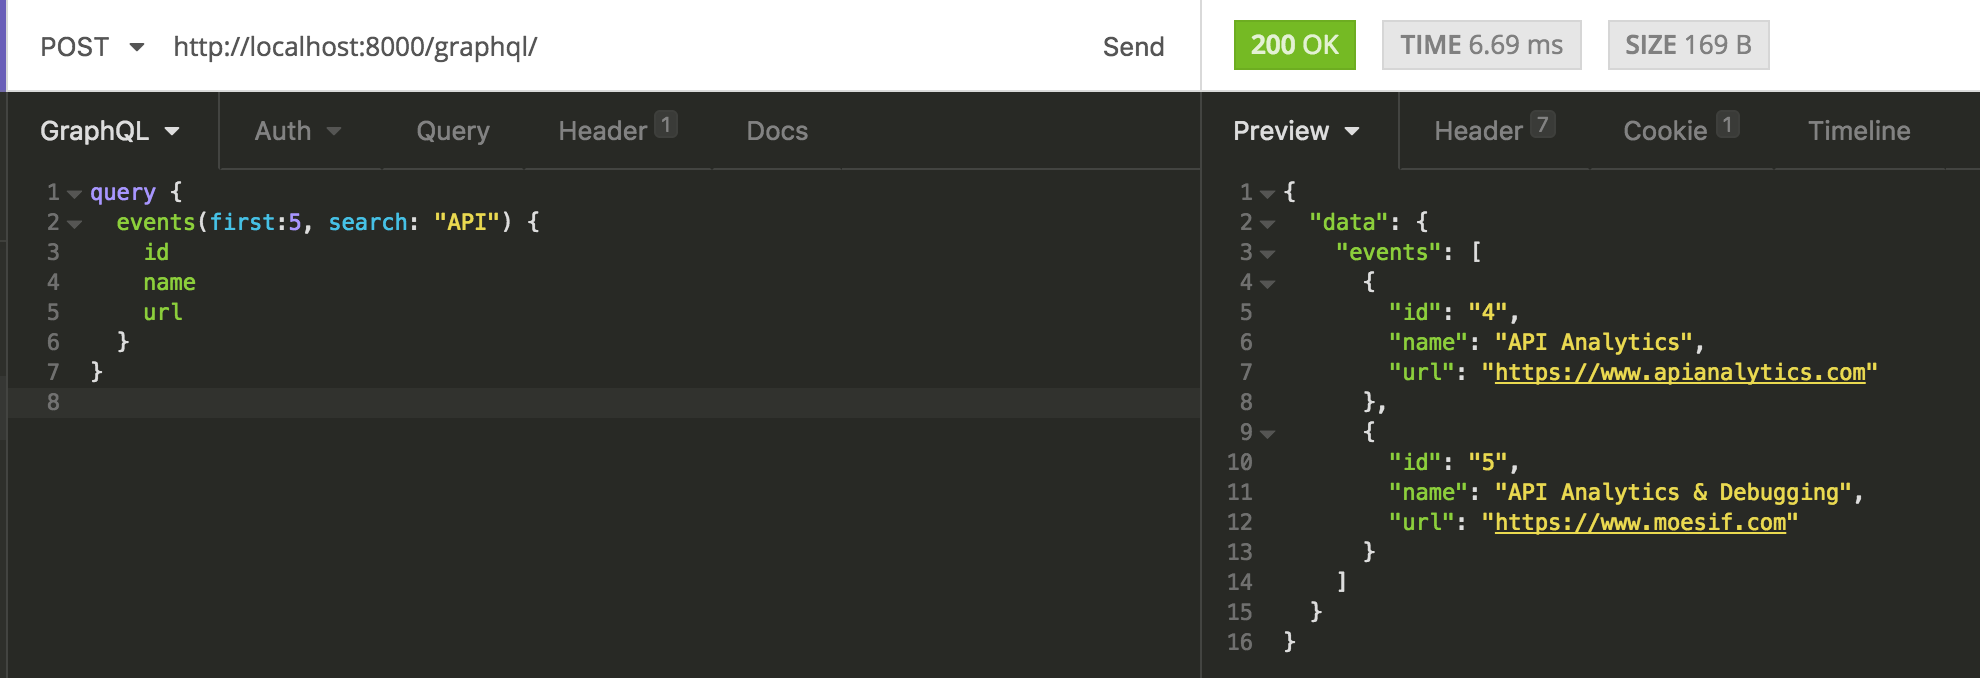
Search for specific term in the name or url fields:
We could also search and filter together:
Okay, just let me play with it! To see the GraphQL in action, you can git clone and run this example app from GitHub.
In next tutorial - we will discuss more about Authentication. Meanwhile, if you’ve any question, reach out to Moesif Team.
Next in this series:


Related Articles

API Strategy
Leveraging AI For a Better API Strategy
Learn how to leverage AI to build and fortify your API strategy. Improve design, governance, documentation, and align APIs with business outcomes.
API Strategy
The 5 Best Mixpanel Alternatives of 2025
Learn about the best Mixpanel alternatives to determine the right analytics solution for your use case.

API Development
How to Leverage Moesif Effectively for API Observability
Effectively leverage Moesif for API observability through best practices for integration, event enrichment, custom actions, and engineering workflow integrat...
API Strategy
How to Build an Internal Chargeback Model for Your API and AI Usage Using Moesif
Use Moesif to implement internal chargebacks and enable precise API and AI cost attribution for better transparency and resource optimization.