Getting Started with Python and GraphQL - Part 2
This tutorial assumes you’re familiar with GraphQL & Python using Django and Graphene. If not, you could refer the previous article on Getting Started with Python and GraphQL
In this tutorial we will discuss about Authentication. Django have a built in concept of Users, so we need to send data to the server through a mutation to create User.
We will create a new folder users and new file schema.py
from django.contrib.auth import get_user_model
import graphene
from graphene_django import DjangoObjectType


class UserType(DjangoObjectType):
    class Meta:
        model = get_user_model()


class CreateUser(graphene.Mutation):
    user = graphene.Field(UserType)

    class Arguments:
        username = graphene.String(required=True)
        password = graphene.String(required=True)
        email = graphene.String(required=True)

    def mutate(self, info, username, password, email):
        user = get_user_model()(
            username=username,
            email=email,
        )
        user.set_password(password)
        user.save()

        return CreateUser(user=user)


class Mutation(graphene.ObjectType):
    create_user = CreateUser.Field()
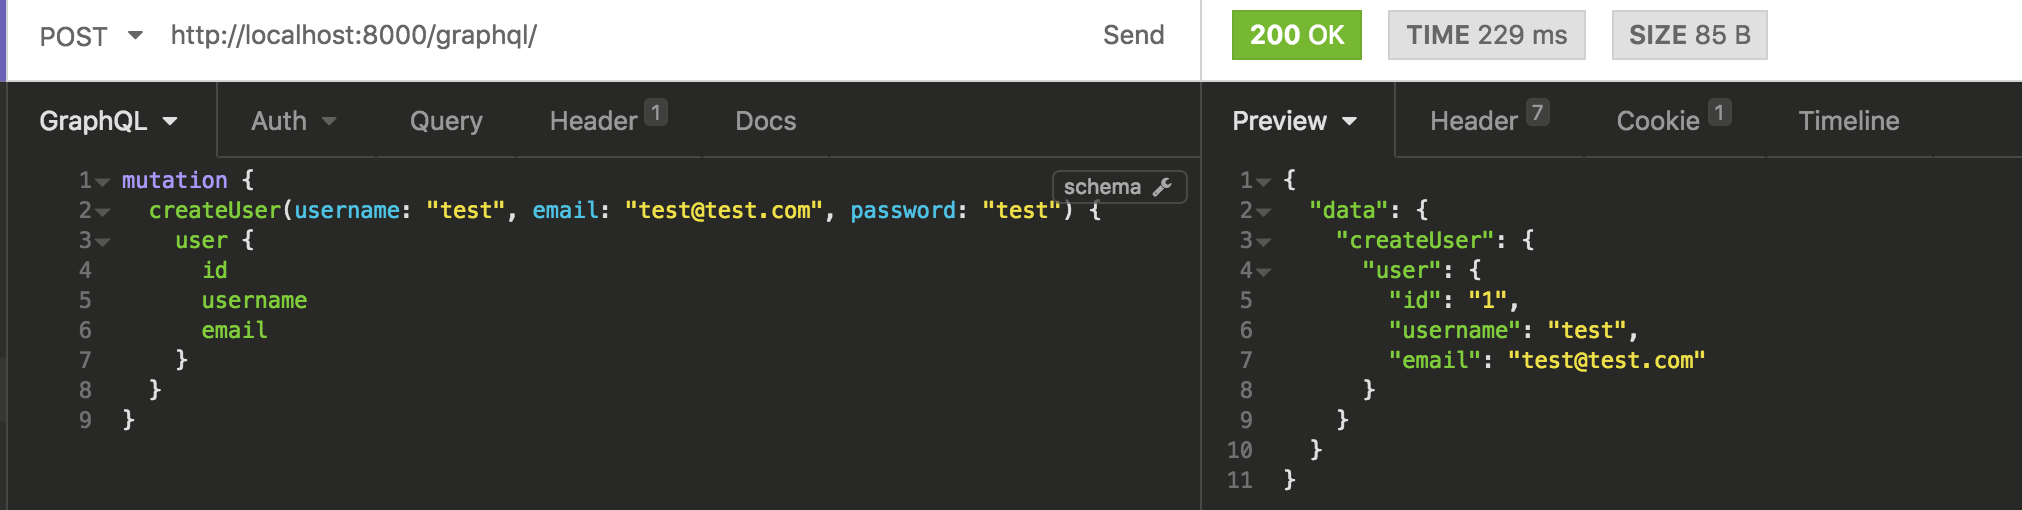
When sending data to the server using mutation, we will send username, password and email. The server will return the created User object with all the information, where the client can ask the fields it wants.
Before executing it, we need to put the new mutation in the root schema.py file.
import graphene
import events.schema
import users.schema

# Query for getting the data from the server.
class Query(events.schema.Query, graphene.ObjectType):
    pass

# Mutation for sending the data to the server.
class Mutation(users.schema.Mutation, events.schema.Mutation, graphene.ObjectType):
    pass

# Create schema
schema = graphene.Schema(query=Query, mutation=Mutation)
Execute the following code using Insomnia and we can see the new user created.
Querying the users
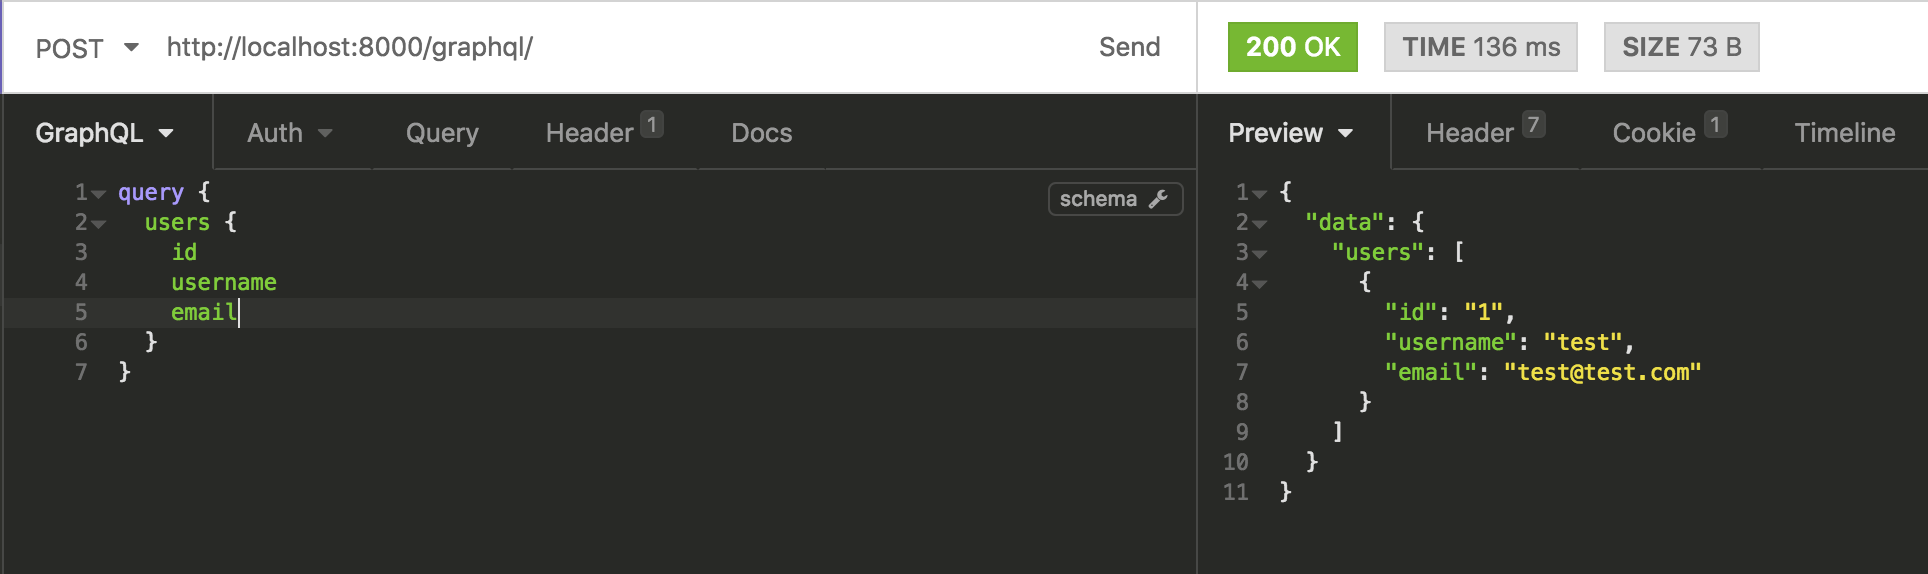
To list all the users we would create a query to send to the server.
We will add the following to the users/schema.py file.
class Query(graphene.ObjectType):
    users = graphene.List(UserType)

    def resolve_users(self, info):
        return get_user_model().objects.all()
We will also update root query class to enable users query.
class Query(users.schema.Query, events.schema.Query, graphene.ObjectType):
    pass
We will send a query to the server to list all the users.
User Authentication
Authentication is enabled by default in Django using sessions. We will use django-graphql-jwt library to implement JWT token in GraphQL.
A piece of data that identifies the User is send to a User when they sign up or log in. The same token should be sent by the User in HTTP Authorization header with the request when authentication is required.
We will configure django-graphql-jwt by adding a new middleware in settings.py file. In the same file we will add the authentication backend settings.
MIDDLEWARE = [
    # After django.contrib.auth.middleware.AuthenticationMiddleware...
    'graphql_jwt.middleware.JSONWebTokenMiddleware',
]

# Authentication backends
AUTHENTICATION_BACKENDS = [
    'graphql_jwt.backends.JSONWebTokenBackend',
    'django.contrib.auth.backends.ModelBackend',
]
What is Moesif? Moesif is the most advanced REST and GraphQL analytics platform used by Thousands of platformsto measure how your queries are performing and understand what your most loyal customers are doing with your APIs.
Next, we will import the library and update the Mutation class to have the following variables in schema.py file.
import graphene
import graphql_jwt

# Mutation for sending the data to the server.
class Mutation(users.schema.Mutation, events.schema.Mutation, graphene.ObjectType):
    token_auth = graphql_jwt.ObtainJSONWebToken.Field()
    verify_token = graphql_jwt.Verify.Field()
    refresh_token = graphql_jwt.Refresh.Field()
The library create three mutation:
We will use TokenAuth to authenticate the User with its username and password and obtain the JSON Web Token.

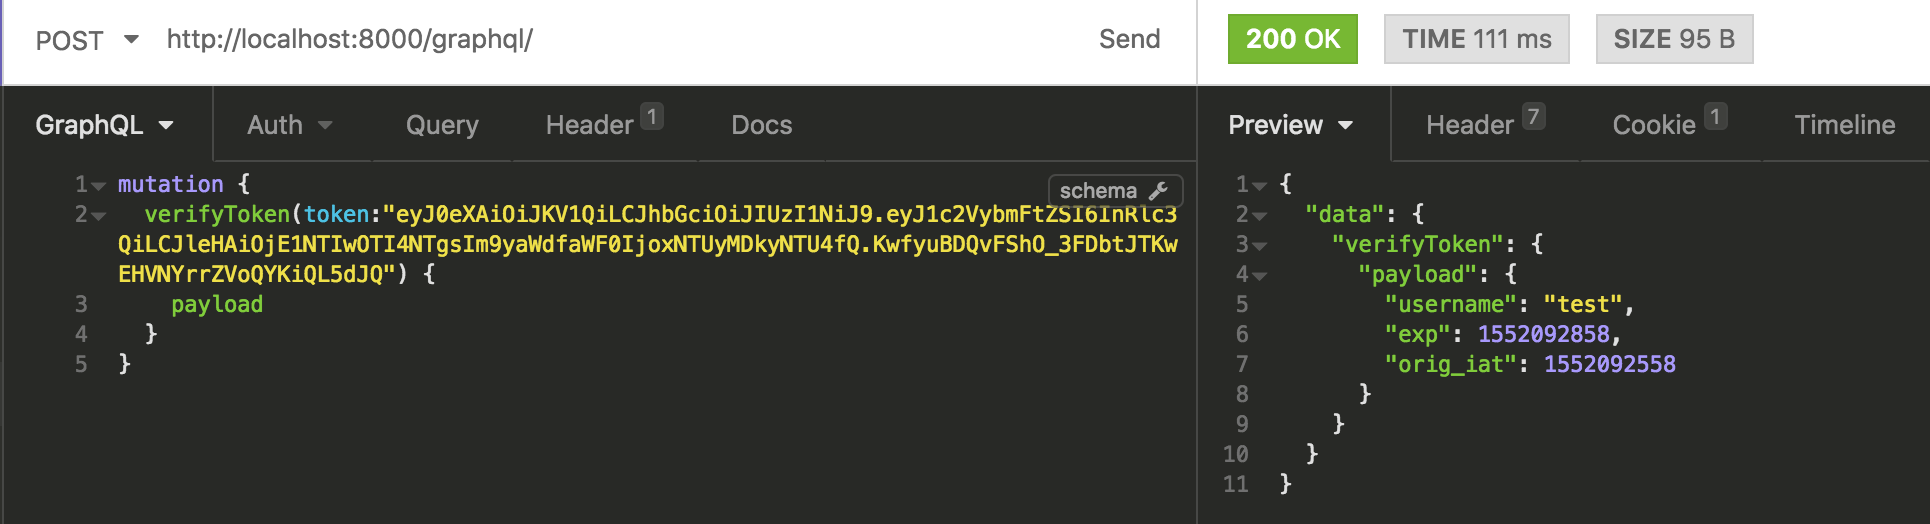
We will use VerifyToken to verify that the token passed as an argument is a valid token.
RefreshToken will generate a new token for non-expired tokens within the renewed expiration time.
Testing the authentication
To test if our authentication is working, we will create a query called me that would return User’s information if logged in or will throw an error otherwise.
First, we will add me query within the Query class in schema.py file.
class Query(graphene.ObjectType):
    me = graphene.Field(UserType)
    users = graphene.List(UserType)

    def resolve_users(self, info):
        return get_user_model().objects.all()

    def resolve_me(self, info):
        user = info.context.user
        if user.is_anonymous:
            raise Exception('Authentication Failure!')
        return user
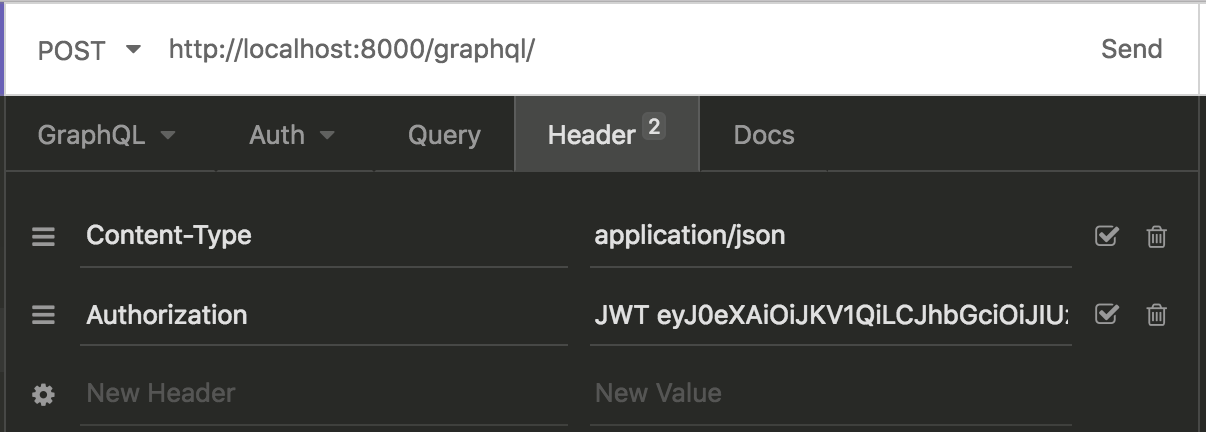
For testing, we need to get a token using tokenAuth mutation and use it in our Query with HTTP Authorization header by adding prefix JWT.
We will add the HTTP Authorization header with the token content, prefix by word JWT.
Finally, we will make the me query which should identify our User.
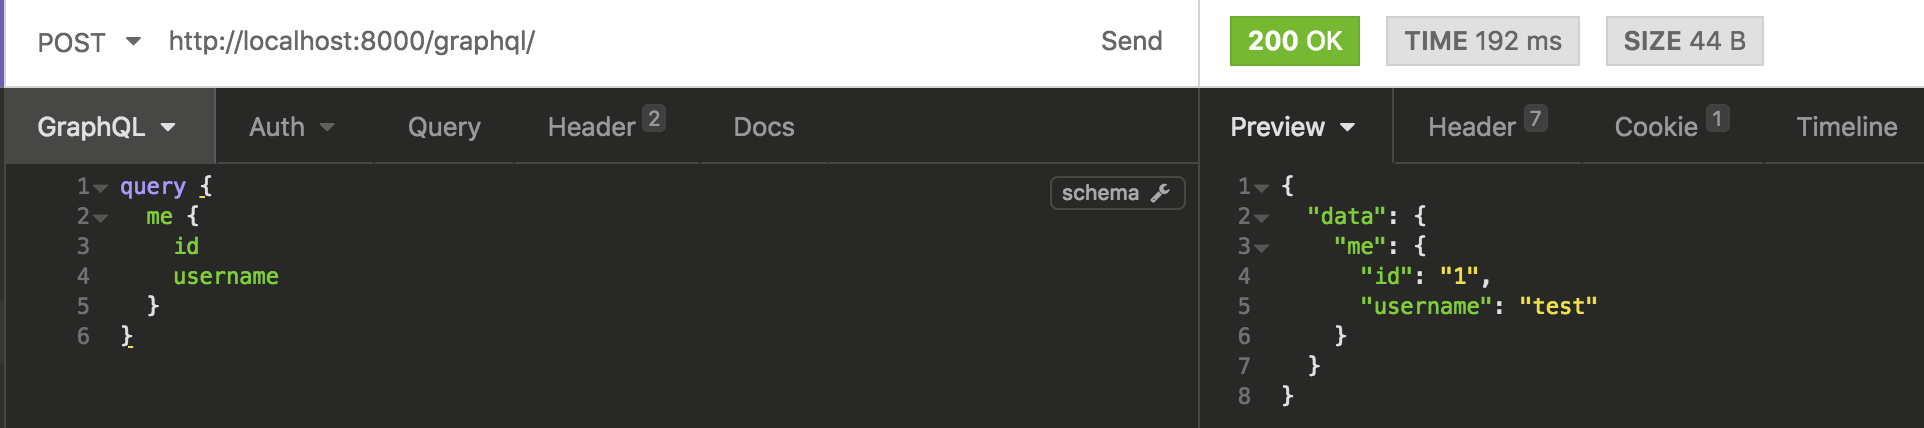
We are able to create users and sign in with them. We will get error message if we will make a query without the HTTP header.
Okay, just let me play with it! To see the GraphQL in action, you can git clone and run this example app from GitHub.
In next tutorial - we will discuss about monitoring GraphQL APIs. Meanwhile, if you’ve any question, reach out to Moesif Team.
Previously in this series:


Related Articles

API Strategy
Leveraging AI For a Better API Strategy
Learn how to leverage AI to build and fortify your API strategy. Improve design, governance, documentation, and align APIs with business outcomes.
API Strategy
The 5 Best Mixpanel Alternatives of 2025
Learn about the best Mixpanel alternatives to determine the right analytics solution for your use case.

API Development
How to Leverage Moesif Effectively for API Observability
Effectively leverage Moesif for API observability through best practices for integration, event enrichment, custom actions, and engineering workflow integrat...
API Strategy
How to Build an Internal Chargeback Model for Your API and AI Usage Using Moesif
Use Moesif to implement internal chargebacks and enable precise API and AI cost attribution for better transparency and resource optimization.