Logging Custom Actions
Actions are custom events such as those triggered within your UI, such as Clicked Sign Up or Sent a SMS or from your backend. You can also track actions from an event stream like AWS Firehose or Logstash. By tracking custom actions, you’re able to create metrics and bill on arbitrary event data.
Tracking custom actions are normally done with a client integration or can be directly sent from an event stream like AWS Firehose and Logstash. See Options to Ingest Custom Actions.
This also enables you to see the end-to-end customer journey from initial sign up to first API call.
Intro to Actions
Actions have an action name (like “Signed Up” or “Finished Data Processing Job”) which represents the name of the consumption event. You can also include arbitrary metadata with an action which enables you to create billable metrics, usage reporting, and more.
An example action is below:
{
  "action_name": "Finished Data Processing Job",
  "request": {
    "time": "2025-01-28T04:45:42.914"
  },
  "company_id": "12345",
  "metadata": {
    "total_rows": 1024,
    "found_rows": 999,
    "consumed_input_tokens": 54322,
    "time_seconds": 66.3
  }
}
Moesif recommends setting the optional field transaction_id to a random 36 character UUID such as 123e4567-e89b-12d3-a456-426614174000. Moesif uses the transaction_id for ensuring duplicate events are not created.
Tracking actions
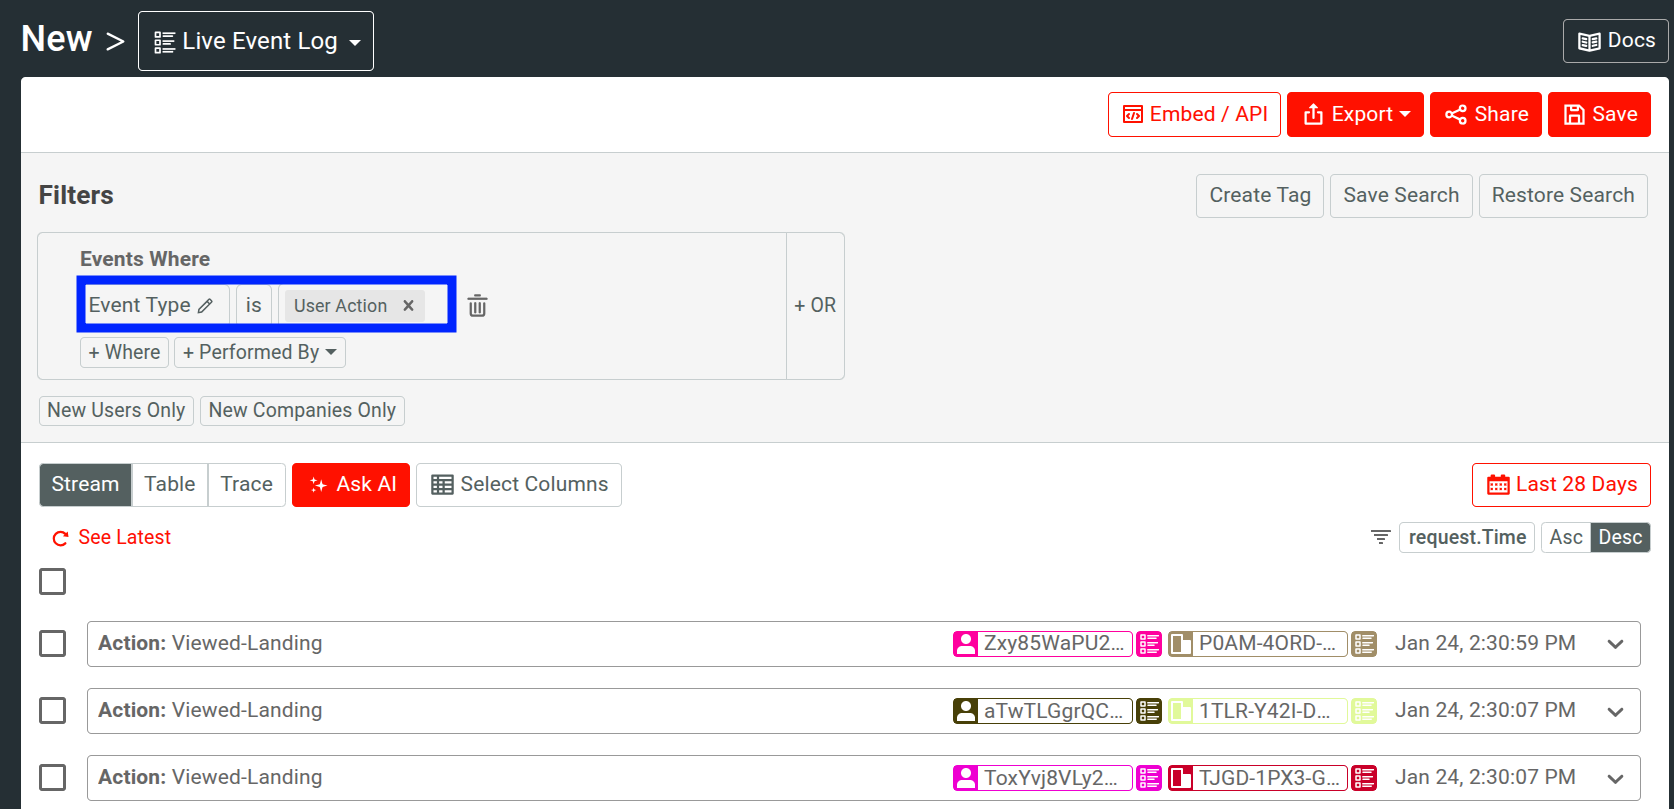
You can directly send actions via API, or you can also track actions from a Moesif client integration such as moesif-browser-js or Segment:
var moesif = require('moesif-browser-js');

moesif.init({
  applicationId: 'YOUR_COLLECTOR_APPLICATION_ID'
});

// The first argument (required) contains the action name string.
// The second argument (optional) contains event metadata.
moesif.track('Clicked Sign Up', {
  button_label: 'Get Started',
  provider: 'Google'
});
Span actions (OTel)
Span Actions are a special type of action ingested from an OpenTelemetry client. An OTel Span Action maps to a Moesif Span Action.
Event metadata
Besides the action name, you can also store event metadata (i.e. attributes), such as the color of the button click or results of a backend job. In the below example, there are also four metrics we are tracking as part of the action such as how many rows of data touched and how many GenAI input tokens consumed.
{
    "total_rows": 1024,
    "found_rows": 999,
    "consumed_input_tokens": 54322,
    "time_seconds": 66.3
}
Using event metadata
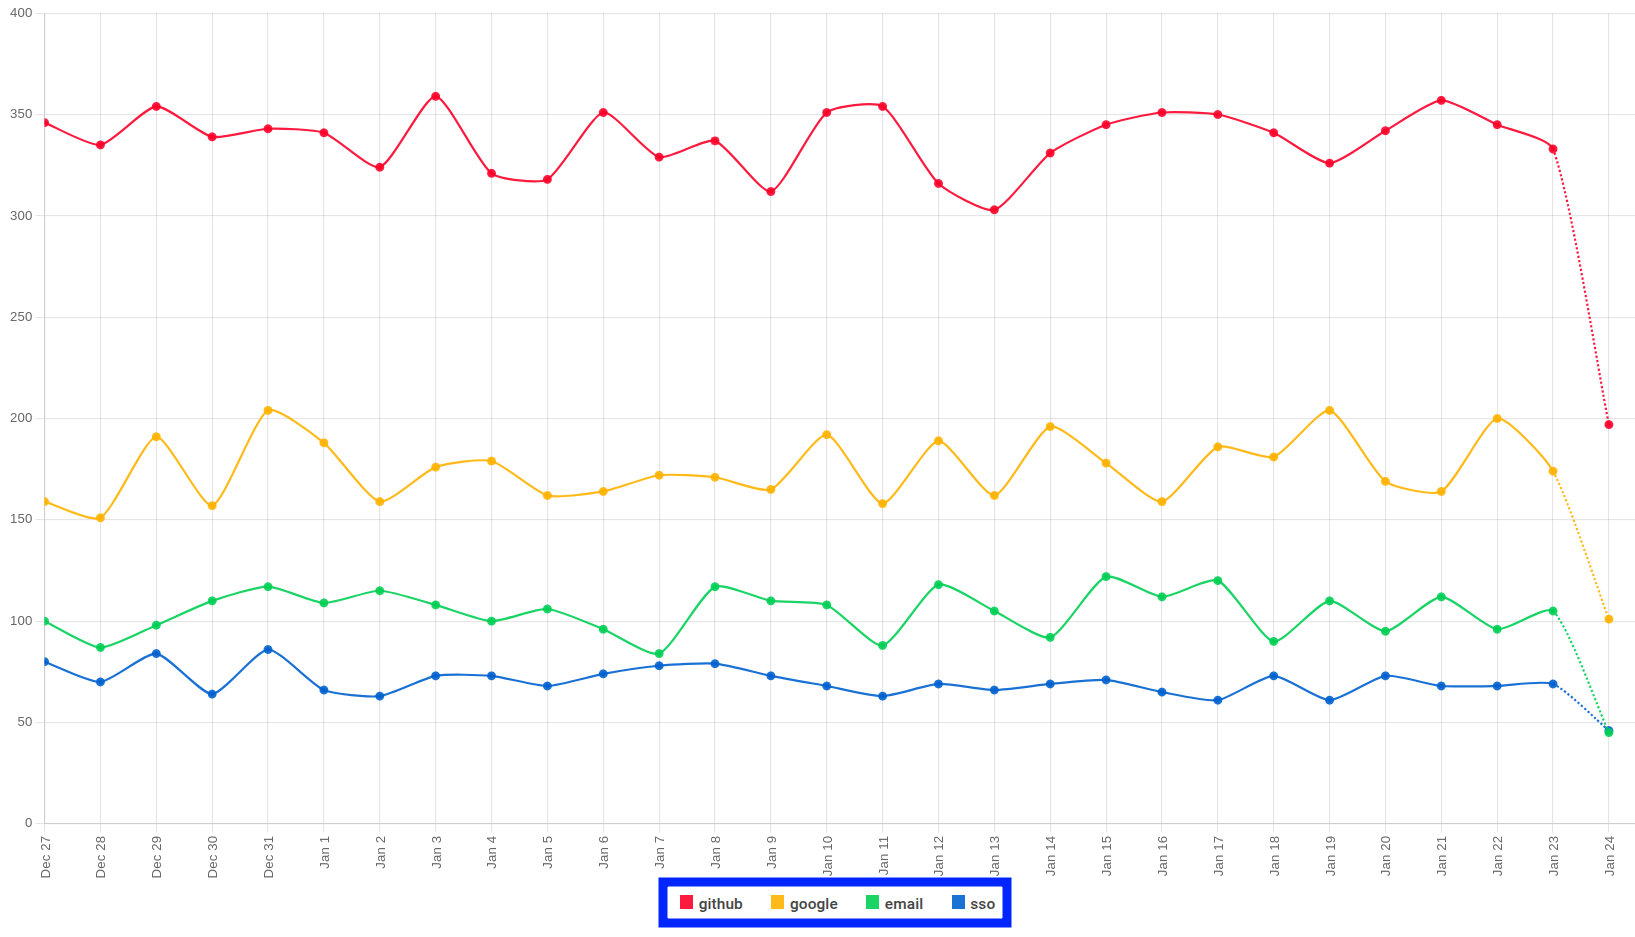
Now that we are tracking custom event metadata, we can create metrics reports within Moesif. For our example above, we can understand which social network login providers are used the most when logging into an application or purchasing a plan.
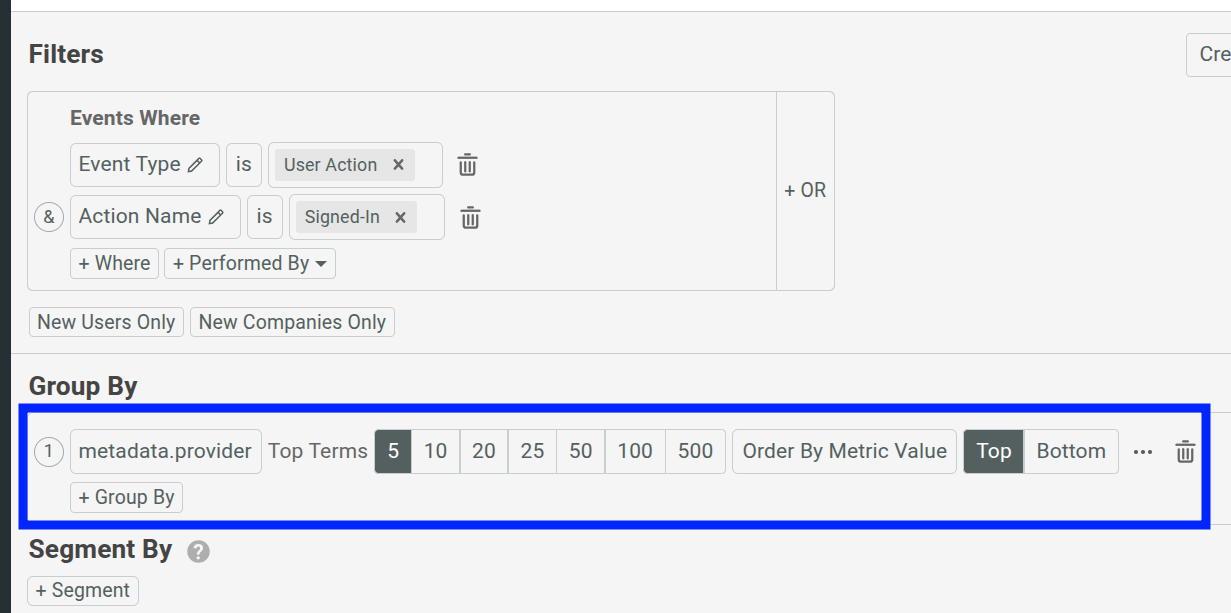
To do so, we can go to Time Series after selecting the + Create New button on the left-side navigation. You can open the Metadata within any filter/group by/metric dropdowns.
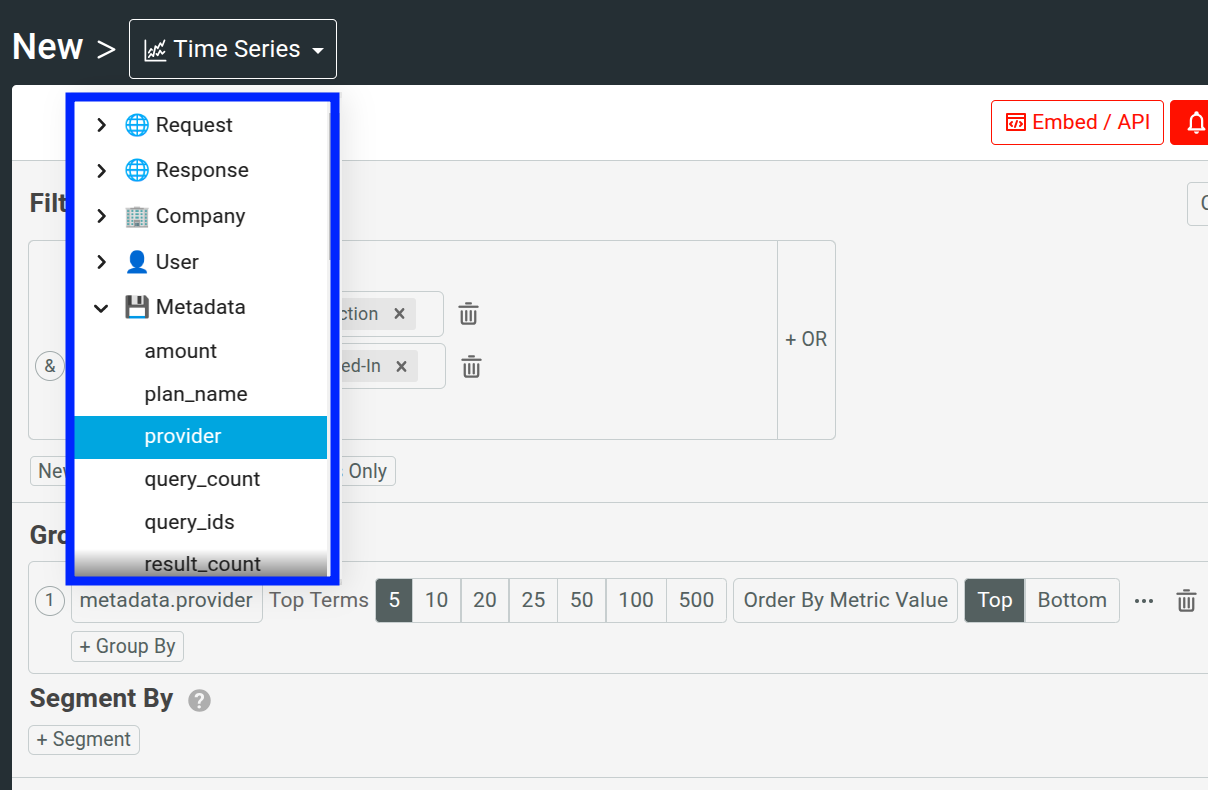
In our example, we select metadata.provider, now our chart will show the daily API calls broken down by login providers as shown below:
Best practices
1. Maintain consistent data types
Moesif auto detects the data type the first time a new JSON key is seen. For example, if a field is set to 2, Moesif will treat this field as a number. You cannot send a different type using the same key. For example, if you previously sent the following event metadata for an API call to Moesif:
{
  "some_string": "I am a string",
  "some_int": 77,
  "some_object": {
      "some_sub_field": "some_value"
    }
}
Then, Moesif automatically saves some_string as a JSON string in the metadata schema. You cannot later send a JSON Number using the same some_string key. This is true regardless of the number of levels relative to the object root. The below metadata would now be invalid:
{
  "some_int": 77,
  "some_object": {
      "some_string": 23,
      "some_sub_field": "some_value"
    }
}
The metadata schema is specific to each application you create in Moesif. For example, your development environment can be different than your production environment.
2. Avoid dots characters
Be aware that Dot characters in a JSON key for event metadata will be converted into an underscore by Moesif automatically. However, Dot characters in a JSON value are fine and will not be transformed.
For example,
{
  "so.me_str.ing": "I am a string",
  "some.int": 77.23
}
Will be converted by Moesif to:
{
  "so_me_str_ing": "I am a string",
  "some_int": 77.23
}