Integrating with Kong Enterprise Gateway
Kong is an extremely popular way to quickly and securely manage your RESTful APIs. Moesif is a great addition on top of Kong to cover everything from analytics to helping you set up metered billing.
Building your API is just the first step. Once built, you need to keep customers and services using your APIs happy. Moesif is the tool to help you do exactly that. Integrating Moesif with your Kong instance can be done in a few simple steps.
Step 1: Set Up Your Kong Instance
Before we get started with integrating Moesif with Kong, you’ll need to make sure you have a running instance of Kong. We will be running our instance in Docker using the official Docker Image, however; feel free to use whatever works best for you! We will make the following assumptions in this guide:
- You will be running a Kong Enterprise API Gateway instance hosted in Docker
- The gateway will run on localhost:8000
- The admin API will on localhost:8001
- The GUI will run on localhost:8002
- Services and Routes are set up within Kong
- Your Kong instance is activated with a Kong Enterprise license
The Kong Manager GUI shown in this demo is only available in Kong Enterprise Edition. These steps are possible to do through Kong Open Source but will need to leverage the Admin API and are out of the scope of this guide.
Step 2: Create Your Moesif Account
If you don’t already have a Moesif account, You’ll want to sign up. Once you’re registered you’ll need to add in a few details.
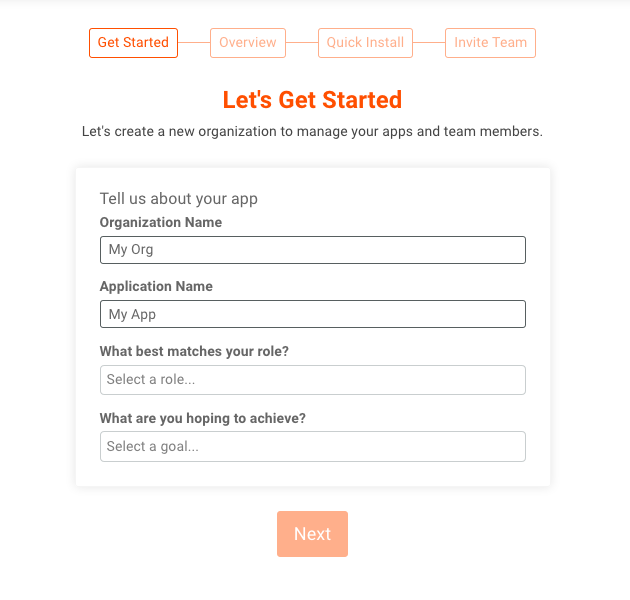
These include:
- Organization Name the name of your organization or company
- App Name the name of the app you are integrating with Moesif
- What best matches your role? Here you can describe what your current role is at your organization. This helps us to assist you with relevant hints and tips in the future.
- What are you hoping to achieve? Here you can let us know how you'll use Moesif to help your organization or project.
Once you’ve filled out these details, click Next. After this, you’ll be presented with a brief overview of Moesif.
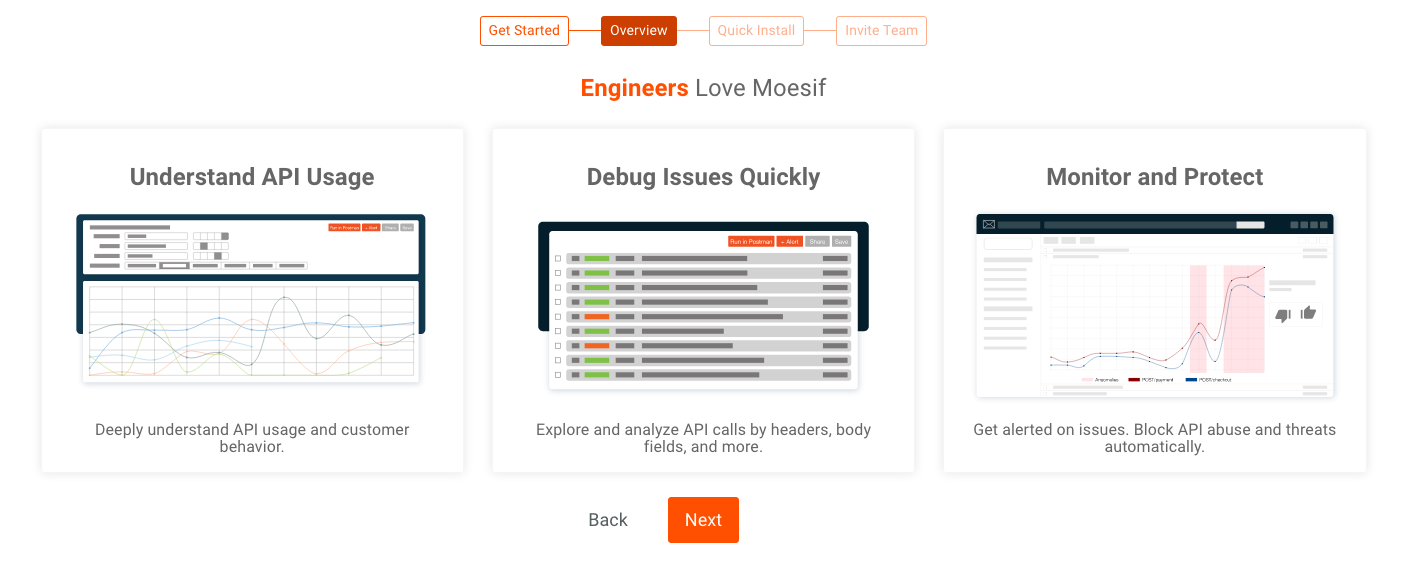
Click Next once again.
Step 3: Set Up Moesif and Kong Gateway
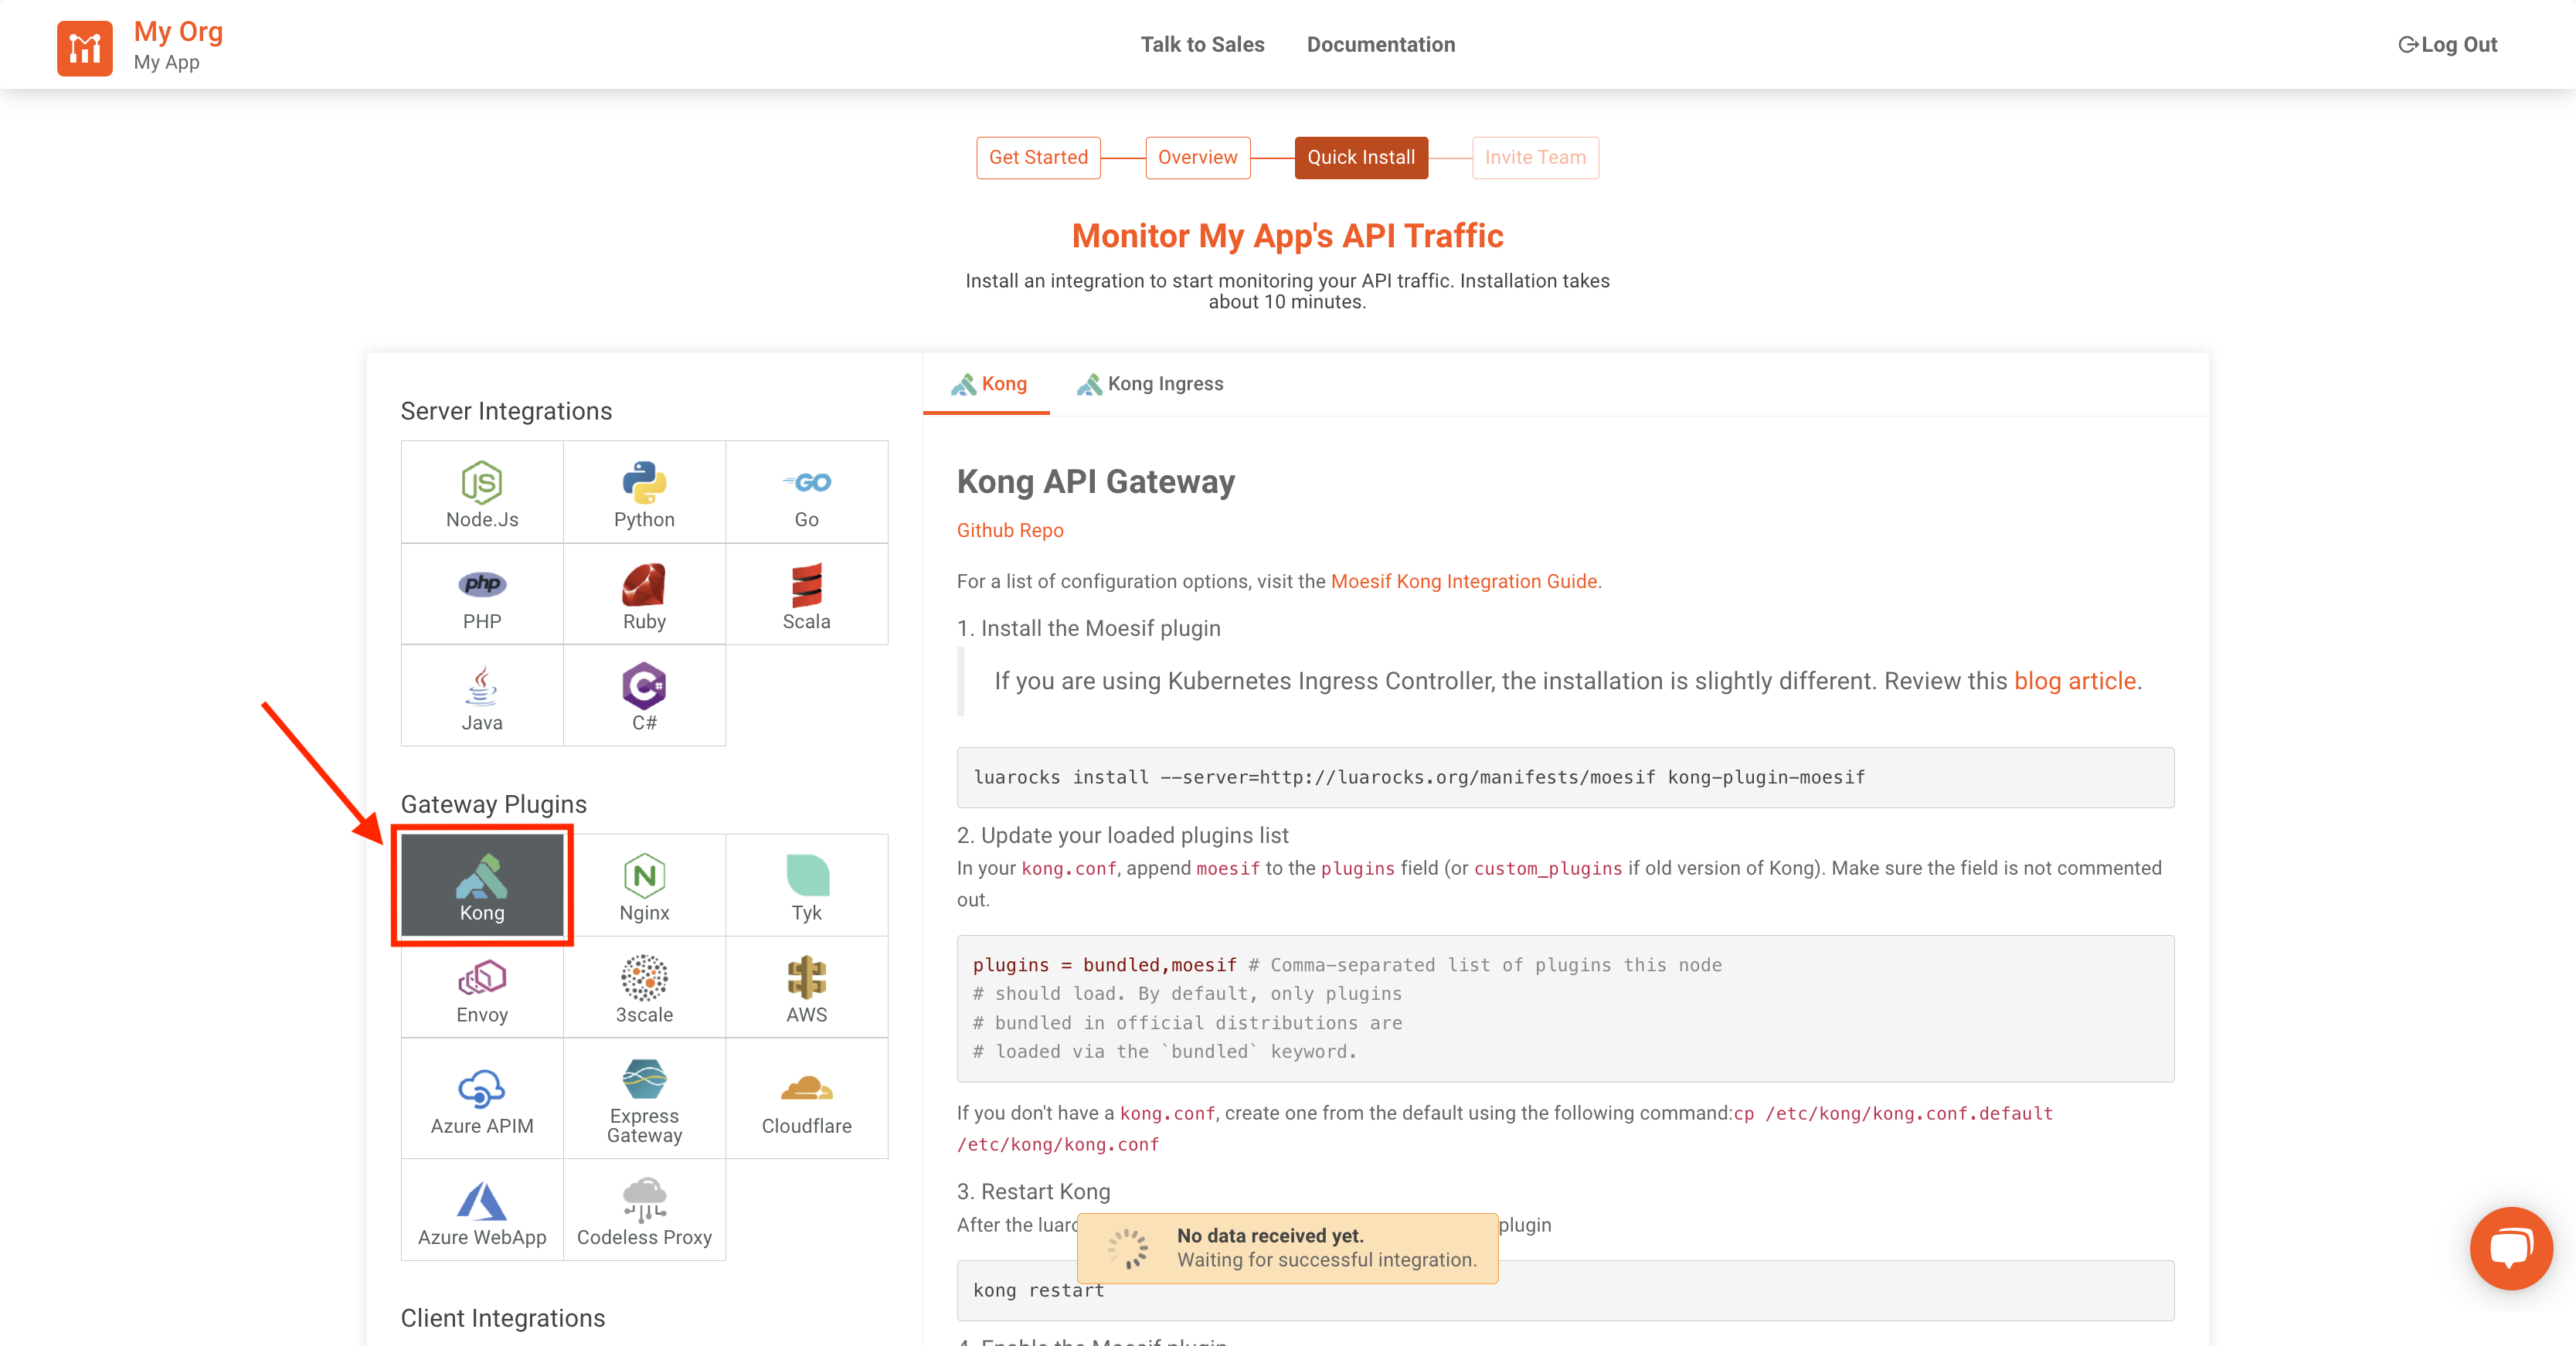
After the Overview screen, you’ll be presented with the Quick Install screen. Here you can pick from any different server integrations and plugins. For the Kong API Gateway we want to make sure Kong is selected in the left pane and that the Kong walk-through is selected and displayed on the right.
Step 4: Access Your Kong Server
First, we’ll access our Kong server via the command line. It is here we will install, configure, and enable the Moesif plugin on our Kong instance.
Use docker ps to obtain the container ID of your Kong instance. Run the following command, filling in your container ID, in your terminal to open a Bash shell within the container with root privileges:
$ docker exec -itu root [CONTAINER ID] bash
Step 5: Install the Moesif Lua Plugin
Now that we have access to our container’s shell, we’ll install the Moesif Plugin into Kong:
# luarocks install --server=http://luarocks.org/manifests/moesif kong-plugin-moesif
Step 6: Update kong.conf With the Moesif Plugin
Make a copy of the default Kong configuration file. We’ll edit it to enable the Moesif plugin:
# cp /etc/kong/kong.conf.default /etc/kong/kong.conf
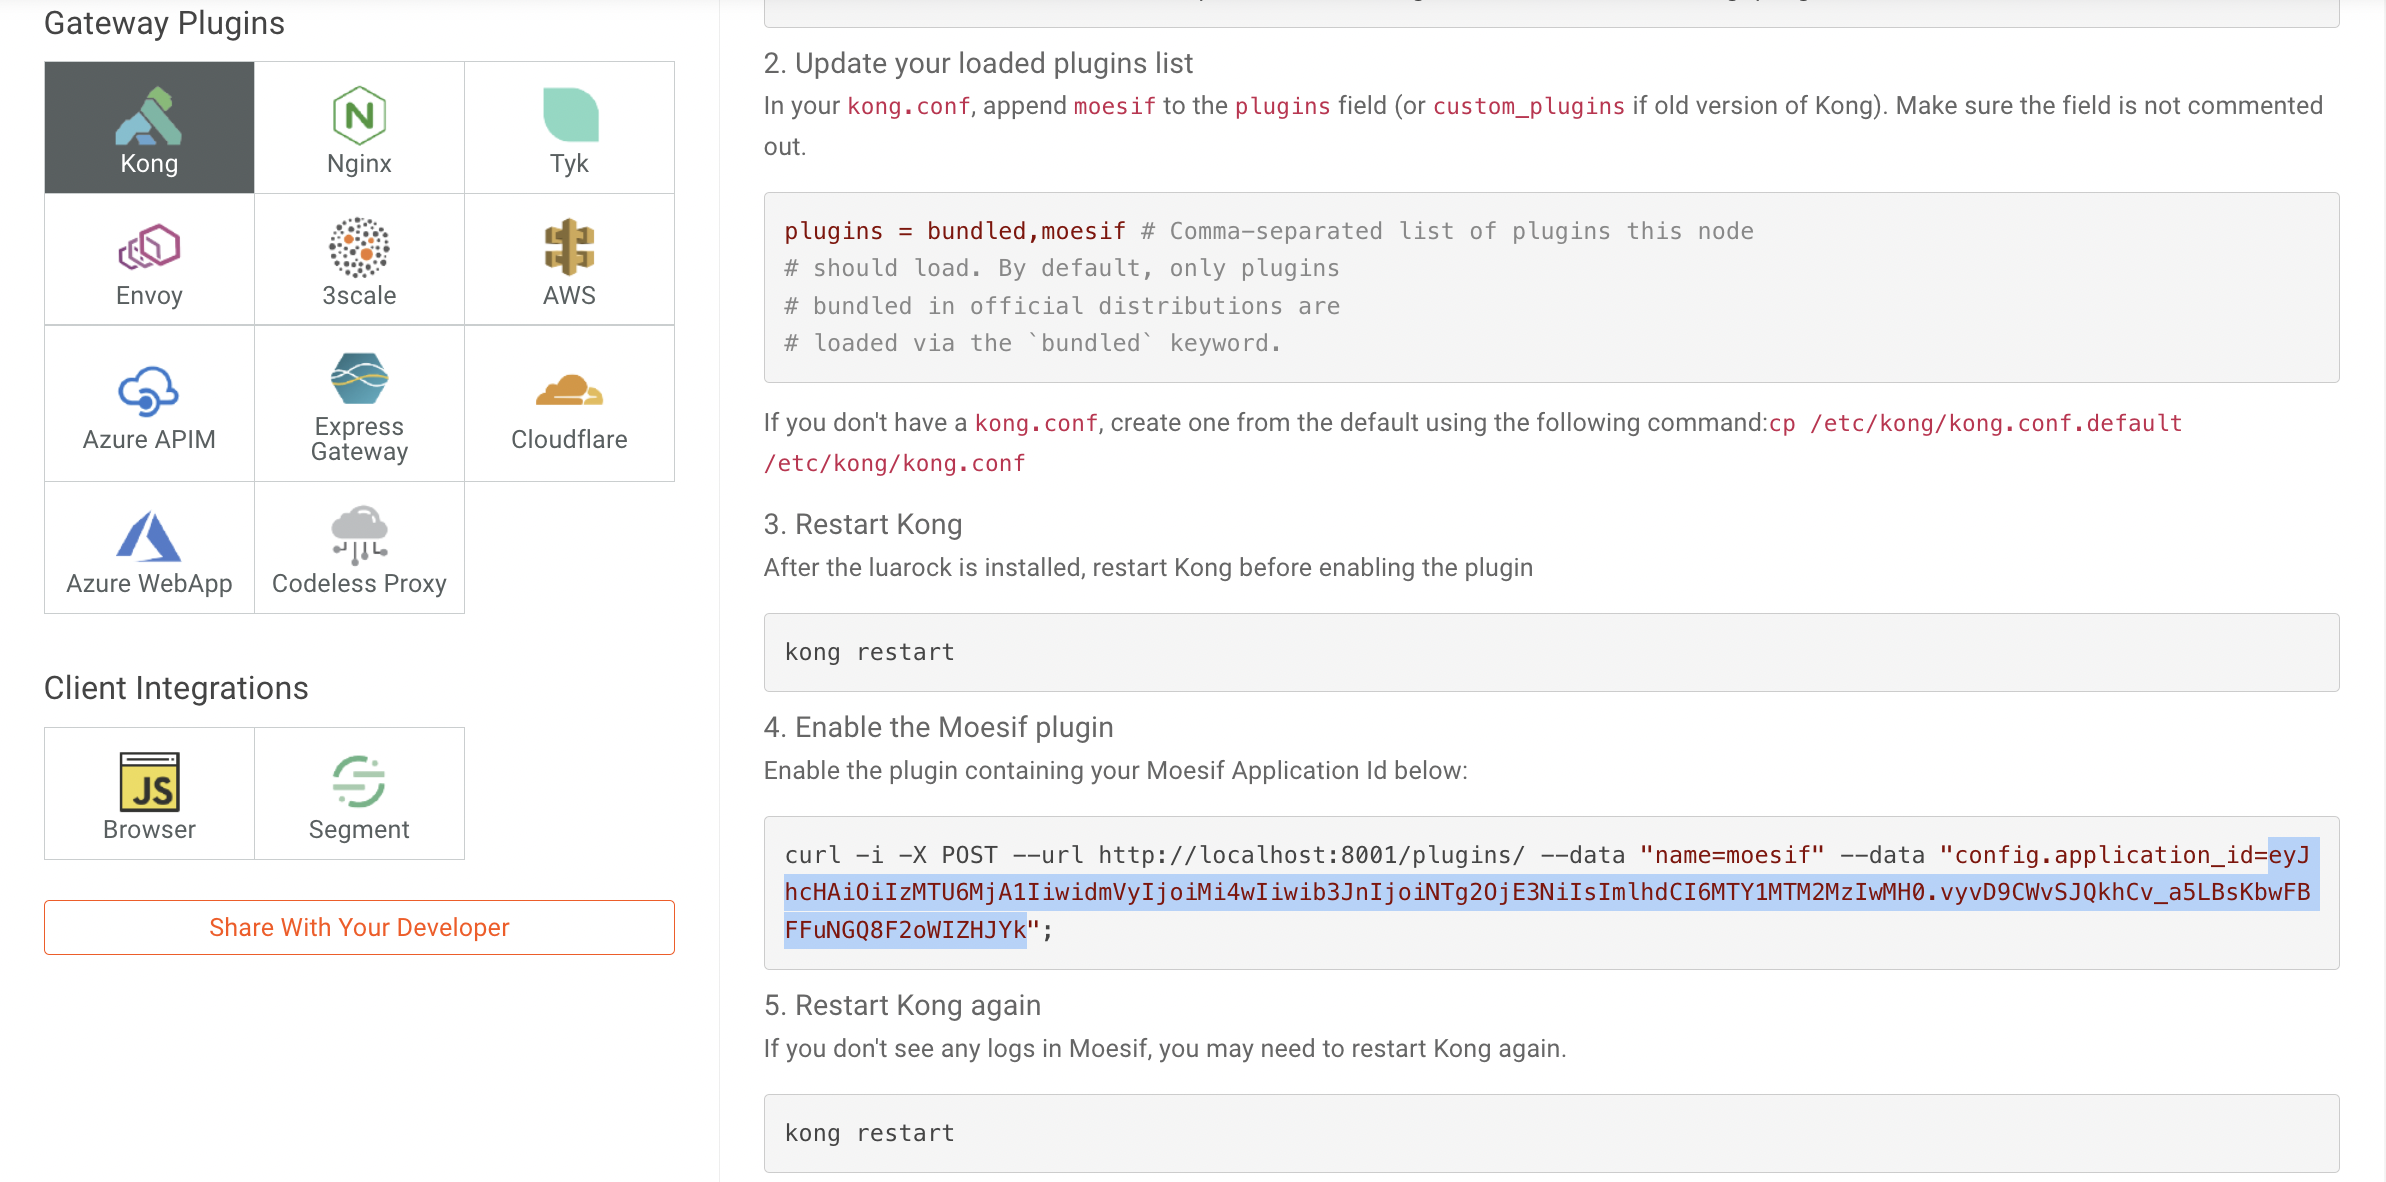
Now edit the newly created kong.conf with your editor of choice. Append moesif to the plugins field and make sure the field is not commented out. The final line will look something like this:
plugins = bundled,moesif         # Comma-separated list of plugins this node
                                 # should load. By default, only plugins
                                 # bundled in official distributions are
                                 # loaded via the `bundled` keyword.
If you would rather, here is a helpful
sedcommand to do it for you:# sed -i s/#plugins\ =\ bundled/plugins\ =\ bundled,moesif/1 /etc/kong/kong.conf
Step 7: Restart Kong
Restart the service from our container’s Bash shell:
# kong restart
Step 8: Enable the Moesif Plugin
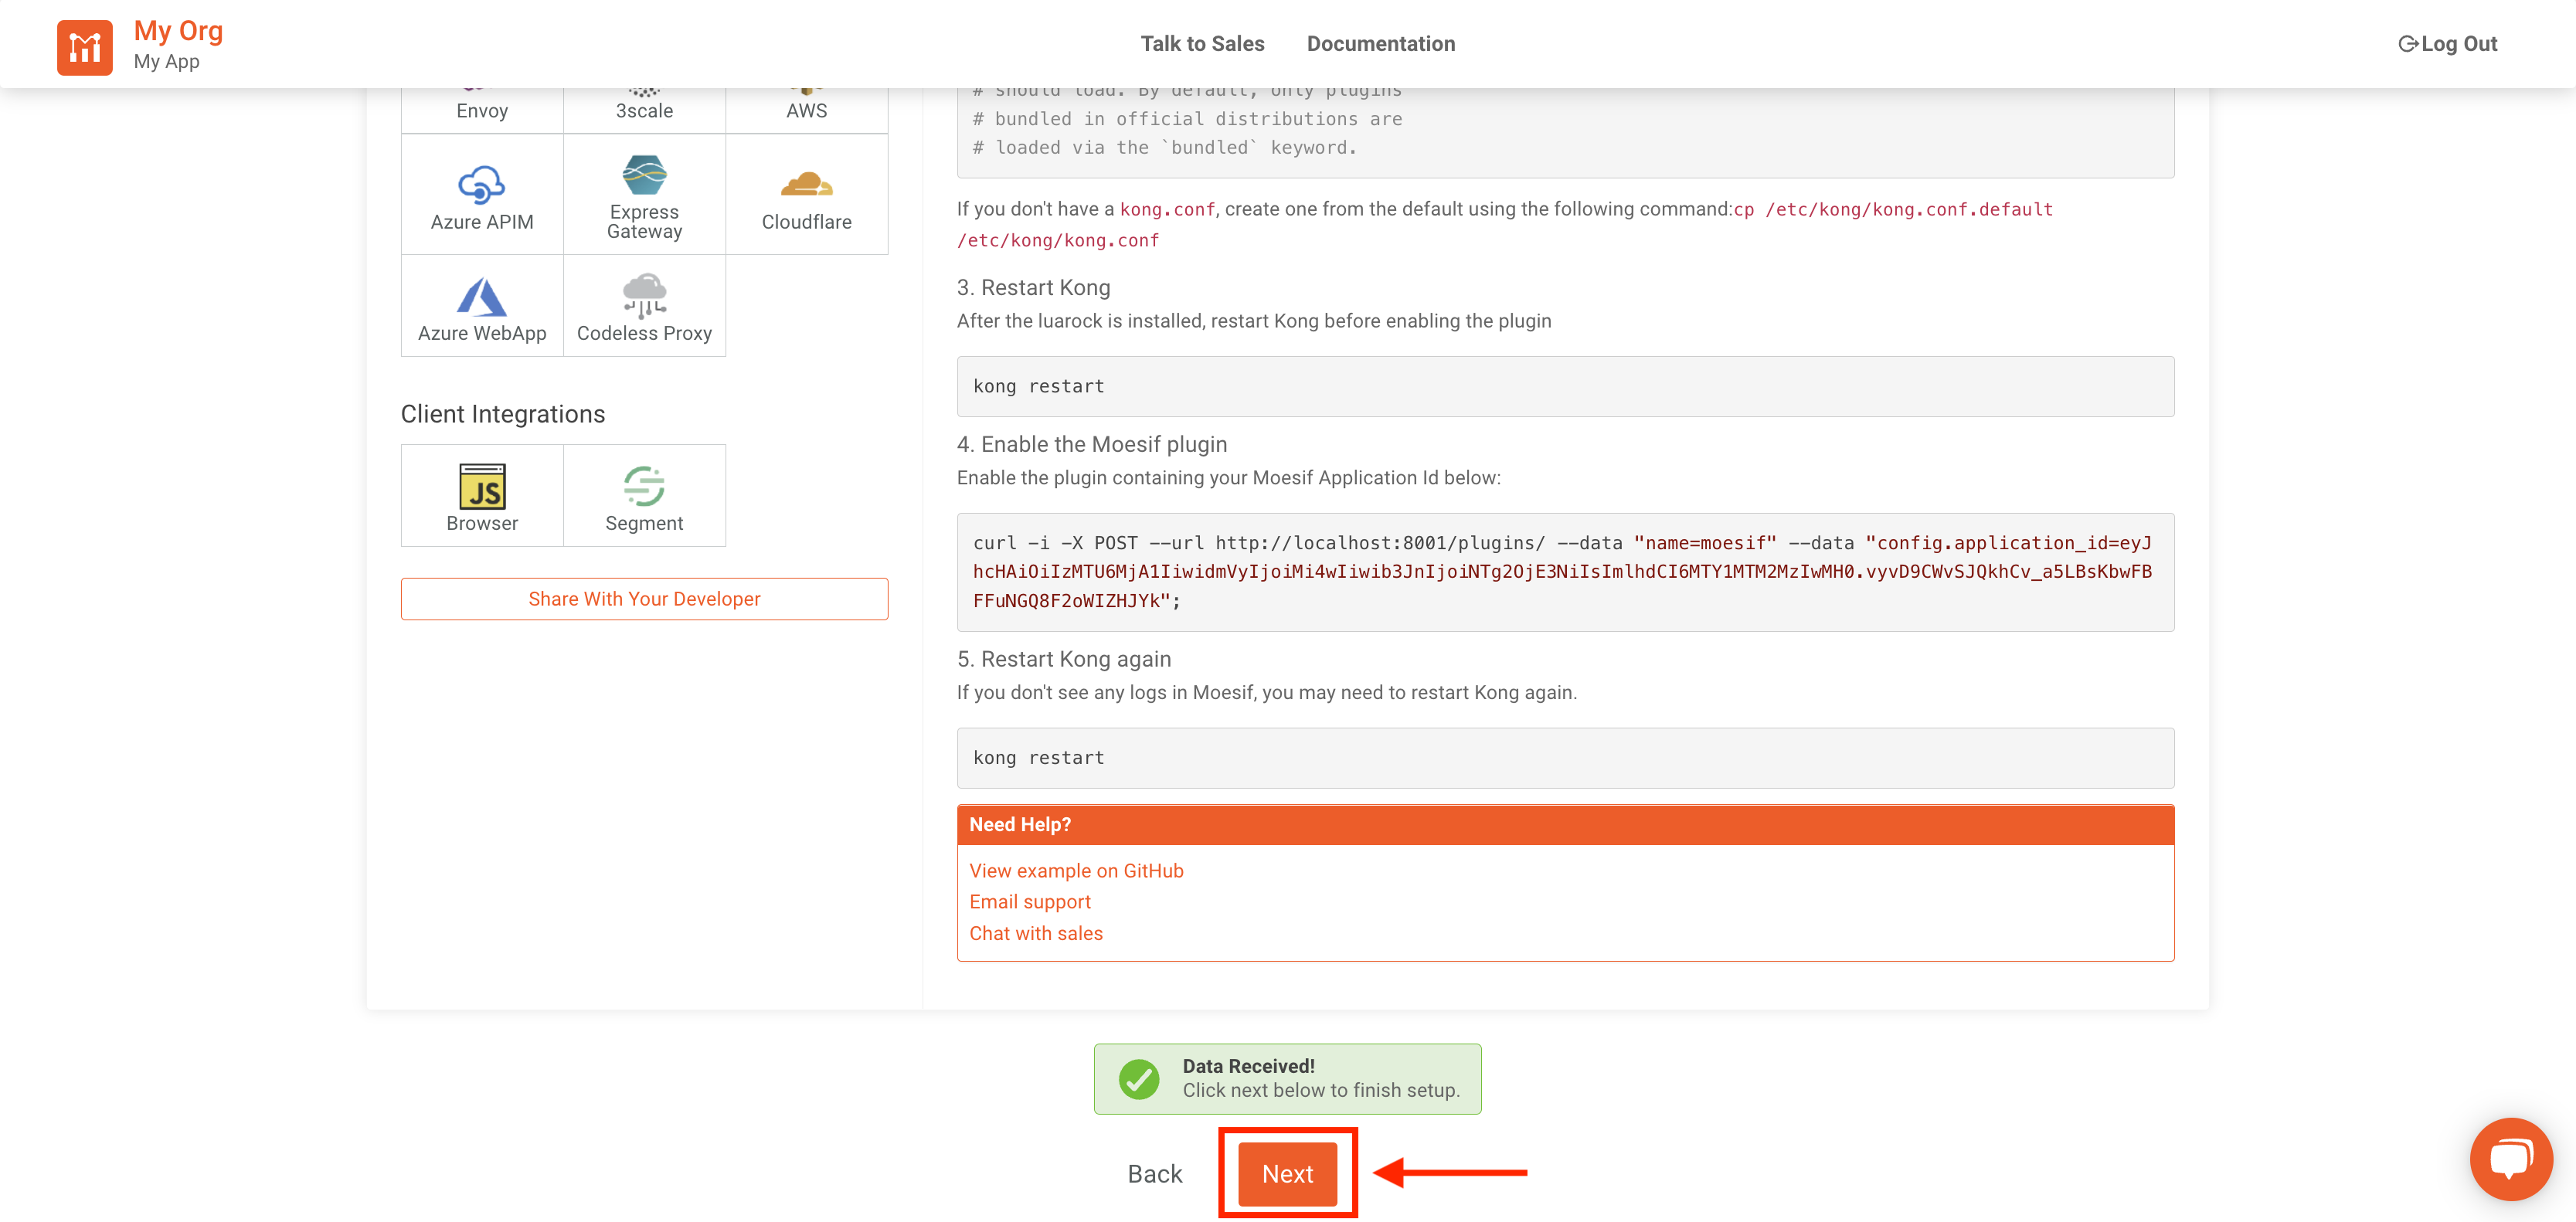
In a local terminal window, enable the Moesif plugin by running the following curl command directed at your Kong instance’s admin API. Remember to replace YOUR_APPLICATION_ID with your Moesif application ID.
$ curl -i -X POST --url http://localhost:8001/plugins/ --data "name=moesif" --data "config.application_id=YOUR_APPLICATION_ID";
Your Moesif application ID can be found on the Quick Install screen. Copy your application ID or the entire command.
Note: This command enables the Moesif plugin globally. Refer to our documentation if you would like to enable the plugin specifically on a Service, Route, Consumer, or an API.
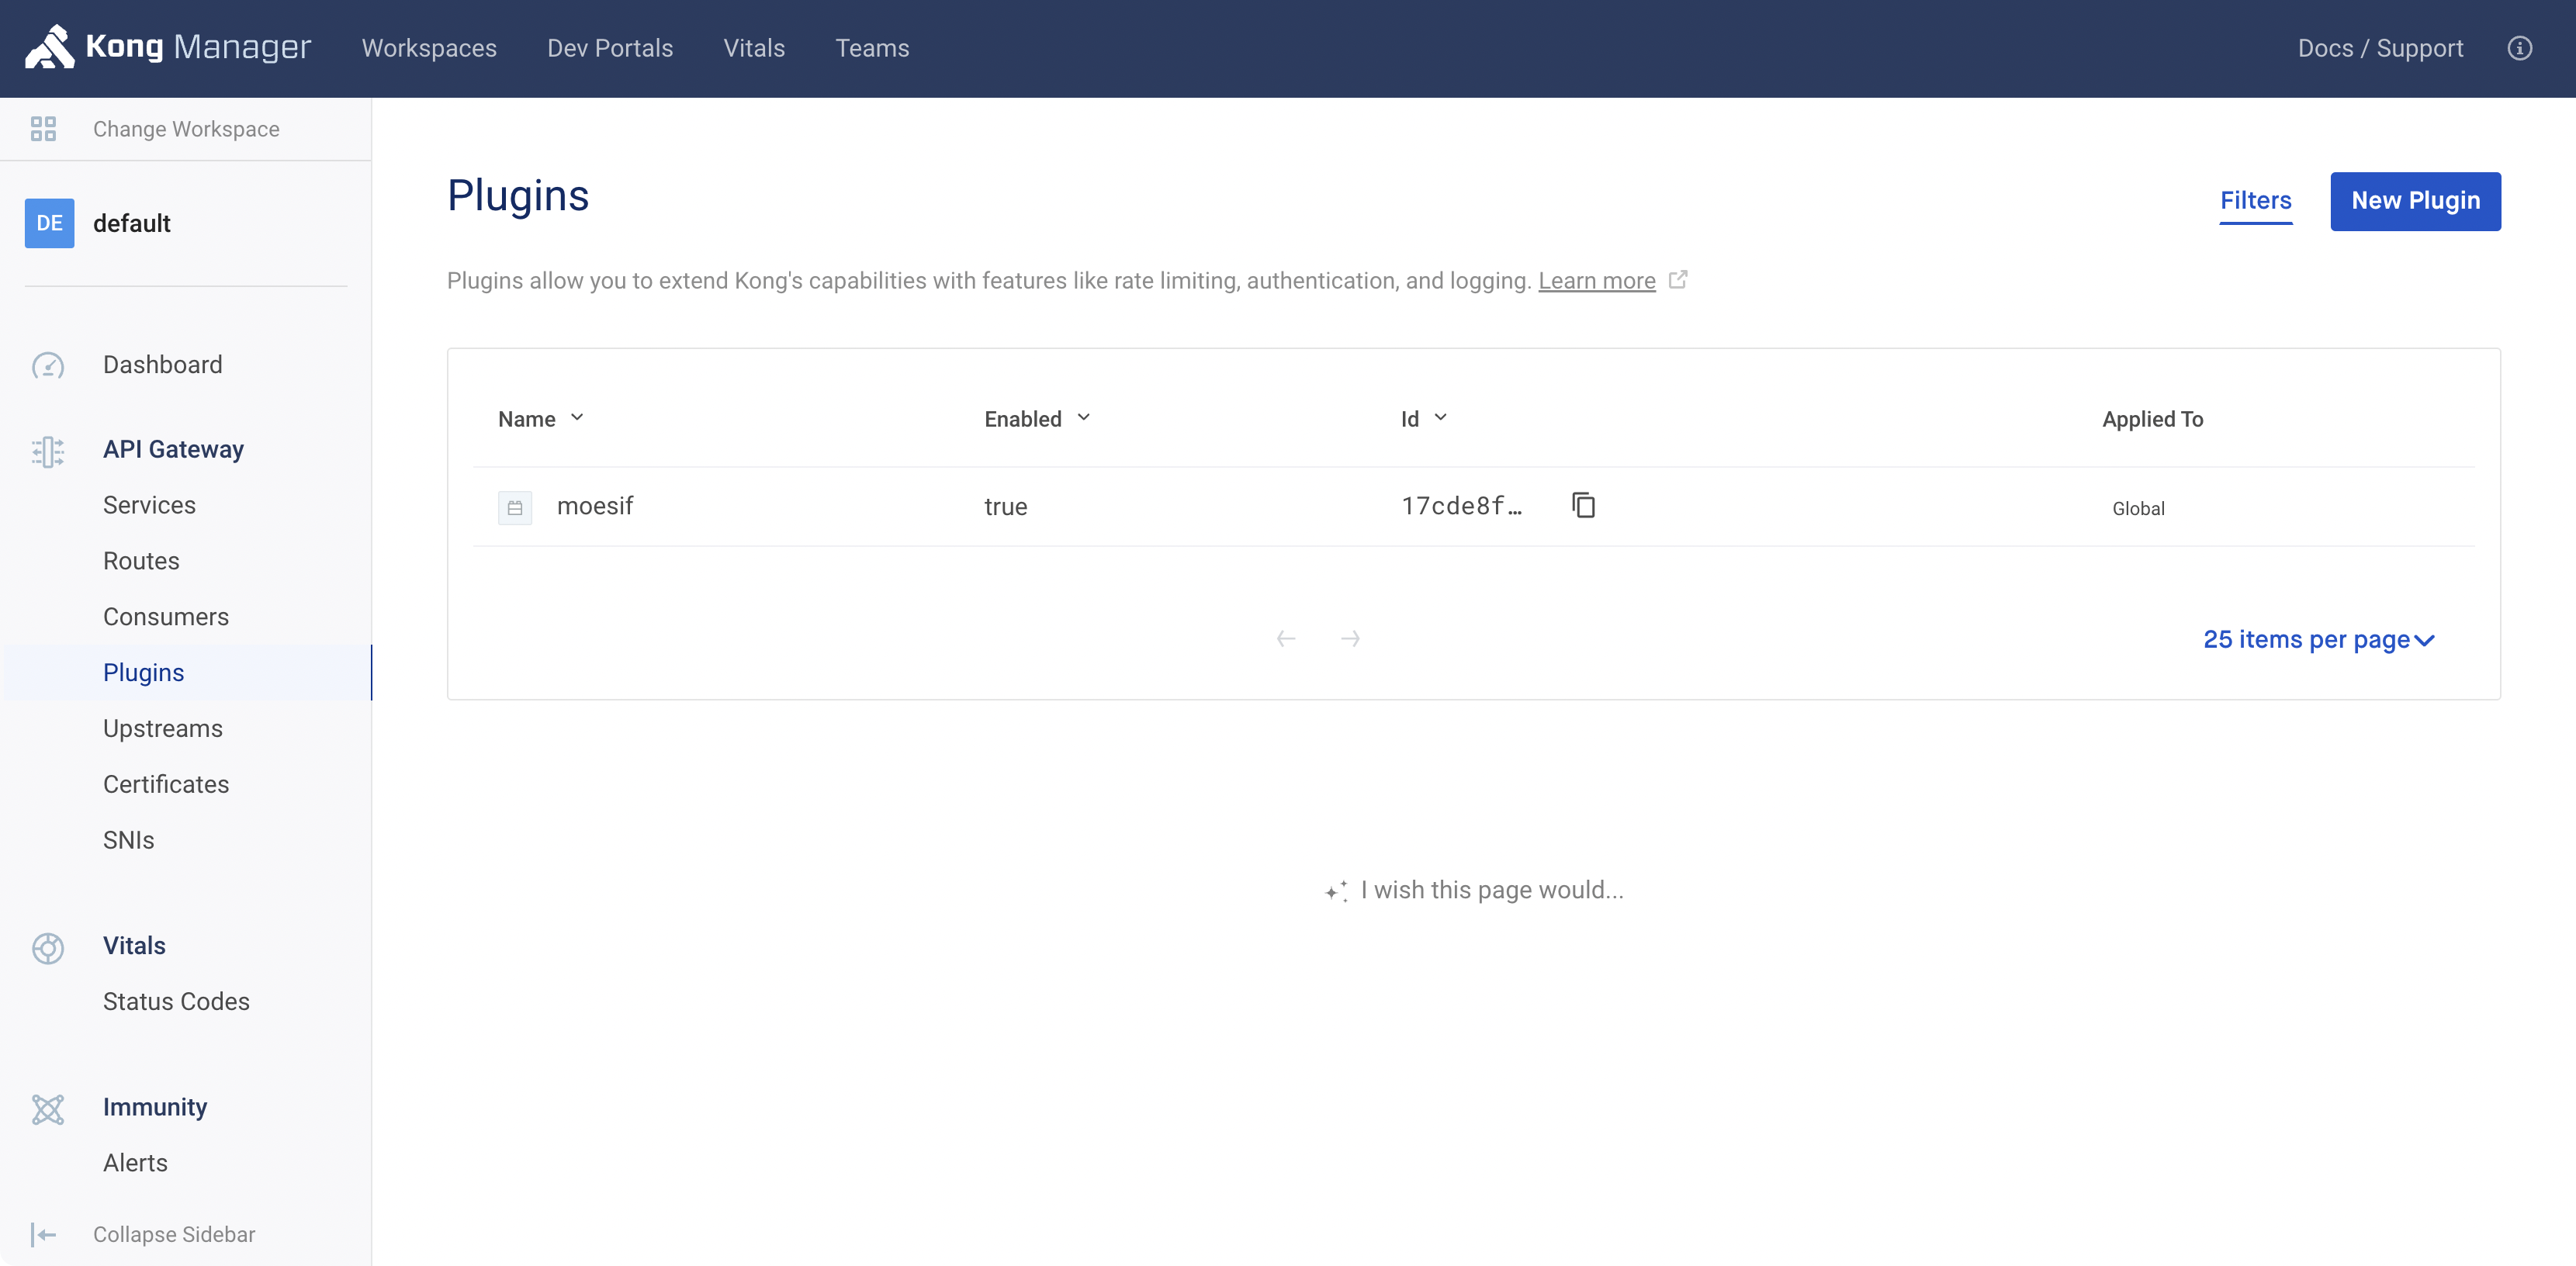
Navigate to the Plugins page on your Kong Dashboard. You should see that the Moesif plugin has been enabled and configured.
Again, restart Kong through our container’s Bash shell for our changes to take effect.
# kong restart
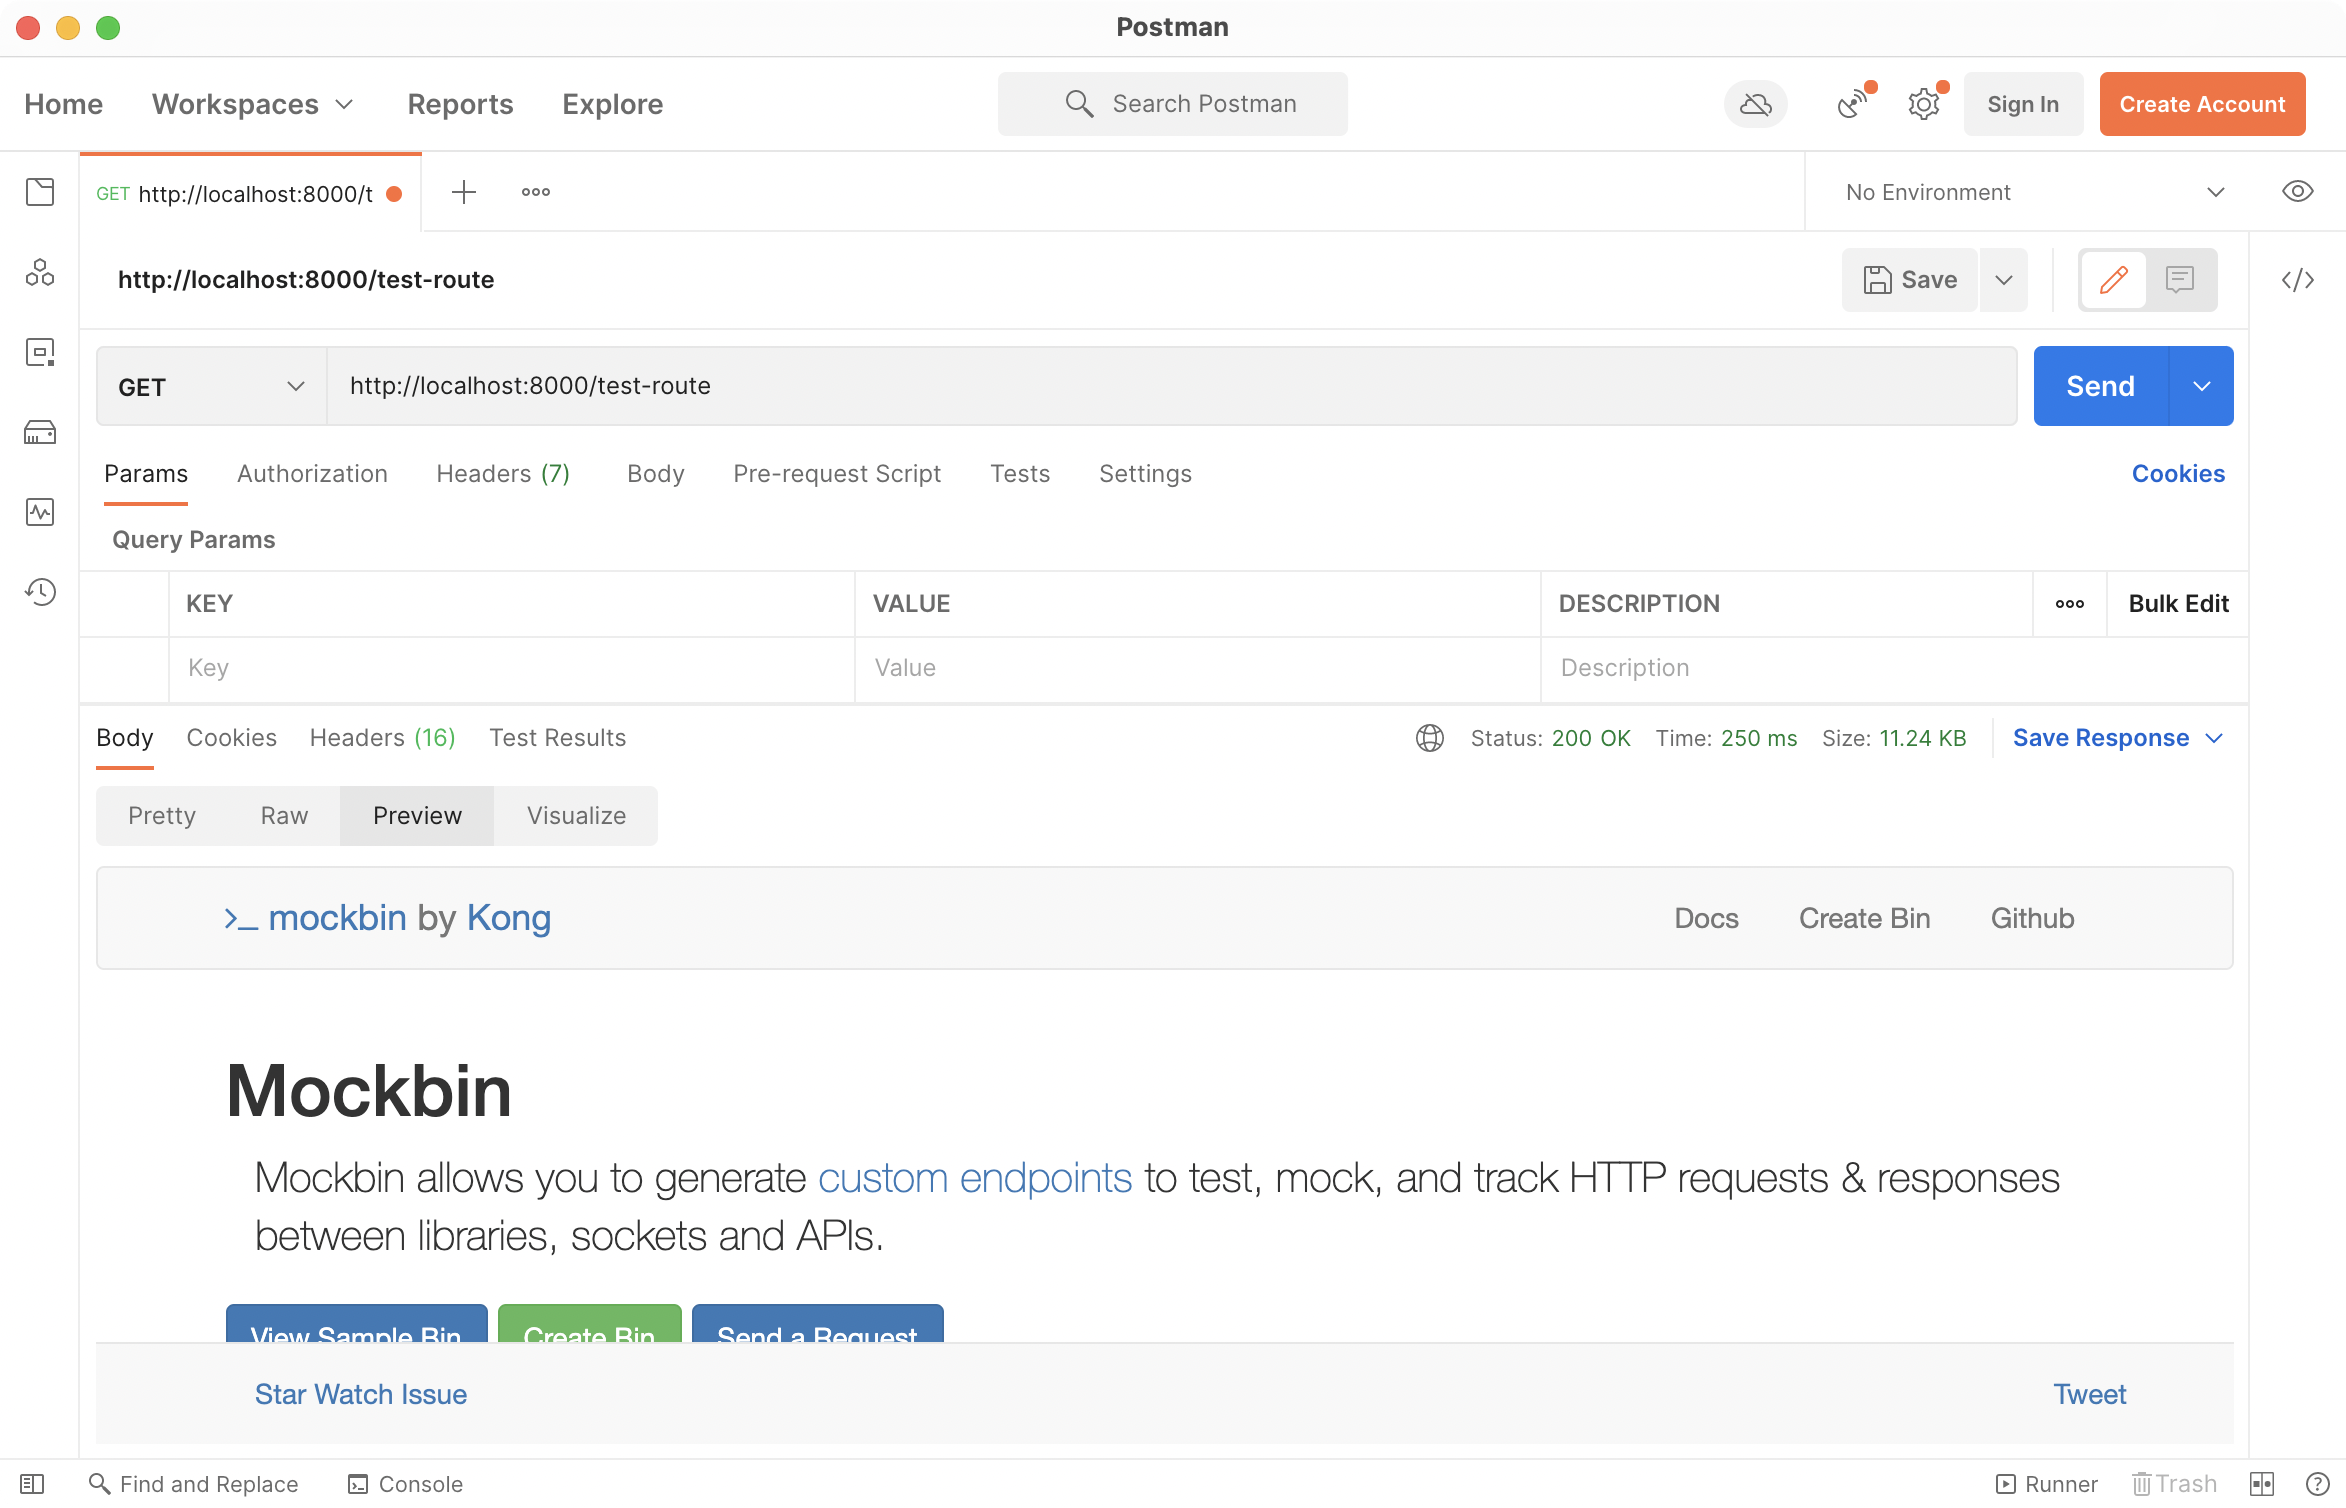
Step 9: Send a Request to Your Endpoint
Using your application or favorite tool, send a request to your endpoint. It can take a few minutes to propagate into Moesif.
Step 10: Confirm Your Integration
After the request is sent, Moesif should receive the event and data. This may take a few moments for the first request to reflect in the system once sent. Once received, Moesif will confirm that you are ready to move forward. The previous prompt will turn green and show “Data Received!”.
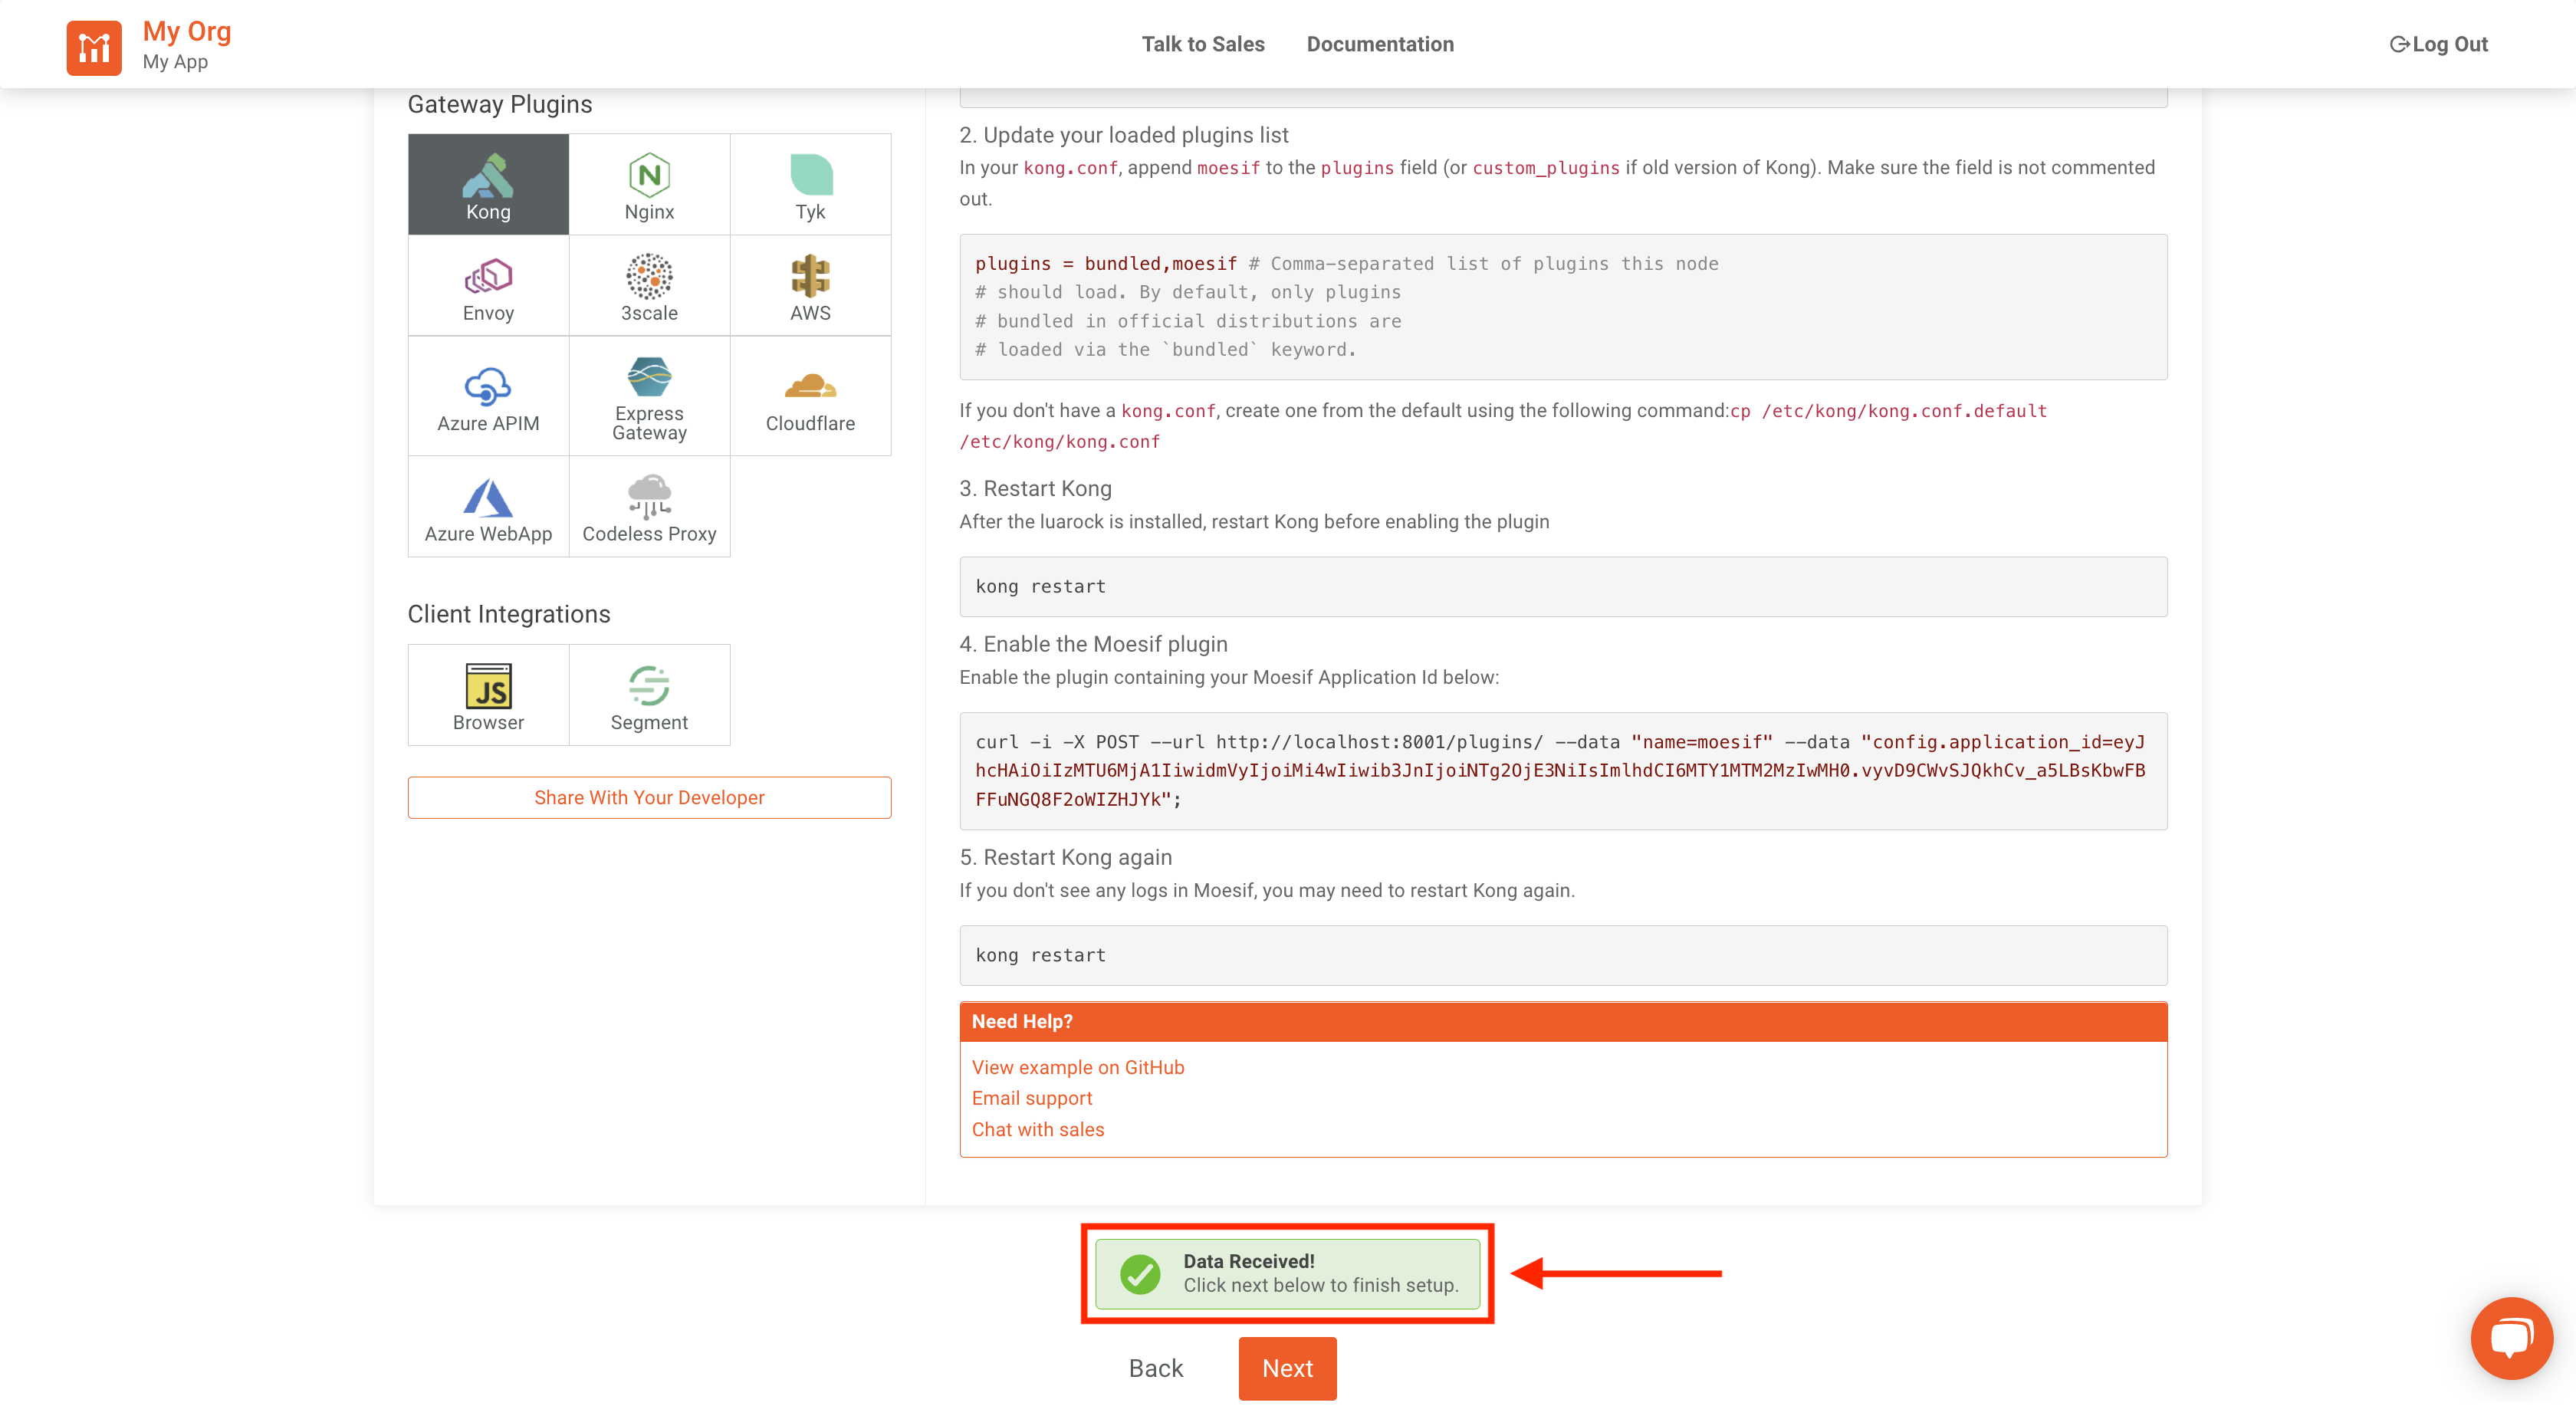
Lastly, scroll to the bottom of the screen and click Next.
Step 11: Invite Your Team
The final step in the setup is to invite your team. The next screen is where you can do this quickly and easily.
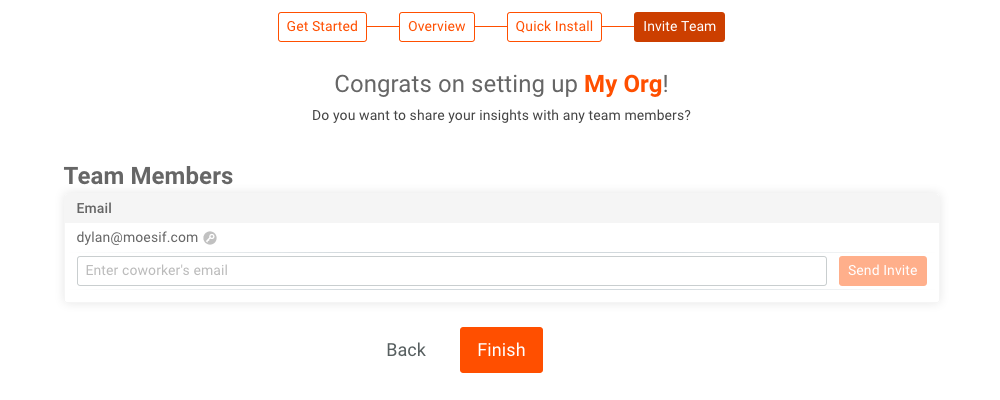
If you’d like to add a team member, simply add their email and click Send Invite.If you don’t have any team members yet or want to skip this step, you can always add team members later.
Once you’ve added all the team members you want, click Finish.
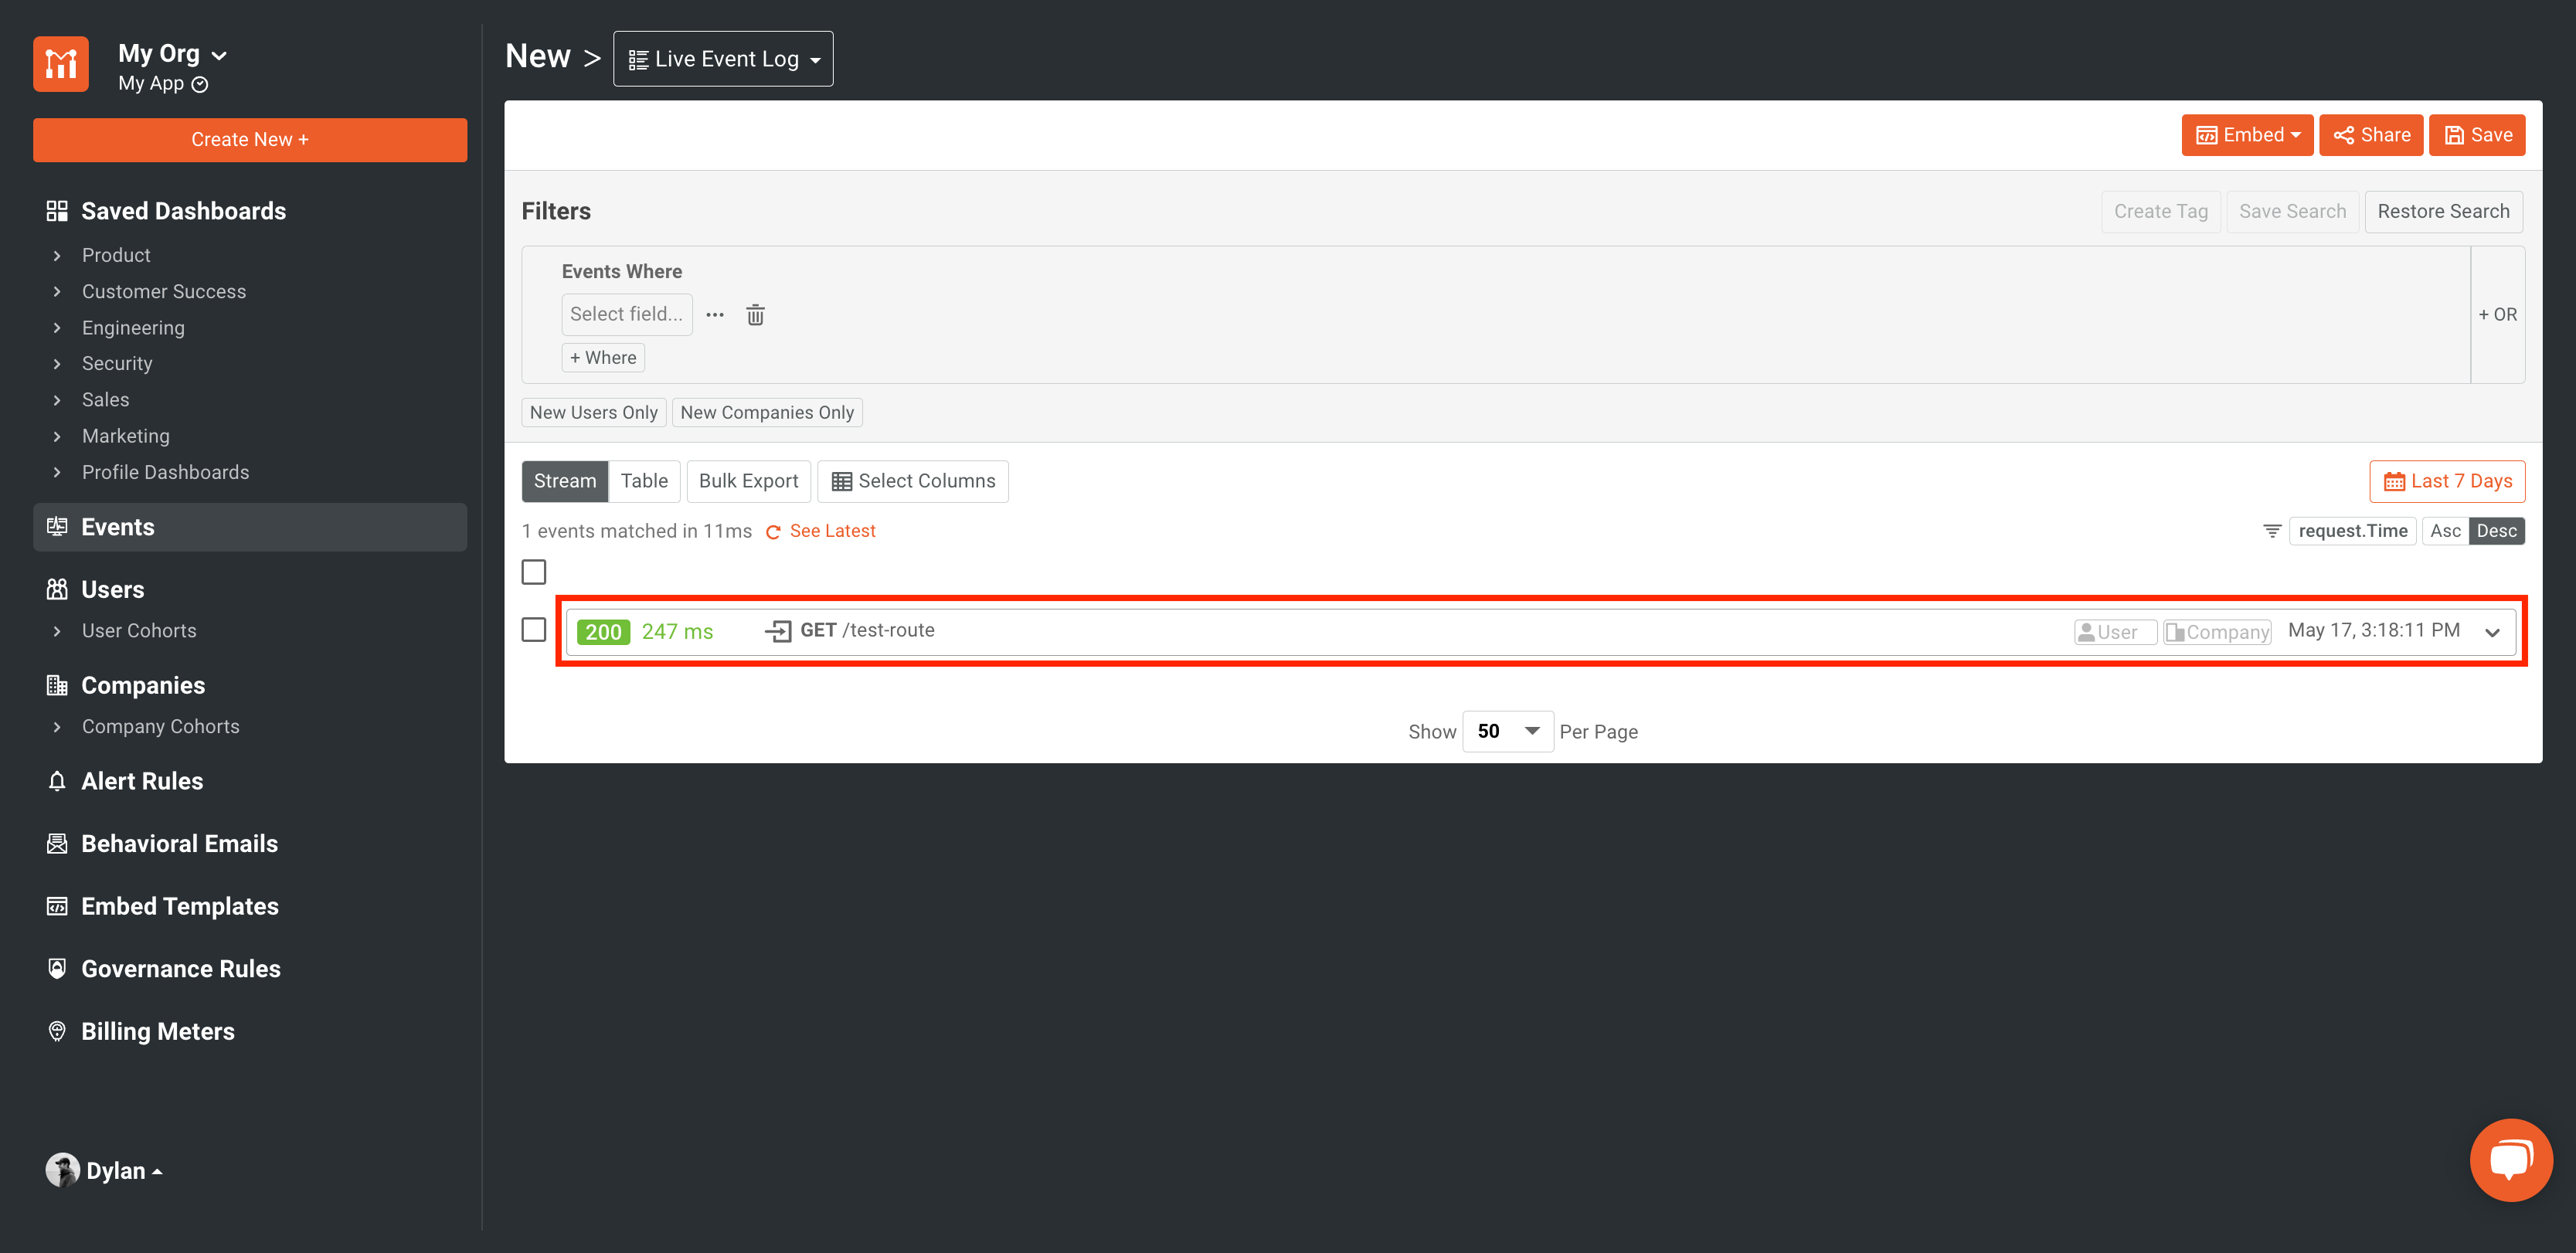
Explore Moesif
You’ve now successfully integrated your Kong Gateway with Moesif. You should now see the request in your Moesif dashboard.
Now that your API is integrated and moving data into Moesif you can start to explore. Check out our docs to find everything from API analytics, monitoring and alerts, and more!