Creating User Funnels
Tracking users throughout their journey is an important part of building a great product. Using the User Funnel Metrics functionality within Moesif is an easy and effective way to track key metrics within that funnel.
In this guide, we will be setting up a 4-step funnel to track users through a specific journey/funnel.
This journey will consist of the following steps:
- Register
- The user creates an account by calling the /register endpoint
- Integrate
- The user integrates with the product by calling the /integrate endpoint
- Test
- The user sends their first data to the platform by calling the /send endpoint
- Purchase
- The user decides to purchase the product (possibly after a free trial period) by calling the /purchase endpoint.
Based on this funnel we can assume that users have registered, used the product, and after that have decided to purchase/subscribe to the product. As the users move through the journey we can see where they drop off. Using this, we can investigate further and take action to improve the funnel. After these improvements, we can once again track to make sure we are heading in the right direction. Using metrics and tools like this is a solid strategy for iterating through improvement to the application.
For this example, to follow along we make the following assumptions:
- You have a Moesif account and application set up
- You have integrated with your platform of choice
- You have user tracking enabled for your installation
Let’s proceed!
Step 1: Implementing the Endpoints
I have created a very simple Node API that is integrated with Moesif. It uses a JSON Web Token (JWT) to enable user tracking and consists of the four endpoints mentioned above. The code looks like this (in a file named App.js):
const express = require('express')
const jwt = require('express-jwt');
const moesif = require('moesif-nodejs');

const app = express()
const port = 5000

const moesifMiddleware = moesif({
 applicationId: 'MOESIF_APPLICATION_ID',

 // Optional hook to link API calls to users
 identifyUser: function (req, res) {
   return req.user ? req.user.id : undefined;
 },
});

// 3. Enable the Moesif middleware to start logging incoming API Calls
app.use(moesifMiddleware);

app.get('/register',
 jwt({ secret: 'shhhhhhared-secret', algorithms: ['HS256'] }),
 (_req, res) => {
   res.status(200)
   res.send('user registered');
 }
)

app.get('/integrate',
 jwt({ secret: 'shhhhhhared-secret', algorithms: ['HS256'] }),
 (_req, res) => {
   res.status(200)
   res.send('user integrated');
 }
)

app.get('/test',
 jwt({ secret: 'shhhhhhared-secret', algorithms: ['HS256'] }),
 (_req, res) => {
   res.status(200)
   res.send('test complete');
 }
)

app.get('/purchase',
 jwt({ secret: 'shhhhhhared-secret', algorithms: ['HS256'] }),
 (_req, res) => {
   res.status(200)
   res.send('user purchased!');
 }
)

app.listen(port, () => {
 console.log(`Example app listening at http://localhost:${port}`);
})
I will now start the server using:
node app.js
Step 2: Sending the Requests
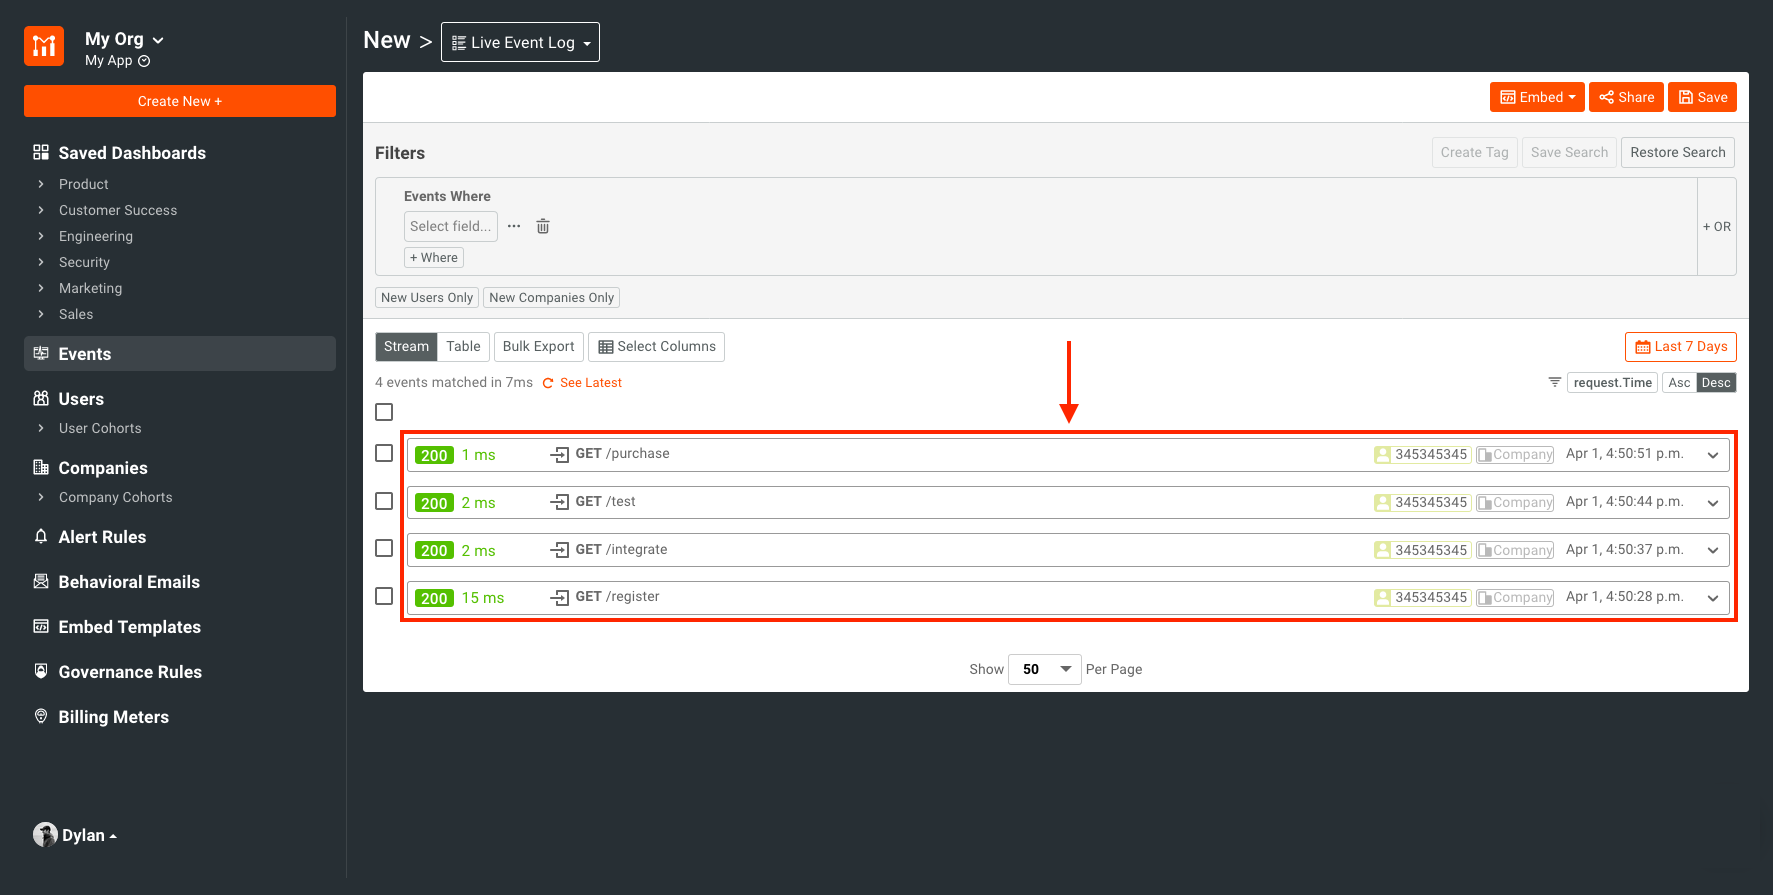
Once the server is up, I will send a request to each of the endpoints, in this order:
- http://localhost:5000/register
- http://localhost:5000/integrate
- http://localhost:5000/test
- http://localhost:5000/purchase
NOTE: the easiest way to do this is to use Postman. If you are unsure about how to generate a JWT or use Postman to hit these endpoints, check out our tutorial on User Tracking in Node.js)
Once these 4 endpoints have been hit, we should see the events trickle into Moesif. They should look similar to this.
Step 3: Creating the User Funnel
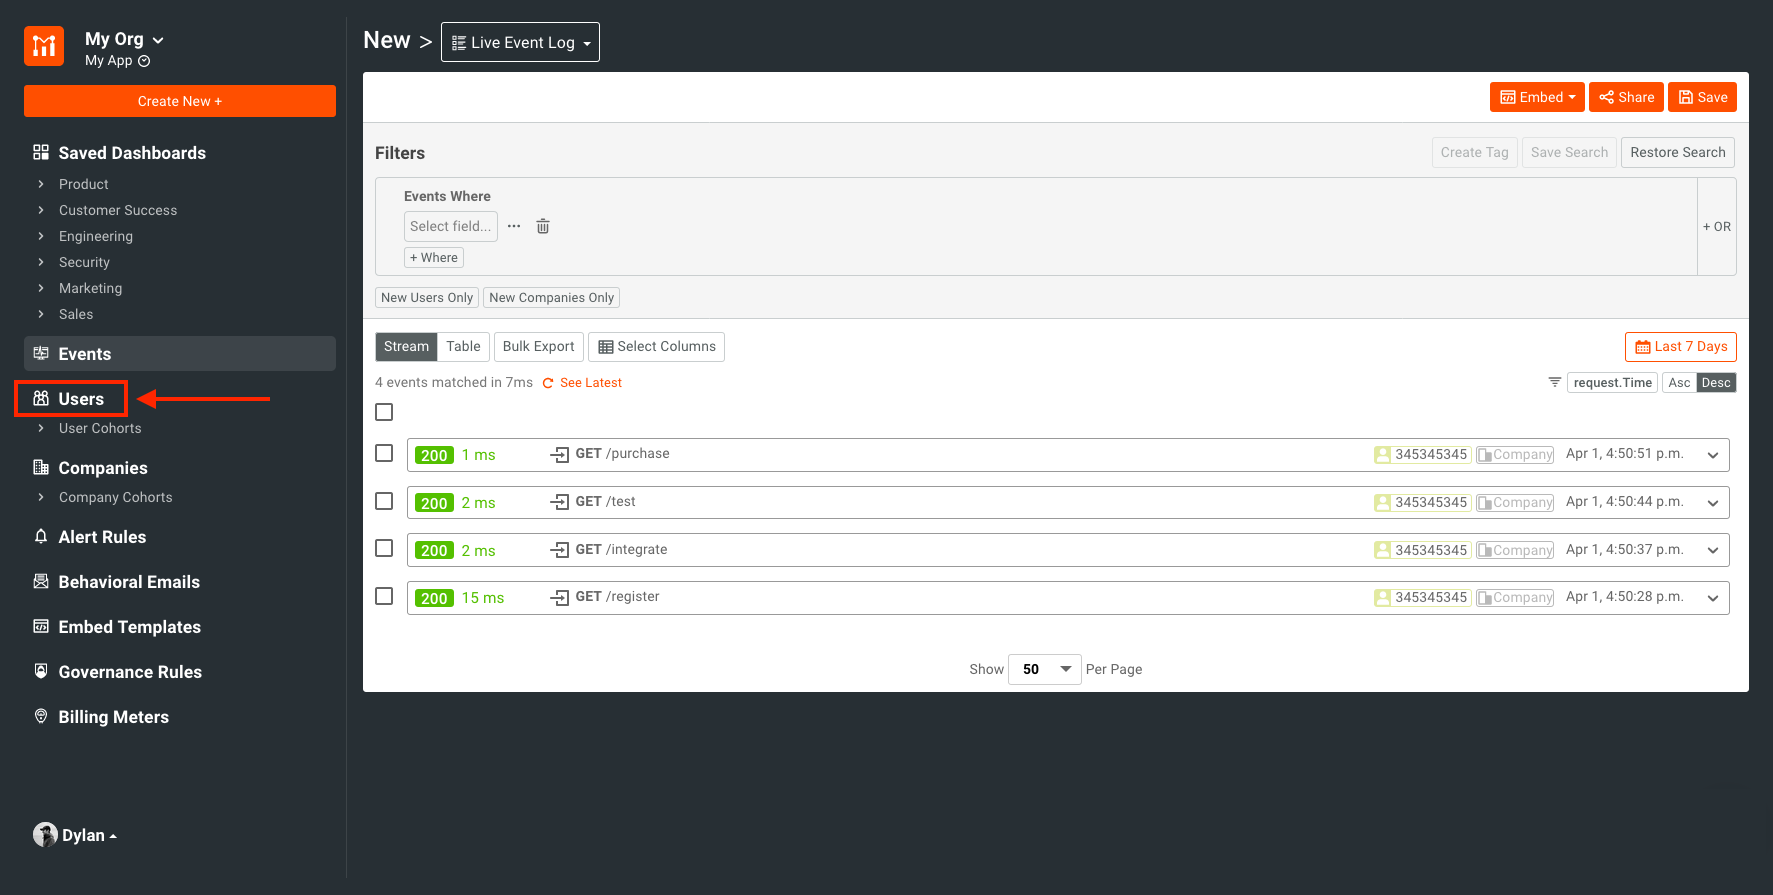
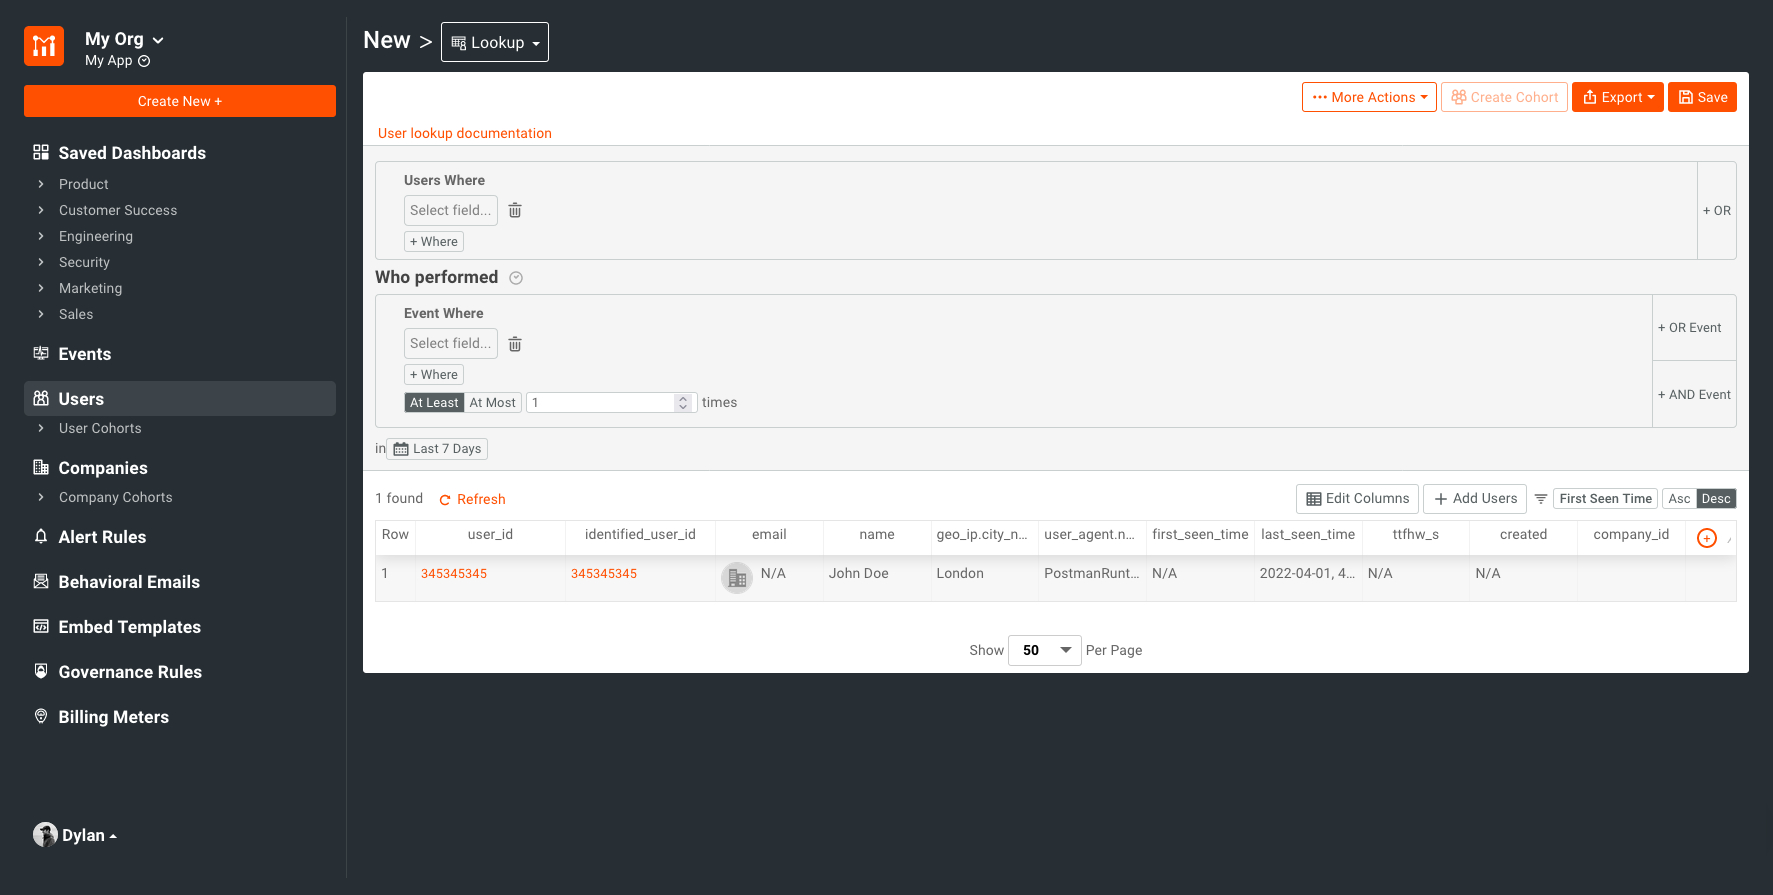
Once your requests are logged, you’ll want to navigate to the Users section on the left navigation pane in Moesif.
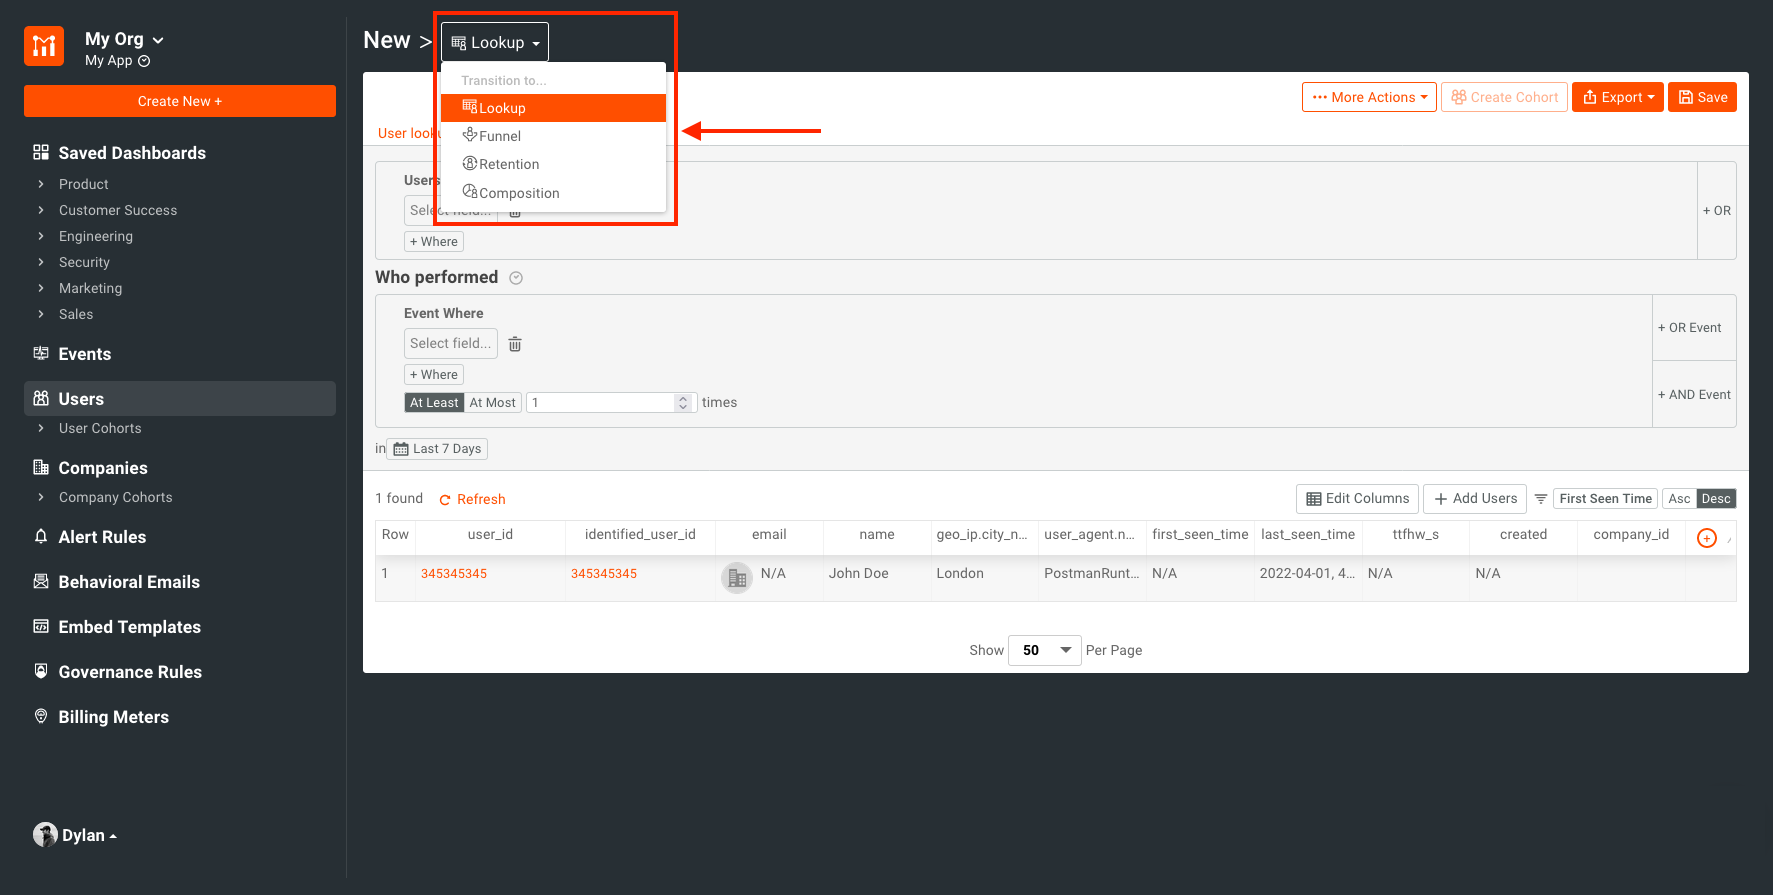
Once here, we will navigate to the New dropdown and select Funnel.
NOTE: Certain filter criteria will take some time to propagate to this interface. I will be using Response.URI Route below. This may take up to 15 minutes to appear after your first request is sent due to processing within Moesif. If your URI Route or other criteria are not showing up, please ensure you have given adequate time for these to propagate.
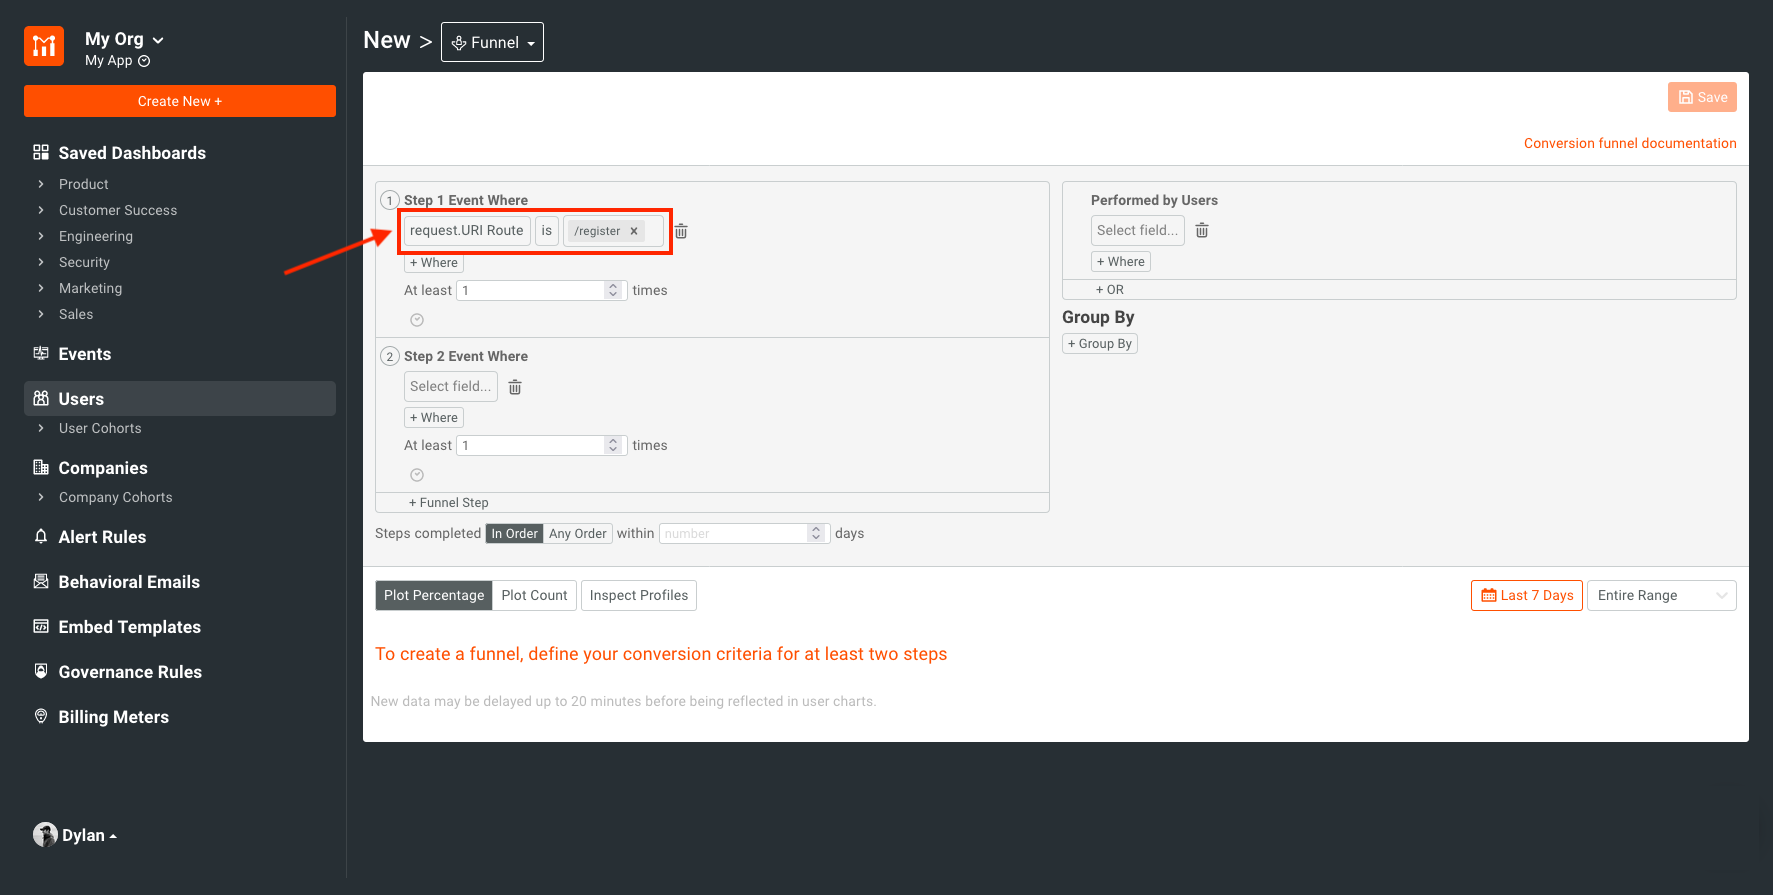
In the Funnel screen, we will set up the first step in our funnel. Our criteria for the first step is when a user calls the /register API signalling that they have registered for our service. For this we will set up the following filter:
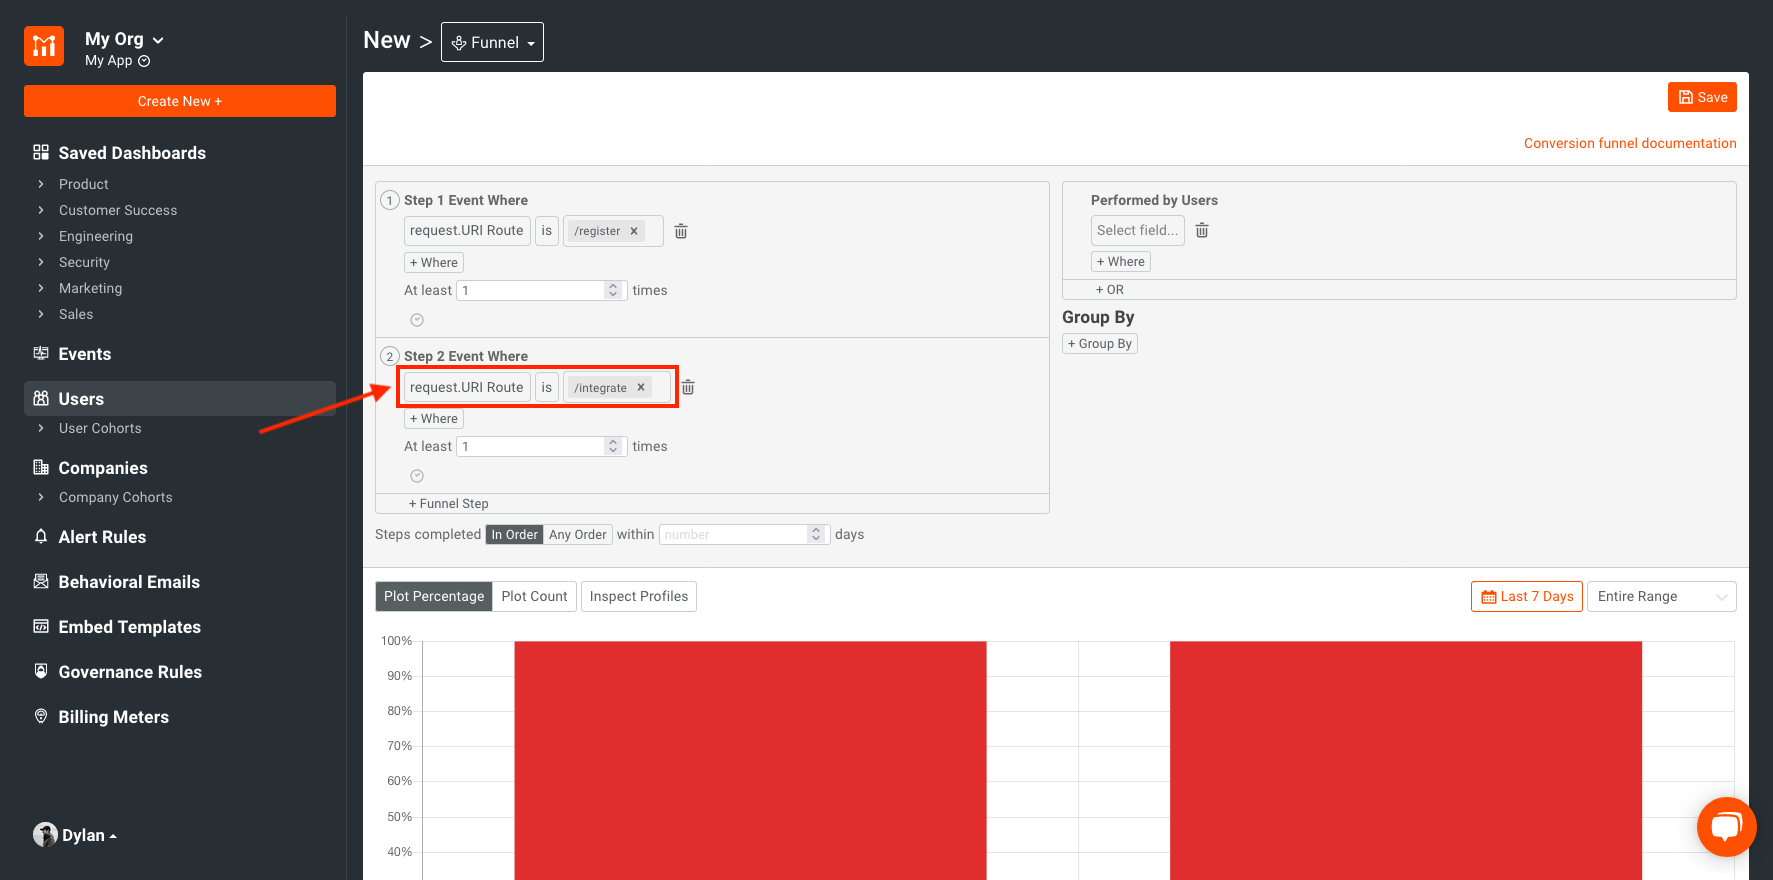
Our second step will be hit when the user then calls the /integrate endpoint signalling that they have integrated successfully with our service. For this, we will set up the following filter:
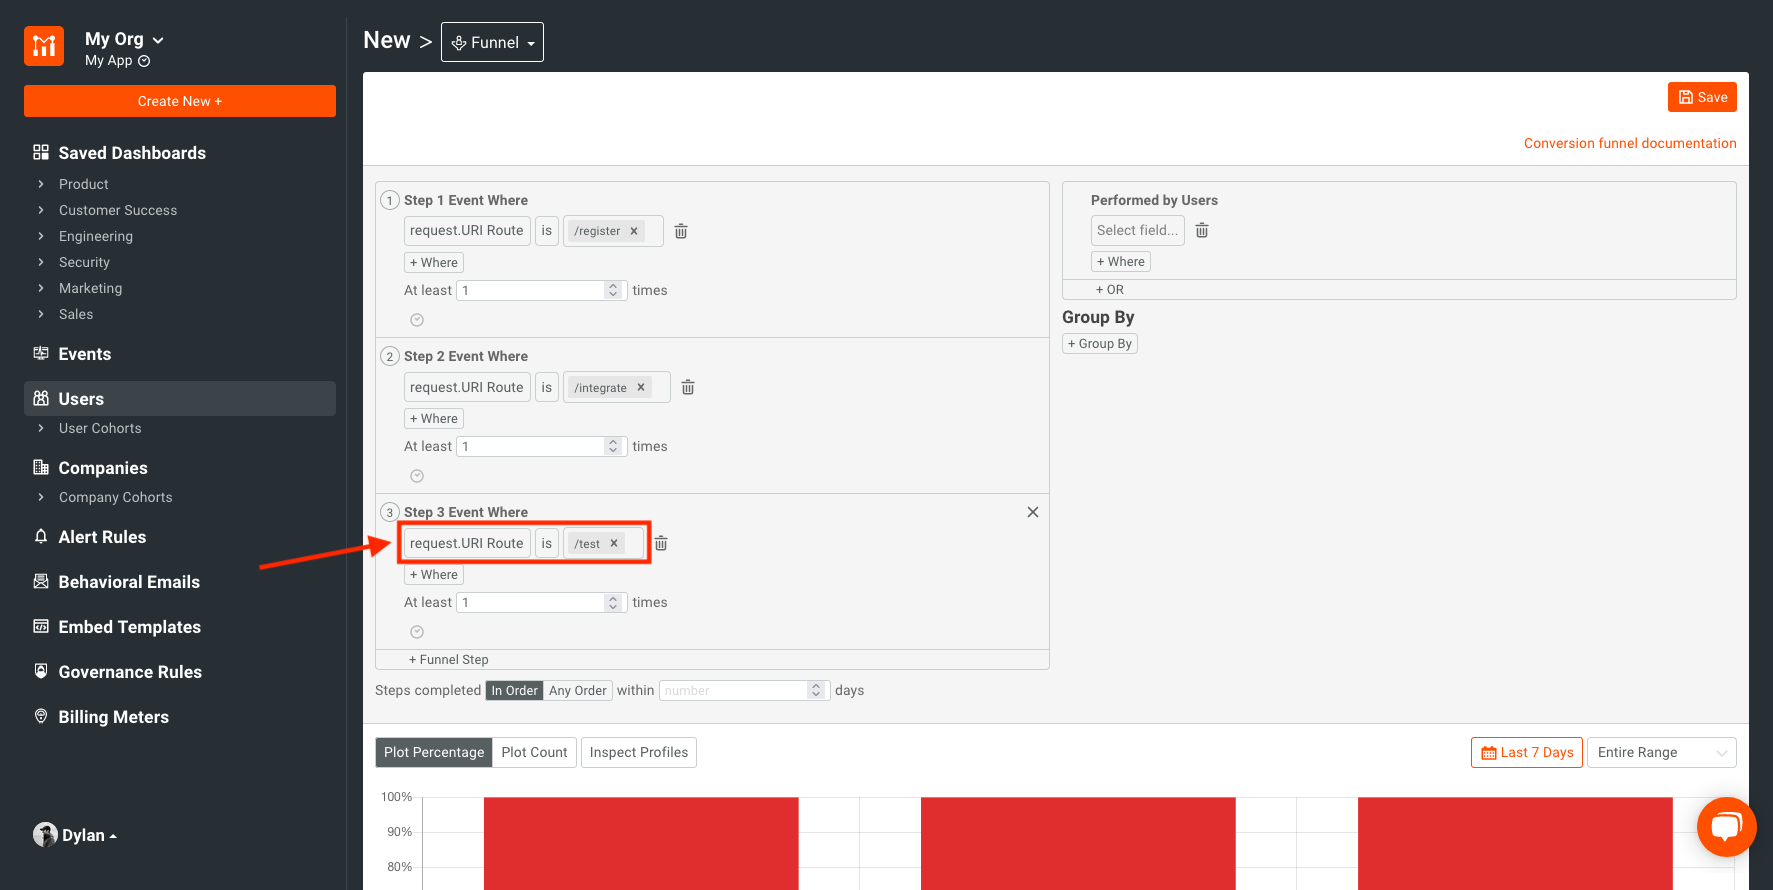
Our third step will be hit when the user calls the /test endpoint signalling that they have sent their first API call after integrating with the service. We will use this as a marker that they have begun to use the service. If the Step 3 filter entry is not present, you’ll need to click + Funnel Step.

Then, we will add the following criteria:
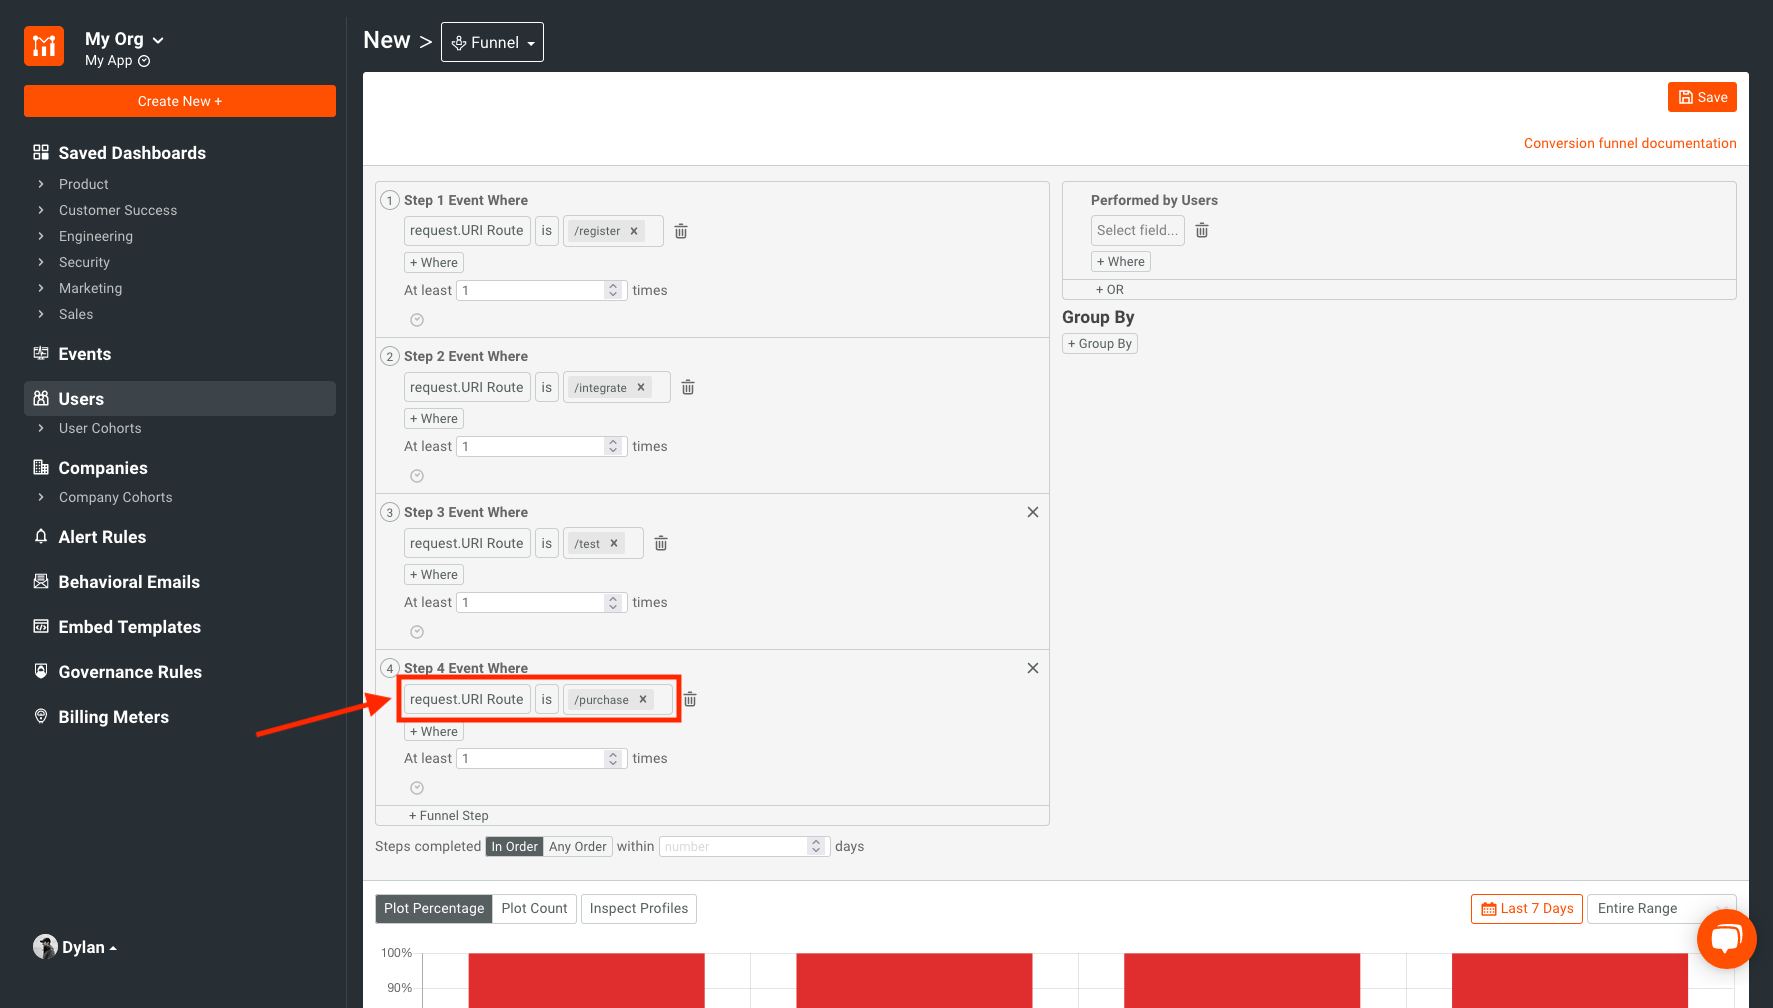
The fourth and final step in our user funnel is when the user calls the /purchase endpoint signalling that the user has now converted to a paying user. We will set up the following filter:
At this point, we have now set up our filter and should see the results in the results pane at the bottom of the screen.
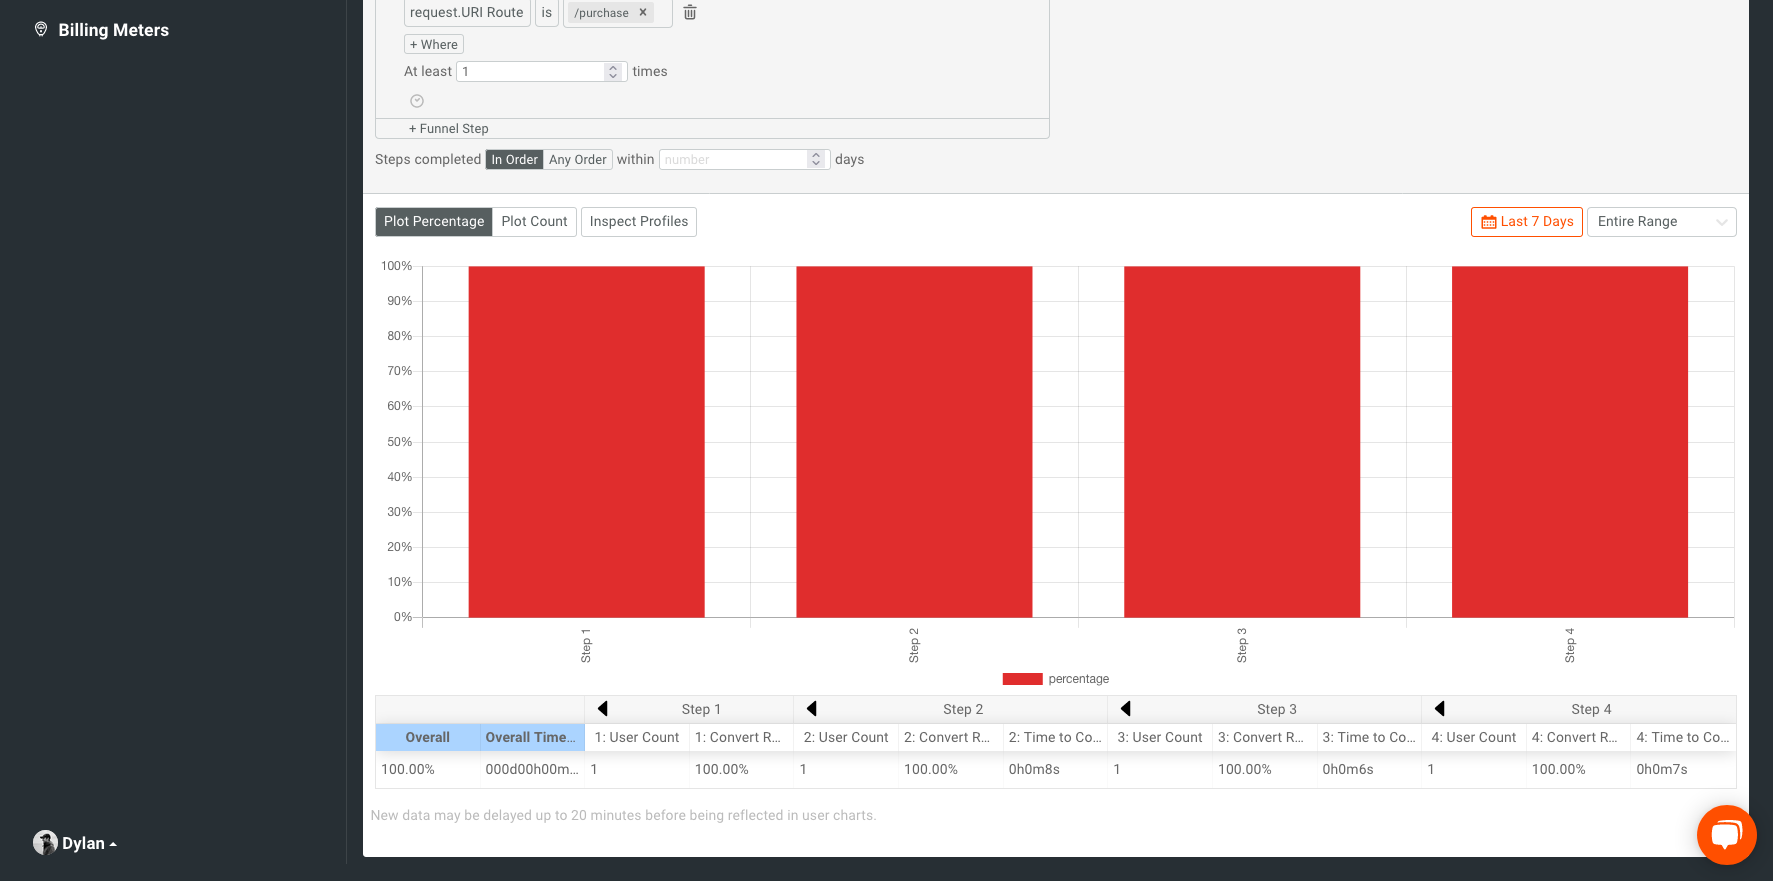
Since I have only sent through one call to each endpoint, currently I will see 100% conversion for each step in our funnel. As more calls come through, this will change and give us valuable insights as to where users are dropping off.
You’ll also be able to identify how long it takes for users to move from one part of the funnel to the next, and how many users have made it into that part of the funnel.
Step 4: Saving the Funnel
If we are happy with this funnel and want to save it for later, we can click Save in the top right corner of the screen:
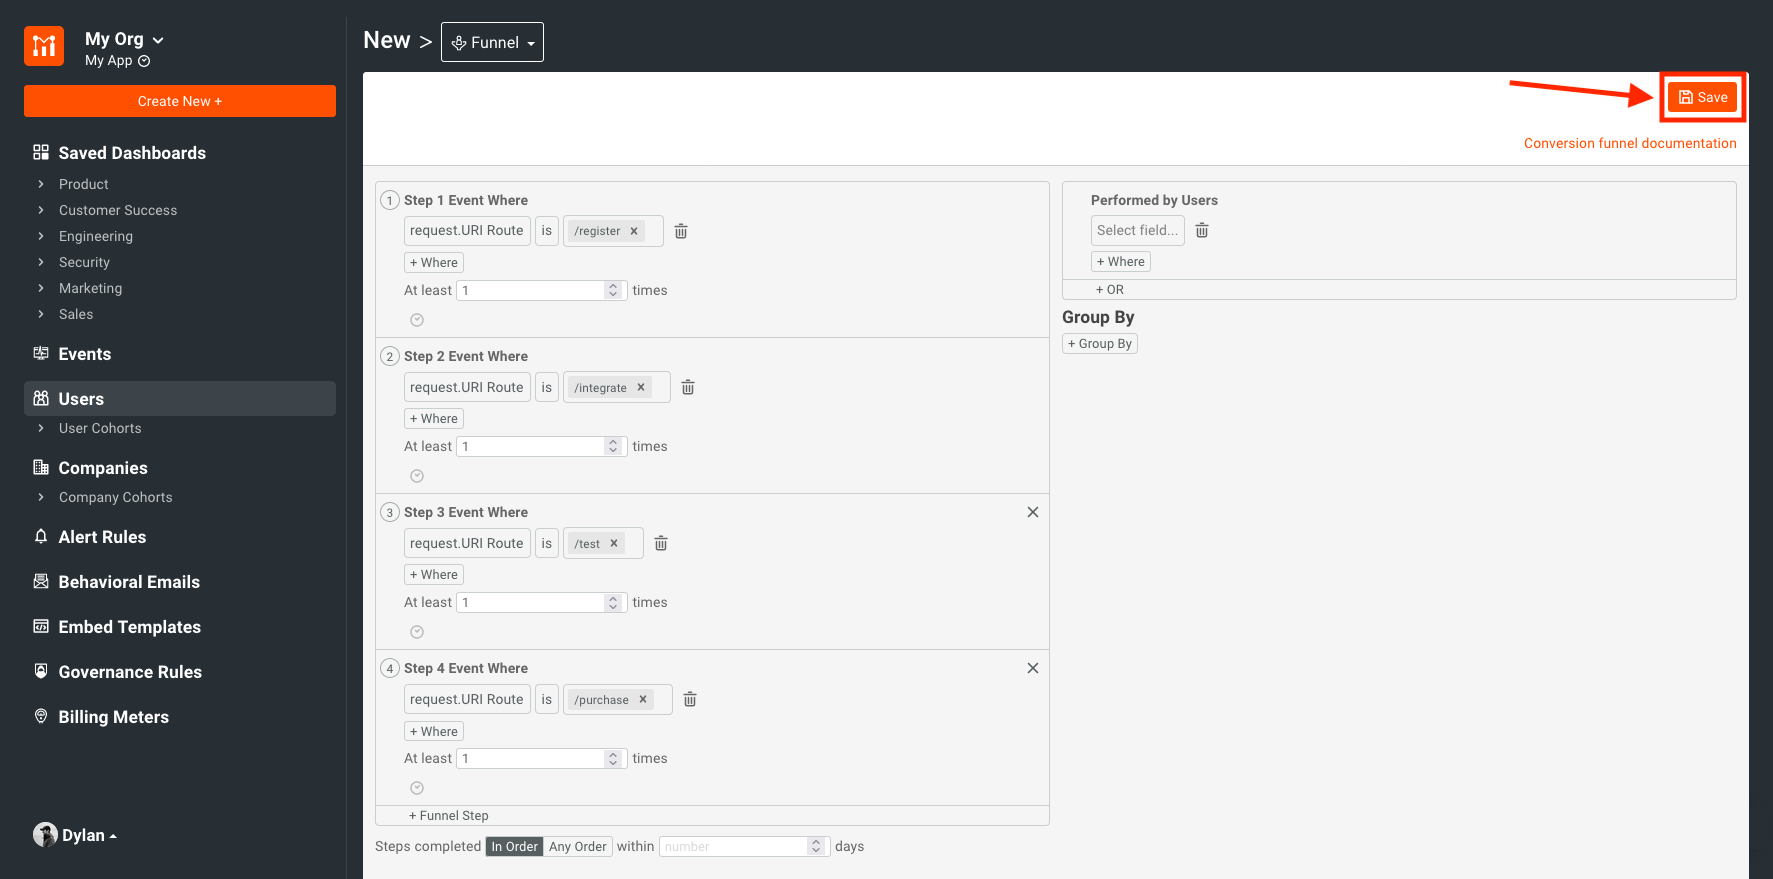
After clicking Save, you’ll be prompted to add in a few details to save the funnel under. These details include:
- Name
- this is the name that you will give this funnel/workspace.
- Share Type
- This allows you to specify who should be able to view your new User Funnel. You can choose to keep it private or share it with your team.
- Add to Dashboard
- This is the dashboard where you’d like to display your funnel metrics. If you want to create a new dashboard, you can do that here as well.
![save user funnel details with some input]()
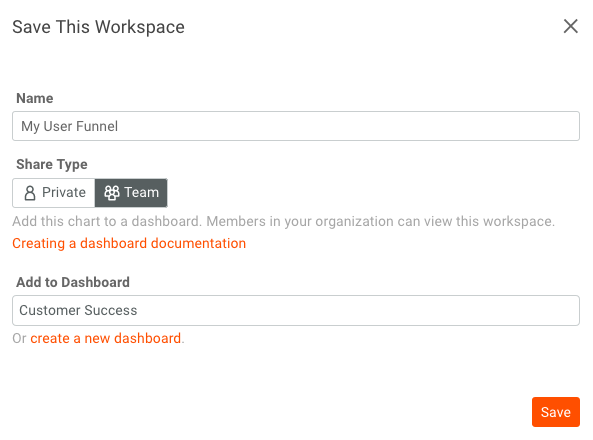
After filling out these details, click the Save button in the lower right corner of the modal.
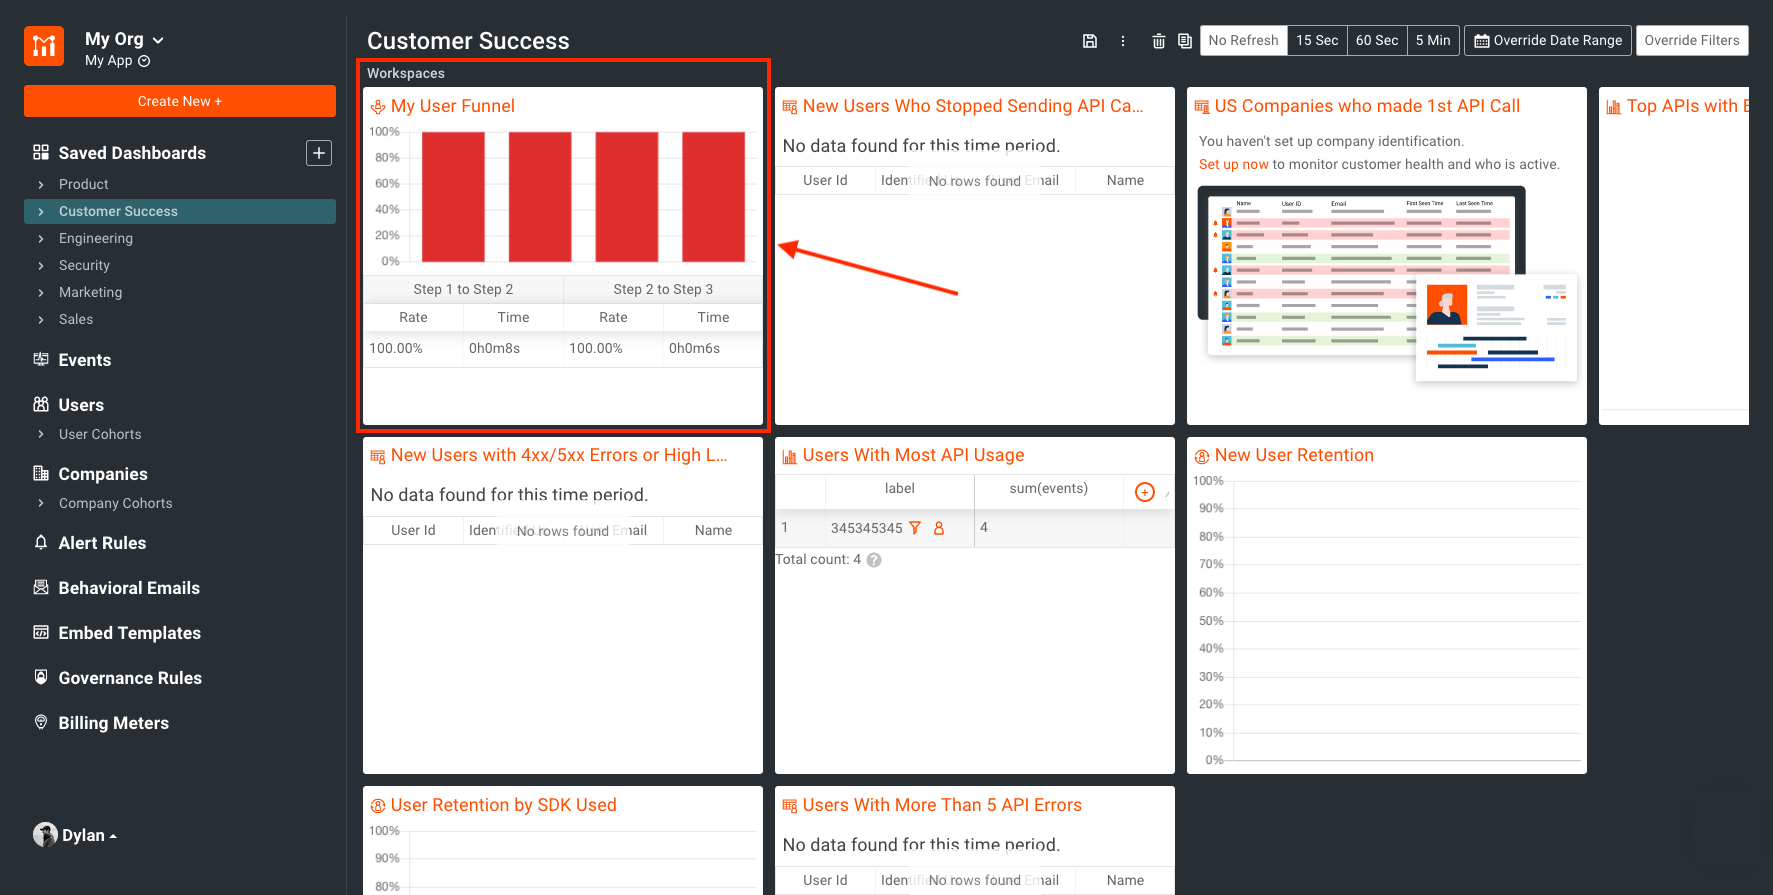
Now your funnel is saved and will show up on the dashboard you’ve saved it to.
That’s all there is to setting up a User Funnel in Moesif. For more info, check out our docs pages on the subject!