Tracking API Calls with AWS Gateway
Tracking API calls by anonymous usage is only part of the story when it comes to leveraging API analytics and metrics. A lot more value can come from knowing exactly what users are using specific endpoints and how they are using them.
In order to track API calls and attribute them to a user, the API calls must be authenticated. For this particular example, I’m going to use an API key when sending the request to identify who the request is coming from. To ensure that Moesif uses the API key to identify the user, we will need to tweak the logging config on our AWS API Gateway. The steps to do all of this will be covered below in detail.
It’s important to note that this tutorial assumes you have already integrated your AWS API Gateway instance with Moesif. If you haven’t please follow this guide to get Moesif and AWS API Gateway integrated before proceeding.
Getting Started
Any code referenced in this example will be from our previously released Building a REST API with AWS Gateway and NodeJS Blog.
Once your AWS API Gateway instance is integrated with Moesif, you’ll begin to see events roll in. Those events will look like this on the Moesif Events dashboard.
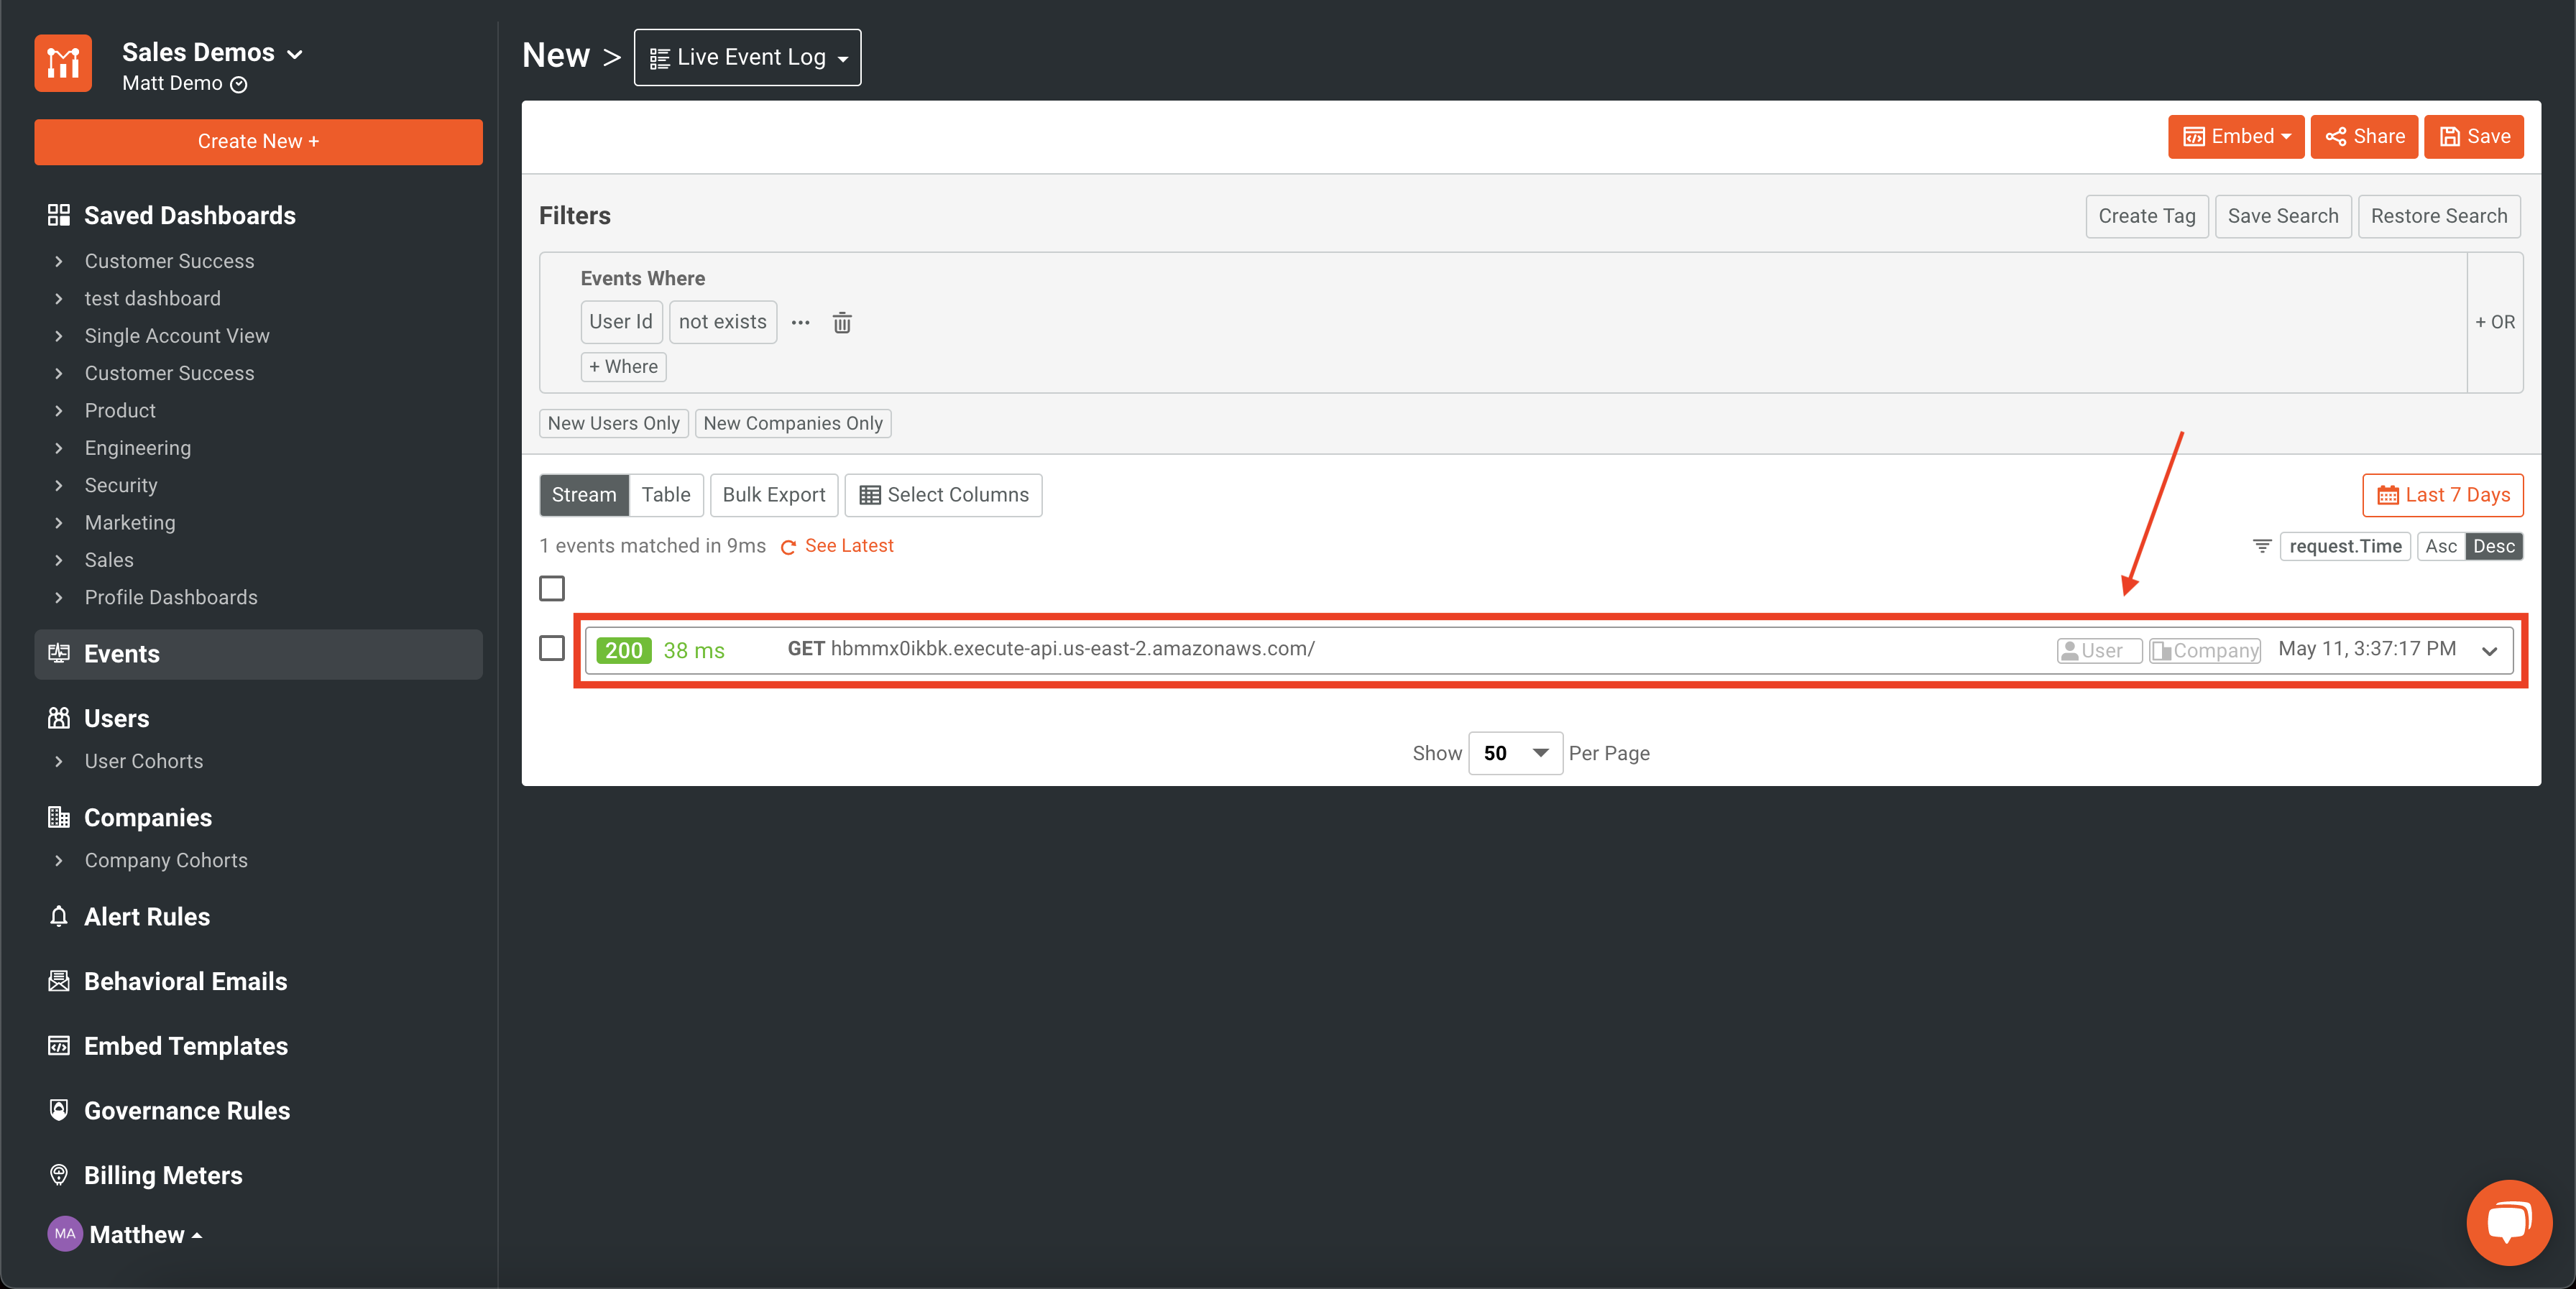
As you can see, each call currently coming into Moesif is not associated with a User or Company. In order to enable User tracking, we will need to enable API Key Auth on our API endpoint and tweak the logging config to map the User’s ID correctly to the API analytics coming into Moesif. Let’s start with enabling API key usage in the AWS API Gateway console.
Enable API key usage
After navigating to the API Gateway console, Under the Services menu, locate the API Gateway option. Next, select the API you want to enable API Key Usage on. Once selected, in the left-hand side of the navigation bar, click on the the Resources tab.
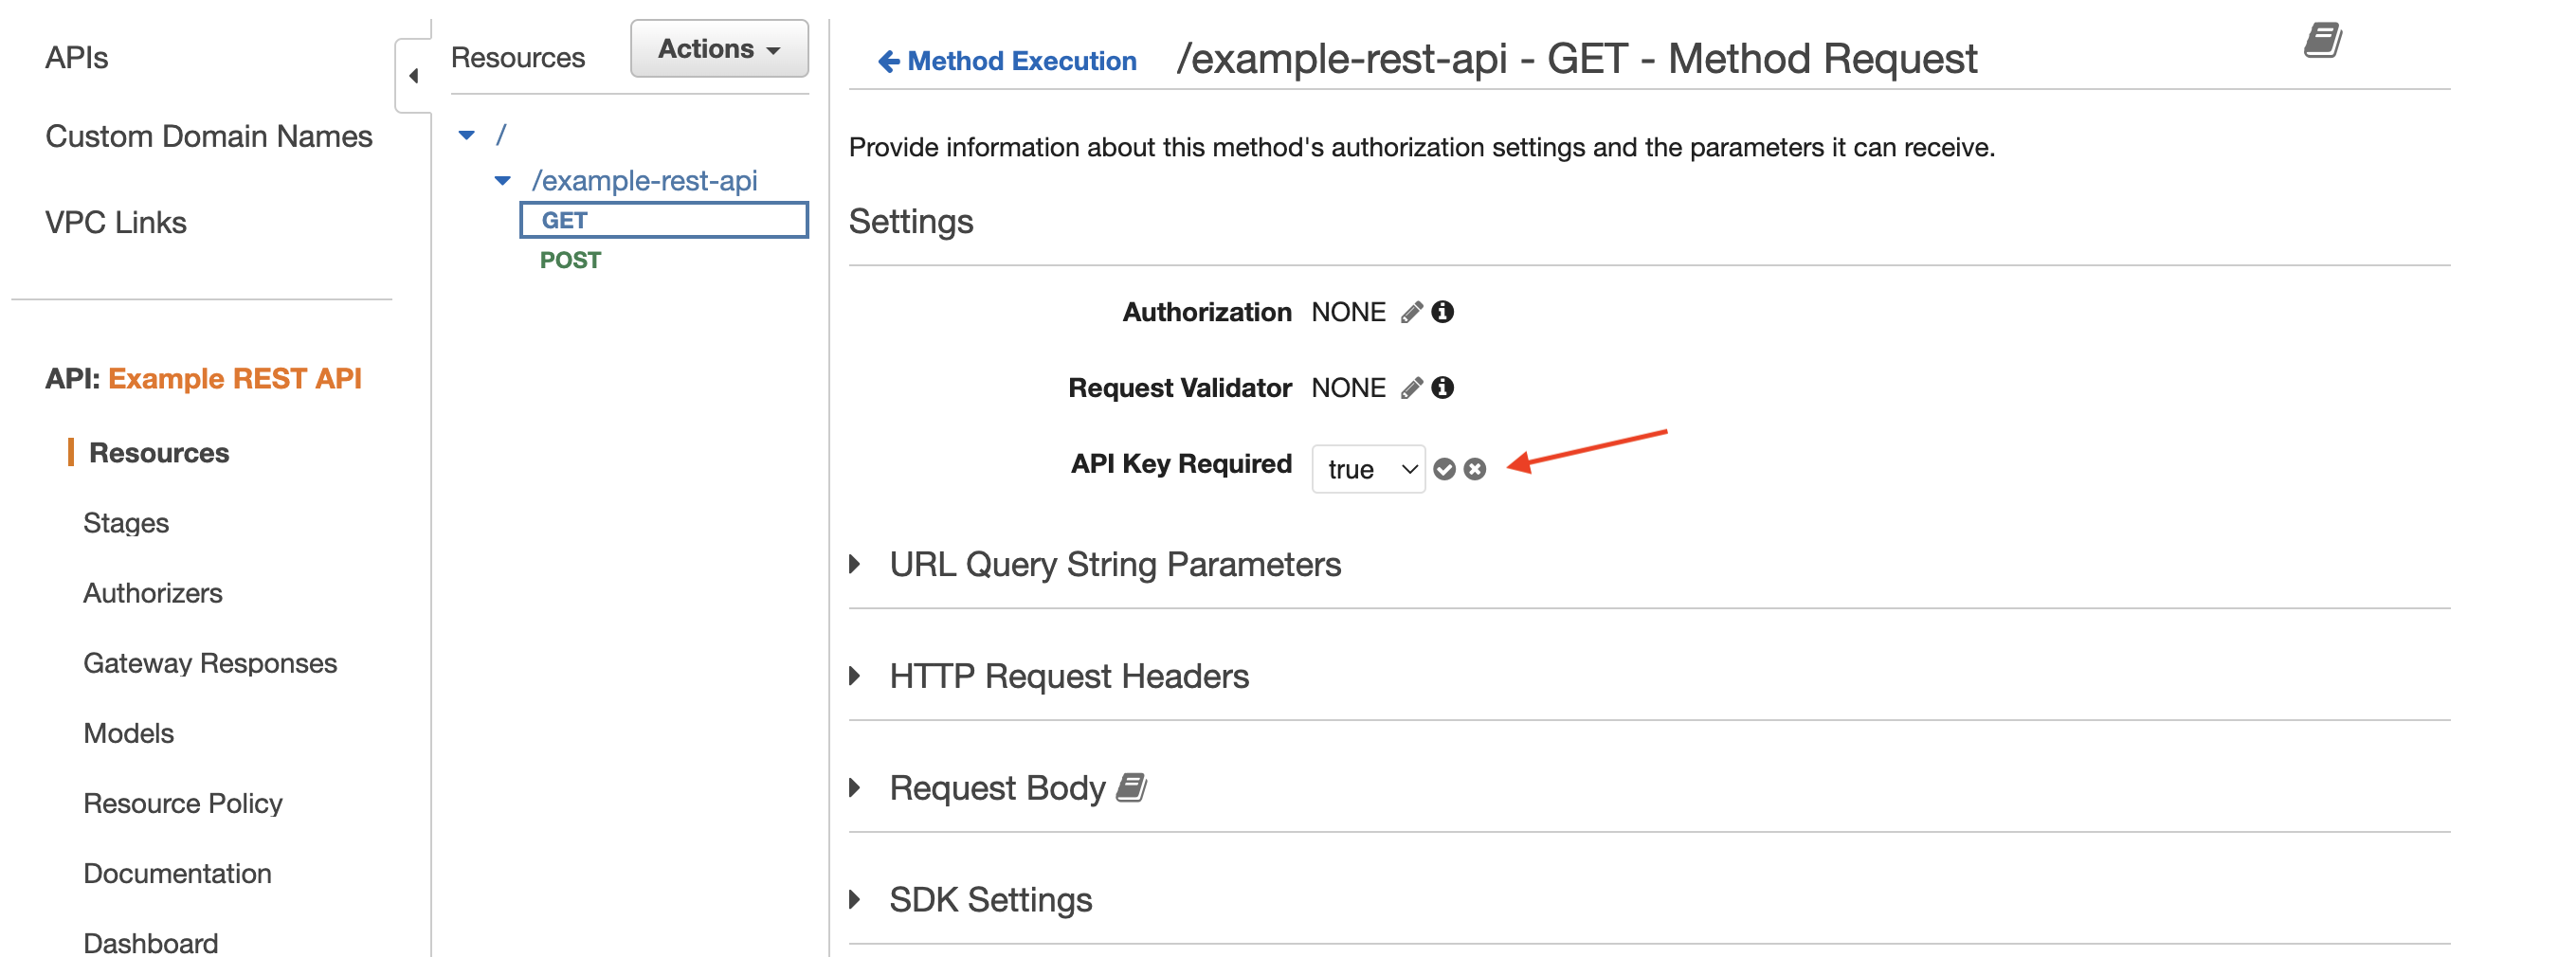
Once you are on the Resources page, select the method for which you want to enable API key usage. In AWS Gateway, set to API Key Required to true. In this example our endpoint can support both GET and POST methods. Firstly, we will enable key auth on the GET method.
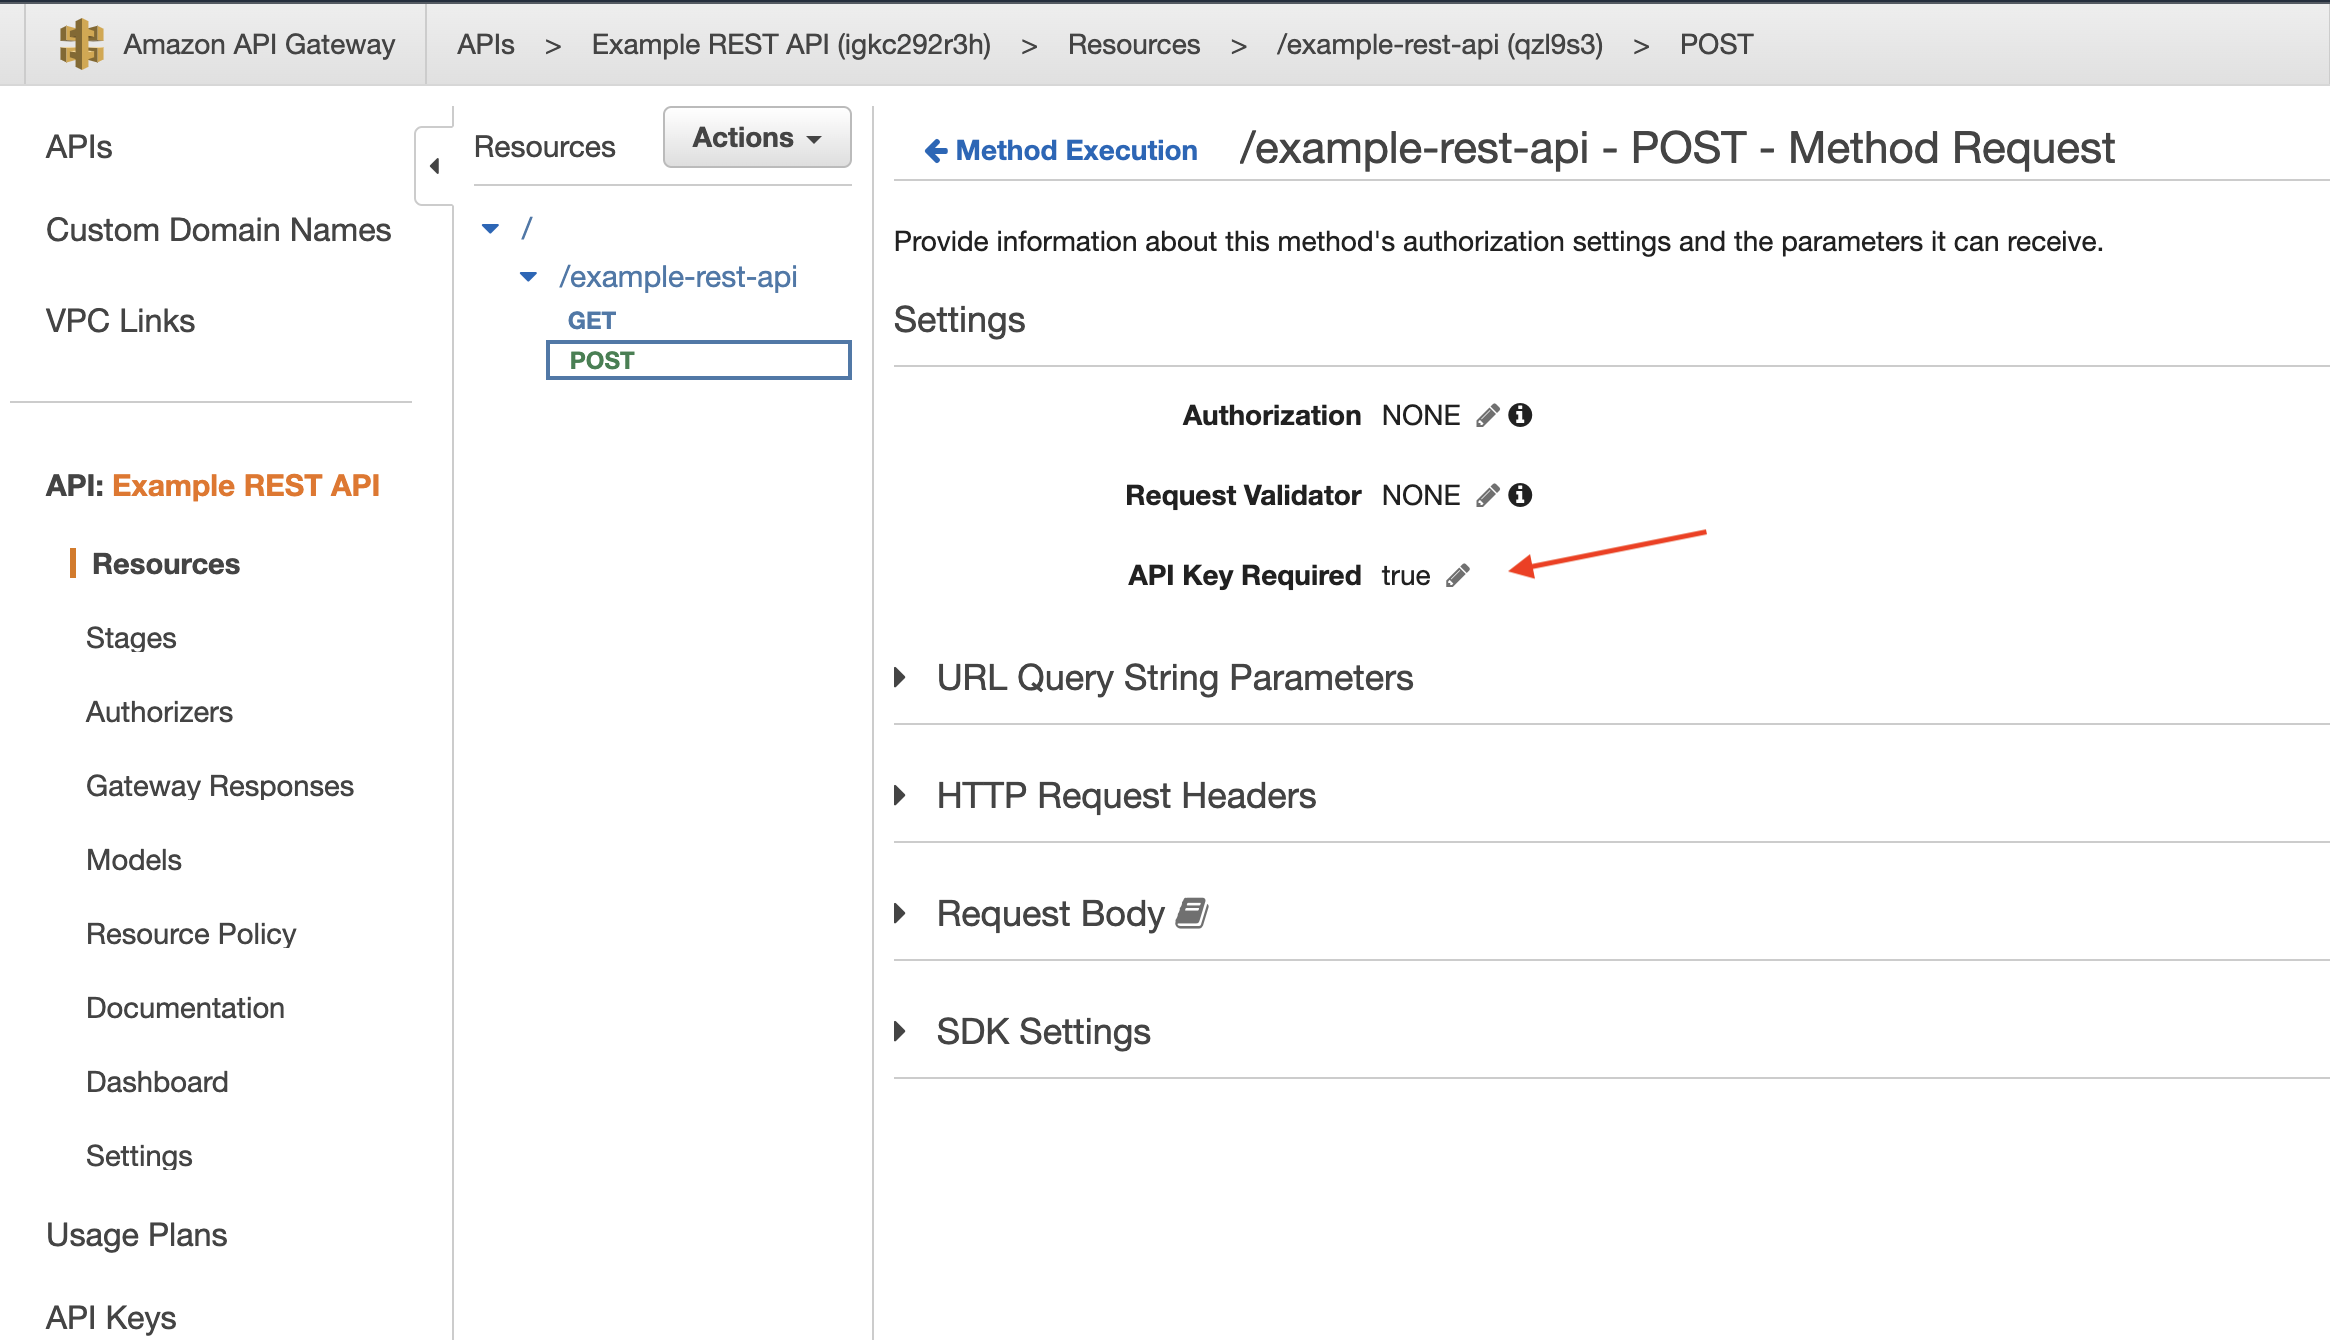
Secondly, if applicable, you can also do the same for any other methods that are available for your endpoint. Below is an example of setting the same setting for a POST method.
Create API KEYS
Now that we have enabled API Key Usage on our endpoint, we will actually go through the steps to create an API key in our AWS API Gateway instance.
API Keys are unique codes and tokens used to control access to APIs and track the usage. They can help secure APIs by ensuring only authorized users or apps have access.
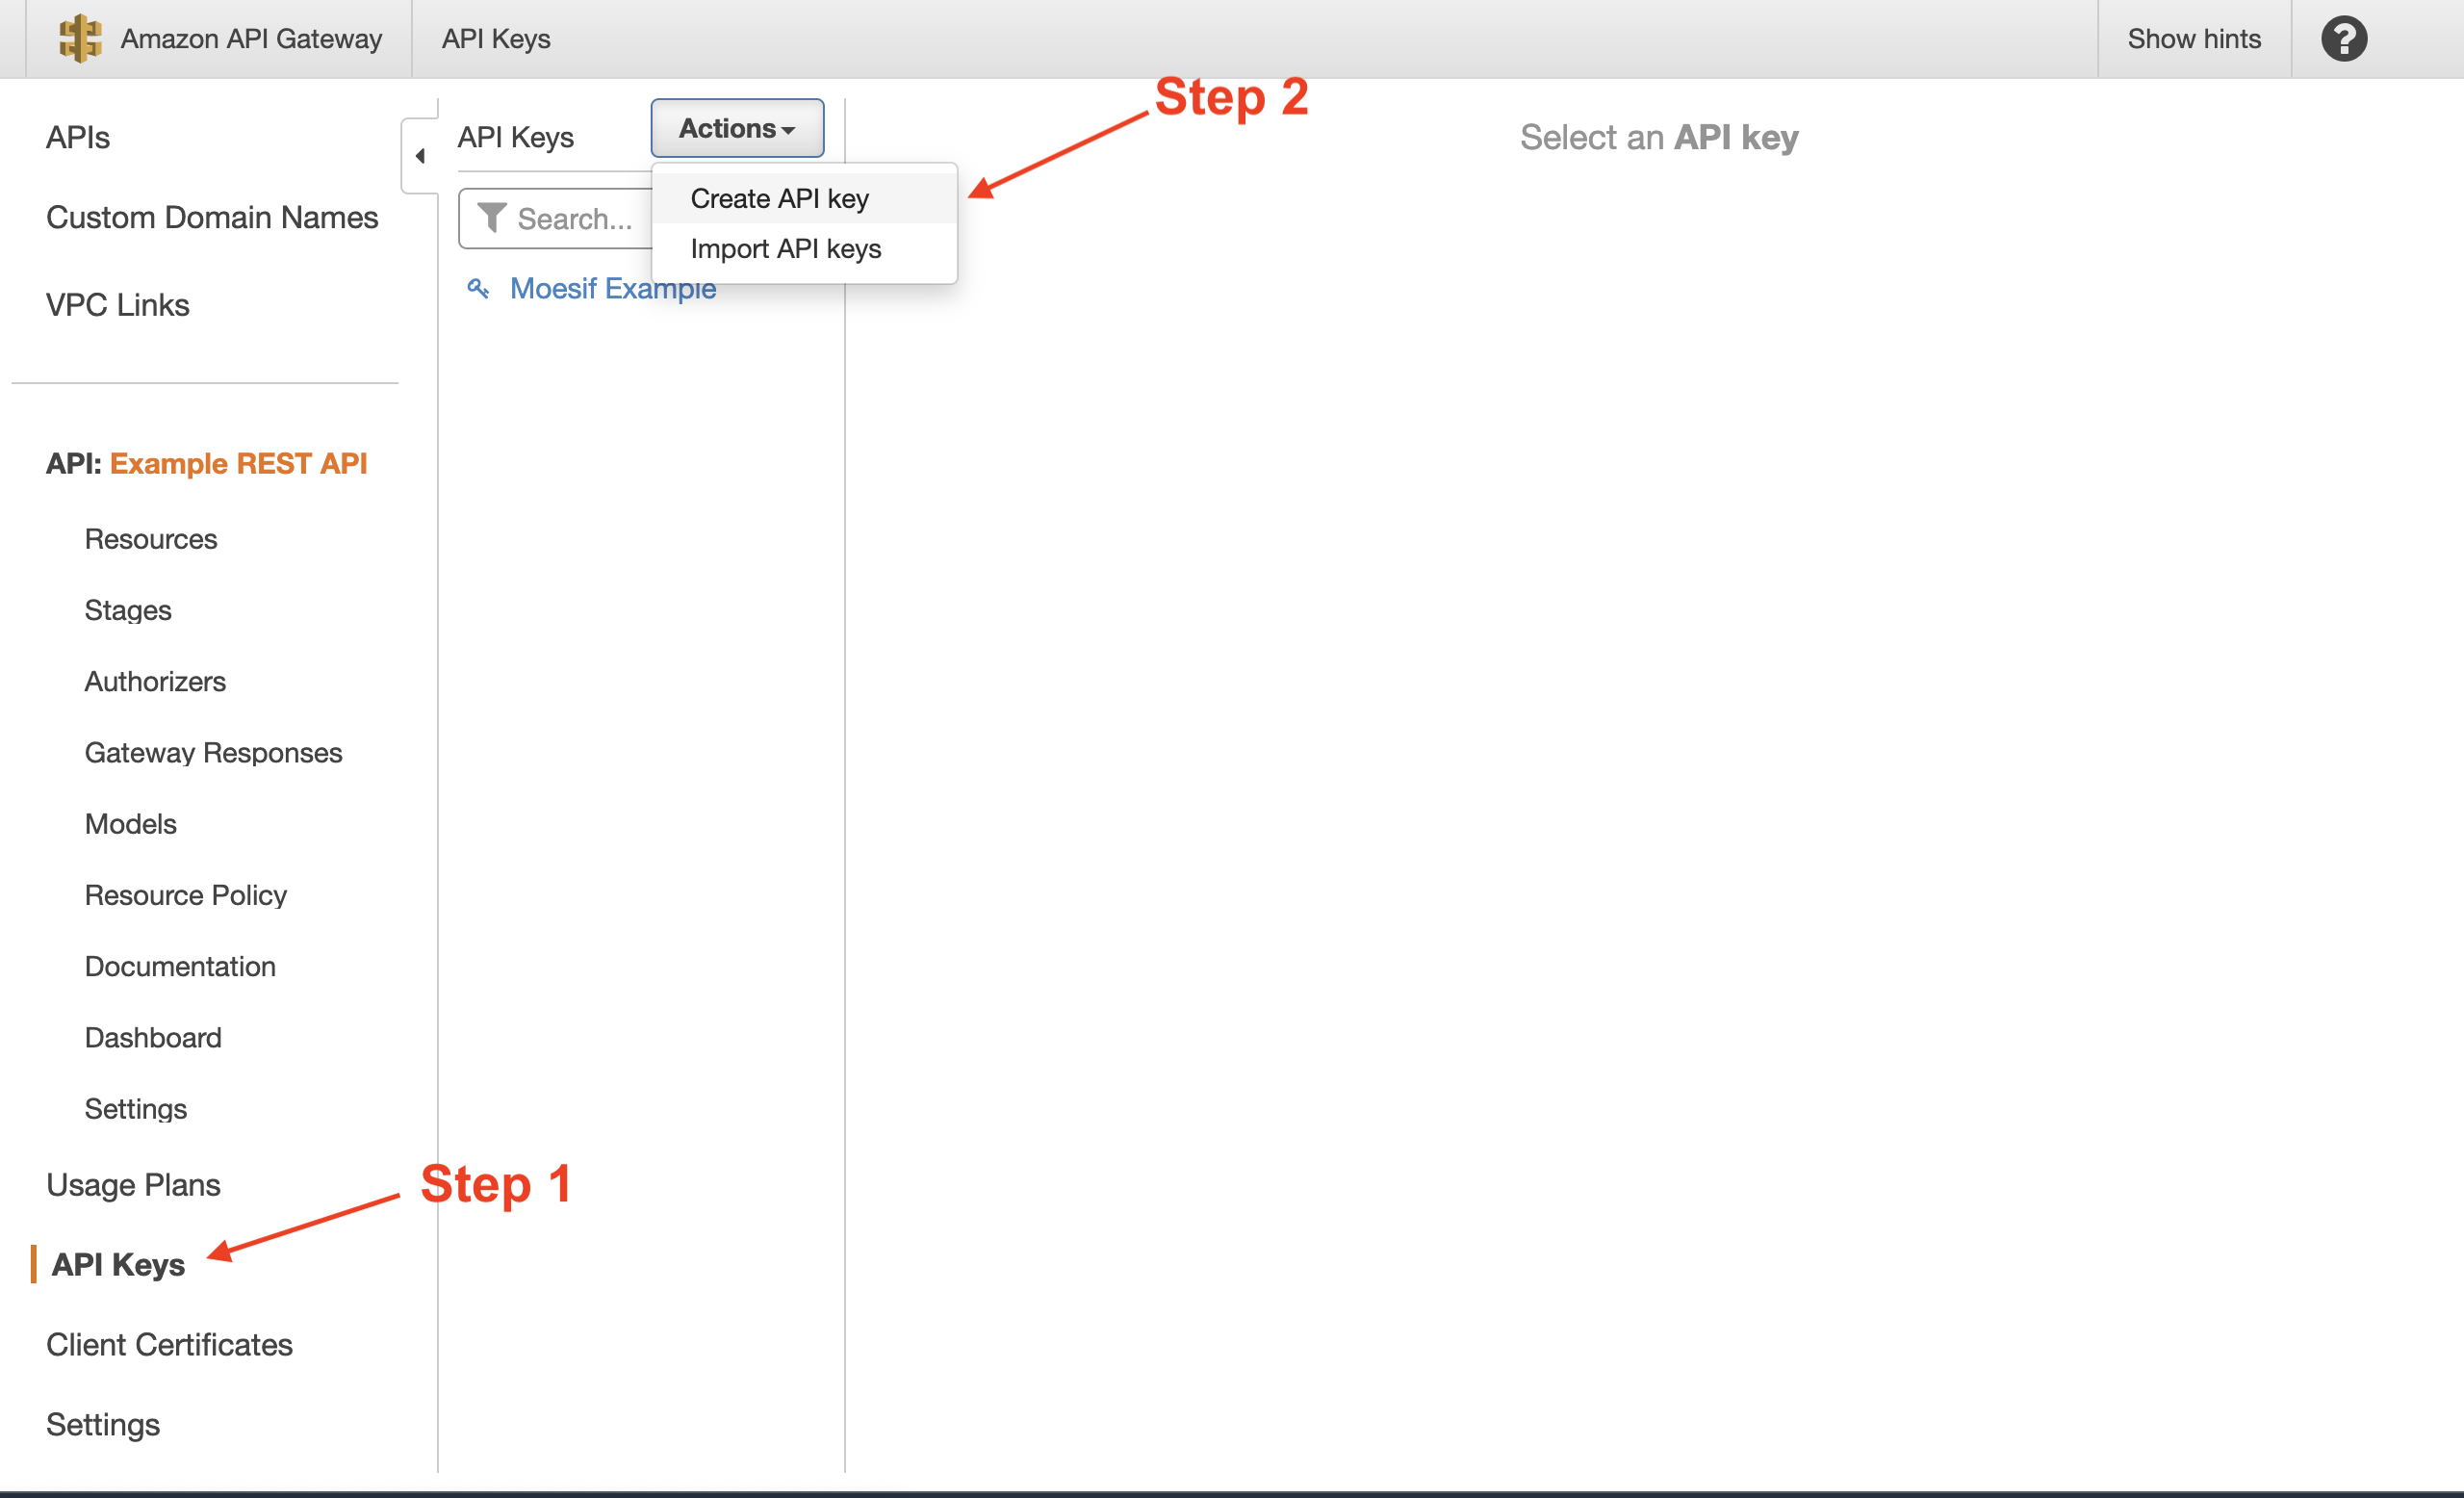
To create an API key for our API, select API Keys on the left-hand side navigation bar. Once on the API Keys screen, click on the Actions drop down and select Create API key.
Next, the Create API Key screen will appear. In the form, give the API Key a descriptive name in the Name field and select auto-generate for the API Key field. For this example, we have used Moesif Example and the name.
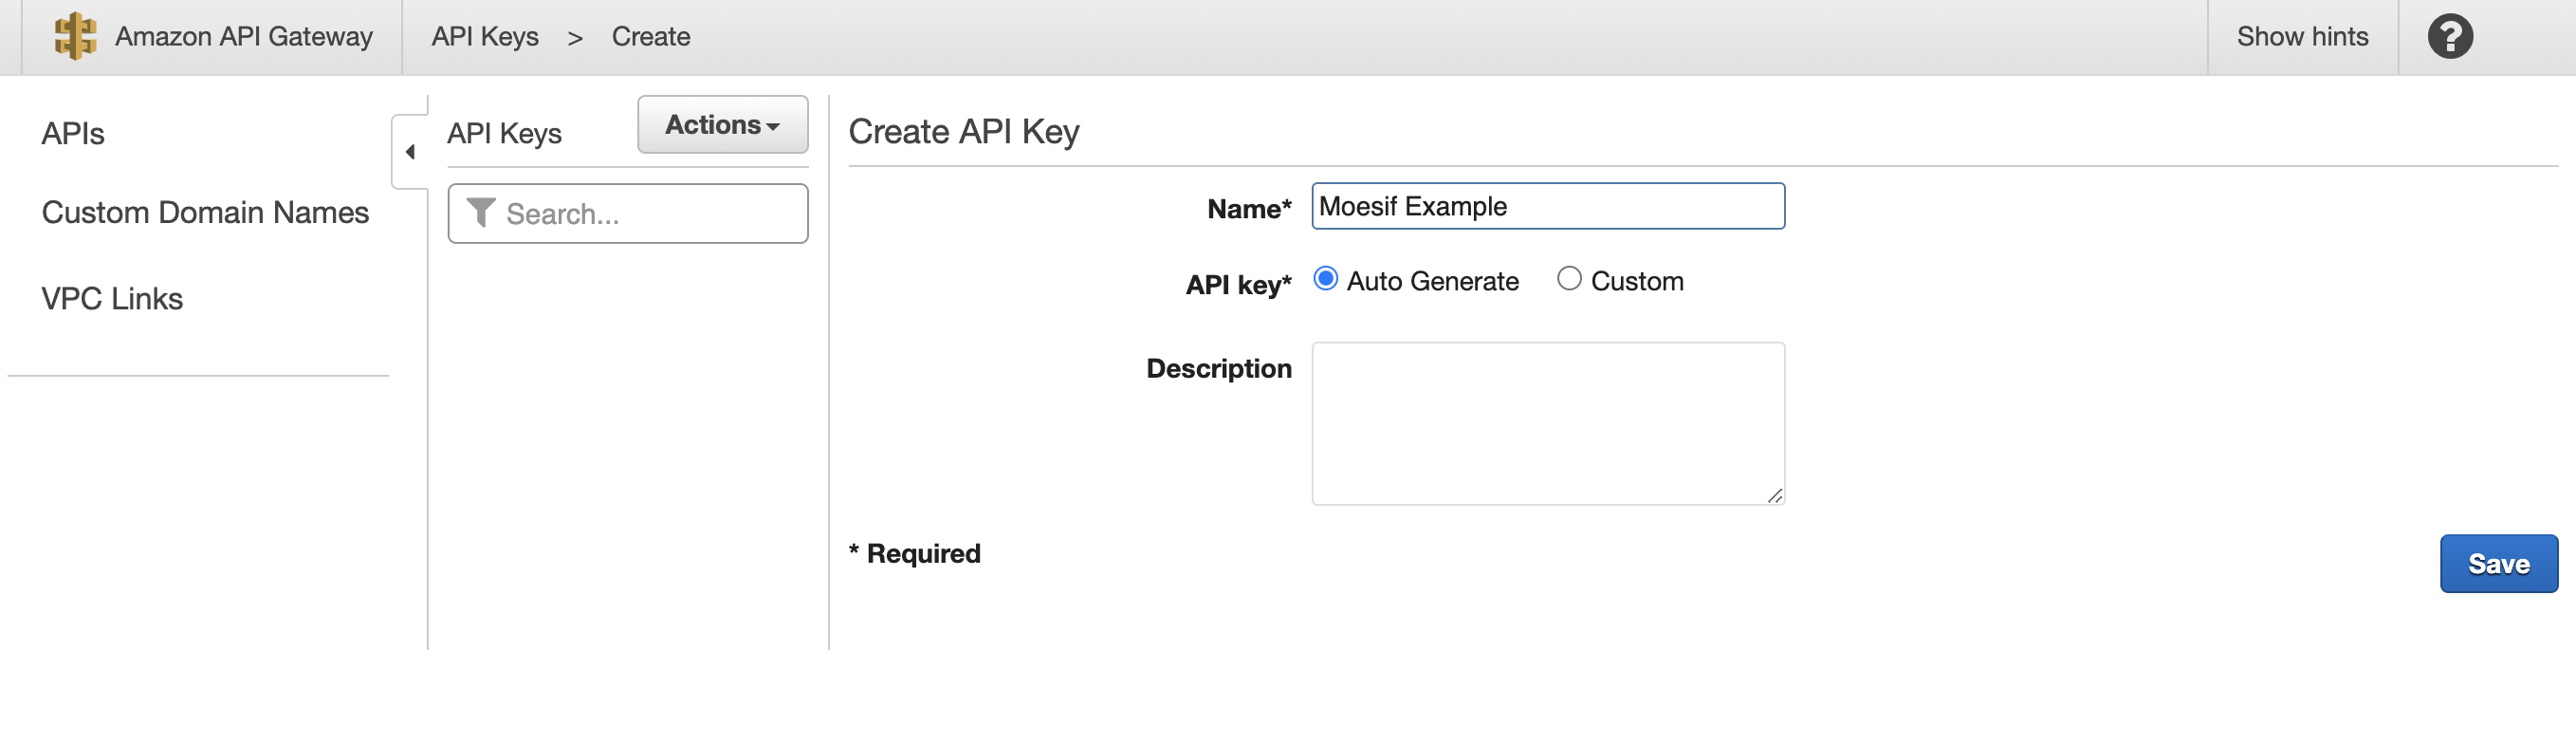
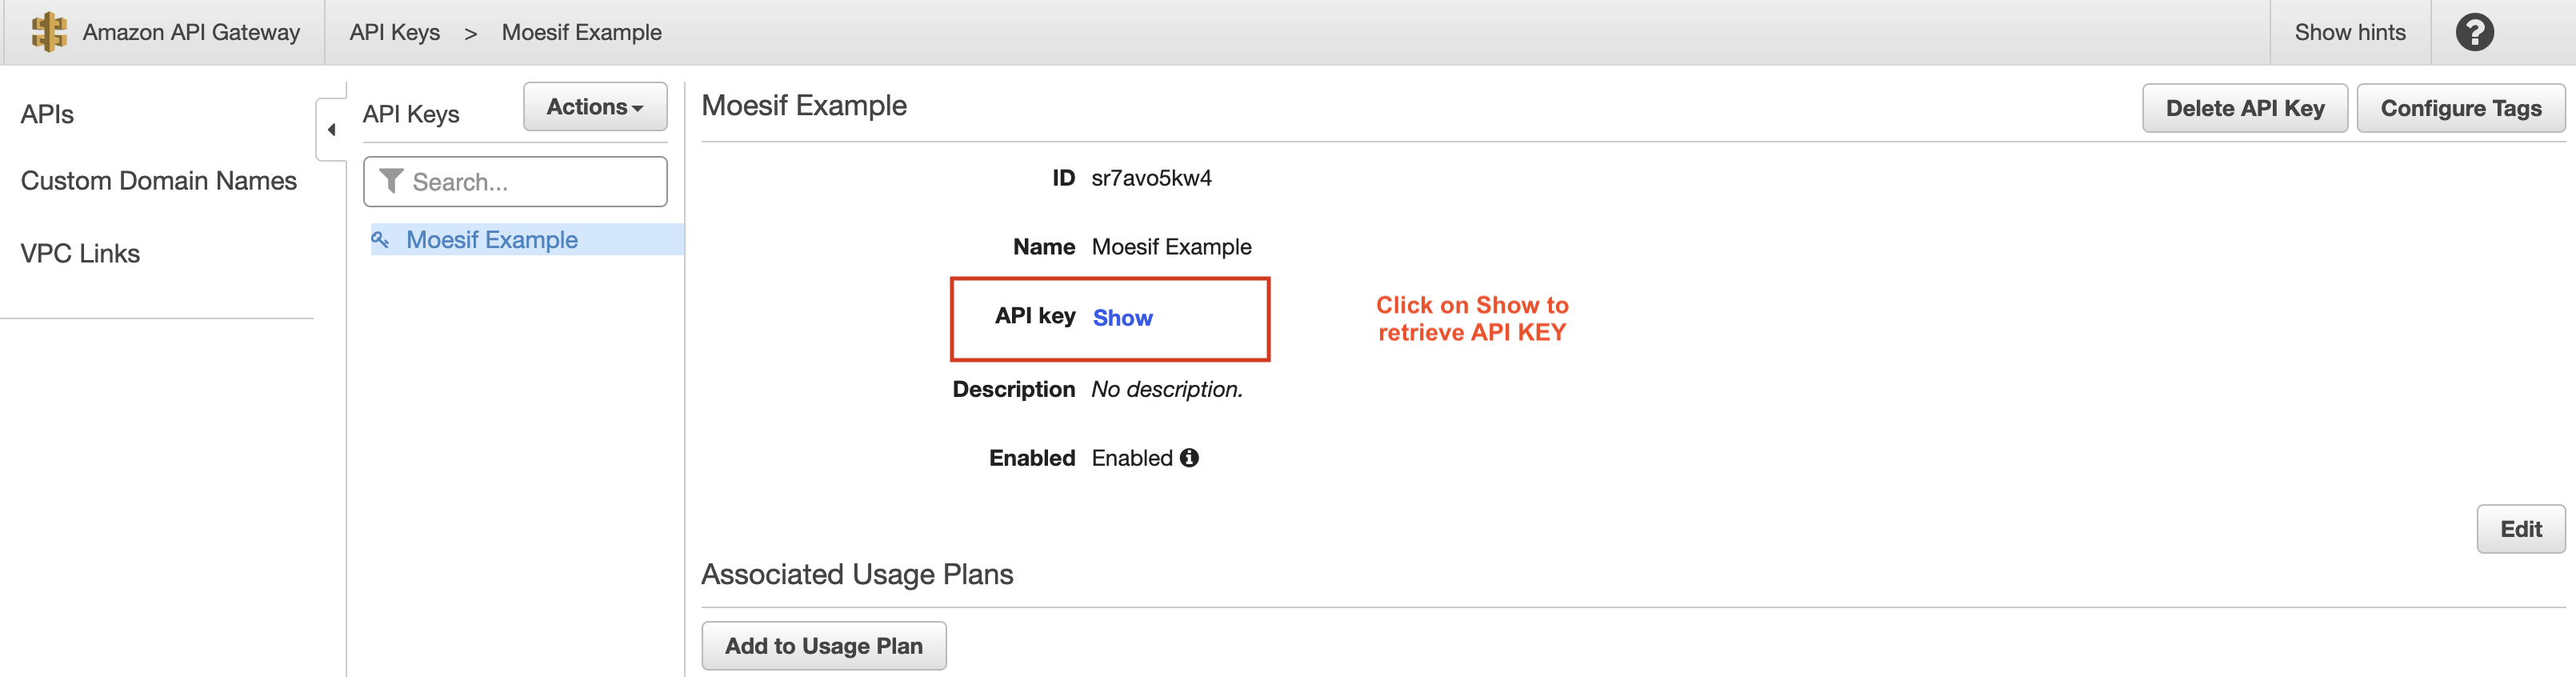
Once the field are populated, click Save and retrieve your generated key.
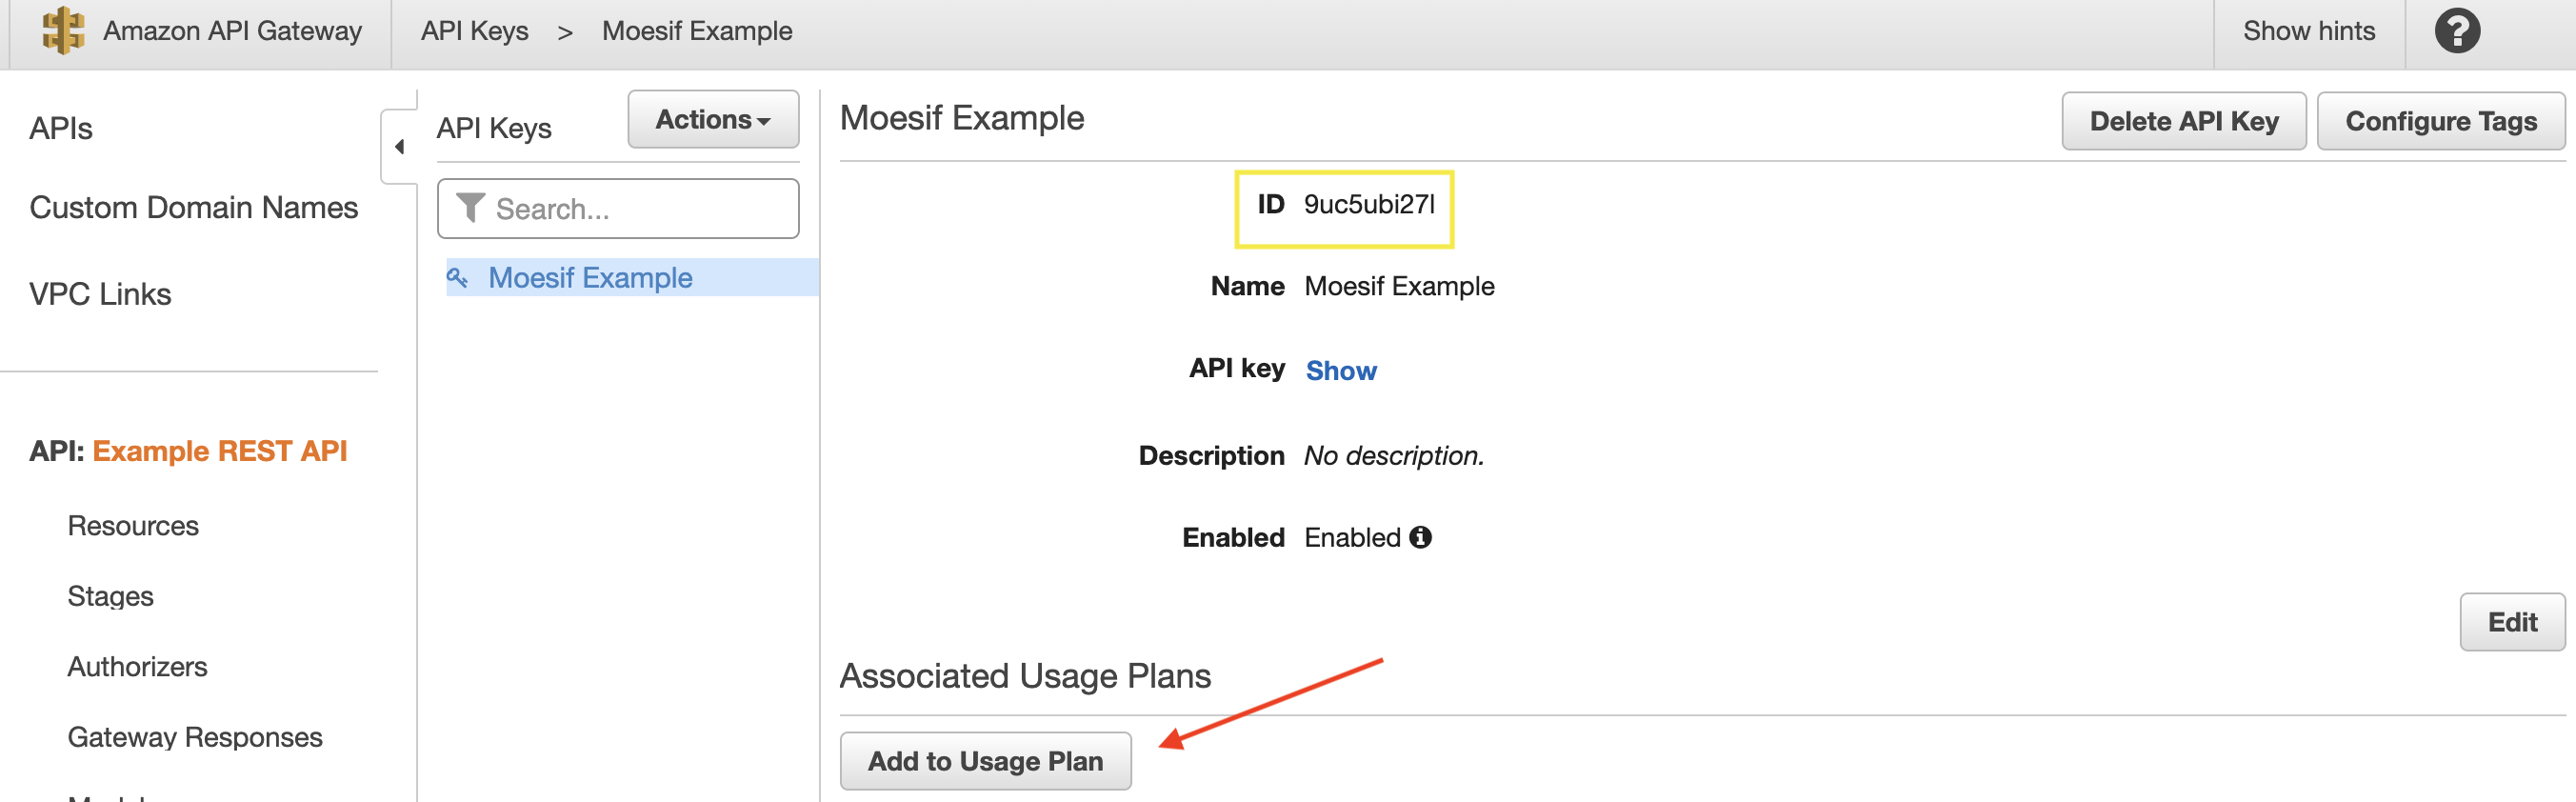
Create Usage Plan
Once you have created your API Keys, you will see an option to create a usage plan. API usage plan allows you to set quotas and rate limits for your API calls, it can help you manage access and usage of your API and prevent excessive usage of your API.
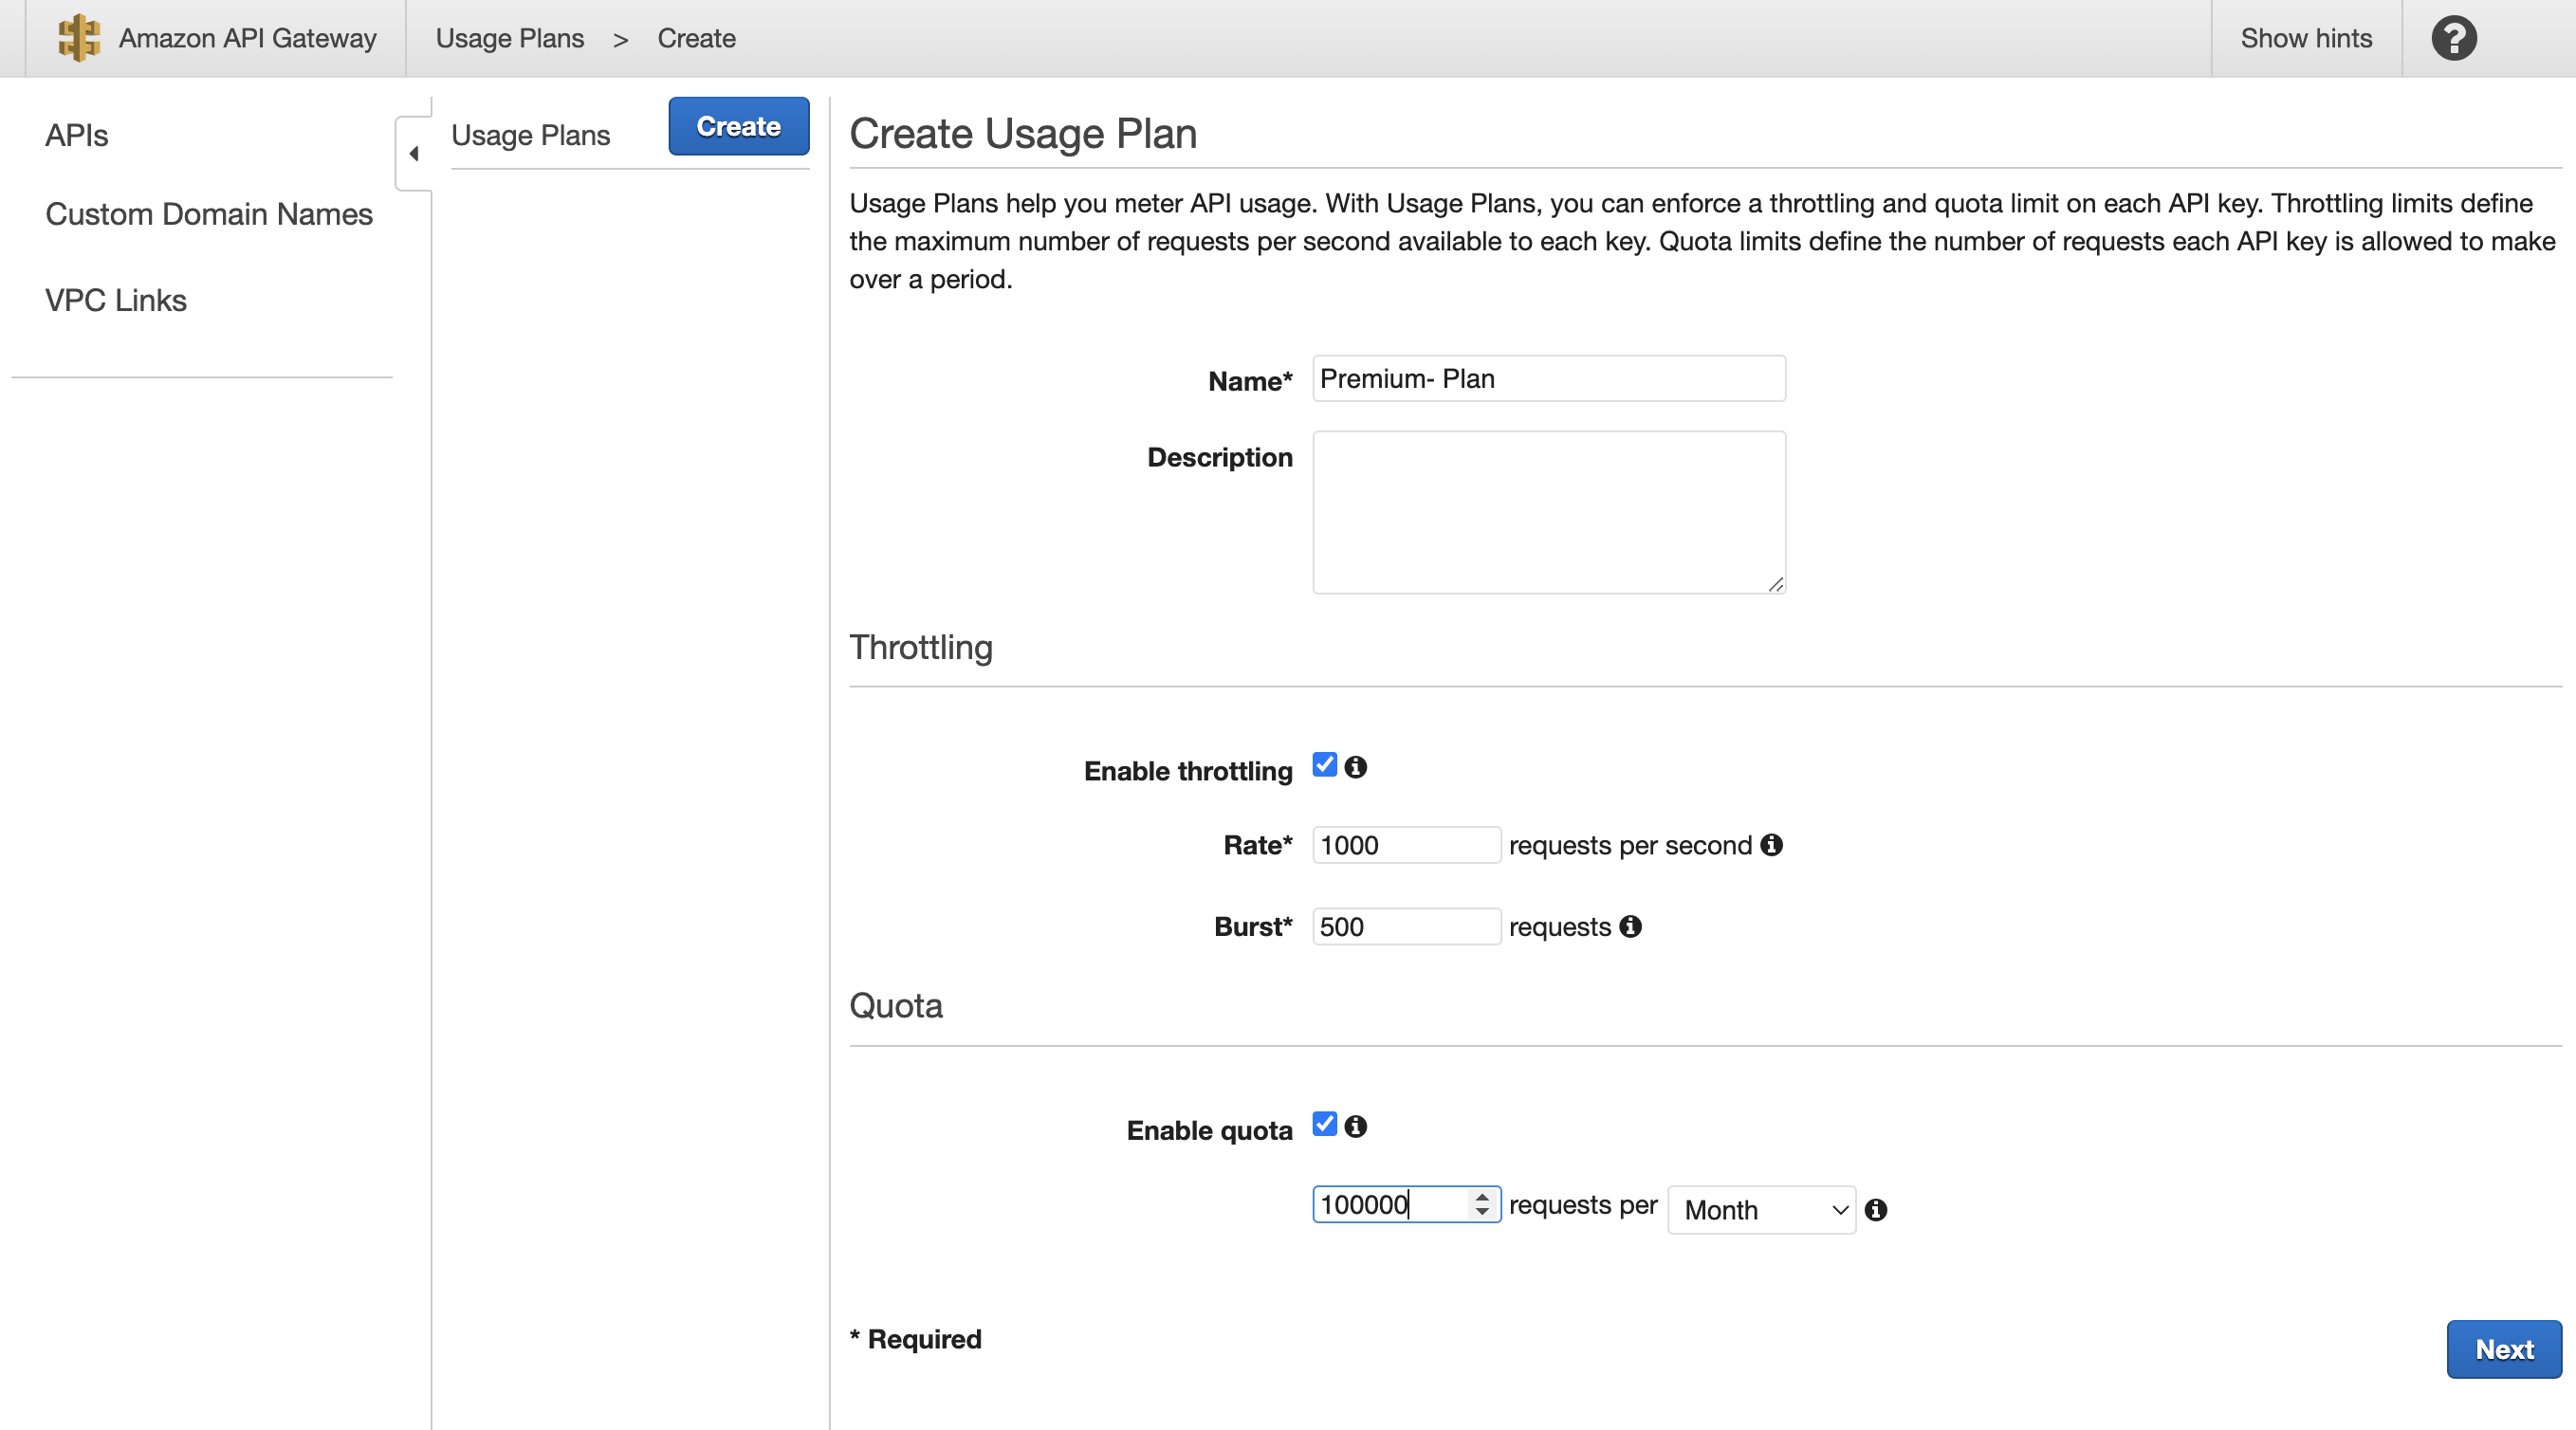
On the Create Usage Plan screen, we will have a few fields and settings to configure. In the Name field we will provide a new for the Usage Plan. In this example we will use “Premium Plan” as the name for our Usage Plan. Optionally, you can choose to Enable Throttling and Enable Quota for your plan. In our example below, we have set both a throttle and quota. Once configured, click Next.
Add API keys to Usage Plan
Next you will add the Usage Plan API Keys, click on the Add API Key to Usage Plan button.
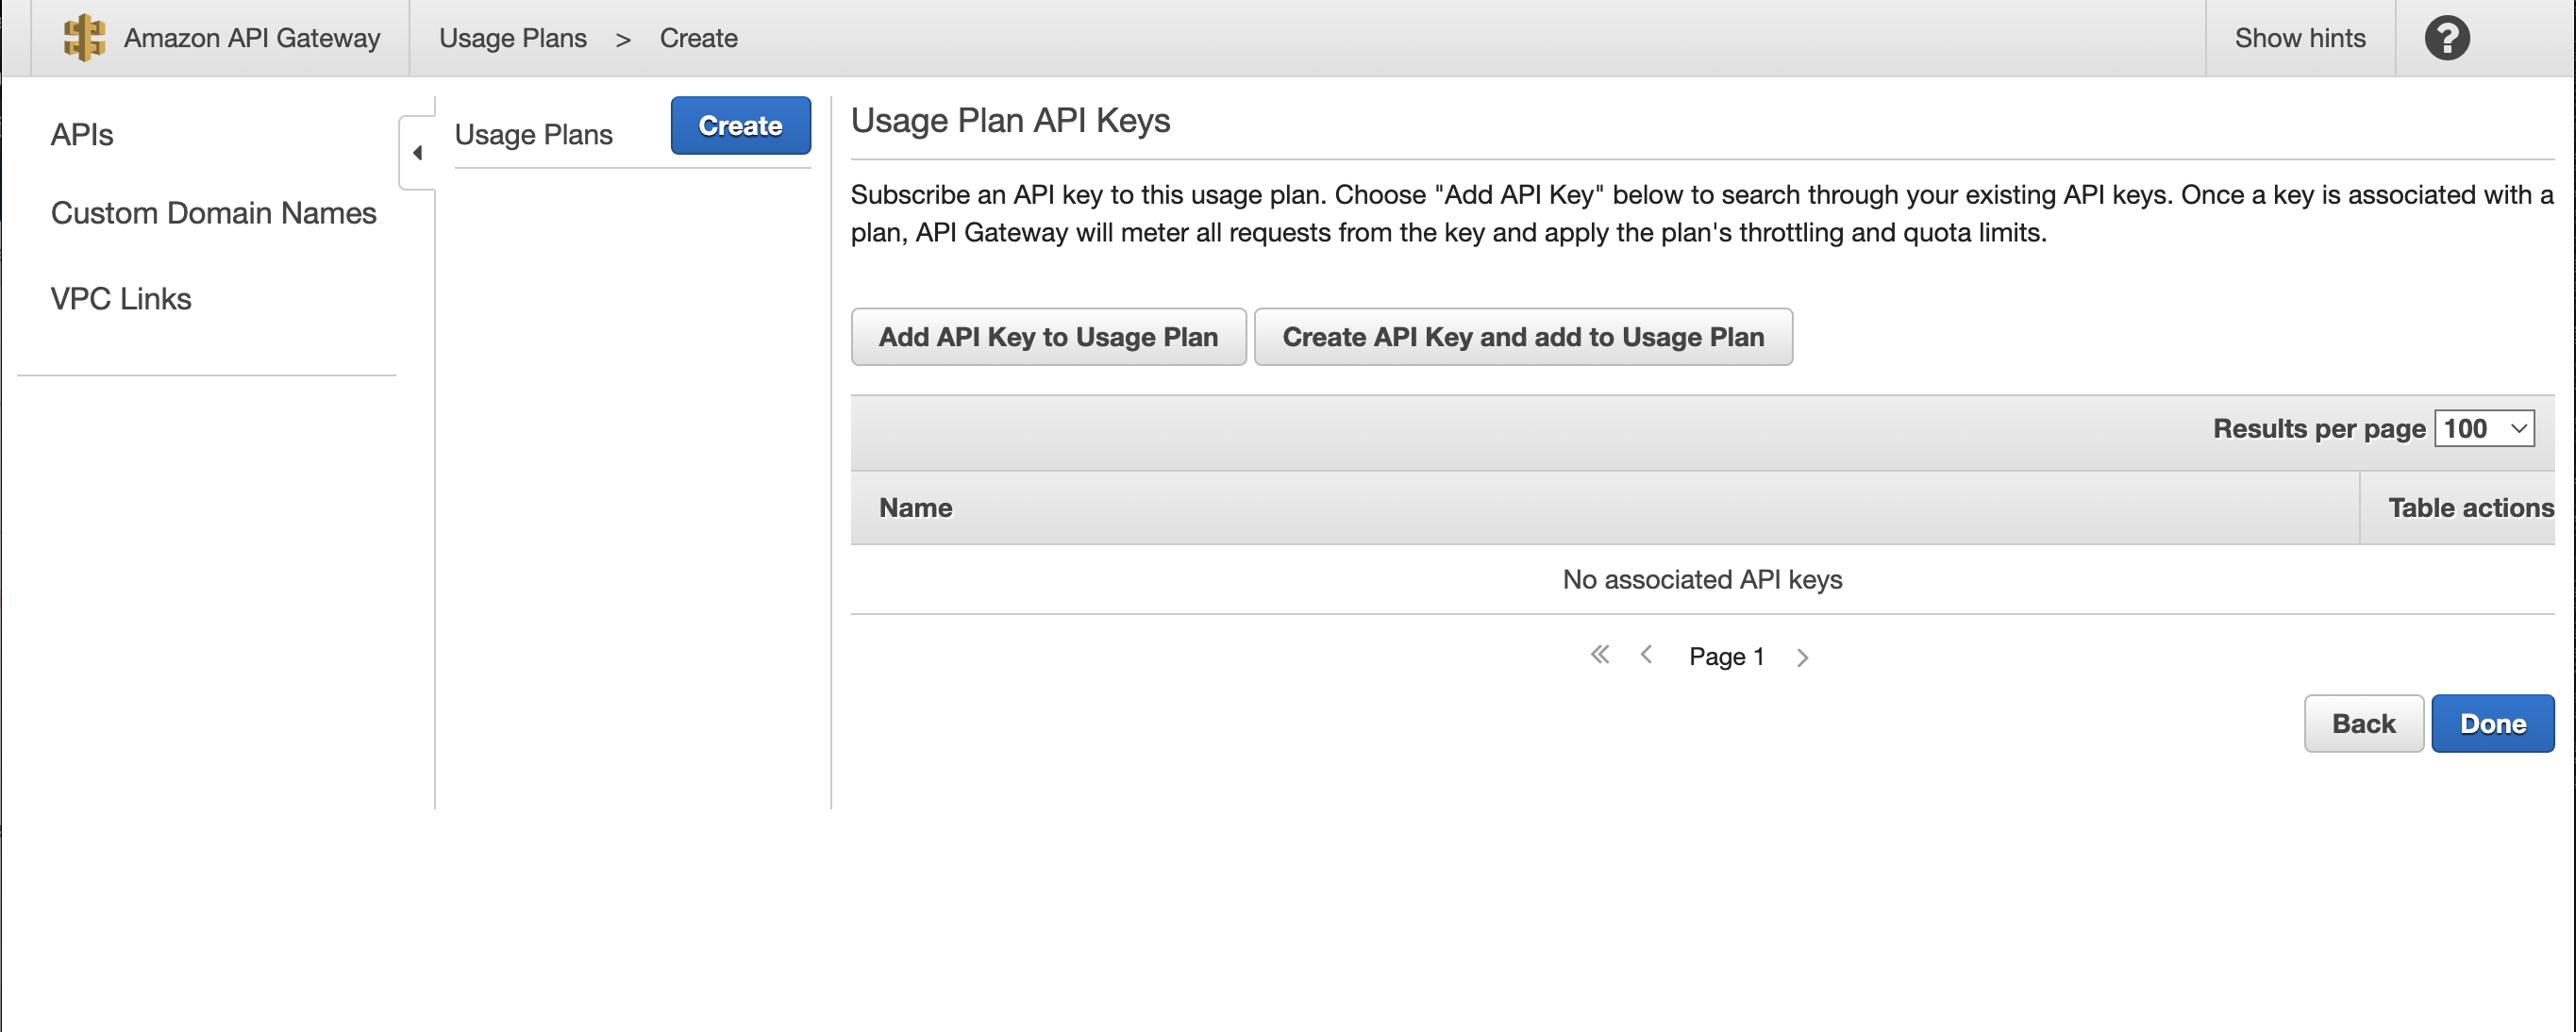
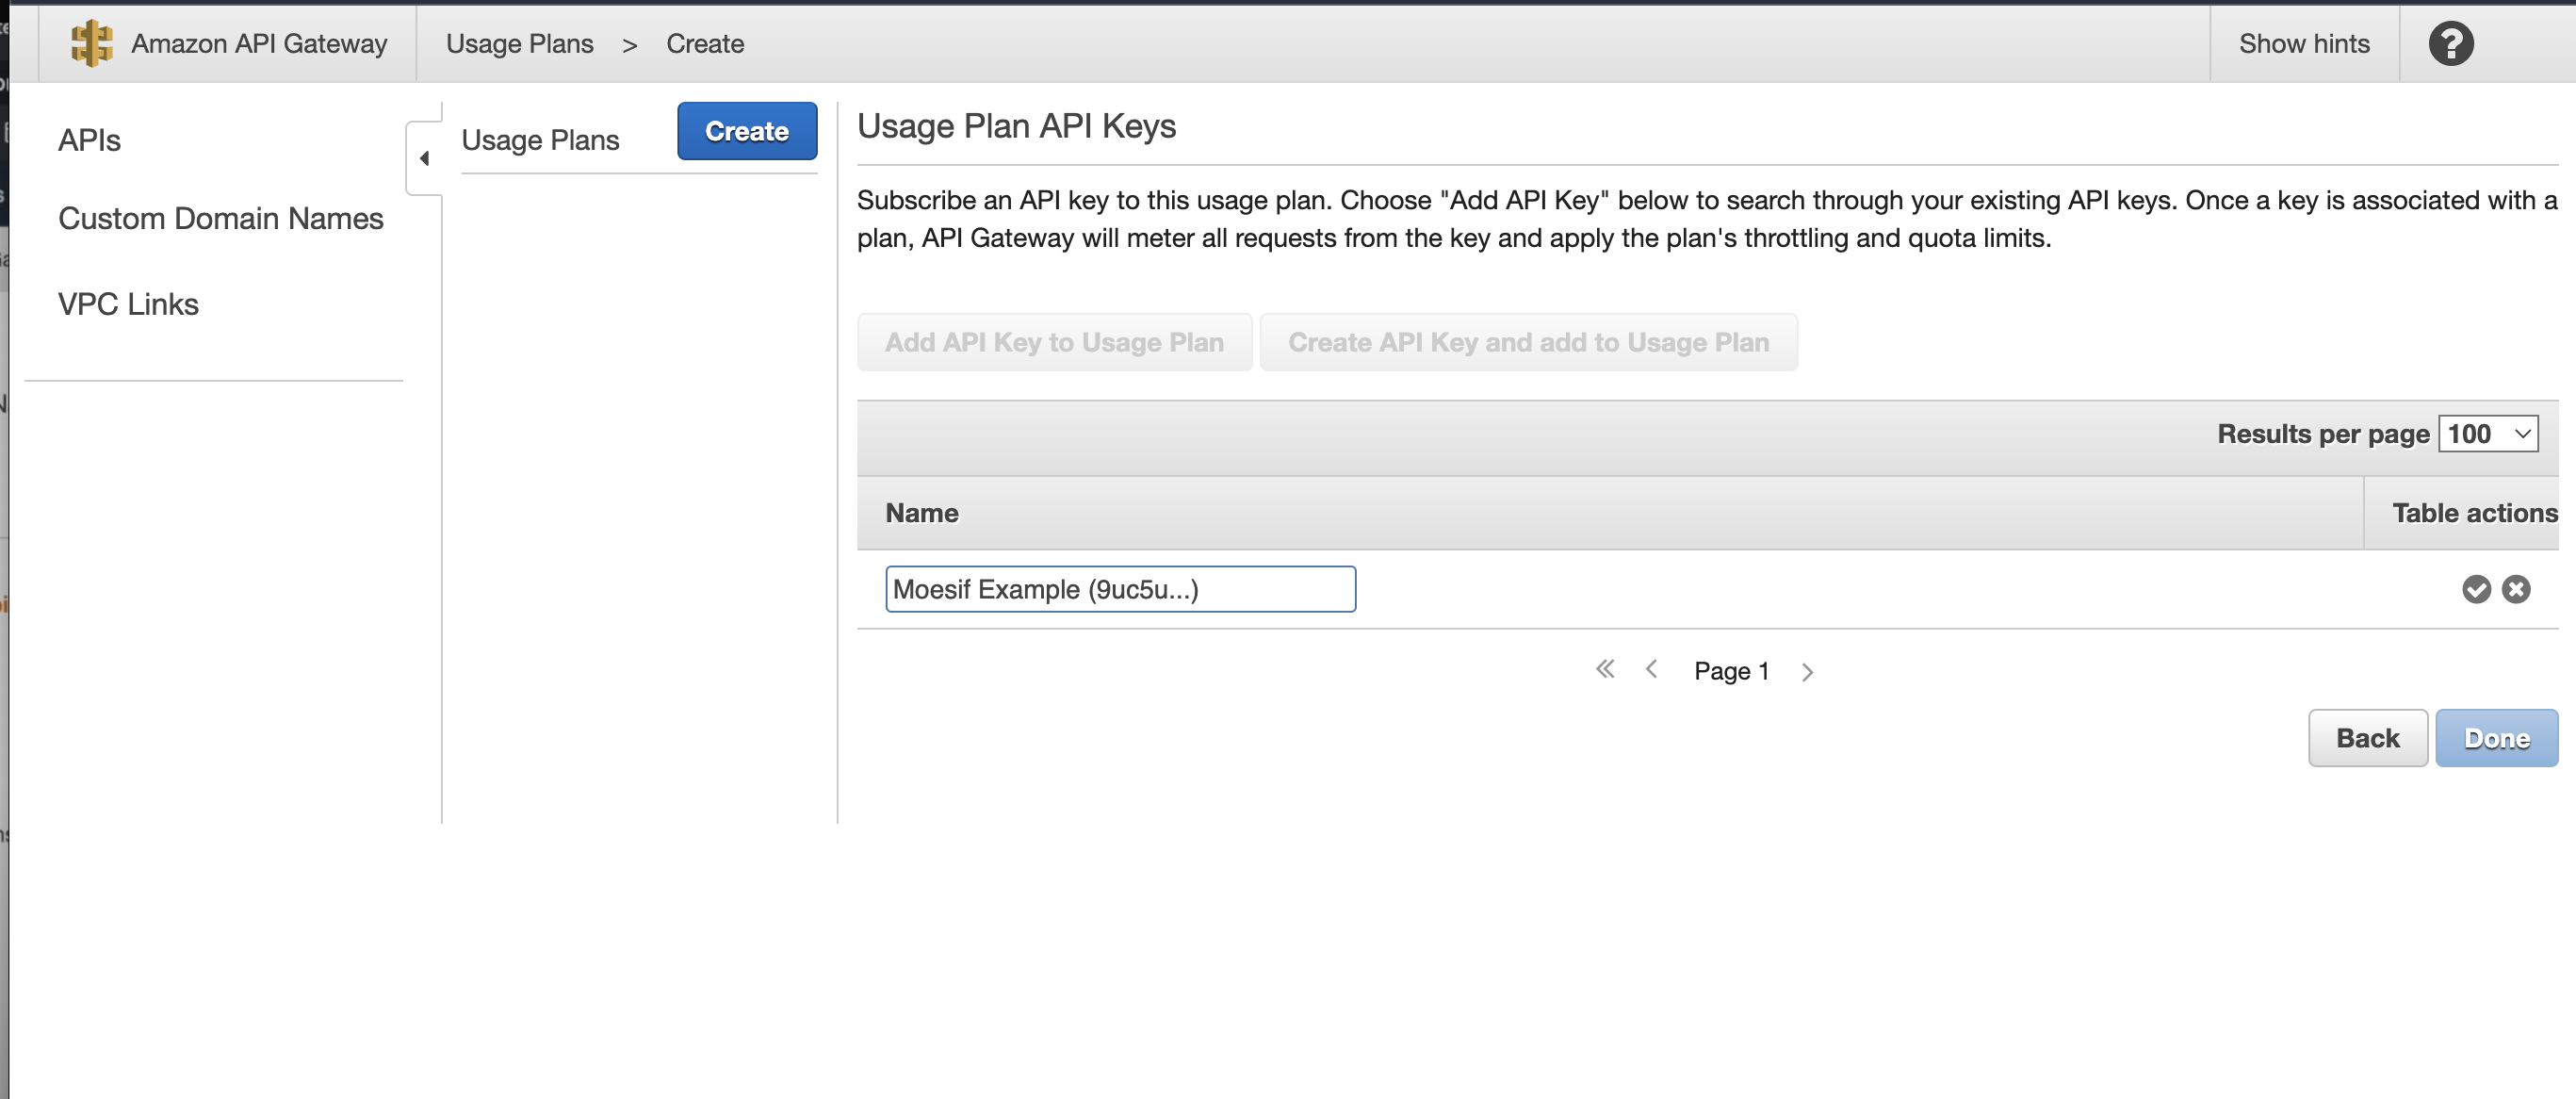
Next, under the Name field, add usage plan that we created earlier and click done. In this example, we will select “Moesif Example” as the usage plan.
Now you have created a usage plan and linked it to the API Key. Next we will update the access for your API.
Customize User Identification in AWS Gateway
Lastly, we will use The API key ID associated with an API request as the User ID in Moesif. To do this, we will go to Stages in the left-side menu, select the appropriate stage, and go to the Logs/Tracing tab. In the Log Format we will make sure the user field is specified like so:
"user": "$context.identity.apiKeyId"
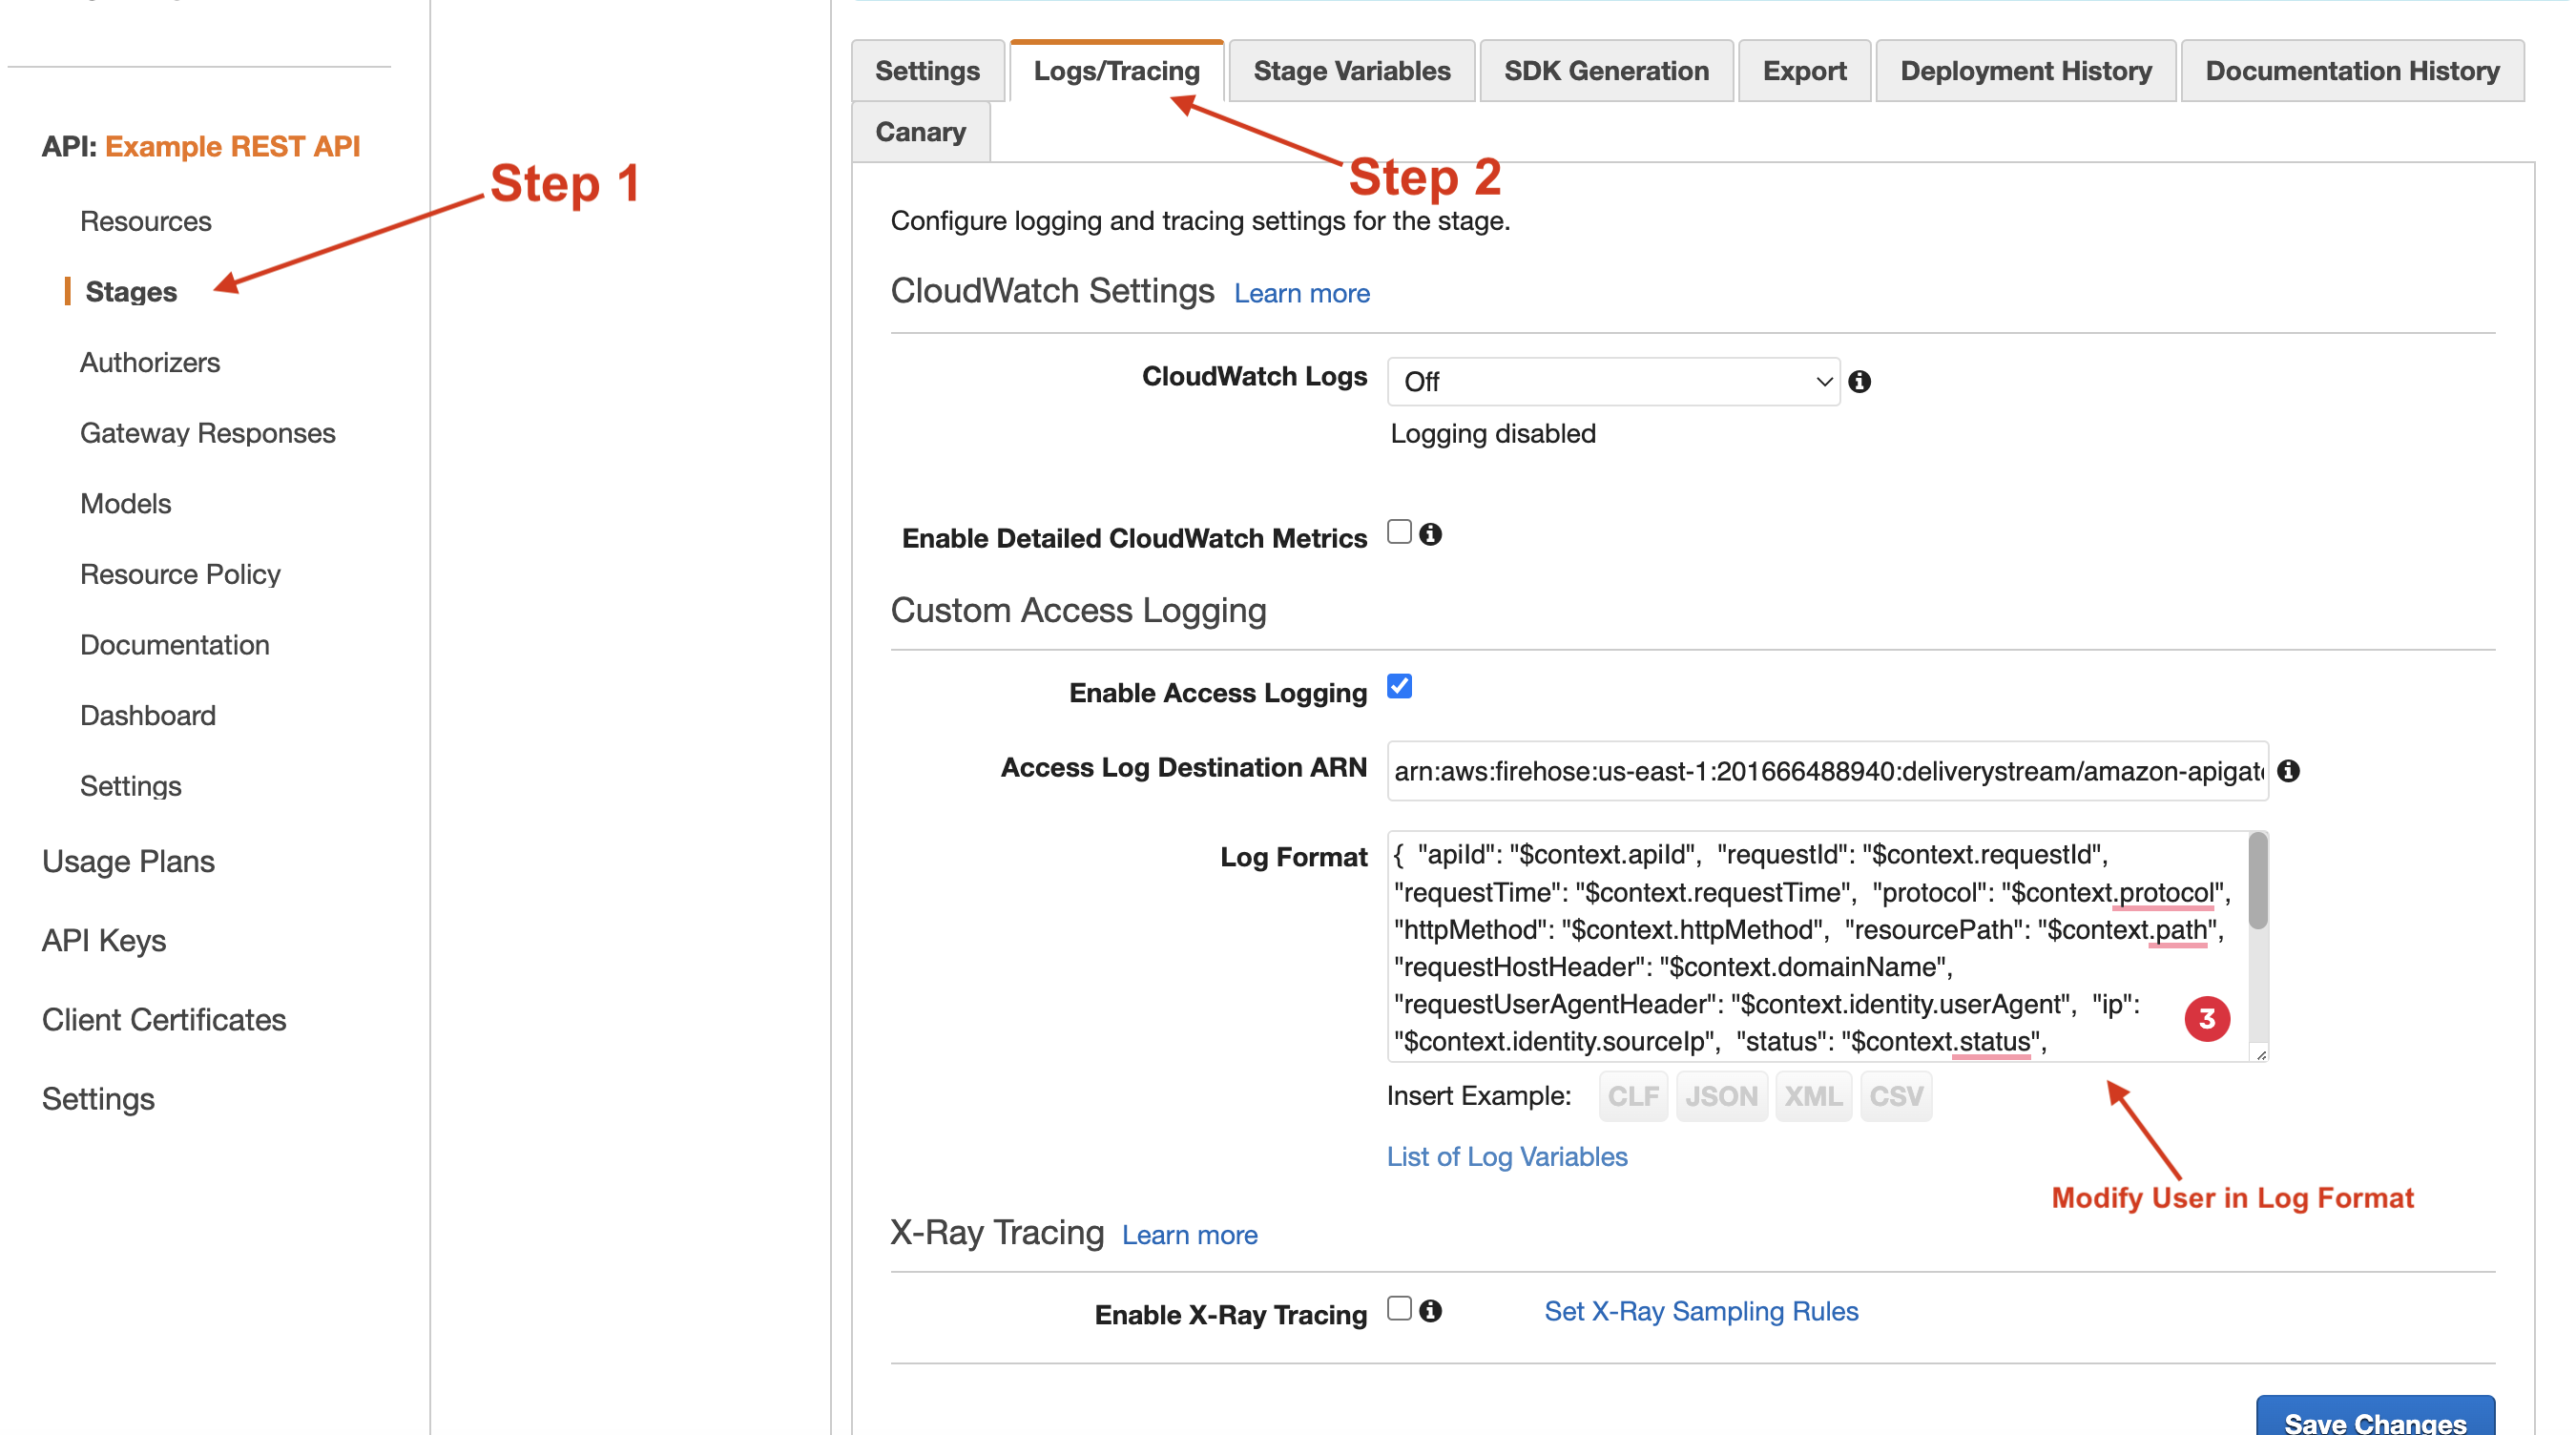
Overall, the Log Format will now look like the below example:
{"apiId": "$context.apiId", "requestId": "$context.requestId", "requestTime": "$context.requestTime", "protocol": "$context.protocol", "httpMethod": "$context.httpMethod", "resourcePath": "$context.path", "requestHostHeader": "$context.domainName", "requestUserAgentHeader": "$context.identity.userAgent", "ip": "$context.identity.sourceIp", "status": "$context.status", "responseLength": "$context.responseLength", "durationMs": "$context.responseLatency", "caller": "$context.identity.caller", "user": "$context.identity.apiKeyId", "principalId": "$context.authorizer.principalId", "cognitoIdentityId": "$context.identity.cognitoIdentityId", "userArn": "$context.identity.userArn", "apiKey": "$context.identity.apiKey", "apiKeyId": "$context.identity.apiKeyId"}
Sending a Request Through Postman
After opening up Postman, we will plug in the endpoint URL for our GET request. We will also go to the Headers tab and create a variable for x-api-key. The value for this header variable will be the API key we created to authenticate and authorize API requests.
Once the API Key is copied in, send the request. Once sent, in Postman your request should look like the screenshot below with a response from the API.

Verifying User Tracking
In Moesif, our request should be showing in the Live Event Log. To open up the Live Event Log, click on the New button in the top-left of the screen and select Live Event Log. Once there, we can see that a userID has been bound to the request in the correct field.
You’ll see that the id passed in our API Keys has now become the userID attached to the request we sent.
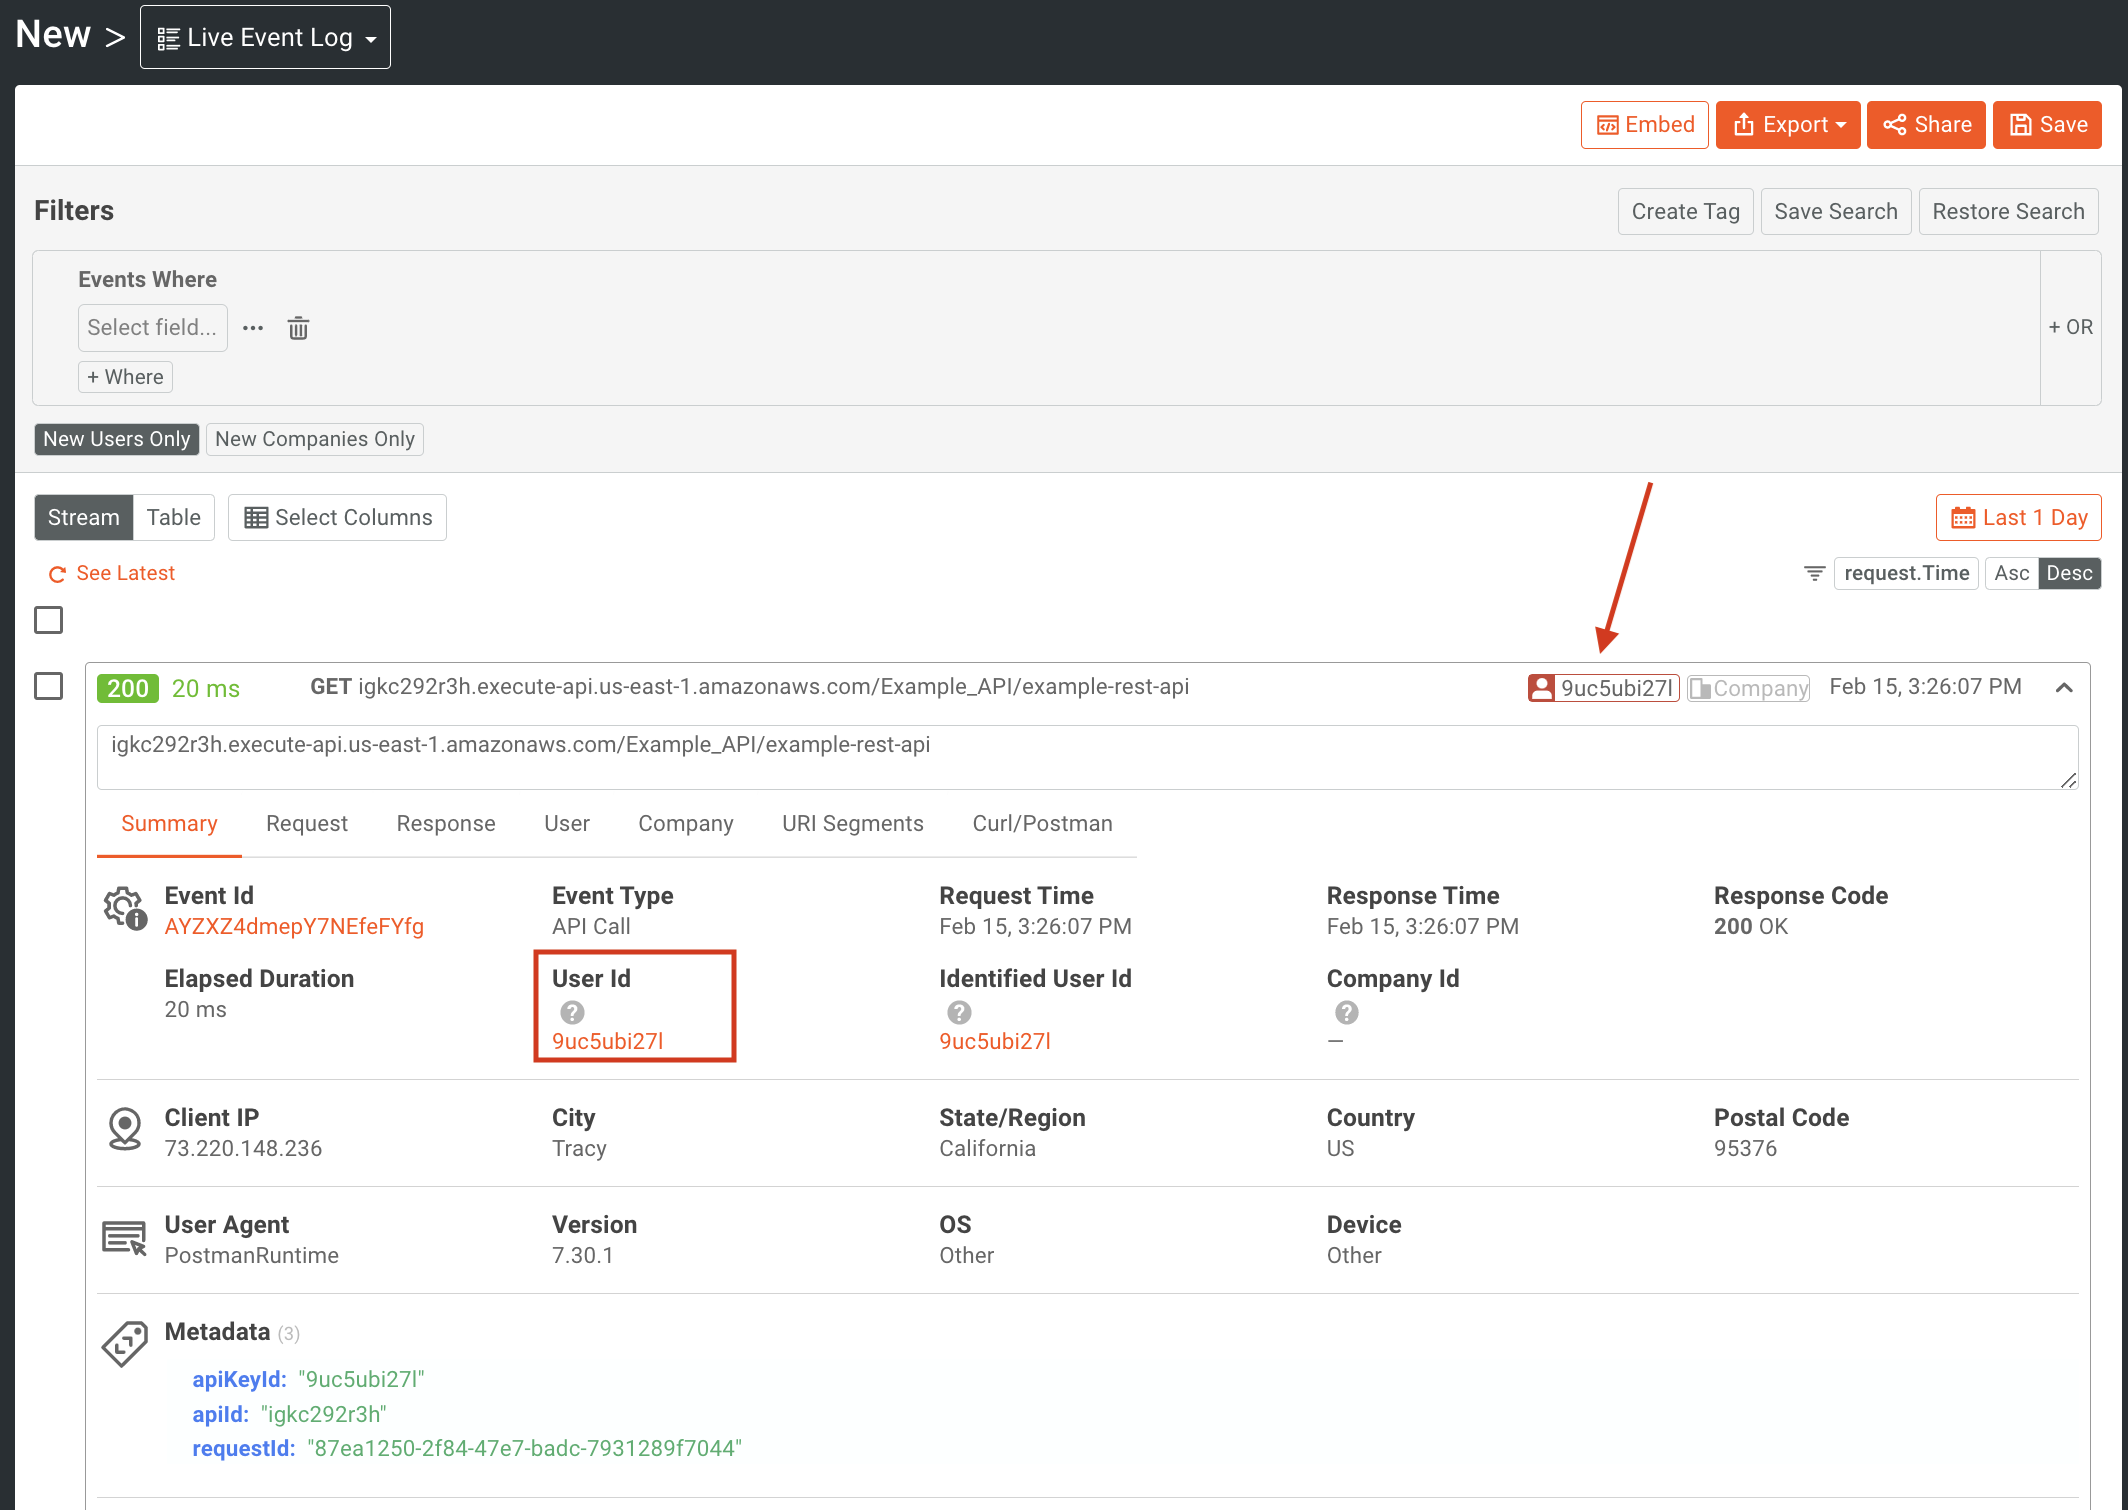
At this point, we are now able to start leveraging user-specific metrics instead of having all of our data be anonymous. This can help to power many of the more advanced and valuable features within Moesif.