Single Sign-On: Okta (OIDC)
Benefits of SSO
- Improve security and regulatory compliance
- Reduce IT costs through auto-provision and de-provisioning
- Enforce policies like Multi-Factor Authentication (MFA), Password Reset, etc
- Improve usability for employees
How SSO works
Moesif supports both identity-provider (IdP) initiated and service-provider (SP) initiated single sign-on. When IdP initiated, a user logs in through your IdP’s app directory. When SP initiated, a user logs in by entering their employee email on Moesif’s website. Because their email domain has SSO enabled, they will be redirected to your organization’s single sign-on page. Once enabled, team management and role-based access control (RBAC) is handled by your identity provider rather than within the Moesif application.
Home Realm Discovery
Moesif’s SSO implementation supports Home Realm Discovery. This means Moesif will redirect the log in page to a special page as soon as Moesif recognizes thee team members email. This takes the guess work of remembering special URLs to log in via SSO. SSO is then enforced for your entire company domain even if a new employee is not yet added to your Moesif organization. If you prefer having a special breakglass account that bypasses this, let us know and we can set one up for you.
Installation Options
For Okta, Moesif provides both an Okta OIDC Connector along with a SAML-based integration. Unless there is strong reason to use SAML, we strongly recommended new installations use the Okta OIDC Connector. This provides a streamlined installation and much better at provisioning deprovisioning team members. If you prefer the traditional SAML approach, view this guide.
How to setup Okta with Moesif
Prerequisites
In order to set up SSO with Okta:
- You must be able to configure your Okta account
- You must be on a Moesif enterprise plan
1. Create a “Moesif Application”
- Go to Applications, and create a new OIDC Application as shown below:
- Ensure “Web Application/server-side application” is selected which will provide both a client id and a secret for Moesif (Moesif only stores these server-side and never in browser code)
- Give the application a name such as
Moesif API Analytics - Configure the application like below
- The text values from the screenshot are also provided for easier copy/paste:

| Setting | Value |
|---|---|
| Sign-in redirect URIs | https://auth.moesif.com/login/callback |
| Login initiated by | Either Okta or App |
| Login flow | Redirect to app to initiate login (OIDC Compliant) |
| Initiate login URI | https://www.moesif.com/wrap?allowed_identity_providers[0]={identityNameFromMoesif} |
| Immediate app access with Federation Broker Mode | Disabled |
- Moesif will provide the unique slug for
identityNameFromMoesif. Typically, this is your company domain, but with.replaced with-. - For example, if your domain is
acmeinc.com, you’ll use?allowed_identity_providers[0]=acmeinc-com
2. Create Moesif Role attribute for OIDC app profile
- Go to Profile Editor → Click on the OIDC Profile View
- Click Add Attribute
- Add an attribute with the name
moesifrolelike below - You will need to add an enum type for at least these three roles:
adminmemberread-onlydashboard-viewer
- If you have defined custom roles in Moesif, you will need to add those as well.
If you prefer a different attribute name, let us know and we can update our mapping for your org You confirm any custom roles by going to Apps & Team within Moesif or check with your customer success rep.
3. Create a Group for Each Moesif Role
- To reduce the burden of managing the permissions of every employee, it’s recommended to create groups which already are associated with the required Moesif role.
- Create a new group in Okta such as
moesif-admin
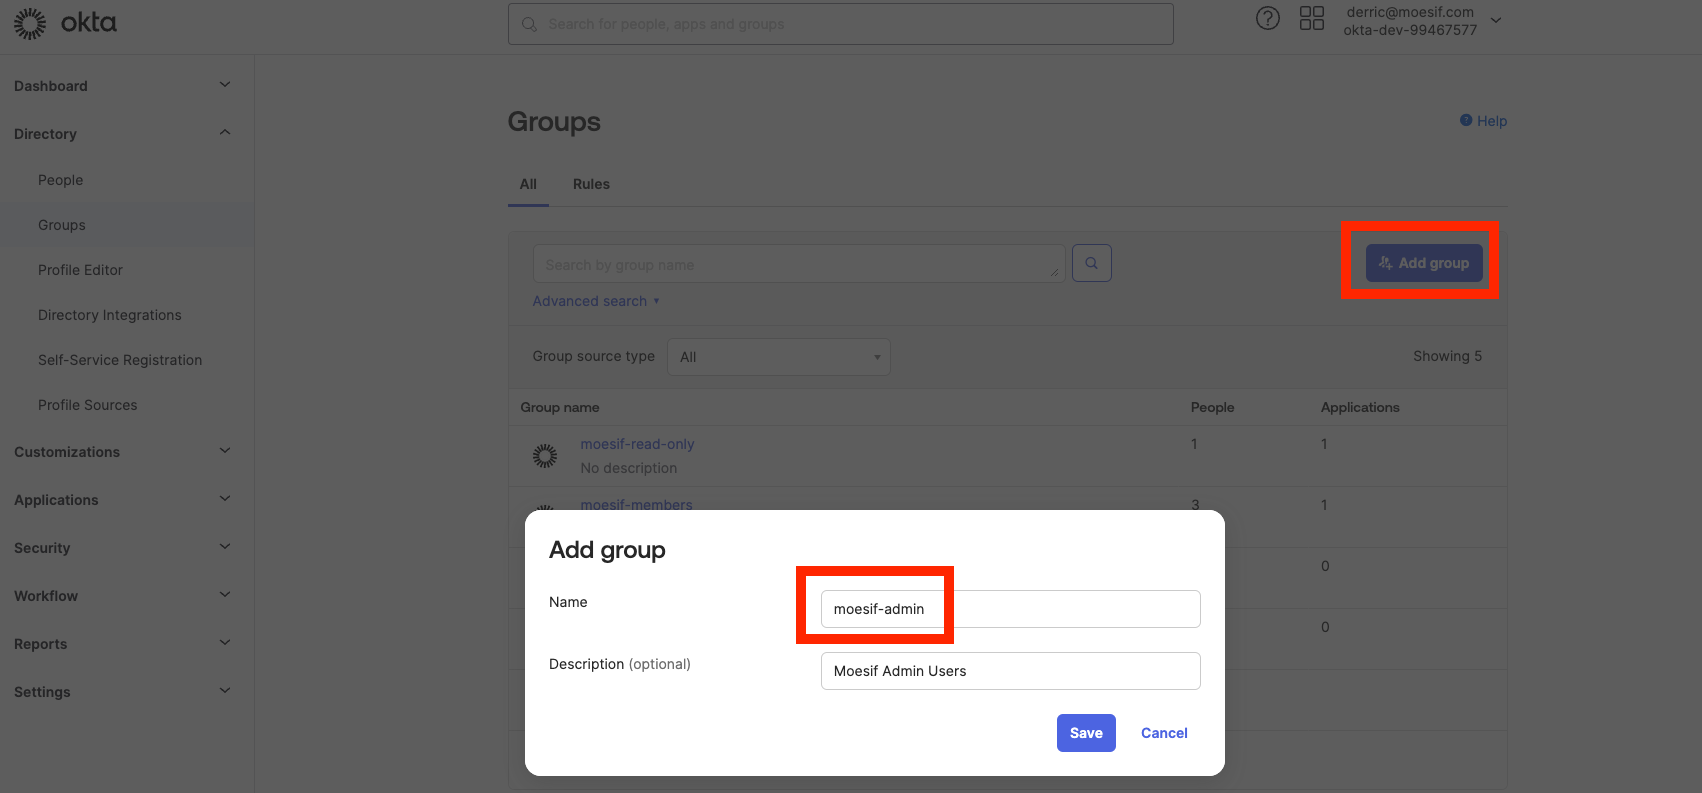
- Then, after the group is created, associate the group with the newly created Moesif application
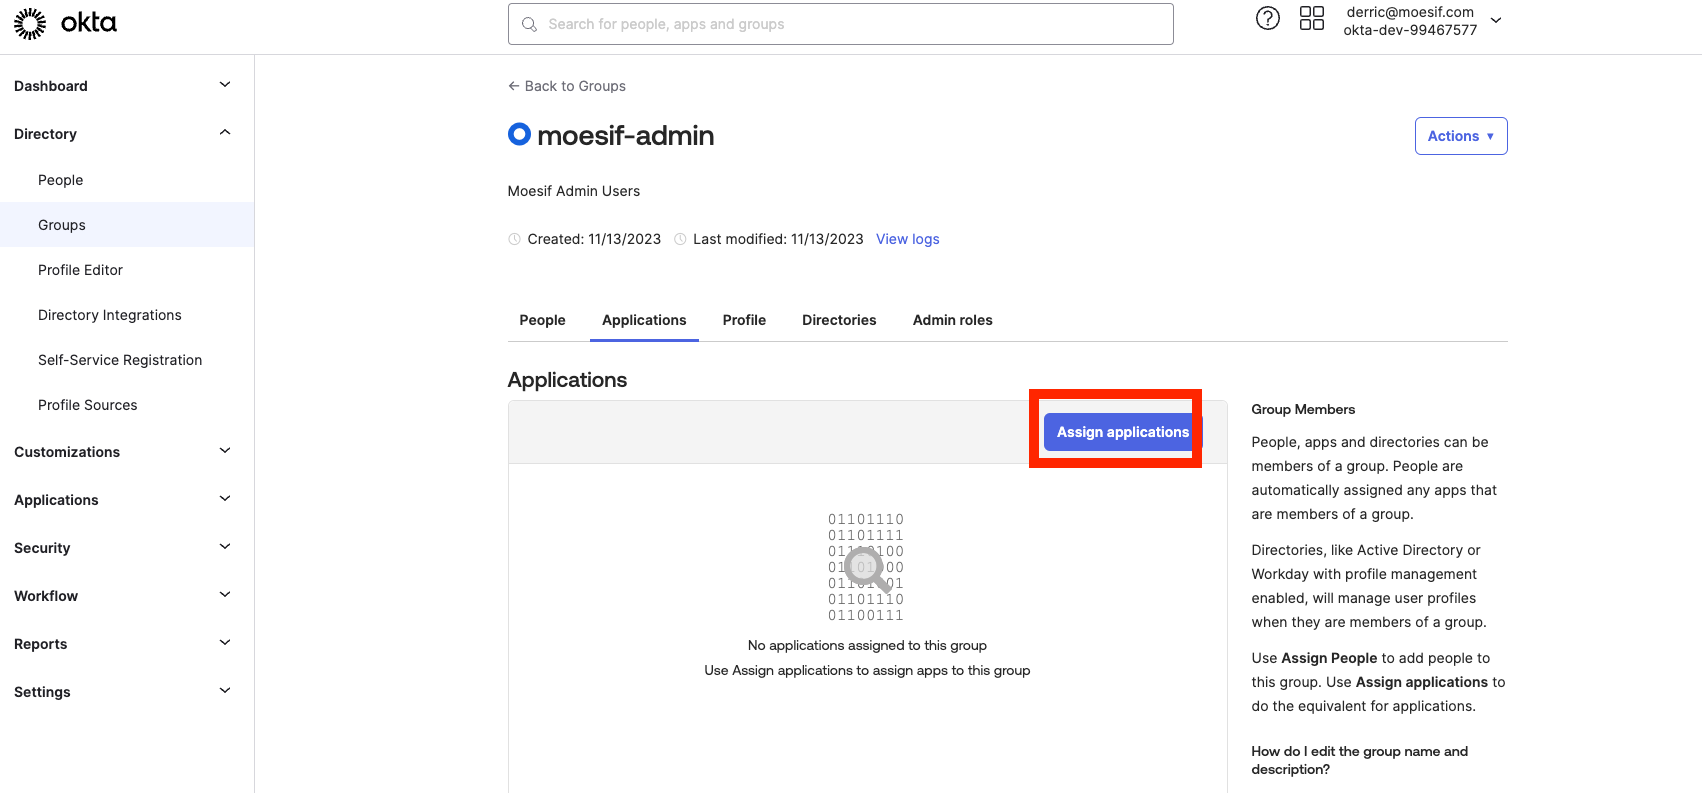
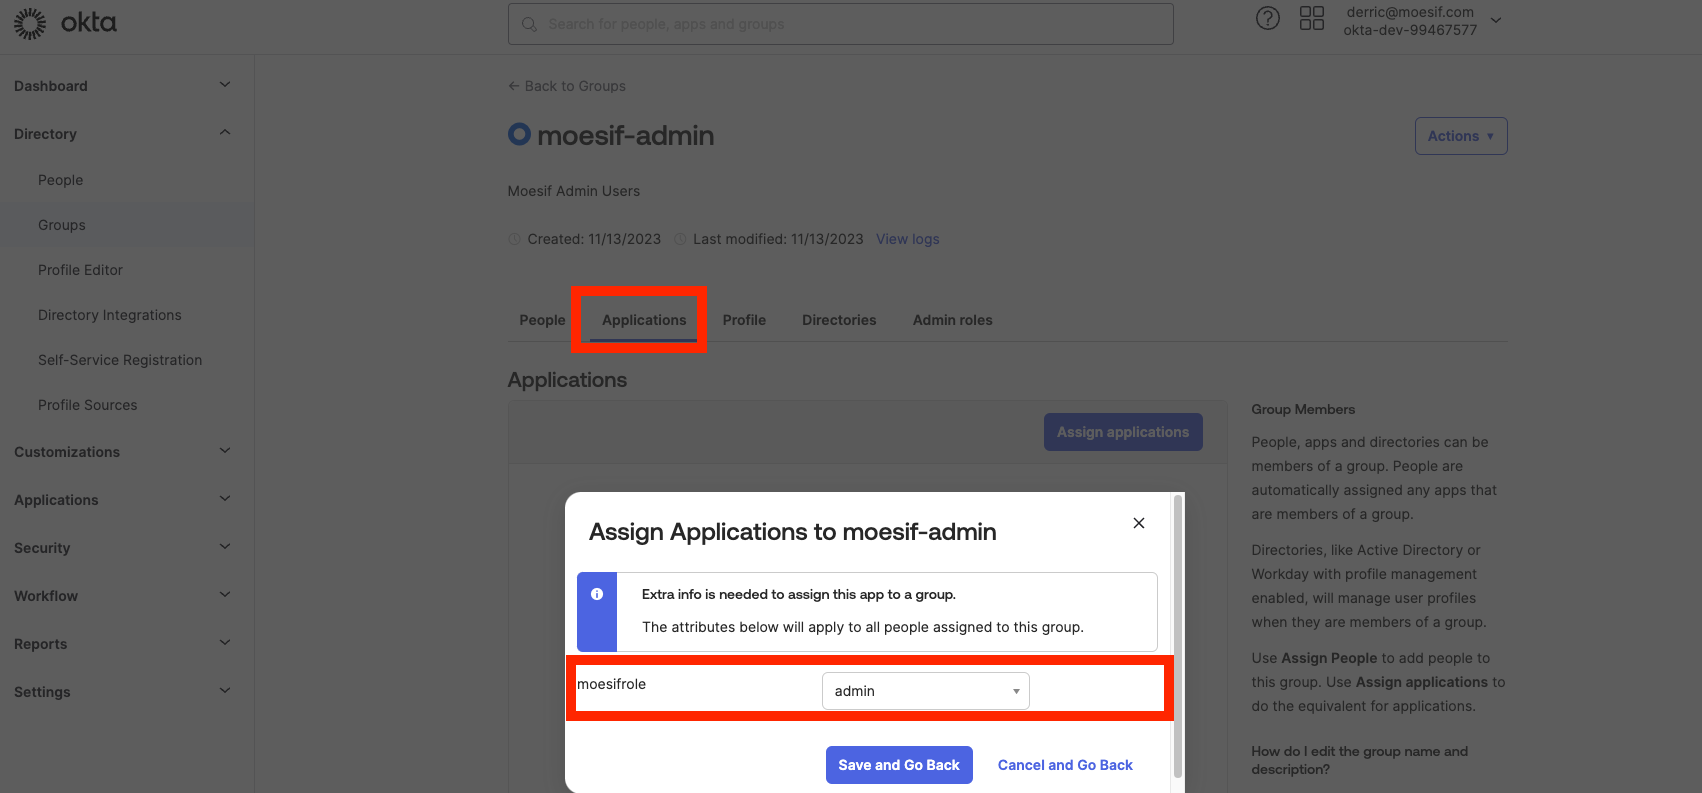
- You should also select the appropriate Moesif role we defined earlier for the group. This will cause anyone part of this group to also have the Moesif role you defined.
4. Test the IdP-Initiated Flow
- At this point, the application should be fully configured.
- Add yourself to one of the groups so you have access to the Moesif app.
- Then, within your Okta app launcher, try accessing the Moesif application.
5. Let Moesif Know
- With the IdP-Initiated flow working, Moesif can enable SP-initiated flow
- Moesif cannot enable a single user to test SP-initiated flows
- This should only be enabled once IdP-initiated flow is working. Once enabled, any users with your chosen email domains that are under your control will be redirected to a special login form where the team member will be prompted to log in via your IdP
- With SP-initiated enabled, you should test two flows:
- You’re already logged into your IdP. In this case, you’ll simply be prompted to click “Continue” to log into the Moesif application
- You’re not yet logged into your IdP. In this case, you’ll be redirected to your IdP’s login screen which will then redirect you back to Moesif.
After SSO activated
- If a user’s role changes, they need to log out of Moesif to have access to new role.
- Regardless of log out, Moesif sessions expire after one hour which will force a refresh
- Team members will no longer be able to log in with a password or social account.
- Password reset is disabled.
- Administrators will no longer be able to add/remove team members within Moesif.
- Role-based access control is synced from your identity provider and cannot be changed within Moesif.
If your Moesif subscription has any custom roles, you can also add their names to this list.
After SSO activated
Once SSO is enabled:
- Team members will no longer be able to log in with a password or social account.
- Password reset and MFA controls are disabled.
- Administrators will no longer be able to add/remove team members within Moesif.
- Role-based access control is synced from your identity provider and cannot be changed within Moesif.
- User licenses are added as new users are provisioned. Contact us to change this behavior.
What is experience like:
- Team members can log in via their IdP or from Moesif’s website.
- If team member logs in from the website, they will automatically be redirected to a special log in page.
Any employee logging in with your company’s domain will automatically be redirected to the single sign-on page where they can click log in. All team management and role-based access control actions is done through your identity provider. Moesif automatically syncs user accounts.
Disabling SSO
An organization can disable SSO at any time by contacting their technical account manager. Once disabled, existing team members who already had an account prior to SSO can log in with their password. New users who were provisioned through SSO can reset their password to log in.