Managing Prices in the Product Catalog
Using the Product Catalog, you can create prices and add them to plans through a single, simple interface across billing providers. You can also manage all prices across all of your billing providers in a single area, making for a seamless and convenient experience.
The Prices Screen
To get to the Prices screen, select Prices under Product Catalog from the navigation menu.
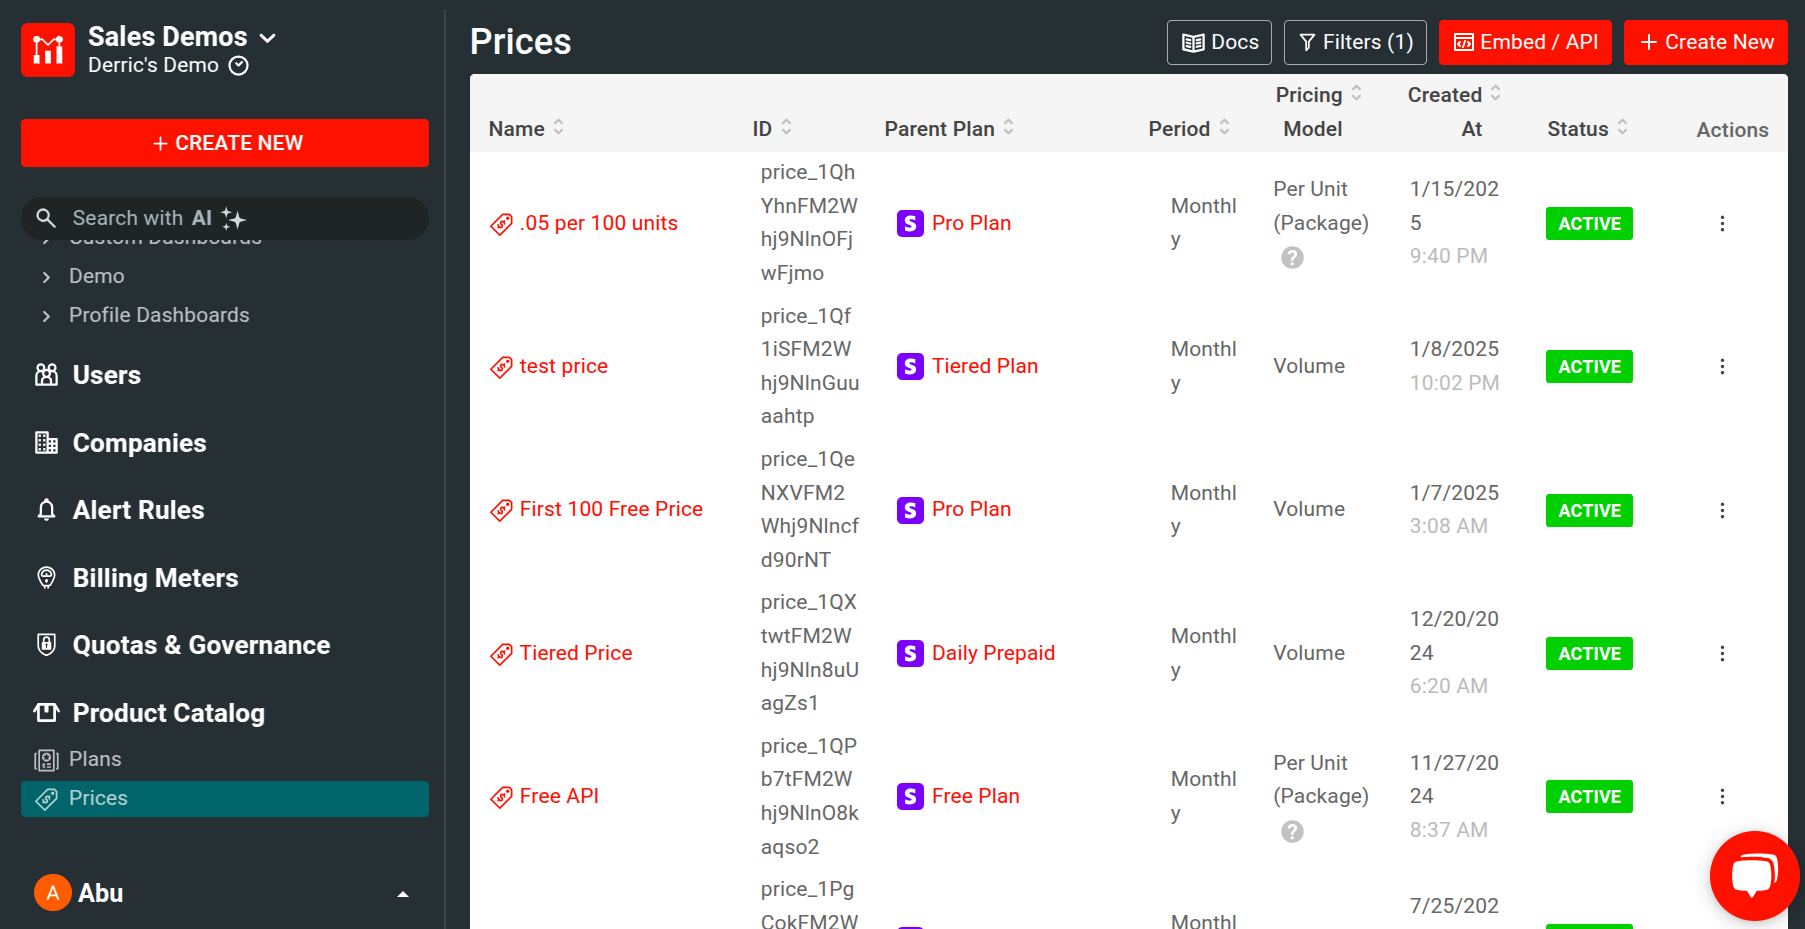
The Prices screen shows a list of prices available across your billing providers.
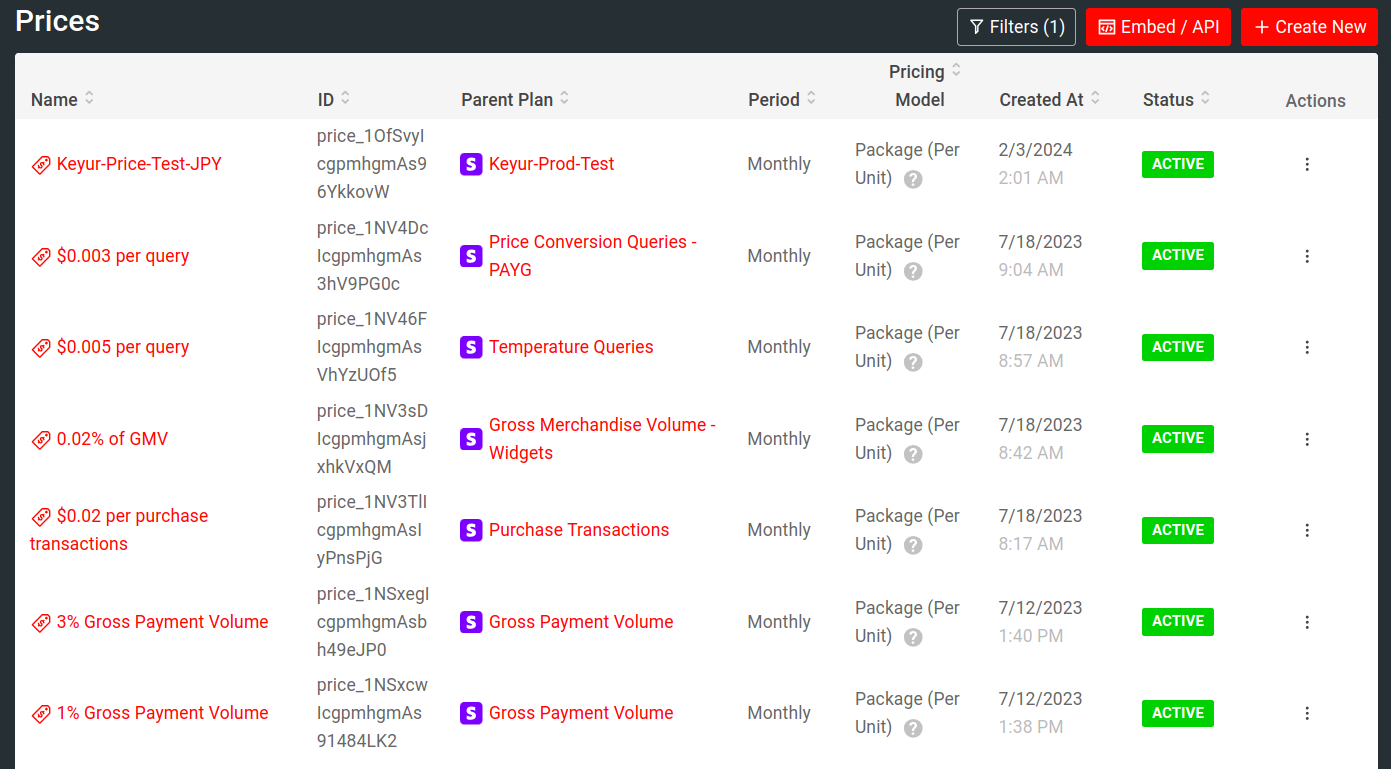
The list contains the following details about your prices:
- Name
- The internal price name.
- ID
- The price’s unique identifier the billing provider creates.
- Parent Plan
- The plan to which the price applies to.
- Period
- The billing period that the price applies to.
- Pricing Model
- The price’s applicable pricing model.
- Created At
- The creation date and time of a plan.
- Status
- The status of the price, Active or Archived.
- Actions
- A sub-menu that allows users to view, clone, and set the status of the price.
Prerequisites
To create a price in Moesif, make sure you meet the following requirements:
- Have an active account with a billing provider—for example, Stripe.
- Have the billing provider integrated with Moesif.
- Create a plan within the billing provider to attach the price to.
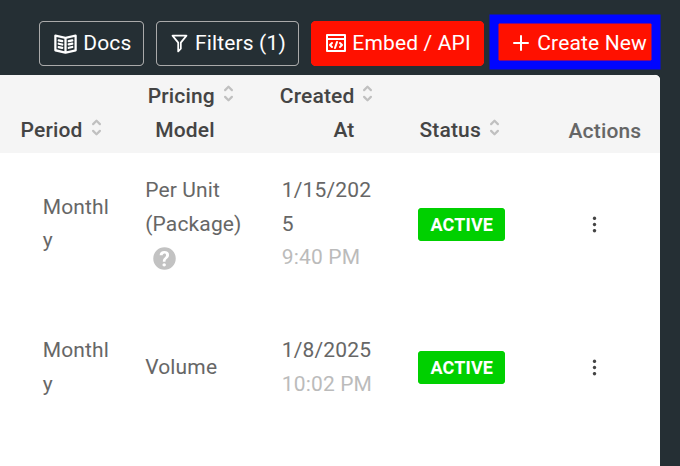
Creating a Price
To create a plan, in the Prices screen, select Create New.
Moesif supports creating metered and recurring prices. We recommend that you create one-time fees and shippable items directly in your billing system.
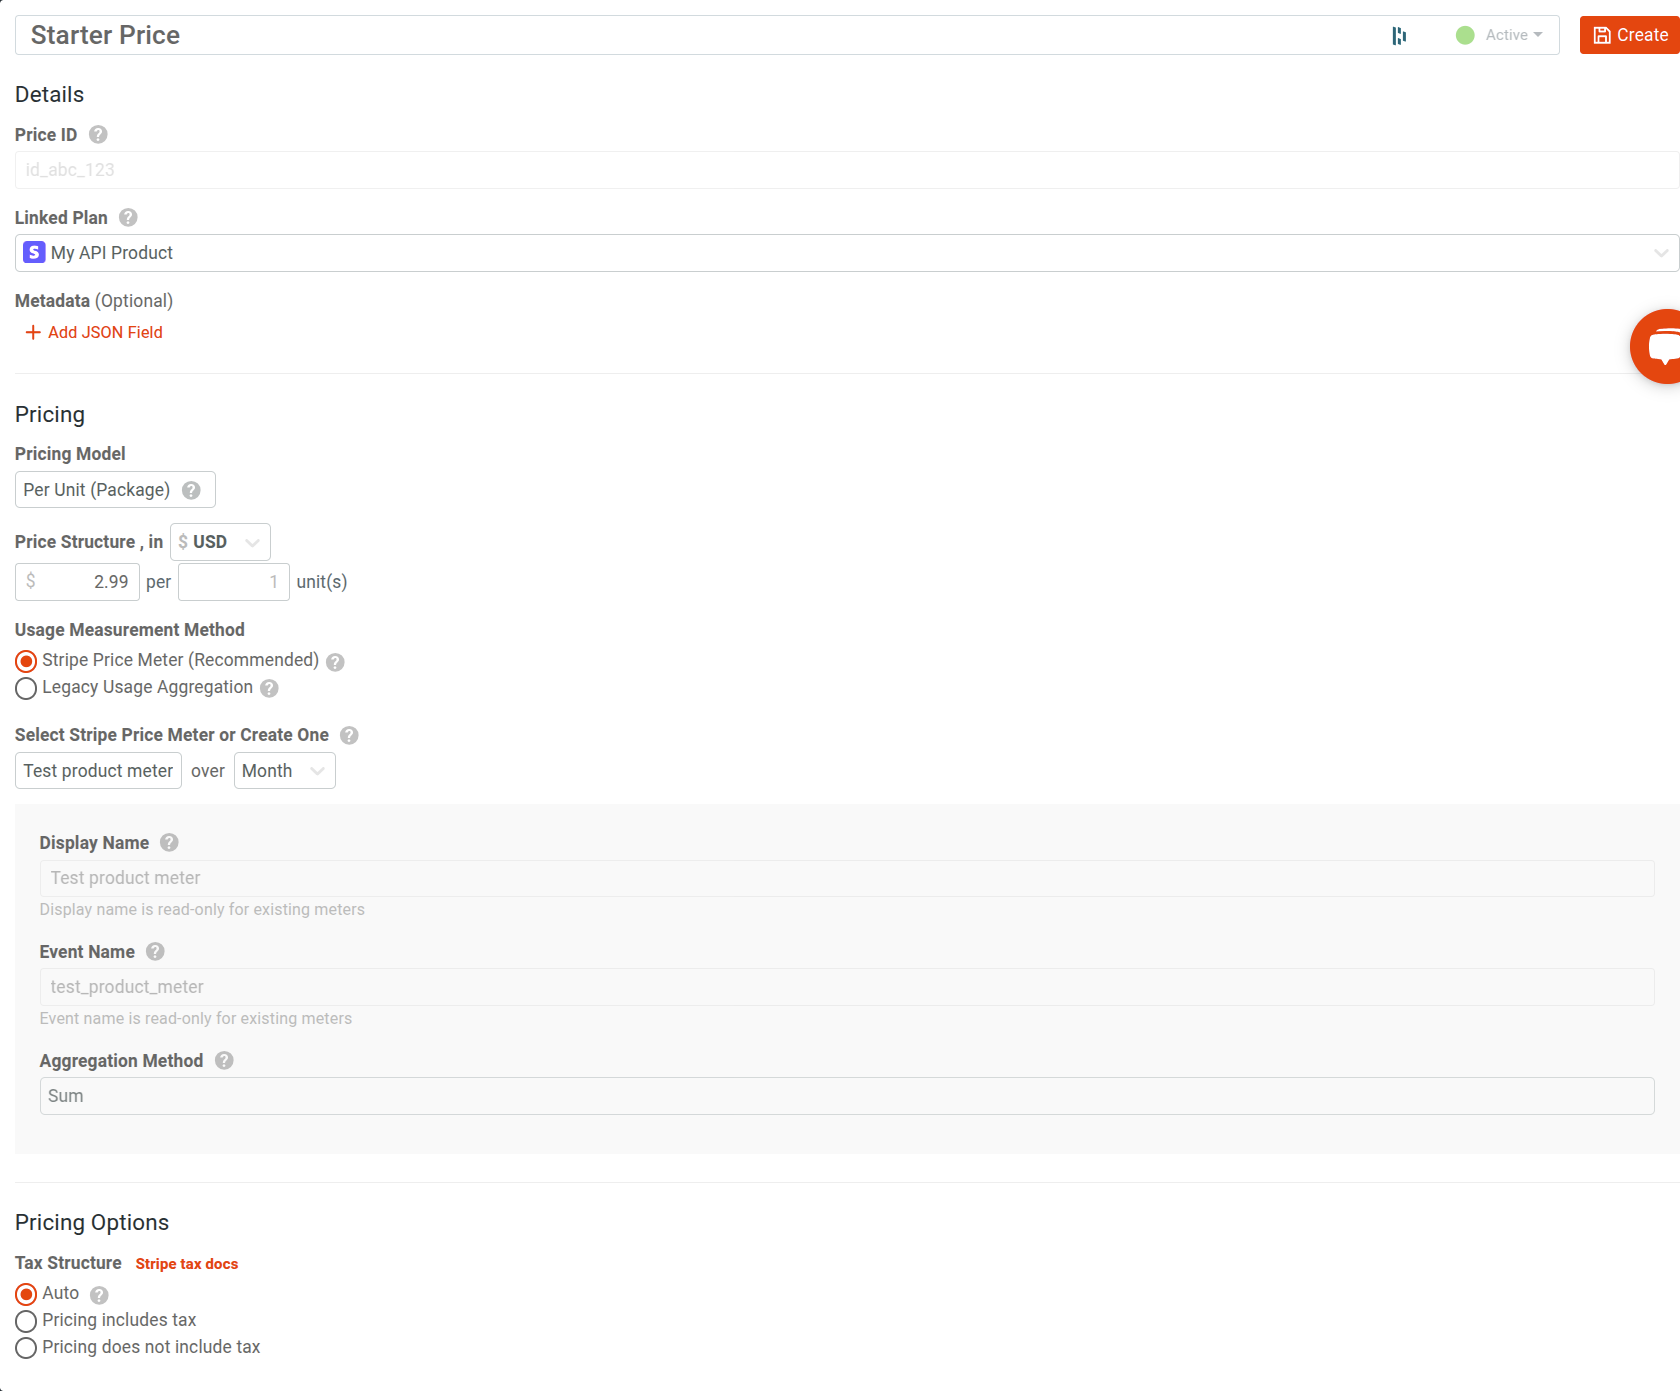
In the new screen, you can add the following details to your price:
Price Name
The name that identifies your price internally.
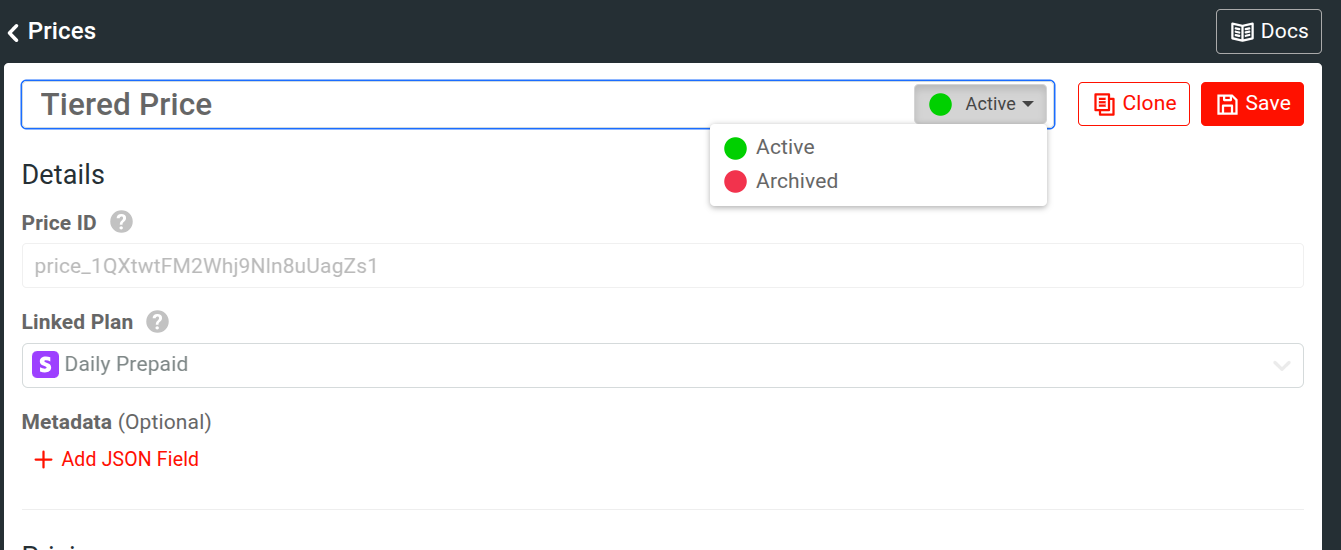
ID
The auto-generated price identifier. The billing provider creates it for internal usage.
Linked Plan
The plan that the price links to.
Metadata
Optional.
Allows you to add price metadata.
Pricing
Allows you to specify the following pricing details:
- Pricing model
- Price structure
- Usage measurement method
Pricing Model
Allows you to designate the pricing model that the price applies to. The pricing models that appear here depend on the billing provider. For example, the following pricing models are available for Stripe:
- Per Unit (Package)
- Volume Tiers
- Graduated Tiers
- Flat
The exact details about how these pricing models work also depend on the billing provider. For Stripe, see Recurring pricing models to understand how Stripe’s pricing models work.
Price Structure
Here, you can specify the price structure and the unit of currency. For example, if you charge per unit, specify the price per unit and choose USD as the currency.
Usage Measurement Method
For usage-based pricing models, depending on the plan you link the price to and the billing provider, you can specify the usage calculation and aggregation methods.
For Stripe, the Per Unit, Volume Tiers, and Graduated Tiers pricing models lets you choose between the following two options:
- Stripe Price Meter
- Uses Stripe Meter.
We recommend you choose this option.
After selecting this option, you must:
- Select the Stripe Meter to attach the price to or create a new Stripe Meter.
- Specify the period of time over which to aggregate the usage.
To create a new Stripe Meter, select Create New Meter. Then enter the following meter details:
- Meter name
- The event name the meter tracks
- The method for aggregating usage data
Moesif supports Sum and Last as usage aggregation methods.
- Legacy Usage Aggregation
- Uses Stripe’s legacy usage-records billing.
After selecting this option, specify how to aggregate usage. For example, you can choose to sum all consumed units per month by selecting Sum of unit(s) used for per Month from the dropdown menus.
Pricing Options
This section allows you to specify how taxes apply to the price. Similar to pricing models, the options available in this section depend on the billing provider. For example, the following tax structure options are available for Stripe:
- Auto
- Pricing includes tax
- Pricing does not include tax
Once you’ve populated the applicable fields, select Create to create the price.
Updating a Price
To update a price, follow these steps from the Prices screen.
- Select the price name that you want to update. Alternatively, select ⋮ Actions and then select View Details for the price you want to update.
- Make your changes.
- Select Save.
Note that you can’t edit all the details of a price. For auditing purposes, certain fields remain read-only after you create a price.
Archiving a Price
To archive a price, select ⋮ Actions and then select Archived.
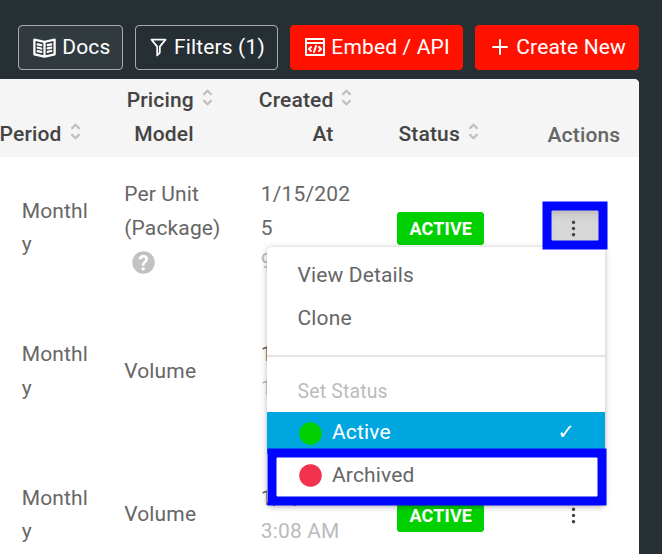
Alternatively, select the name of the price you want to archive and then select Archived from the dropdown next to the price name. Then select Save.
Cloning a Price
To make a copy of an existing price, follow these steps:
- Select Product Catalog and then select Prices from the navigation menu.
- For the price you want to make a copy of, select ⋮ Actions and then select Clone.
- Fill out the necessary details of your price.
- Select Create.