Sharing Workspaces
This document explains how to share a metric workspace.
This document also assumes you are familiar with Moesif API Analytics suite. For an introduction, see Introduction to Event Analytics and Logging.
Sharable Metric Types
You can share any workspace that contains one of the five metric types:
Access Restriction and Policy Constraints
Based on audience visibility and who you want to share a workspace with, Moesif Workspaces fall into three types:
- Private
- Team
- Public
For more information, see Types of Workspaces.
When you share a workspace publicly, you can enforce policy constraints that control what data you expose. You can add constraints like event IDs, user IDs, session tokens, or other constraints. Anyone with the link can only access the data that satisfies these constraints. You can add these constraints using Filters.
These constraints appear under Sandbox Policy in the Settings tab when creating a public workspace.
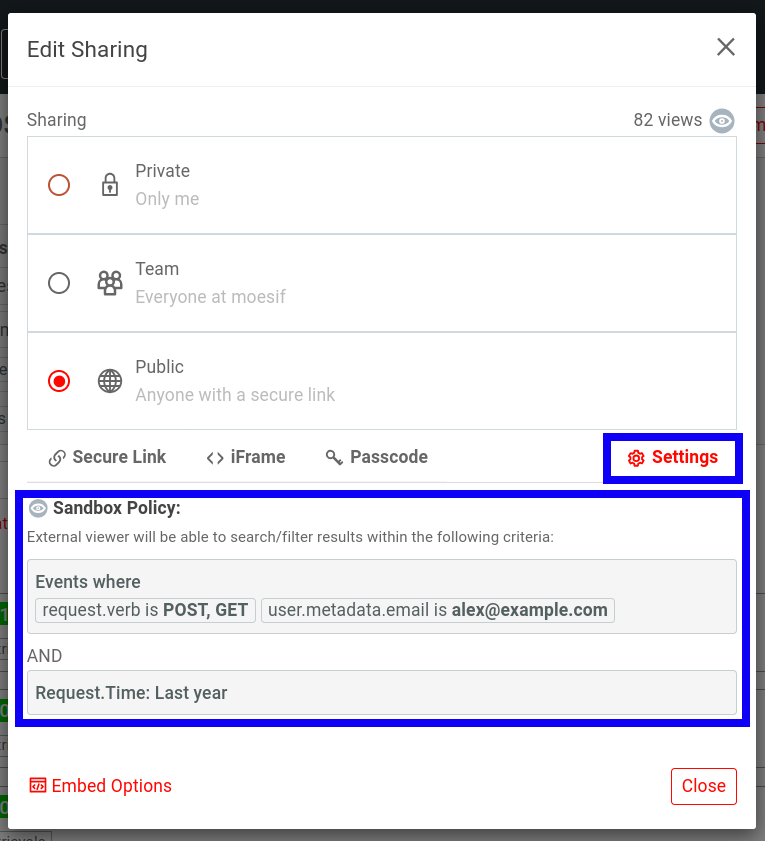
In the preceding example, the event data the shared workspace exposes must meet the following criteria according to the constraints:
- Events must be HTTP POST and GET requests.
- Events must only be associated with the user email
alex@example.com. - Events must be from the past year.
For security reasons, you cannot change the policy once set. We recommended that you test the link first as policy constraints can limit the view differently from what you are seeing.
You can also view the policy constraints for a saved public workspace by selecting Show Detailed Info in the workspace tile and then selecting Public Link.
Share a Workspace
Before you can share a workspace, you must first save the workspace to a dashboard. Then follow these steps to share your workspace:
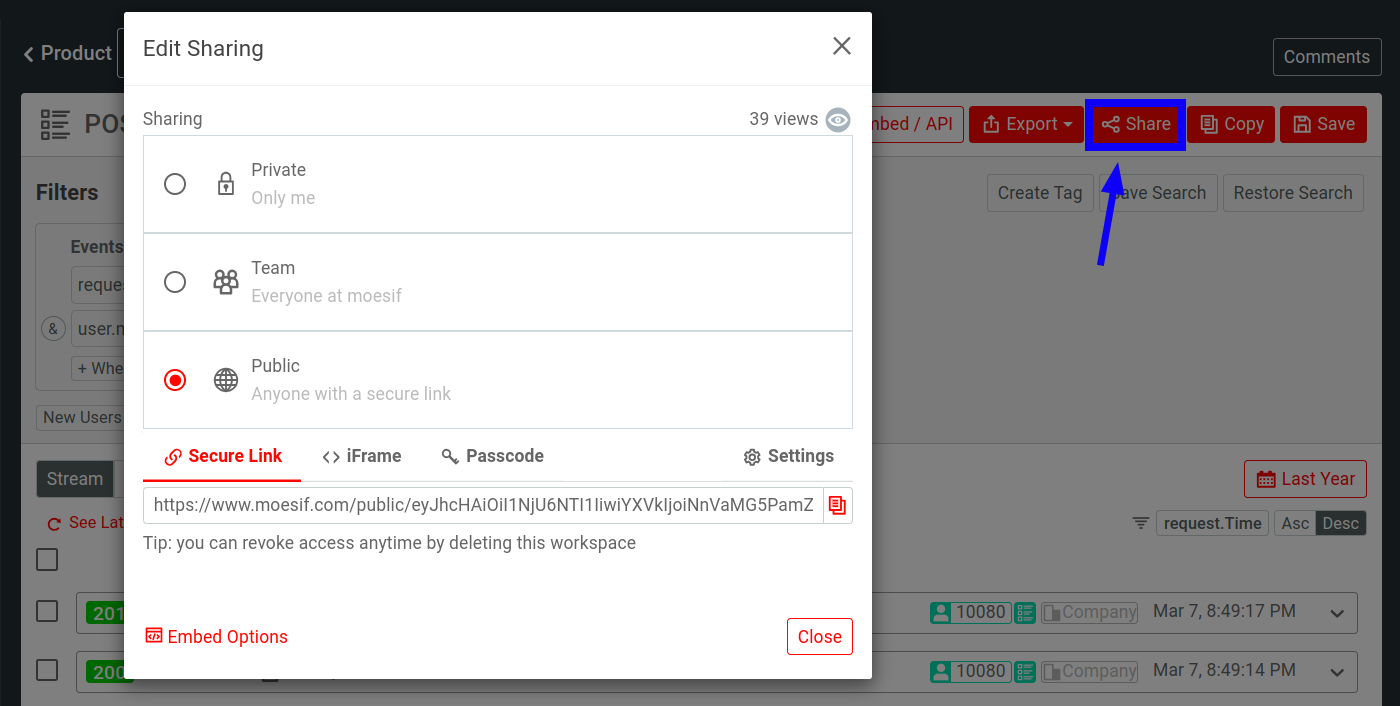
- Select Share.
-
Choose the sharing type:
a. If you want to keep the workspace private and only accessible to you, select Private.
b. If you want to share with your team members, select Team. Moesif generates a link that your team members can use to access the workspace.
c. If you want to share the workspace publicly with anyone, select Public and then select Save and Generate Public Link. Then you can choose how you want to share from the Secure Link, iFrame, and Passcode tabs.
Access Shareable Links
To access the shareable links for a workspace any time, follow these steps:
- Go to the dashboard where you saved the workspace to.
- Select the title of the workspace.
- Select Share
Alternatively, for public workspaces, you can select Show Detailed Info in the workspace tile and then select Public Link. A dialog appears with a sharable public link, a generated <iframe> element, and the policy constraints for the workspace.
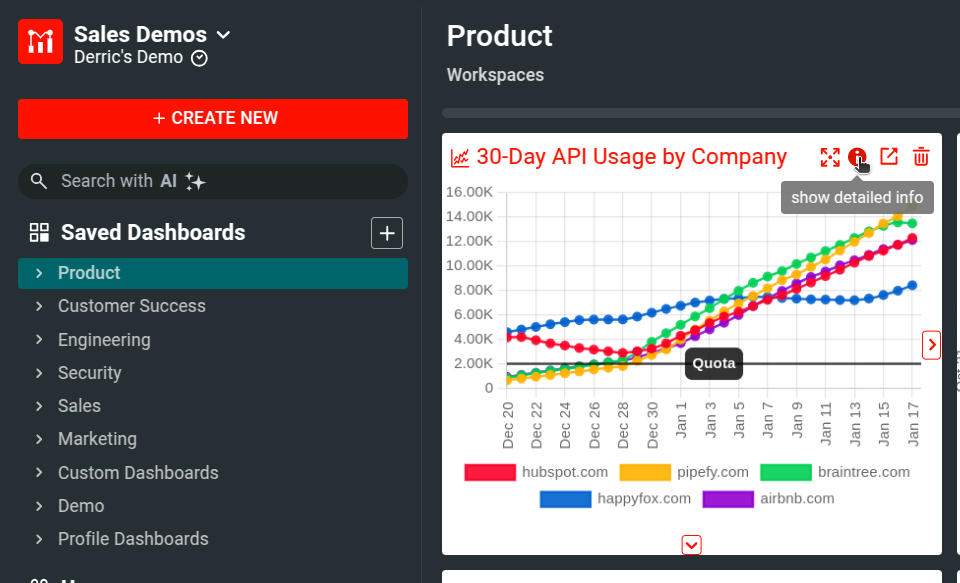
This example shows how to fetch shareable links for the POST Events public workspace from the Product dashboard.
Delete a workspace
- Go to the dashboard containing the workspace you want to delete.
- Select Delete.
- Select Delete again to confirm your choice.
Embedded Metrics
If you want to embed your metrics into custom solutions such as customer-facing applications, custom workflows, and so on, use Embedded Templates. Embedded Templates automatically update to the latest data and dynamically associate with different properties, allowing you to securely share metrics outside Moesif and support context-critical use cases.