Server Integration Guide - Cloud Proxy (Deprecated)
Moesif’s Cloud Proxy is now deprecated and no longer available for use. To integrate Moesif with your APIs, use one of our SDK or plugin server integrations.
The cloud proxy works by creating a new API URL which is a drop-in replacement of your original API URL, but with automatic API logging. It’s like a bit.ly link but for APIs and webhooks.
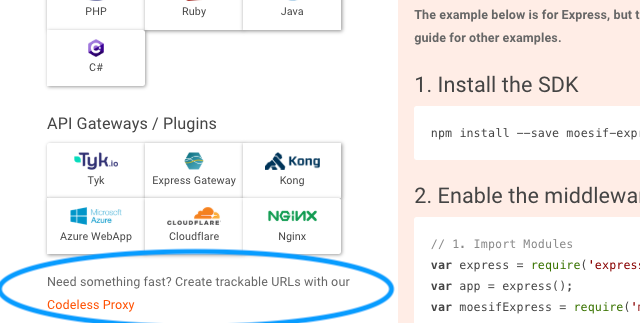
The cloud proxy method is codeless and can be used in lieu of installing a Moesif server integration while still monitoring API calls for webhooks, SaaS integrations, 3rd party tools, etc.
Getting started
Encoding a new URL
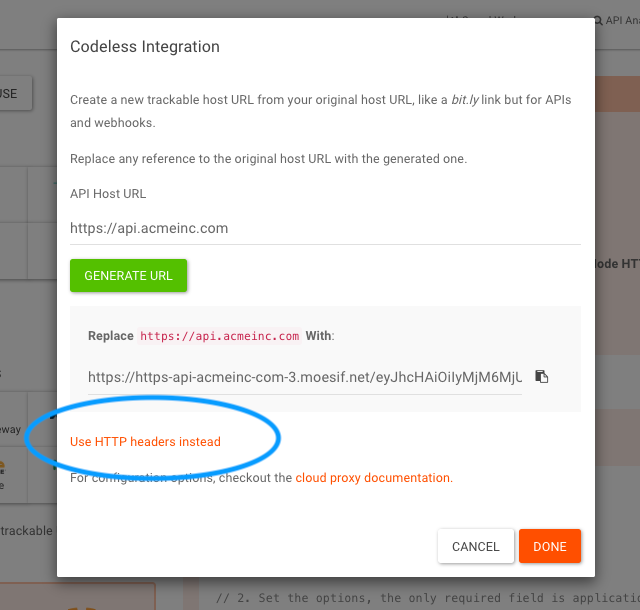
- Sign into your Moesif Dashboard, and go to Bottom Left Menu -> Installation -> Create trackable URLs with our Codeless Proxy. You will see a box to enter your API domain or host.
- Enter your base API URL in the below box and click generate.

Multiple URLs and domains
You only need the protocol and domain parts since the generated
host URL can handle any arbitrary URL path such as /items and /users. Of course, if you have separate domains such as
such as api-1.acmeinc.com and api-2.acmeinc.com, you can also encode both domains under the same Moesif app/project.
- Replace any occurrence of your old URL with the new one provided by Moesif. i.e.
https://api.acmeinc.comcan be replaced withhttps://https-api_acmeinc_com-1.moesif.net/XXXXXX
Alternative installation
The above installation adds an Application Id into the first path segment. This is the part after the first / and is stripped off before relaying to the proxied service. However, if you have an unique setup that cannot handle this, you can leverage our alternative installation via HTTP Headers.
To use the alternative:
- After generating a URL, Click Use HTTP headers instead.
- Add the specified Application Id to your API requests using the HTTP request header:
X-Moesif-Application-Id: Your Application Id
- Replace any occurrence of your old URL with the new one provided by Moesif. i.e.
https://api.acmeinc.comcan be replaced withhttps://https-api_acmeinc_com-1.moesif.net
Example Code
Javascript
// Example client code calling your backend RESTful API through our proxy

var request = require('request');

var options = {

    method: 'GET',

    url: 'https://https-api-acmeinc-com-3.moesif.net/XXXXXX/users/123',

    // replace your api base url with the encoded base url from Moesif
    headers: {
        // Session token used for authentication/authorization, could be a JWT, Device Identifier, etc
        'X-Moesif-Session-Token': 'dioe2jfioehfcioehfcehefheofh',

        // The persistence user_id of the end user
        'X-Moesif-User-Id': '1234',

        // Tag  API Call as getting a user profile if to /users
        'X-Moesif-Tags': url.contains('user') && method.contains('GET') ? 'user' : ''
    }
};

function callback(error, response, body) {
    // your code
}

request(options, callback);
Objective-C
// Example client code calling your backend RESTful API through our proxy

NSURL *url = [NSURL URLWithString: @"https://https-api-acmeinc-com-3.moesif.net/XXXXXX/users/123"];
// replace your api base url with the encoded base url from Moesif.

NSMutableURLRequest *request=[NSMutableURLRequest requestWithURL:url
                               cachePolicy:NSURLRequestReloadIgnoringCacheData
                               timeoutInterval:60];

[request setHTTPMethod:@"GET"];

[request setValue:@"user" forHTTPHeaderField:@"X-Moesif-Tags"];
// only set the user tag for the key API endpoint for user data.
Swift
// Example client code calling your backend RESTful API through our proxy

let url: NSURL = NSURL(string: "https://https-api-acmeinc-com-3.moesif.net/XXXXXX/users/123")!
// replace your api base url with the encoded base url from Moesif.

request = NSMutableURLRequest(URL:url)
request.HTTPMethod = "GET"

request.addValue("user", forHTTPHeaderField: "X-Moesif-Tags")
// only set the user tag for the key API endpoint for user data.
Java
// Example client code calling your backend RESTful API through our proxy

  private Map<String, String> mHeaders = new HashMap<String, String>();

  private static final String sBaseUrl = "https://https-api-acmeinc-com-3.moesif.net/XXXXXX/users/123";

  public void sendHttpRequest(String verb, String path) {
      mHeaders.put("X-Moesif-Api-Version", "1.0.1");

      if (verb.equals("GET") && path.startsWith("/user")) {
          mHeaders.put("X-Moesif-Tags", "user");
          // only set the user tag for the key API endpoint for user data.
      }
      String userId = getUserSession().getUserId();
      if (!Strings.isNullOrEmpty(userId)) {
          mHeaders.put("X-Moesif-User-Id", userId);
      }

      String url = sBaseUrl + path;

      // do HTTP request
  }
Configuration options
Configuration options can be added to the API call to add more insights.
We highly recommend at least setting X-Moesif-User-Id so the user is identified with Moesif.
This enables you to use any of the integrations to save user profiles in Moesif such as the customer email and
name.
-
X-Moesif-Application-Idrequired (If using HTTP headers)- value: my_application_id
- This authenticates/authorizes your application with Moesif.
-
X-Moesif-User-Idrecommended- value: persistent *user_id string for this user
- This enables Moesif to attribute API requests to individual users so you can understand who calling your API
- amd should be the unique identifier you use in your internal infrastructure to identify users.
-
X-Moesif-Session-Tokenrecommended- value: your end user’s session token
- The session token or API key for the authenticated user. Unlike
X-Moesif-User-Id, the session token can be temporary. Moesif will alias multiple session tokens to the same user id.
-
X-Moesif-Api-Versionoptional- value:
X.X.X - You can tag the API or client with a version. Any string is fine such as semantic versioning or a date string can be used.
- value:
-
X-Moesif-Tagsoptional- value: Comma Separated list of tags for the API Call
user- The
usertag is a hint to what is considered the “user profile” for the signed in end user. - Add to a single method/endpoint template which you consider has the most user metadata.
- For example, if you have an endpoint that gets the authenticated user via
GET /users/me, add this header to those API Calls. The verb or url doesn’t matter but the response body should have user’s data. - You shouldn’t add to more than one method/endpoint combination. i.e. Don’t add it to both
GET /usersandPOST /usersunless both return the same JSON schema.
- The
- value: Comma Separated list of tags for the API Call
-
X-Moesif-Cookie-Domain-Rewriteoptional- value:
trueorfalse - If true, this will rewrite any cookie domains that match the destination domain with your actual moesif domain. So if a cookie had the domain
api.acmeinc.com, this flag will rewrite the domain tohttps-api-acmeinc-com-3.moesif.net. This may be needed to expose cookies in browser, Postman, etc.
- value:
Limitations of Cloud Proxy
-
For public API platforms and high volume APIs measured in billions of API calls, Moesif highly recommends using a Moesif server integration or API Gateway plugin rather than the cloud proxy for high availability.
-
The proxied API service has to be accessible from the internet. The cloud proxy won’t work for
http://localhost. If you’re making calls to an API behind a firewall, a Moesif server integration must be used. -
Certain enterprise features like intelligent sampling and one-click user suppression are not supported with the cloud proxy. To use these features a Moesif server integration must be used.