Integrating with Java Spring Boot APIs
Spring Boot is an extremely popular way to quickly and securely build RESTful APIs with Java. Moesif is a great addition to your Spring Boot and Java API stack to cover everything from analytics to helping you set up metered billing.
Building your API is just the first step. Once built, you need to keep customers and services using the API happy. Moesif is the tool to help you do exactly that.
Integrating Moesif with your Spring Boot API can be done in a few simple steps. In this blog I’ll show you how to:
- Create a Moesif Account
- Integrate Moesif into your API code
- Verify the integration
- Be ready to jump into docs and get started!
Prerequisites
- A functioning Java Spring project (Follow our guide) if you are starting from scratch
- We’ll be utilizing the Spring Web dependency listed in Spring Initialzr. It can be added to your project by including
spring-boot-starter-webin your dependencies.
- We’ll be utilizing the Spring Web dependency listed in Spring Initialzr. It can be added to your project by including
- Gradle or Maven build tools installed (We’ll be using Gradle)
- Postman to test our functionality
Step 1: Creating Your Moesif Account
If you don’t already have a Moesif account, You’ll want to sign up. Once you’re registered you’ll need to add in a few details.
<img class="lazyload blur-up" data-src="/docs/images/guides/1900/org-details-screen.png" width="75%" alt="Moesif create account first screen">
These include:
- Organization Name the name of your organization or company
- App Name the name of the app you are integrating with Moesif
- What best matches your role? Here you can describe what your current role is at your organization. This helps us to assist you with relevant hints and tips in the future.
- What are you hoping to achieve? Here you can let us know how you'll use Moesif to help your organization or project.
Once you’ve filled out these details, click Next. After this, you’ll be presented with a brief overview of Moesif.
<img class="lazyload blur-up" data-src="/docs/images/guides/1900/moesif-overview-screen.png" alt="Moesif create account overview screen">
Click Next once again.
After the Overview screen, you’ll be presented with the Quick Install screen. Here you can pick from any different server integrations and plugins. For Spring Boot, we want to make sure Java is selected in the left pane and that the Spring Boot walk-through is displayed on the right.
<img class="lazyload blur-up" data-src="/docs/images/guides/1900/java-spring-boot-select-screen.png" alt="Moesif config screen with Spring Boot integration info displayed">
Take note of your application ID, we’ll be using it later.
Step 2: Adding Project Dependencies
We will now edit our gradle file with our correct dependencies. In build.gradle we will add the following entries under the dependencies object.
dependencies {
    implementation 'com.moesif.servlet:moesif-servlet-jakarta:2.0.0'
    implementation 'jakarta.servlet:jakarta.servlet-api:6.0.0'
}
Run the following command to ensure your project builds correctly.
./gradlew build
Maven users can add the following to the
pom.xmlfile:<dependency> <groupId>com.moesif.servlet</groupId> <artifactId>moesif-servlet-jakarta</artifactId> <version>2.0.0</version> </dependency> <dependency> <groupId>jakarta.servlet</groupId> <artifactId>jakarta.servlet-api</artifactId> <version>6.0.0</version> <scope>provided</scope> </dependency>Run
mvn packageto ensure your project compiles correctly.
Your dependencies will be brought into the project and compiled if necessary. The moesif-servlet-jakarta dependency is what allows us to connect to Moesif.
Step 3: Adding the Moesif Integration Code
We’ll create a file to host all of our Moesif configuration details called MoesifConfig.java. In this file we will set up the filter that passes events along to Moesif. It is here we can also define details that enable user and company tracking as well.
import jakarta.servlet.Filter;
import com.moesif.servlet.MoesifFilter;
import org.springframework.context.annotation.Bean;
import org.springframework.context.annotation.Configuration;

@Configuration
public class MoesifConfig {

  @Bean
  public Filter moesifFilter() {
    return new MoesifFilter("APPLICATION_ID");
  }
}
Our code imports the necessary classes for creating a Filter Bean using the Spring Framework. The class is annotated with @Configuration which indicates that this class can be used by Spring’s IoC container as a source of bean definitions.
The class defines a single method, moesifFilter() and is annotated with @Bean. This method returns an instance of the MoesifFilter class, configured with the “APPLICATION_ID” of your Moesif Application you created earlier.
This configuration allows the Spring Framework to create and manage the MoesifFilter Bean, and it can be used to track the API calls made to the application.
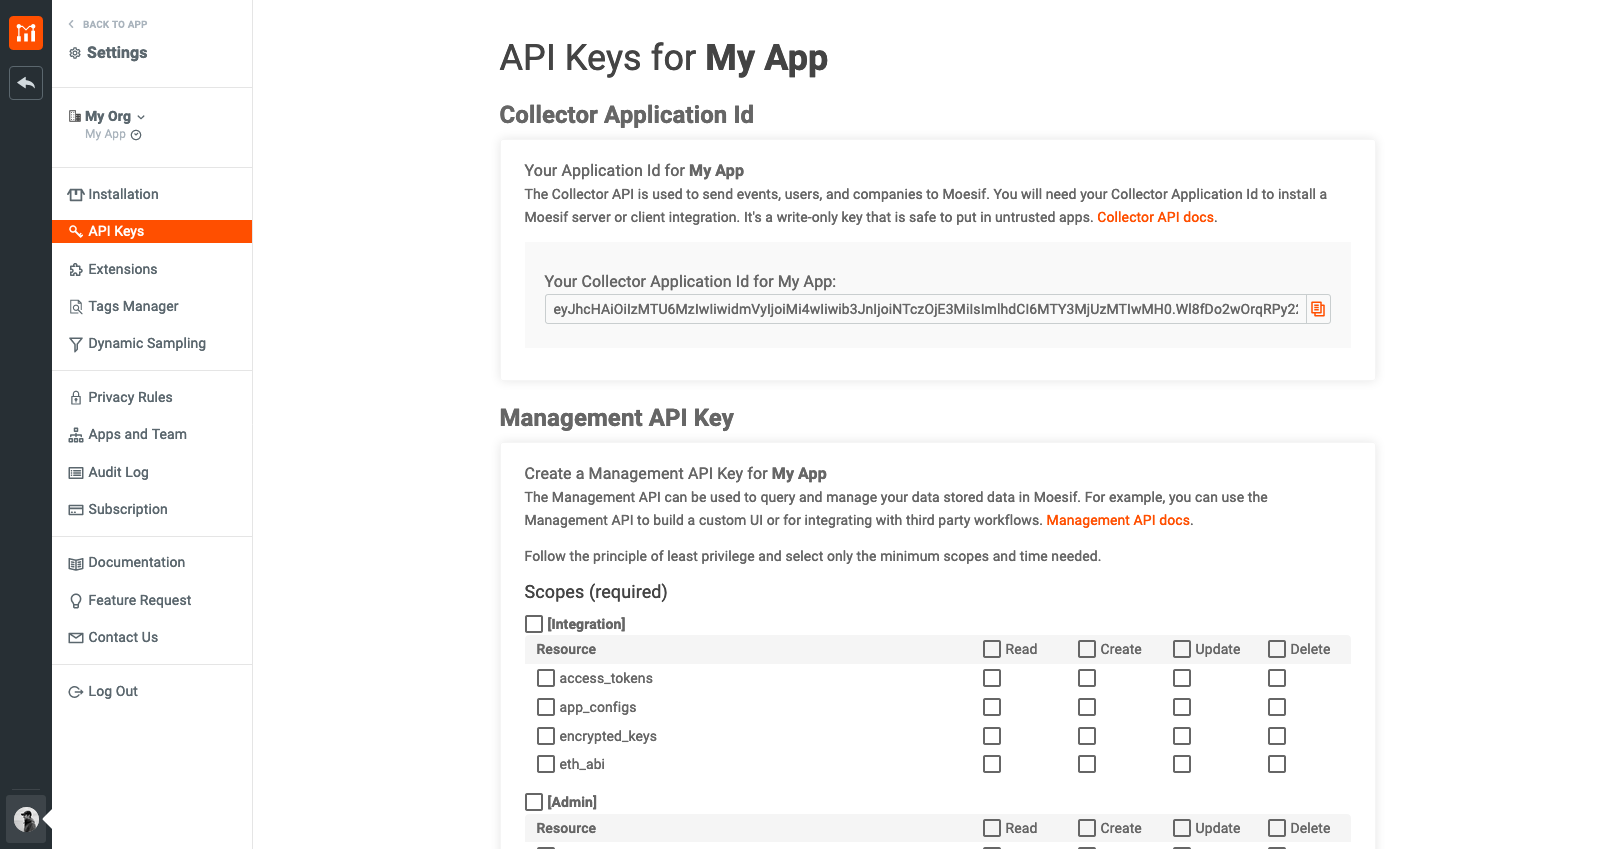
Obtaining your Moesif Application ID
Your Moesif Application ID is provided to you in the code example on the setup screen. If you navigated away from the screen or have need for your application ID in the future, there are alternative ways to access it. Your Moesif application ID is found in Moesif by going to the menu link in the bottom-left of the screen (which will show your name) and selecting API Keys.
The key will then be on the page that appears under Collector Application Id.
Step 4: Making Your First Request
Once your API code is back up and running, it’s time to issue a request to your endpoint. My preference for this is to use Postman to send the GET request.
Regardless of how the request is sent, the Moesif integration into your application isn’t complete until the first request is sent and detected by Moesif. In the Moesif setup screen, before you send off the request, you should see a dialog at the bottom of the screen showing “No data received yet.”
<img class="lazyload blur-up" data-src="/docs/images/guides/1900/no-data-received-screen.png" alt="Moesif no data received onboarding screen">
To continue, send off the request to your endpoint.
<img class="lazyload blur-up" data-src="/docs/images/guides/1900/postman.png" alt="Postman showing a successful request to our endpoint">
Step 5: Confirming Your Integration
After the request is sent, Moesif should receive the event and data. This may take a few moments for the first request to reflect in the system, once sent. Once received, Moesif will confirm that you are ready to move forward. The previous prompt will turn green and show “Data Received!”.
<img class="lazyload blur-up" data-src="/docs/images/guides/1900/data-received-screen.png" alt="Moesif data received onboarding screen">
Lastly, scroll to the bottom of the screen and click View Events.
<img class="lazyload blur-up" data-src="/docs/images/guides/1900/next-button.png" alt="Moesif next button">
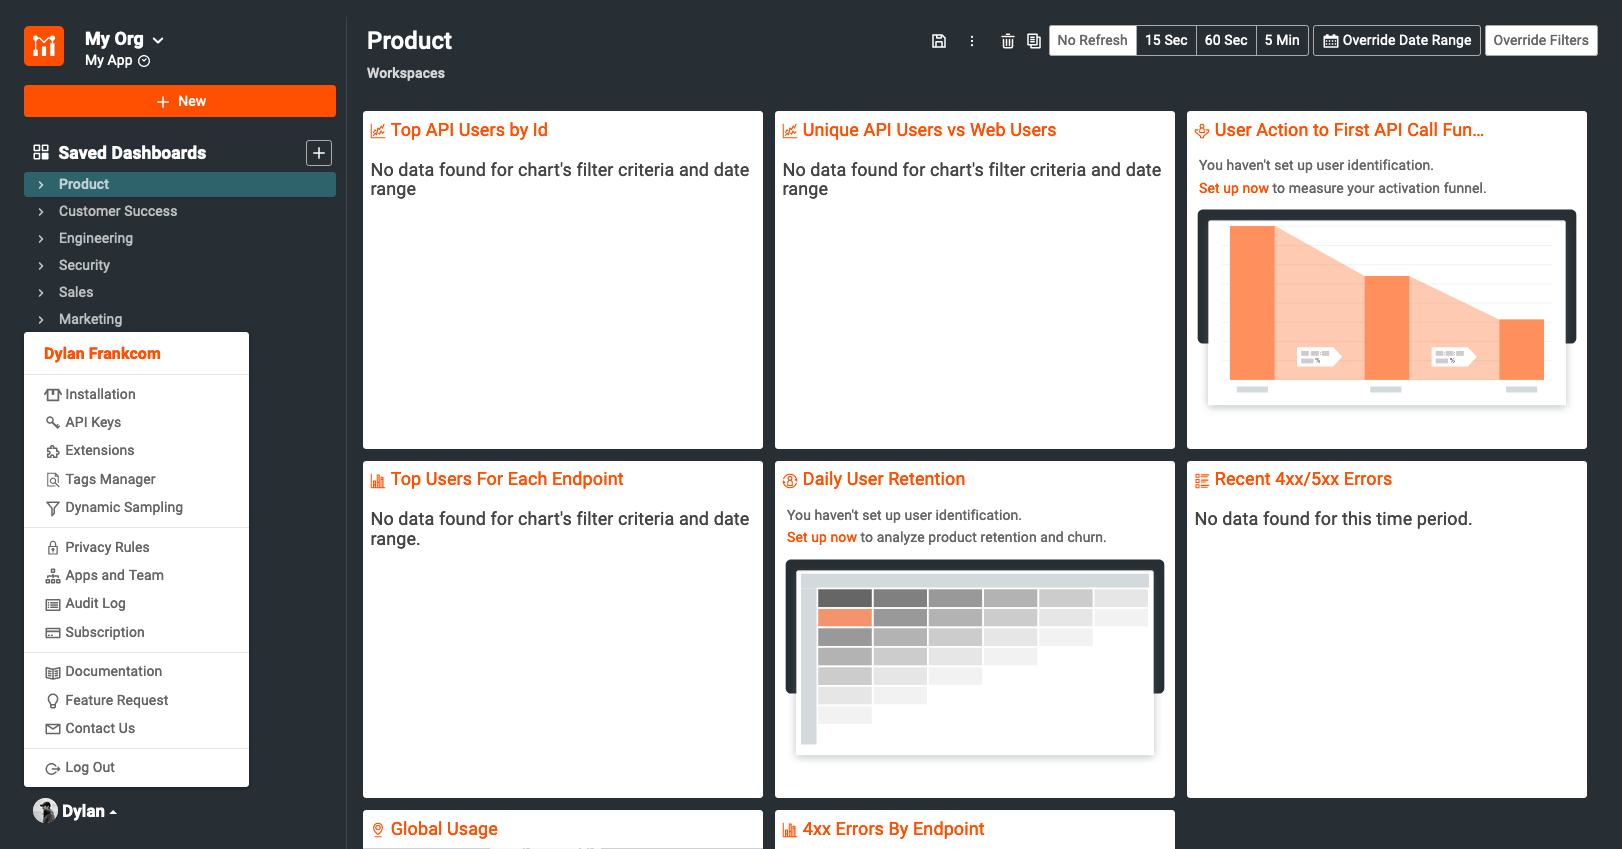
Explore Moesif
You’ve now successfully integrated your API application with Moesif. You should now see the Moesif dashboard in the browser, ready to explore.
<img class="lazyload blur-up" data-src="/docs/images/guides/1900/query-received-dashboard.png" alt="Moesif dashboard with event received">
Now that your API is integrated and moving data into Moesif you can start to explore. Check out our docs to find everything from API analytics, monitoring and alerts, and more!