Tracking API calls by User in Java Spring Boot APIs
When it comes to leveraging API analytics and metrics, simply tracking API calls by anonymous usage is not enough to gain valuable insights. It’s essential to understand how specific endpoints are being used by different users to get a more complete picture of API usage. This information can help optimize the performance of the API and improve the user experience.
To track API calls and attribute them to a specific user, authentication is required. Authentication is the process of verifying the identity of the user making the API call. In this example, a JSON Web Token (JWT) can be used to authenticate the API calls.
I will be working from the Java Spring Boot Integration code example from a previous guide, available here.
To get user tracking working we will:
- Update our
build.gradlefile to include the required dependencies - Configure our servers Moesif middleware to use an ID field coming from a JWT as our User ID within Moesif
- Configure our endpoints to accept a JWT within the request
- Attach a JWT to our request, and send it to the API
A few things to mention in this guide, before we start.
-
I will be generating a JWT from jwt.io. Normally you would use the authentication flow from your app in order to generate this upon login, or by other means that do not require manual creation. In order to make things easier though, I have opted for manual creation. You will want to ensure that your JWT does have the required fields though in order to make user identification work.
-
This example API is not secured. It uses a JWT is passed with the request but we are not doing any type of authorization checks in this example. When publishing an API to production, likely you will want to make sure you have the correct authorization flows in place.
-
Our example assumes that your server and API are already integrated with Moesif. If you still need to integrate your API with Moesif, please take a look at our Java Spring integration guide before proceeding if you want to follow along.
With that said, let’s jump into our example!
Step 1: Getting Started
Below is the code for our sample API. It is just a very simple, single endpoint, built with Java Spring. As mentioned earlier, this server has already been integrated with Moesif.
The code for our API Controller currently looks like this:
// APIController.java

import java.util.Random;
import org.springframework.web.bind.annotation.ResponseBody;
import org.springframework.web.bind.annotation.RequestMapping;
import org.springframework.web.bind.annotation.RestController;

@RestController
public class APIController {

  @RequestMapping("/creditscore")
  @ResponseBody
  public String creditScore() {
    int creditScoreMin = 500;
    int creditScoreMax = 900;

    Random rand = new Random();
    int randomCreditScore = rand.nextInt(creditScoreMin, creditScoreMax);

    return String.format("{ \"credit_score\": \"%d\" }", randomCreditScore);
  }
}
And our Moesif integration like this:
// MoesifConfig.java

import jakarta.servlet.Filter;
import com.moesif.servlet.MoesifFilter;
import org.springframework.context.annotation.Bean;
import org.springframework.context.annotation.Configuration;

@Configuration
public class MoesifConfig {

  @Bean
  public Filter moesifFilter() {
    return new MoesifFilter("YOUR_MOESIF_APPLICATION_ID");
  }
}
You will see in our MoesifConfig class, our configuration only includes the Moesif Application ID. Once your backend is integrated with Moesif, you’ll begin to see events roll in. Those events will look like this on the Moesif Events dashboard:
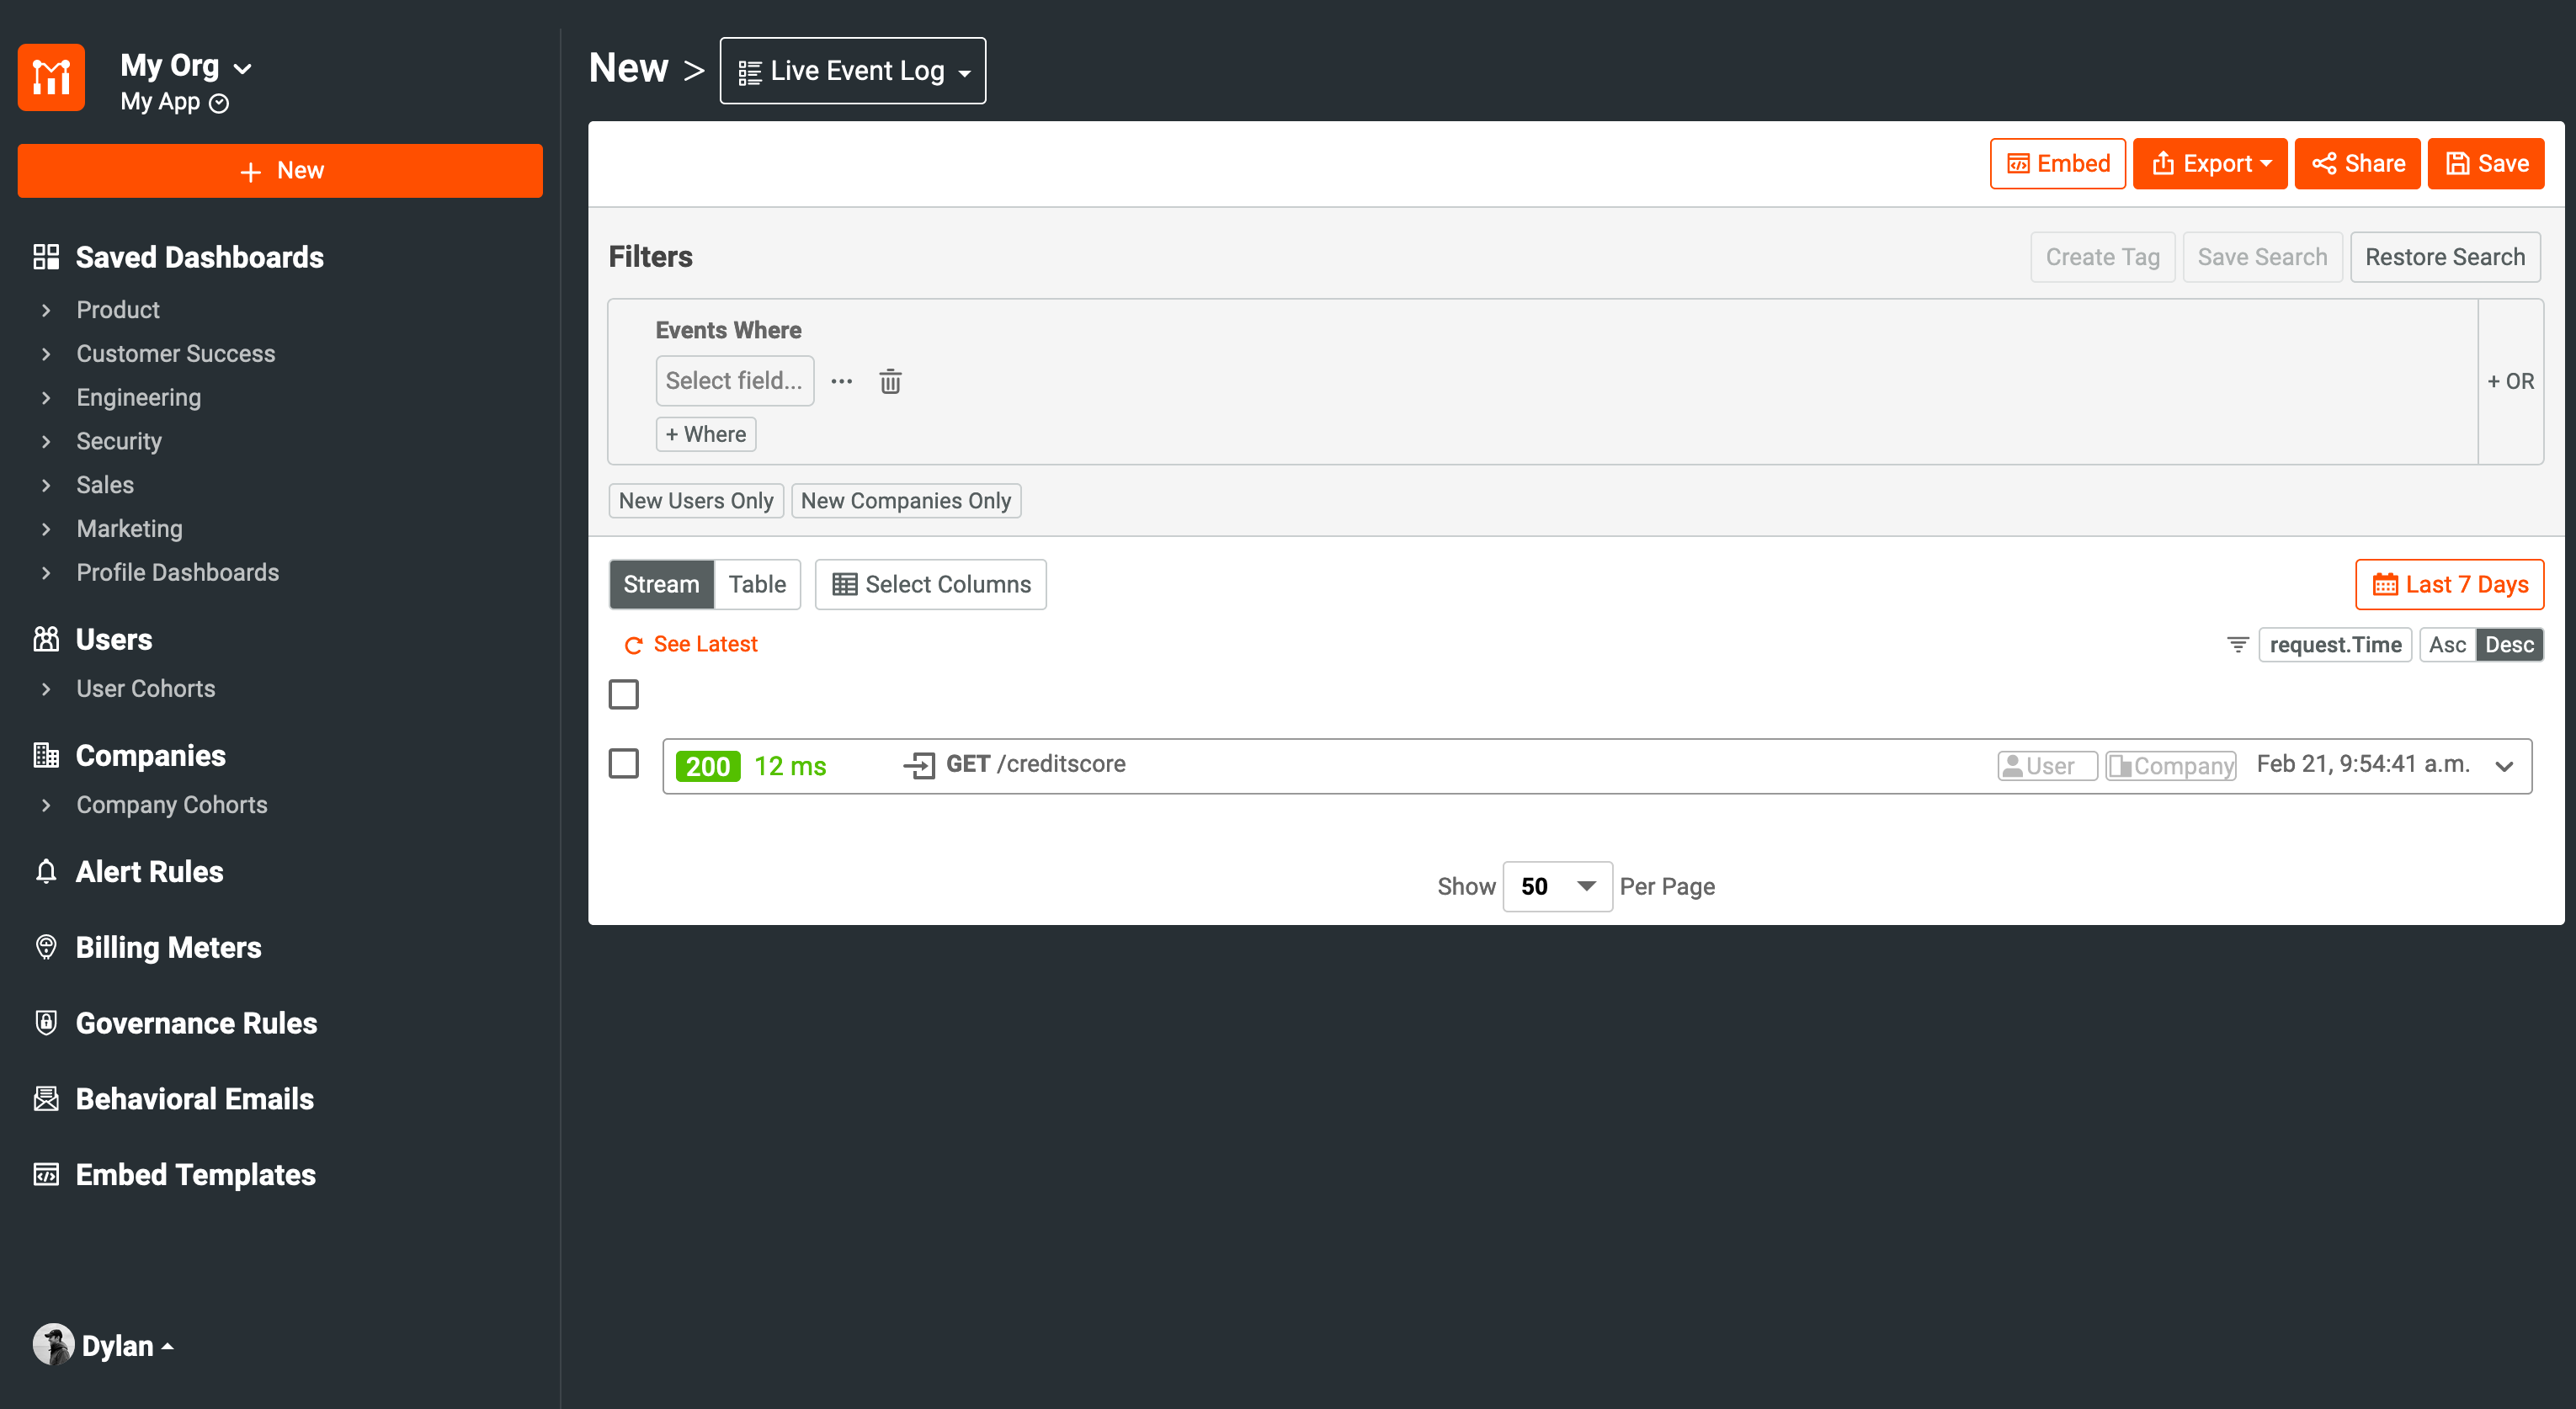
You’ll notice that the User ID field is blank. This means that these events are not tagged to a specific user. Therefore, we cannot leverage user-specific metrics. In order for us to configure user tracking, we need to add a few lines of code to the configuration.
Step 2: Adding User Tracking to Our Moesif Configuration
In order to add user tracking to our configuration, we need to supply an identifyUser parameter to the middleware. Doing that, our configuration object will now look like this:
// MoesifConfig.java

// Additional imports
import java.util.Base64;
import org.json.JSONObject;
import com.moesif.servlet.MoesifConfiguration;
import jakarta.servlet.http.HttpServletRequest;
import jakarta.servlet.http.HttpServletResponse;

@Configuration
public class MoesifConfig {

  public String APPLICATION_ID = "YOUR_MOESIF_APPLICATION_ID";

  @Bean
  public Filter moesifFilter() {

    MoesifConfiguration config = new MoesifConfiguration() {

      @Override
      public String identifyUser(HttpServletRequest request, HttpServletResponse response) {
        String customerID = null;

        try {
          // Obtain ID from JWT
          // Parse Authorization Header
          String token = request.getHeader("Authorization");
          String[] chunks = token.split("\\.");
          Base64.Decoder decoder = Base64.getUrlDecoder();
          String payload = new String(decoder.decode(chunks[1]));

          // Convert to JSON Object for easy access to the ID field of the JWT
          JSONObject jsonObject = new JSONObject(payload);
          customerID = jsonObject.getString("id");
        } catch (Exception e) {
          System.out.print("Auth payload could not be parsed into JSON object: " + e.toString());
        }

        if (customerID == null) {
          return null;
        }

        return customerID;
      }
    };

    MoesifFilter moesifFilter = new MoesifFilter(APPLICATION_ID, config, true);

    // Set flag to log request and response body
    moesifFilter.setLogBody(true);

    return moesifFilter;
  }
}
This identifyUser function will parse out the field from the request you want to use to identify the user. The decoded JWT payload is available on the request via the id property. This is the value we will use as our user identifier in Moesif.
With the code we supplied, Moesif will now be able to attach a user ID to an API request when the filter intercepts the request.
We now need to configure out endpoints to use the JWT.
Step 3: Adding Authorization Request Headers to Our Endpoint
Next, we’ll add a Spring annotation to our credit score endpoint. The @RequestHeader is a Spring annotation used to extract the value of an HTTP request header.
// APIController.java

// Additional imports
import org.springframework.web.bind.annotation.RequestHeader;

@RestController
public class APIController {

  @RequestMapping("/creditscore")
  @ResponseBody
  public String creditScore(@RequestHeader (name="Authorization") String token) {
    int creditScoreMin = 500;
    int creditScoreMax = 900;

    Random rand = new Random();
    int randomCreditScore = rand.nextInt(creditScoreMin, creditScoreMax);

    return String.format("{ \"credit_score\": \"%d\" }", randomCreditScore);
  }
}
@RequestHeader allows us to access and use this information in our controller methods. When a request is sent to the endpoint, it will contain the authorization header housing the JWT.
Our next step is to generate our JWT and attach it to our request.
Step 4: Creating the JWT
In this specific example, I’ll be using a JWT that contains an id in its payload. My JWT looks like this:
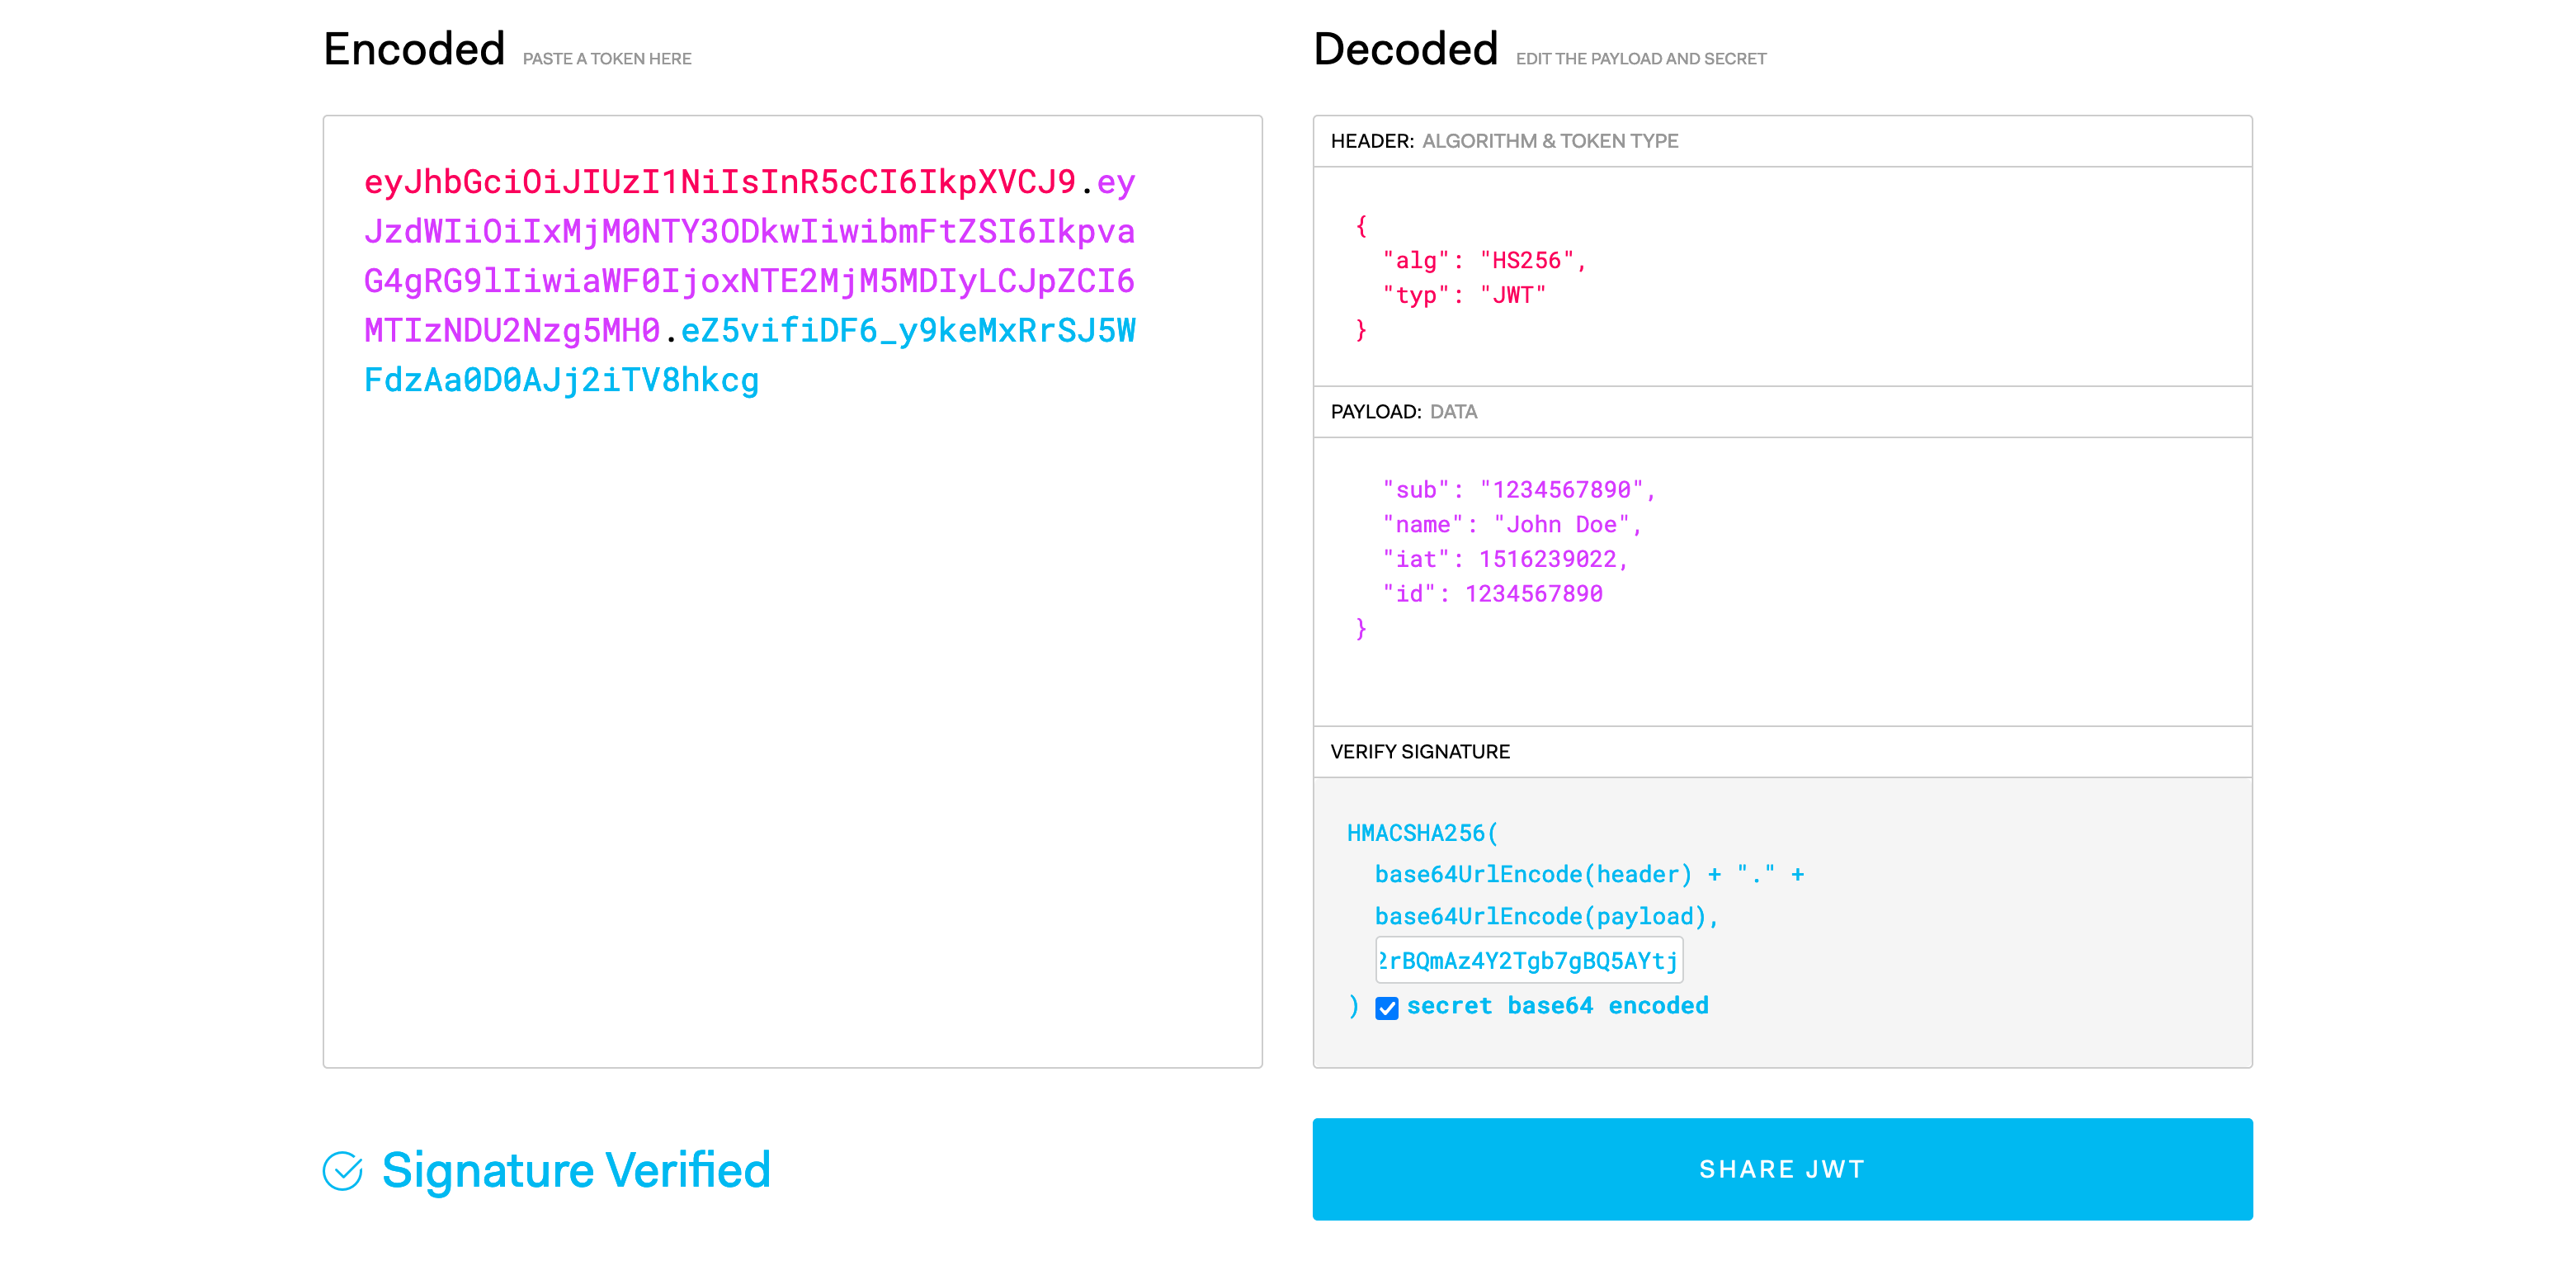
I’ve created a JWT through jwt.io. Jwt.io allows you to create a JWT and edit the fields without having to use an Identity Provider or other source to create one. I’ve added a sample id field to the payload of our generated JWT. Now, I’ll attach the JWT to the request in Postman.
Step 5: Sending a Request Through Postman
After opening up Postman, we will plug in the endpoint URL for our GET request. We will also go to the Authorization tab for the request and attach our JWT in the Token field. Also note that the Type field should be set to “Bearer”. Once the JWT is copied in, your request should look like this:
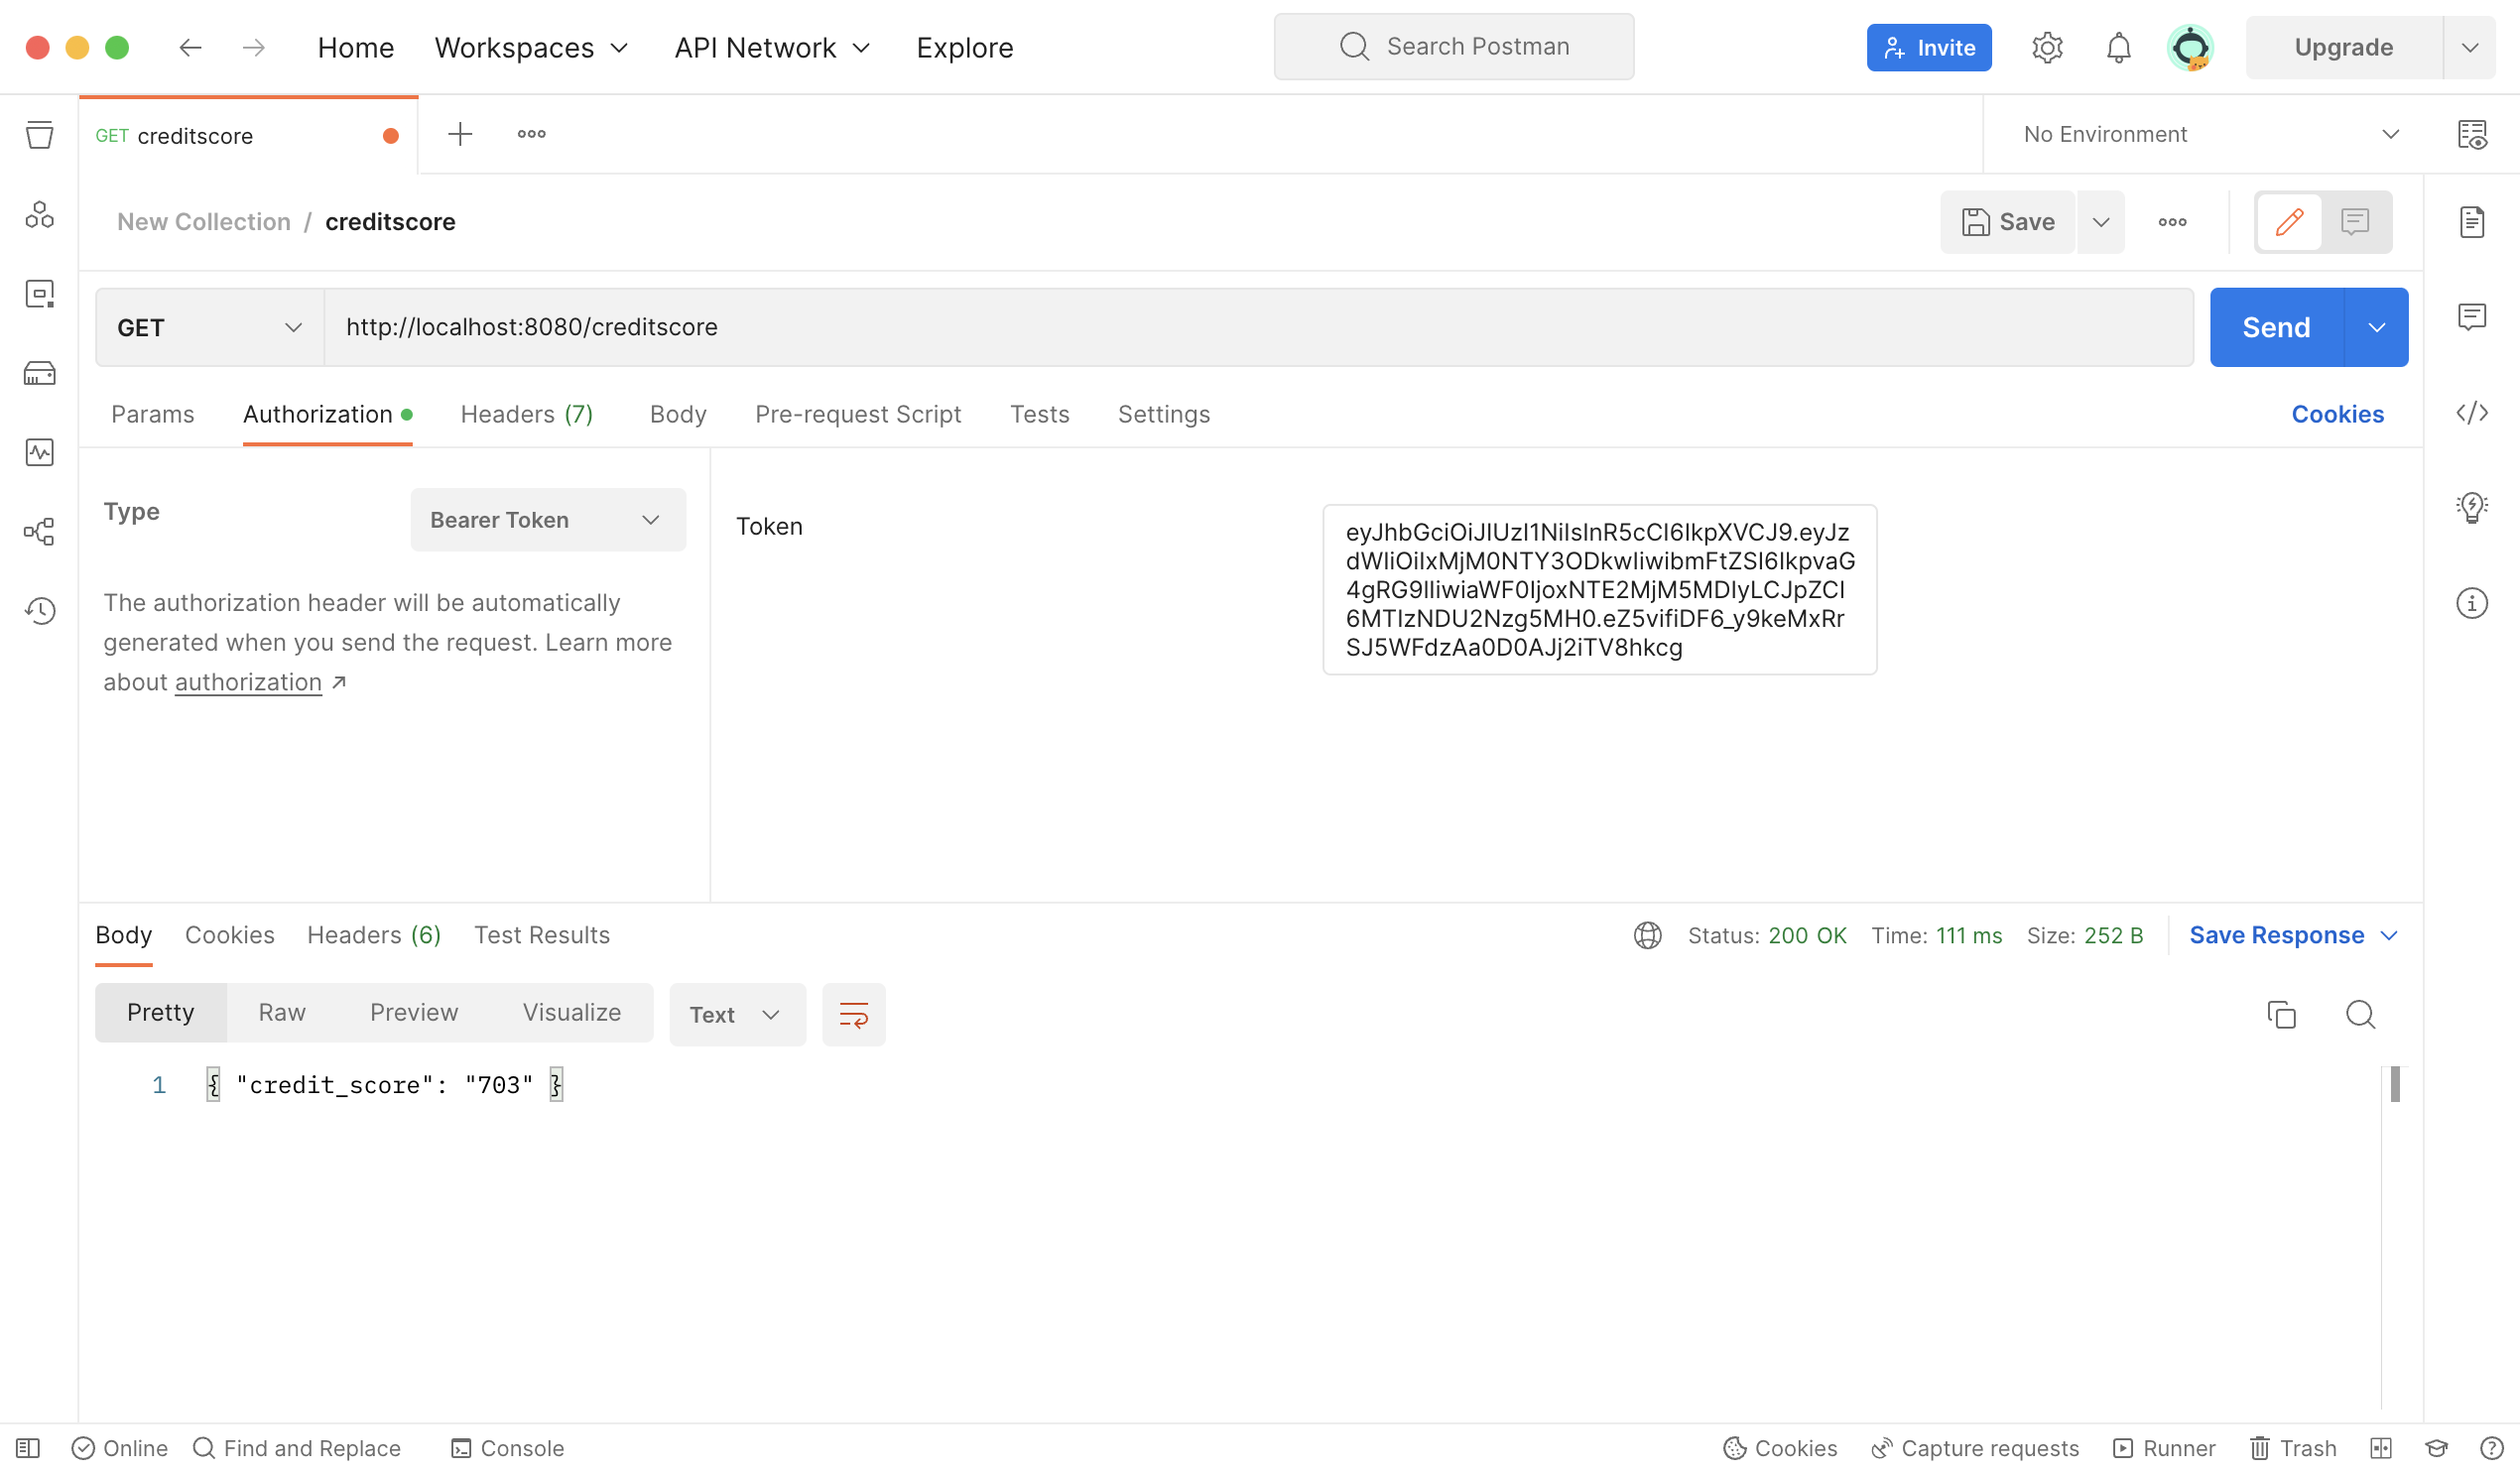
Now, send off the request. At this point, the request will be received by the server. Once at the server, the following will occur: the JWT id field will be parsed out using the Moesif Filter’s identifyUser function and attached to the metric in Moesif.
Step 6: Verifying User Tracking
In Moesif, our request should be showing in the Live Event Log dashboard. Now we can see that a userID has been bound to the request.
You’ll see that the id passed in our JWT has now become the userID attached to the request we sent.
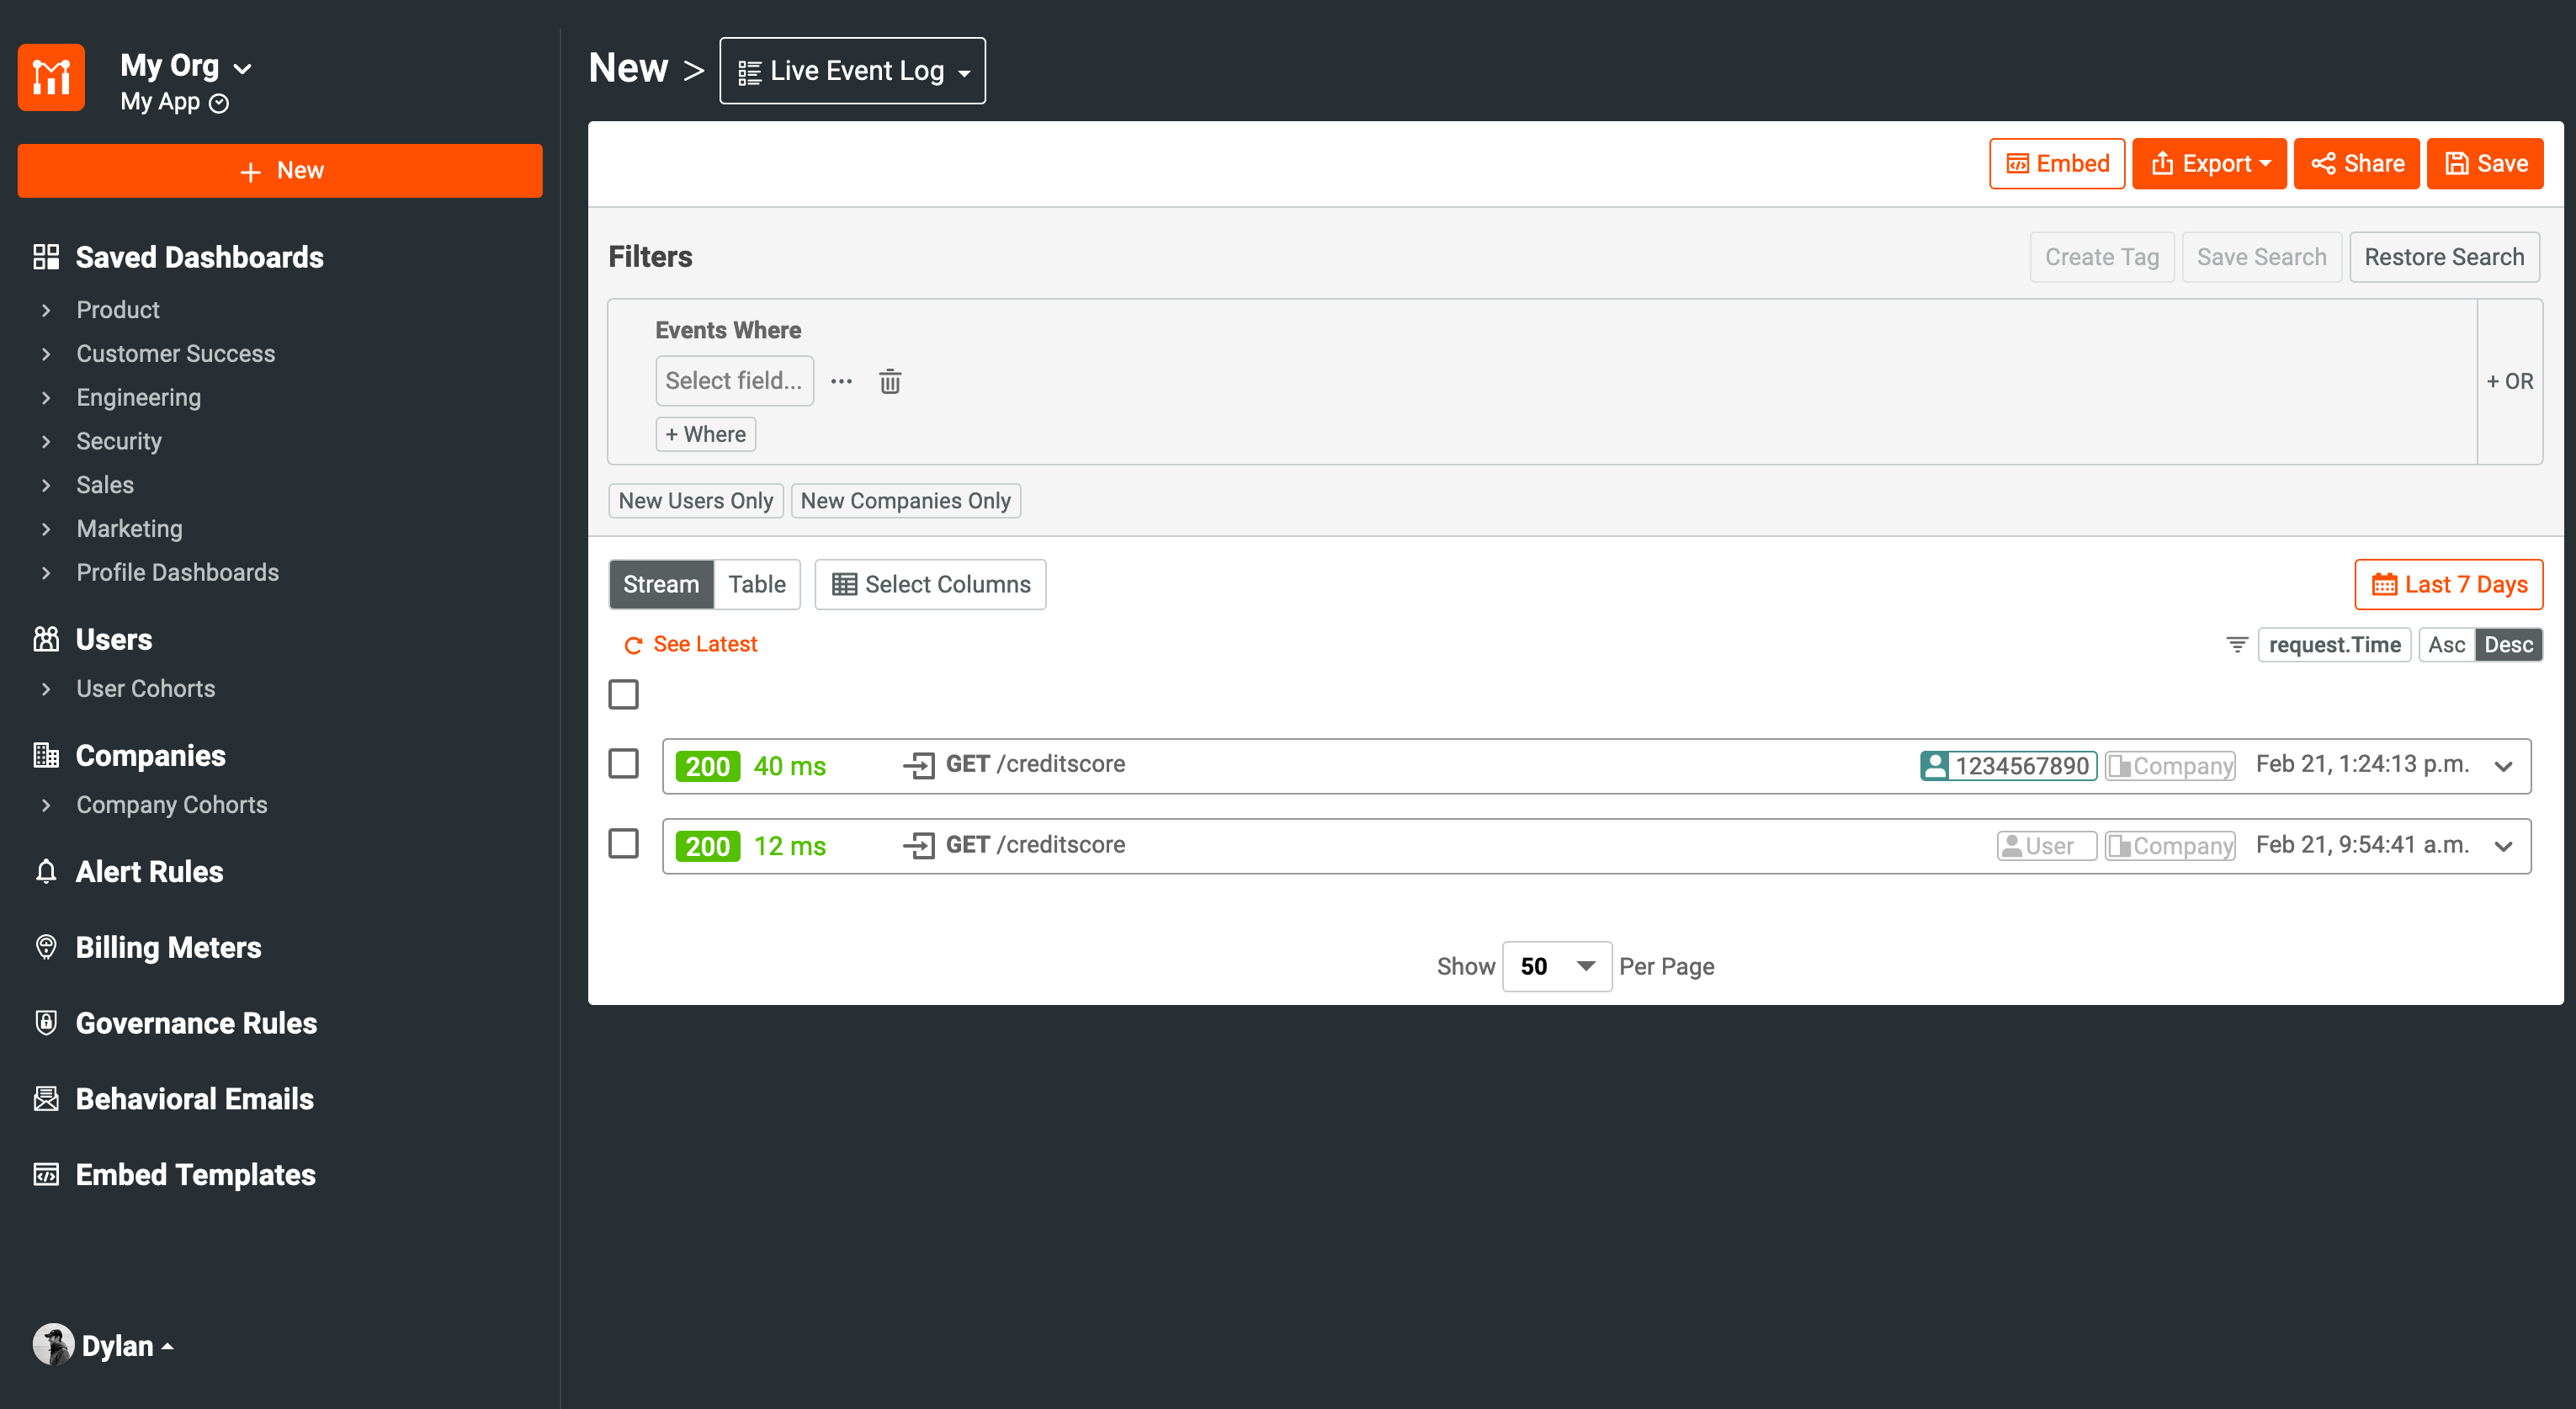
At this point, we are now able to start leveraging user-specific metrics instead of having all of our data be anonymous. This can help to power many of the more advanced and valuable features within Moesif.