Setting up the Moesif Developer Portal

Moesif Developer Portal

The Moesif developer portal is an open-source project to help provide a great starting place to quickly build your own developer experience. You can customize and deploy the developer portal without being worried about lock-in or lack of customization. The developer portal is focused on providing a low-friction solution allowing your customers to quickly and easily subscribe and provide authenticated, metered access to your APIs.

Architecture Diagram of Moesif Developer Portal

Production Readiness

This portal is a pre-release project in preview and actively being developed. Before going to production, a few things should be done:

  1. Ensure APIs are secured using HTTPS and authentication layer
  2. Ensuring all keys stored securely in a keystore
  3. Customize the CSS for your brand

Supported Solutions

Below are the currently supported solutions in the developer portal. They may be used in any combination and we are continuing to add support for additional platforms regularly.

Identity / Access Management

  • Auth0
  • Okta

APIM / Gateway

  • Kong
  • AWS
  • Tyk

Payment Provider

  • Stripe

Prerequisites

In order to set up and use the Moesif Developer Portal, you will need the following:

  • An active Identity / Access Management platform account
  • An active payment provider account
  • A running APIM / Gateway instance
  • An active Moesif account

Below is a step-by-step guide on how to set up the Moesif Developer Portal. Since there are a lot of moving parts, it’s suggested that you follow each step carefully and in the order that they are presented.

Integrating Moesif and Your Gateway

Kong

The Moesif Developer Portal can be used with a running instance of Kong.

To integrate Moesif and Kong, you can follow our guide that covers integrating Moesif and Kong in detail. Alternatively, you can also check out our integration documentation for Kong if you’re already an experienced Kong user. Once you have the integration set, you’ll be ready to move to the next step in the Moesif Developer Portal setup process.

Creating an Endpoint in Kong Manager

This next step will require you to set up an endpoint in Kong. If you already have an endpoint created, feel free to skip ahead to the next step in the guide.

If you are using Kong Manager, you can create the endpoint by clicking Services in the left-side menu, under the API Gateway section. On the Services page, click the New Service button in the top-right corner to add a new service.

On the Create Service page, You will need to fill out the Name and, after selecting the Add using URL option, the URL field. For this example, you can fill them out with the following values:

Name: HttpBin

URL: https://www.httpbin.org

Once populated, click Create to create the service. After this, you’ll see your new services viewing page.

Next, we will create a route that will expose this service. To do this, click on Routes in the left-side menu, which is also under the API Gateway section.

On the Routes page, click on the Create Route button in the top-right corner of the screen to add the new route. On the Create Route screen, you’ll have a few values to fill out including the Service, Name, Protocols, Method(s), and Path(s) fields on the screen. For this example, you can fill out these fields with the following values:

Service: Choose the Service you just created, HttpBin

Name: TestService

Protocols: http, https

Method(s): GET

Path(s): /test-service

Once populated, click Create to create the route. After this, you’ll see your new routes viewing page. With the endpoint creation complete, we can now move on to testing it to ensure it is configured correctly.

Testing the Endpoint

To test your newly created endpoint, you’ll want to use a tool like Postman or Insomnia. Alternatively, you could also just use a browser at this point too. In your tool, add your endpoint URL which will look like {KONG_URL}:PORT/test-service/ and send a GET request. If you are running Kong in Docker and have set up the endpoint as shown above, your URL will look like localhost:8000/test-service/.

After the request has been sent, you should see a 200 OK response as well as a response body containing the HttpBin contents (essentially a webpage). With our endpoint working, now let’s move on to securing it with an API key.

Adding Key Auth to All Endpoints

Our next step is to add the Key-Auth plugin to our Kong endpoint. For simplicity, we will enable this plugin globally but if in the future you want to only apply it to specific routes, you can do that.

In the Kong Manager Dashboard, you can add the plugin by clicking Plugins in the left-side menu, under the API Gateway section. On the Plugins page, you’ll click the New Plugin button to add a new plugin. On the Add New Plugin screen, you’ll find the Key-Authentication plugin by scrolling or searching, once found, click Enable.

On the Create new key-auth plugin screen, you’ll want to make sure that the This plugin is Enabled toggle is set to on, the Global radio button is selected, and that Config.Key Names field is set to apikey. By setting this to apikey we can pass a field of the same name in the header and include our API key as the value.

Lastly, to save our plugin configuration, scroll down to the bottom of the screen and click Create. Now, our endpoint will be secured by the kay-auth plugin. To test it out, resend the request from earlier and you should get a 401 Unauthorized response, and a message body stating No API key found in request. If you are not getting this response, please refer to the Kong documentation for key-auth.


AWS

The Moesif Developer Portal can be used with a running instance of AWS API Gateway.

To integrate Moesif and AWS API Gateway, you can follow our guide that covers integrating Moesif and AWS API Gateway in detail. Alternatively, you can also check out our integration documentation for Tyk if you’re already an experienced AWS user. Once you have the integration set, you’ll be ready to move to the next step in the Moesif Developer Portal setup process.

Before proceeding, you’ll also need to make sure that you’ve set up an API endpoint within AWS API Gateway and added the custom Authorizer covered below.

Add The Auth0 Authorizer to AWS API Gateway

We will add a custom Lambda Authorizer to our AWS API Gateway endpoint. Our first step is to enter the dev-portal-authorizer project in the Moesif Developer Portal. Once you have the project opened in a terminal pointing to the dev-portal-authorizer directory, do the following:

Run npm install to install the project’s dependencies. After the dependencies are installed, zip up the project using npm run zip. From this command, an authorizer.zip file will be created in the root directory of the authorizer project.

  • Next, log into AWS Lambda and from the main page click Create function in the top-right corner. From here, you’ll do the following:
  • On the Create function screen:
  • Select Author from scratch
  • Set the Function name field as Auth0Authorizer
  • Choose Node.js 18.x as the Runtime and x86_64 as the Architecture
  • Everything else can stay as the default and then you’ll click Create function
  • On the Auth0Authorizer screen, under Code source, click the Upload from dropdown and select .zip file.
  • In the modal that appears, either drop your .zip file onto it or select it from the file explorer by clicking the Upload button. Then click Save to load the .zip code.

In AWS API Gateway, we will create the Authorizer by clicking on Authorizers in the left-side menu. On the Authorizers screen, we will do the following:

  • Click Create New Authorizer
  • Add our Name as Auth0_Authorizer
  • Select the type as Lambda
  • Set the Lambda Event Payload as Token
  • Set the Token Source as Authorization
  • The rest of the fields can be left as their defaults, and you can click Create to create the Authorizer.

Next, we will add the Authorizer by going to Resources in the left-side menu, clicking on our endpoint, and bringing up the Method Execution screen. On this screen, do the following:

  • Click on Method Request
  • Under Settings > Authorizer, click the Edit (pencil) icon and select Auth0_Authorizer. Click the checkmark to save the setting.
  • Make sure that API Key Required is set to false

Lastly, select the appropriate stage from the list at Stages in the left-side menu. In the Stage Editor screen, click on the Logs/Tracing tab. Under Custom Access Logging > Log Format, paste in the log format from the my-dev-portal-authorizer/aws-config/CustomAccessLogging_LogFormat.json file. The key here is that the ` “principalId”: “$context.authorizer.principalId”` formatter is included to ensure that the Stripe data is correctly attributed to the request in Moesif.


Tyk

The Moesif Developer Portal can be used with a running instance of Tyk.

To integrate Moesif and Tyk, you can follow our guide that covers integrating Moesif and Tyk in detail. Alternatively, you can also check out our integration documentation for Tyk if you’re already an experienced Tyk user. Once you have the integration set, you’ll be ready to move to the next step in the Moesif Developer Portal setup process.

Creating an Endpoint in Tyk Dashboard

This next step will require you to set up an endpoint in Tyk. If you already have an endpoint created, feel free to skip ahead to the next step in the guide.

If you are using the Tyk Dashboard, you can create the endpoint by following these steps:

Log in to Tyk Dashboard:

If you already have an account, log in to the Tyk Dashboard. If not, sign up for an account to get started.

Create a New API:

  • Navigate to the dashboard’s main page.
  • Click on the APIs section, located in the main navigation menu.
  • Click the Add New API button to begin the API creation process.

API Details:

  • Enter a suitable API Name, such as TestService.
  • Under Type, select HTTP.
  • Fill in the Upstream URL field with the URL of the service you want to expose. For this example, use http://www.httpbin.org.

Select + Configure API to explore some more advanced configuration settings.

API Configuration:

  • Under Listen path, set the listen path to whatever you would like, we will be setting it to /test-service/. Unselect strip the listen path
  • Choose whether to enable SSL/TLS encryption for the API in the Enable SSL/TLS field.
  • Specify supported protocols in the API Protocol field, such as http, https.
  • Set allowed HTTP methods in the Allowed HTTP Methods field. Choose GET for this case.
  • Under Authentication, we will want to set the Authentication Mode to Authentication Token. Under Authentication Token > Auth Key Header Name, type Authorization. If you would like to test your endpoint without any authentication you can set this to Open (Keyless). This is assumed in the next testing step.

Save Changes:

  • After completing the necessary fields and configuring API settings, save the changes by clicking the Save button.

With these steps completed, your endpoint should now be set up in the Tyk Dashboard.

Testing the Endpoint

To test your newly created endpoint, you’ll want to use a tool like Postman or Insomnia. Alternatively, you could also just use a browser at this point too. In your tool, add your endpoint URL which will look like {TYK_URL}:PORT/test-service/ and send a GET request. If you are running Tyk in Docker and have set up the endpoint as shown above, your URL will look like localhost:8080/test-service/.

After the request has been sent, you should see a 200 OK response as well as a response body containing the HttpBin contents (essentially a webpage). With our endpoint working, now let’s move on to securing it with an API key.

Adding Authentication to Your Endpoint

Ensure that you have set the Authentication Mode to Authentication Token within your API configuration for your endpoint. Under Authentication Token > Auth Key Header Name, type Authorization.

Running the Developer Portal

Download the Source Code

Now it’s time to pull down the source code for the Moesif Developer portal. Using git, you’ll want to clone the Moesif Developer Portal repository to your local machine. If you’re unfamiliar with how to clone a git repository, check out the GitHub guide on how to do so.

Once the code is pulled down, open up your favorite code editor or IDE and open up the project.

Source Code Layout

Within the project, you will see two subfolders: my-dev-portal and my-dev-portal-api. For the project to work, both applications must be running.

The my-dev-portal folder is a React application that contains the UI and logic for the developer portal. Any additions to the UI, styling or branding changes, and other user-facing changes will be done within this folder/project.

The my-dev-portal-api project is where the APIs and various other logic are contained. In this project, you’ll have connectivity to Moesif, Stripe, and Kong through various APIs. For example, the /register endpoint in this project contains the logic used to register a new user in the various systems that are part of the developer portal ecosystem.

Setting up the .env File

Each of the projects in the developer portal, my-dev-portal and my-dev-portal-api, require a .env file to function. In the .env file, various API keys and other credentials are stored. Of course, when moving to production you may want to move these from the .env file and into a more secure secrets management system.

In the root of both the my-dev-portal and my-dev-portal-api projects, create a .env file. In each project, there is a .env.template file that shows the variables that you need to add. You can copy and paste these contents into the new .env files created in each of the projects.

In the my-dev-portal/.env file, you should have the following key/value pairs, depending on your desired setup:

# Portal envars
HOST="127.0.0.1"
PORT="4000"

# Stripe envars
REACT_APP_STRIPE_PRICING_TABLE_ID="prctbl_123abc"
REACT_APP_STRIPE_PUBLISHABLE_KEY="pk_test_123abc"

REACT_APP_STRIPE_MANAGEMENT_URL="https://billing.stripe.com/p/login/test_123abc"

# API server envars
REACT_APP_DEV_PORTAL_API_SERVER="http://127.0.0.1:3030"

# Auth type envars
REACT_APP_AUTH_PROVIDER="Auth0|Okta"

# Auth0 envars
REACT_APP_AUTH0_DOMAIN="yoururl.us.auth0.com"
REACT_APP_AUTH0_CLIENT_ID="Your Auth0 Client ID"

# Okta envars
REACT_APP_OKTA_ORG_URL="https://yoururl.okta.com/oauth2/default"
REACT_APP_OKTA_CLIENT_ID="Your Okta Client ID"

The only value we need to set in this .env file currently is the REACT_APP_DEV_PORTAL_API_SERVER value. This should be set to the URL and port where our my-dev-portal-api project will be deployed. If you’re running this locally and using the default configuration, this value can stay as it is. If you are running your API project on another URL or port, you can change this value to match.

All the other values in this file will be filled in as we work through the remainder of the guide.

In the my-dev-portal-api/.env file, you should have the following key/value pairs, depending on your desired setup:

STRIPE_API_KEY="sk_test_123abc"
MOESIF_APPLICATION_ID="your Moesif application ID"
MOESIF_MANAGEMENT_TOKEN="your Moesif management token"
MOESIF_TEMPLATE_WORKSPACE_ID_LIVE_EVENT_LOG="workspace ID"
MOESIF_TEMPLATE_WORKSPACE_ID_TIME_SERIES="workspace ID"

# APIM Provider
APIM_PROVIDER="Kong|AWS|Tyk"

# AWS envars
AWS_INVOKE_URL="https://123abc.execute-api.region.amazonaws.com"

# Kong envars
KONG_URL="http://localhost:8001"
## Kong Konnect Settings
KONNECT_API_URL="https://us.api.konghq.com"
KONNECT_API_VERSION="v2"
KONNECT_RUNTIME_GROUP_NAME="default"
KONNECT_PAT=""

# Tyk envars
TYK_GATEWAY_URL="http://localhost:8080"
TYK_GATEWAY_SECRET_KEY="TYK_GATEWAY_SECRET_KEY"
TYK_DASH_ORG_ID="TYK_DASH_ORG_ID"

# Okta envars
OKTA_DOMAIN="https://you-okta-url.okta.com/"
OKTA_API_TOKEN="Okta API Token"

# Auth0 envars
AUTH0_DOMAIN="your-domain.us.auth0.com"
AUTH0_CLIENT_ID="auth0 client ID"
AUTH0_CLIENT_SECRET="auth0 client secret"
AUTH0_MANAGEMENT_API_AUDIENCE="https://your-domain.us.auth0.com/api/v2/"

The only values we need set in this .env file currently will be your Gateway URL (Kong / Tyk) and MOESIF_APPLICATION_ID.

Kong

For the KONG_URL, If you’re running a local instance of Kong, by default this should be running on http://localhost:8001. If this is the case, you can leave the value as is. If it is different or running remotely, you can change the value to point to your Kong gateway.

With Kong Konnect

For Kong Konnect, the setup also requires you to add a few additional environment variables to the my-dev-portal-api/.env file. You’ll want to add in the following key-values to the file:

KONNECT_API_URL="https://us.api.konghq.com"
KONNECT_API_VERSION="v2"
KONNECT_RUNTIME_GROUP_NAME="default"
KONNECT_PAT=""

for the KONNECT_API_URL and KONNECT_API_VERSION values, you’ll want to log into your Kong Konnect control plane and retrieve this. You can get this value by going to the Gateway Manager screen and selecting your control plane. In the next screen, you can grab the Admin API value (located in near the top of the screen) and truncate anything we don’t need.

The raw value will look like this: https://us.api.konghq.com/v2/control-planes/123-asd-etc

From this, we can populate our values like so:

KONNECT_API_URL="https://us.api.konghq.com"
KONNECT_API_VERSION="v2"

For the KONNECT_RUNTIME_GROUP_NAME, you’ll use your Control Plane name. By default, this will be fittingly named default.

KONNECT_RUNTIME_GROUP_NAME="default"

Lastly, we will generate a Konnect Personal Access Token. This can be done through the Konnect UI by going to your initials in the top-right of the screen and from the dropdown, selecting Personal Access Tokens.

From here, click Generate Token, give the token a Name and Expiration, then click Generate. Paste the returned value into the KONNECT_PAT value.

KONNECT_PAT="kpat_FIZqQxICG6aEpA10nQ1TesTtEStTEST"

AWS

For the AWS_INVOKE_URL, you’ll need to grab the Invoke URL from your AWS API gateway instance. To do this, go to your API Gateway instance, click on Stages, and then select the appropriate stage. On the Stage Editor screen, grab the Invoke URL and paste the value into AWS_INVOKE_URL.

Tyk

Tyk Gateway

For the TYK_GATEWAY_URL, If you’re running a local instance of Tyk, by default this should be running on http://localhost:8080. If this is the case, you can leave the value as is. If it is different or running remotely, you can change the value to point to your Tyk gateway.

Tyk Gateway Secret

This would also be a good time to grab your TYK_GATEWAY_SECRET_KEY. If running in docker, your TYK_GATEWAY_SECRET_KEY can be found in the tyk.conf file in the Gateway container under the "secret" variable.

Tyk Master Key Creation

While we are in tyk.conf, we need to set allow_master_keys to true. This allows us to automate authentication key creation via the Tyk API.

Moesif Application ID

For the MOESIF_APPLICATION_ID, Your Moesif Application ID value is found in Moesif by going to the menu link in the bottom-left of the screen (which will show your name) and selecting API Keys. The key will then be on the page that appears under Collector Application Id.

As with the previous .env file, All the other values in this file will be filled in as we work through the remainder of the guide.

Adding APIM to the Moesif Developer Portal

Kong

Now that we have our endpoints in Kong set up and our base developer portal code pulled down, we can start to get analytics flowing into Moesif from Kong. The Moesif-Kong plugin makes it easy to get API call analytics funneled into Moesif. For instructions on how to do this, you can reference our integration documentation or a more in-depth step-by-step approach in our integration guide.

Once the integration is complete, you should begin to see some API call metrics flowing into Moesif. Even if you are being blocked by the key-auth plugin in Kong, the 401 Unauthorized responses will still show up in Moesif. Once the integration is confirmed, you can move to the next step and create the Auth0 or Okta app to be used with the Moesif Developer Portal.


AWS

With endpoints set up in AWS API Gateway and our base developer portal code pulled down, we can start to get analytics flowing into Moesif from AWS API Gateway. For instructions on how to do integrate AWS API Gateway and Moesif, you can reference our integration documentation or a more in-depth step-by-step approach in our integration guide.


Tyk

Now that we have our endpoints in Tyk set up and our base developer portal code pulled down, we can start to get analytics flowing into Moesif from Tyk. For instructions on how to do integrate Tyk and Moesif, you can reference our integration documentation or a more in-depth step-by-step approach in our integration guide.

Once the integration is complete, you should begin to see some API call metrics flowing into Moesif. Even if you are being blocked by the Authentication Mode in Tyk, the 401 Unauthorized responses will still show up in Moesif. Once the integration is confirmed, you can move to the next step and create the Auth0 or Okta app to be used with the Moesif Developer Portal.

Creating the App within Your Identity Provider

Auth0

With the Moesif Developer Portal you can use Auth0 for controlling access and user management. Of course, the open-source code could be tweaked to support other identity providers as well.

To configure Auth0 to work with the portal, you will need to create an Auth0 Application. To do this, log into Auth0, and from the left-side menu click on Applications and select Applications. From the Applications page, click the Create Application button.

In the modal that appears, fill in the Name field with a value such as Developer Portal and select Single Page Application as the Application Type. After these selections are made, click Create.

On the next page that appears, select the Settings tab. In the settings tab, scroll down to the Application URIs section. In this section you’ll need to add http://127.0.0.1:4000, or the URL where your developer portal will be hosted, as an entry for Allowed Callback URLs, Allowed Logout URLs, and Allowed Web Origins.

Once added, scroll to the bottom of the page and click Save Changes to save your application’s settings.


Okta

With the Moesif Developer Portal you can use Okta for controlling access and user management. Of course, the open-source code could be tweaked to support other identity providers as well.

To configure Okta to work with the portal, you will need to create an Okta Application for the dev portal. To do this, log into Okta, and from the left-side menu click on Applications and select Applications. From the Applications page, click the Create App Integration button.

In the modal that appears, Under Sign-in method select the OIDC - OpenID Connect option. In the Application type selection that appears, select Single-Page Application and click Next.

On the next page that appears, fill in the App integration name field with a value such as Developer Portal. Under Grant type, make sure Authorization Code and Refresh Token are selected. Then, Under the Sign-in redirect URIs section, add in the correct values, if you’re running this locally, and example value would be http://127.0.0.1:4000/login/callback. You’ll also want to add a similar value under the Sign-in redirect URIs, like http://127.0.0.1:4000/. Lastly, under Assignments, select Skip group assignment for now (unless you want to set this). Once added, scroll to the bottom of the page and click Save to save your application’s settings.

Adding the Identity Provider to the Moesif Developer Portal

Auth0

In the my-dev-portal/.env file, we will add the correct values for both the REACT_APP_AUTH0_DOMAIN and REACT_APP_AUTH0_CLIENT_ID entries. In the .env file, we will replace the following lines:

REACT_APP_AUTH0_DOMAIN="yoururl.us.auth0.com"
REACT_APP_AUTH0_CLIENT_ID="your Auth0 client ID"

In Auth0, navigate to the Applications screen and select the application you are using for the Developer Portal. Under the Settings tab, copy the value under Domain and add it to the value under REACT_APP_AUTH0_DOMAIN in the .env file. Next copy the Client ID value and add it as the value for the REACT_APP_AUTH0_CLIENT_ID entry in the .env file.

Once both values are added, save the file to make sure the updated values are persisted. Next, we will move on to creating our products in Stripe so that they can be used in the Developer Portal.

For AWS API Gateway

A few additional steps need to happen in order to get the AWS APi Gateway integration to work. These include adding the Developer Portal API to Auth0 and adding logic to add additional fields from Stripe to the JWT.

Add The Developer Portal API to Auth0

In Auth0, we will also need to add our Developer Portal API to Auth0. To do this, log into Auth0, and from the left-side menu, select Applications > APIs.

Click the Create API button in the top right on the API screen to add the API to Auth0.

We will fill in the following fields:

  • Name - Here, we will put a friendly name for the API. For example, you can put in a value like “dev-portal-api”.
  • Identifier - In this field, we will put our API endpoint, as recommended by Auth0. For example, you can put in a value like http://127.0.0.1:3000 or the URL of where your Developer Portal API is hosted.
  • Signing Algorithm - This field can be left as the default unless you require something more specific.

Once the fields are filled in, click Create.

In the Developer Portal UI projects .env file, we will add the following values:

REACT_APP_AUTH0_AUDIENCE="http://127.0.0.1:3030"

The value here will be what you put in the Identifier field when you create the API in Auth0. Alternatively, you can retrieve the value by going to the APIs page again, locating your API, and copying the API Audience field.

Add Custom JWT Field Logic to Auth0

Next, we will add the logic to add the Stripe Customer and Subscription ID’s to the Auth0 JWT token. To do this, we will execute the following steps.

  • In Auth0, from the left-side menu, navigate to Actions > Flows > Login
  • In the right-side panel on the Login Flow screen, click Add Action > Build Custom
  • Name the Custom Action AddStripeDetailsToClaim
  • Add the code from the my-dev-portal-authorizer/auth0/AddStripeDetailsToClaim in the code editor.js file in the Moesif Developer Portal, overwriting the existing code.
  • Once the code is added, click Save Draft and then Deploy.
  • Back in the Flows screen, drag the AddStripeDetailsToClaim action (in the right-side panel under Custom) in between the Start and Complete actions.
  • Click Apply to update and activate the flow.
Add Auth0 Environment Variables to API Project

Lastly, we need to add in a few additional environment variables to our API project .env file. In Auth0, go to Applications > APIs and select Auth0 Management API.

From this screen, we will be able to get the values for the following values in the my-dev-portal-api project’s .env file:

AUTH0_DOMAIN="your-domain.us.auth0.com"
AUTH0_CLIENT_ID="yOurAuth0CliENtID"
AUTH0_CLIENT_SECRET="abcd1234efgh5678"
AUTH0_MANAGEMENT_API_AUDIENCE="https://{your-domain.us.auth0.com}/api/v2/"

​​for the AUTH0_MANAGEMENT_API_AUDIENCE value, just swap out the {your-domain.us.auth0.com} for your domain but leave the https:// and /api/v2/ in place.

Once the values are added, save the .env file.


Okta

Frontend

In the my-dev-portal/.env file, we will add the correct values for both the REACT_APP_AUTH0_DOMAIN and REACT_APP_AUTH0_CLIENT_ID entries. In the .env file, we will replace the following lines:

REACT_APP_OKTA_ORG_URL="https://yoururl.okta.com/oauth2/default"
REACT_APP_OKTA_CLIENT_ID="Your Okta Client ID"

To get these values, in the Okta console, navigate to the Applications screen and select the application you are using for the Developer Portal. Copy the Client ID value and add it as the value for the REACT_APP_OKTA_CLIENT_ID entry in the .env file. For the REACT_APP_OKTA_ORG_URL you’ll use the domain where your Okta app is running and add /oauth2/default. IF you’re just using a dev instance, the result will be something like "https://dev-123456.okta.com/oauth2/default.

Once both values are added, save the file to make sure the updated values are persisted. Next, we will move on to creating our products in Stripe so that they can be used in the Developer Portal.

Backend

In the my-dev-portal-api/.env file, we will add the correct values for both the OKTA_DOMAIN, OKTA_API_TOKEN, and OKTA_APPLICATION_ID entries. In the .env file, we will replace the following lines:

OKTA_DOMAIN="https://you-okta-url.okta.com/"
OKTA_API_TOKEN="Okta API Token"
OKTA_APPLICATION_ID="Okta App/Client Id"

First, fill in the OKTA_DOMAIN with the same value we used in the REACT_APP_OKTA_DOMAIN in the frontend .env but without the /oauth2/default route attached. Next, generate an API token (as described here), and add the value as the OKTA_API_TOKEN. Lastly, add the same Client ID value we used in the frontend .env to the value for OKTA_APPLICATION_ID.

Once all three values are added, save the file to make sure the updated values are persisted. Next, we will move on to creating our products in Stripe so that they can be used in the Developer Portal.

Setting up Payment Provider

Stripe

While you can create plans and prices directly in Stripe, we recommend you use the Moesif Product Catalog Tool to create usage billing compatible plans.

Adding Stripe API key to the Moesif Developer Portal

Adding Stripe to the Moesif Developer Portal will require adding some details to the .env API projects.

In the my-dev-portal-api/.env file, you will need to add a value for the STRIPE_API_KEY entry. This key can be accessed by logging into Stripe and clicking on the Developers link in the top-right of the screen. On the Developers screen, click on API Keys in the left-side menu. You’ll then be able to see the private key for your API in either the Secret key or a generated Restricted keys field on the screen. Either key can be copied and used.

STRIPE_API_KEY="sk_test_123abc"

In the my-dev-portal/.env file, we will add publishable-key values. To do this, take these values and add them to the values in the .env file.

REACT_APP_STRIPE_PUBLISHABLE_KEY="pk_test_123abc"

Once the values are added, save the .env files and move to the next step in the developer portal configuration.

Integrating Moesif and Stripe

Once your products and prices are created, it’s time to begin to integrate Stripe with Moesif. To begin configuring Stripe in Moesif, go to the Billing Meters screen by clicking on Billing Meters in the left-side menu. On the Billing Meters screen, click the Edit Billing Provider dropdown in the top right corner of the screen and select Stripe.

This will bring up the Stripe configuration screen to walk you through the integration. From this screen, you can get all of the info needed to plug Stripe into Moesif. Each step for configuration is covered within the modal. The below sections go into more detail if required.

Add the Moesif Webhook to Stripe

The first step in the integration is to add the Moesif webhook into the Moesif configuration for Stripe. Adding this allows Stripe to send subscription updates to Moesif.

To add the Moesif webhook to Stripe, in the Stripe dashboard, click on Developers in the upper right-hand side, and then Webhooks in the left-side menu. This will bring you to the Webhooks page where you can view existing webhooks and add new ones. To add a new webhook we will click the Add an endpoint button at the bottom of the screen.

From here, plug in the Moesif API endpoint URL and configure the events to listen to. You’ll want to copy your Moesif Webhook URL, shown in the Stripe Settings modal displayed in Moesif, into the Endpoint URL field. After this, click the Select Events button.

On the Select events to send screen, Scroll to the Customer section and select the option for Select all Customer events. After this, click the Add events button at the bottom of the screen. After this, you’ll be returned to the original screen where you added the endpoint details. Scroll to the bottom of the screen and click Add endpoint to save the webhook endpoint to Stripe.

Plug the Stripe API Details into Moesif

For Moesif to add usage quantities to subscriptions in Stripe, we need to add the Stripe API details into Moesif. This is done in the Stripe configuration screen in Moesif. Currently, Moesif only supports version 2020-08-27 of the Stripe API so that field defaults for the Stripe API Version field.

For the Stripe API Key field in Stripe, you’ll need to retrieve the API key from Stripe to plug it in. In Stripe, from the Developers screen click on API Keys in the left-side menu. You’ll then be able to see the private key for your API in either the Secret key or a generated Restricted keys field on the screen. Either key can be copied and used.

After copying the key from Stripe, paste the key into the Stripe API Key field on the Stripe Configuration screen in Moesif. After setting the API key value, scroll down to the bottom of the screen and click Save to save the configuration in Moesif. At this point, your Stripe integration is complete in Moesif and you can begin to use it.

Use Moesif Product Catalog Tool to Create Plans and Price in Stripe

Please Moesif Product Catalog Tool to create usage billing compatible plans. These plans will actually reside in Stripe, the Moesif product catalog tool ensures they are compatible with usage based billing type.

Setting up a Billing Meter in Moesif

Once you have the Stripe integration active in Moesif, you can begin to set up your billing meter. Billing meters created in Moesif do two things: track usage based on specific criteria and report that usage to the billing provider. Moesif allows you to set up very simple and very complex billing meters with relative ease.

To create the Billing Meter, in Moesif you will navigate to the Billing Meter screen. You can do this from the left-side menu by clicking the Billing Meters menu item. Once on the Billing Meters screen, you’ll then click Add Billing Meter in the top-right corner of the screen.

The next screen to appear will be the Create Billing Meter screen where you can create and input the criteria for your Billing Meter.

Fields on this screen include:

  • Billing Meter Name

    • This is the Moesif internal name of your new Billing Meter
  • Billing Provider

    • In this dropdown, you can choose the billing provider you want to send your usage metrics.
  • Product

    • Here you can choose which product that you’ve set up in Stripe your usage metrics should be tied to.
  • Price

    • In the last field in the Billing Provider settings for the Billing Meter, you will choose which price you want to tie your usage metrics to.
  • Filters

    • Under the Filters configuration, you will configure your billing criteria to only include requests that fit certain criteria.
  • Metrics

    • Here you can choose which metric you would like to bill on. Available options include:

      • Volume > Event Count

        • This will increment usage for every event that fits the criteria outlined in the Filter criteria.
      • Uniques > Users

        • This will increment usage whenever a unique user sends a request that fits the Filter criteria. For every unique user, the count will be incremented by 1 regardless of the event count for that user.
      • Uniques > Sessions/API Keys

        • This will increment usage whenever a unique session or API key is used to send a request that fits the Filter criteria. For every unique session or API key, the count will be incremented by 1 regardless of the event count for that particular session or API key.

There are other options under Metrics, including customer metrics, as well but the above 4 tend to be the most applicable to usage-based billing.

As an example, you can create a Billing Meter that will filter traffic for a single endpoint and where requests received a successful HTTP 200 response. We will use the Event Count metric to make sure that every request is added to the tally and sent to the billing provider.

Once your meter is set, click Create. This will create and activate the Billing Meter. After the meter is created, you will be prompted to do a Meter Test. The Meter Test will check connectivity with Stripe and that the meter is reporting usage as expected to the correct subscription. For now, we will forego the Meter Test and run it manually when we have the ability to create subscriptions and API keys. From here, we will continue to set up the necessary components to get the Moesif Developer Portal operational.

Creating and Adding the Embedded Templates to the Moesif Developer Portal Dashboard

In the Dashboard page of the Developer Portal, users are able to see two charts that are sourced from Moesif: a Live Event log and a Time Series Chart. Both of these help the user to see how their usage is trending and individual details for each call. These charts are actually Moesif Embedded Templates, a feature that you can use to embed Moesif charts into your applications.

We will need to create each of the required charts in Moesif and plug the details into our .env file for the my-dev-portal-api. Let’s look at each step required below.

Create the Live Event Log

In Moesif, click the New button in the top corner of the left-side menu and select Live Event Log. Once the Live Event Log is showing, click the Embed/API button in the top-right corner of the screen. In the Embed/API Access modal, under Select Integration Type select Embed Template. Then, in the Template Name field, give the template a name like “Live Event Log” and click the Dynamic User Id button in the Sandbox Policy section.

After everything is filled out, click Get Embed Code. You’ll then be presented with some embed code that you will need to plug into the .env file.

In the my-dev-portal-api/.env file, you’ll need to add values for MOESIF_MANAGEMENT_TOKEN and MOESIF_TEMPLATE_WORKSPACE_ID_LIVE_EVENT_LOG. The MOESIF_TEMPLATE_WORKSPACE_ID_LIVE_EVENT_LOG value is the shorter string, the workspace id, highlighted at the top of the above image.

But, instead of using MOESIF_MANAGEMENT_TOKEN comes from the large token highlighted in the example image above, we need to create a custom Moesif Management Token with some additional permissions. Please to go Moesif Menu API Keys and select these permissions:

  • workspaces: read
  • public_workspaces: read
  • companies: read,
  • users: read,
  • plans: read,
  • prices: read,
  • subscriptions: read,
MOESIF_MANAGEMENT_TOKEN="your Moesif management token"
MOESIF_TEMPLATE_WORKSPACE_ID_LIVE_EVENT_LOG="workspace ID"

Once the values are plugged in, save the .env file.

Create the Time Series Chart

Still in Moesif, click the New button button again and select Time Series. Once the Time Series is showing, click the Embed/API button in the top-right corner of the screen. In the Embed/API Access modal, under Select Integration Type select Embed Template. Then, in the Template Name field, give the template a name like “Time Series” and click the Dynamic User Id button in the Sandbox Policy section. After everything is filled out, click Get Embed Code. You’ll then be presented with some embed code that you will need to plug into the .env file.

In the my-dev-portal-api/.env file, replace the value for MOESIF_TEMPLATE_WORKSPACE_ID_TIME_SERIES with the workspace id displayed in the Embed Code displayed for the Time Series:

MOESIF_TEMPLATE_WORKSPACE_ID_TIME_SERIES="workspace ID"

Once the value is added, save the .env file and move to the last step off actually starting up the Moesif Developer Portal.

Starting the Developer Portal

Due to how Auth0/Okta and Stripe are configured, you’ll need to define a host variable in your my-dev-portal/.env. We can also define a port for the frontend. We’ll set this to the following:

HOST="127.0.0.1"
PORT="4000"

Now that everything is configured, it’s time to start up the Developer portal. This will require starting up both the UI and the API projects.

First, in a terminal that is pointing to the /my-dev-portal-api directory in the project, you’ll run:

node app.js

This will start up our API project.

Secondly, we will start up our UI project by opening another terminal at the /my-dev-portal directory and running:

npm start

Once it has started, your browser will open up the Developer Portal on http://127.0.0.1:4000. Next, you can move on to testing the Moesif Developer Portal to make sure all parts are working as expected.

Testing the Moesif Developer Portal

Testing out all of the moving parts of the Developer Portal is crucial to making sure everything is working as intended. A lot is going on across multiple platforms so it makes sense to double-check that nothing was missed during the setup process.

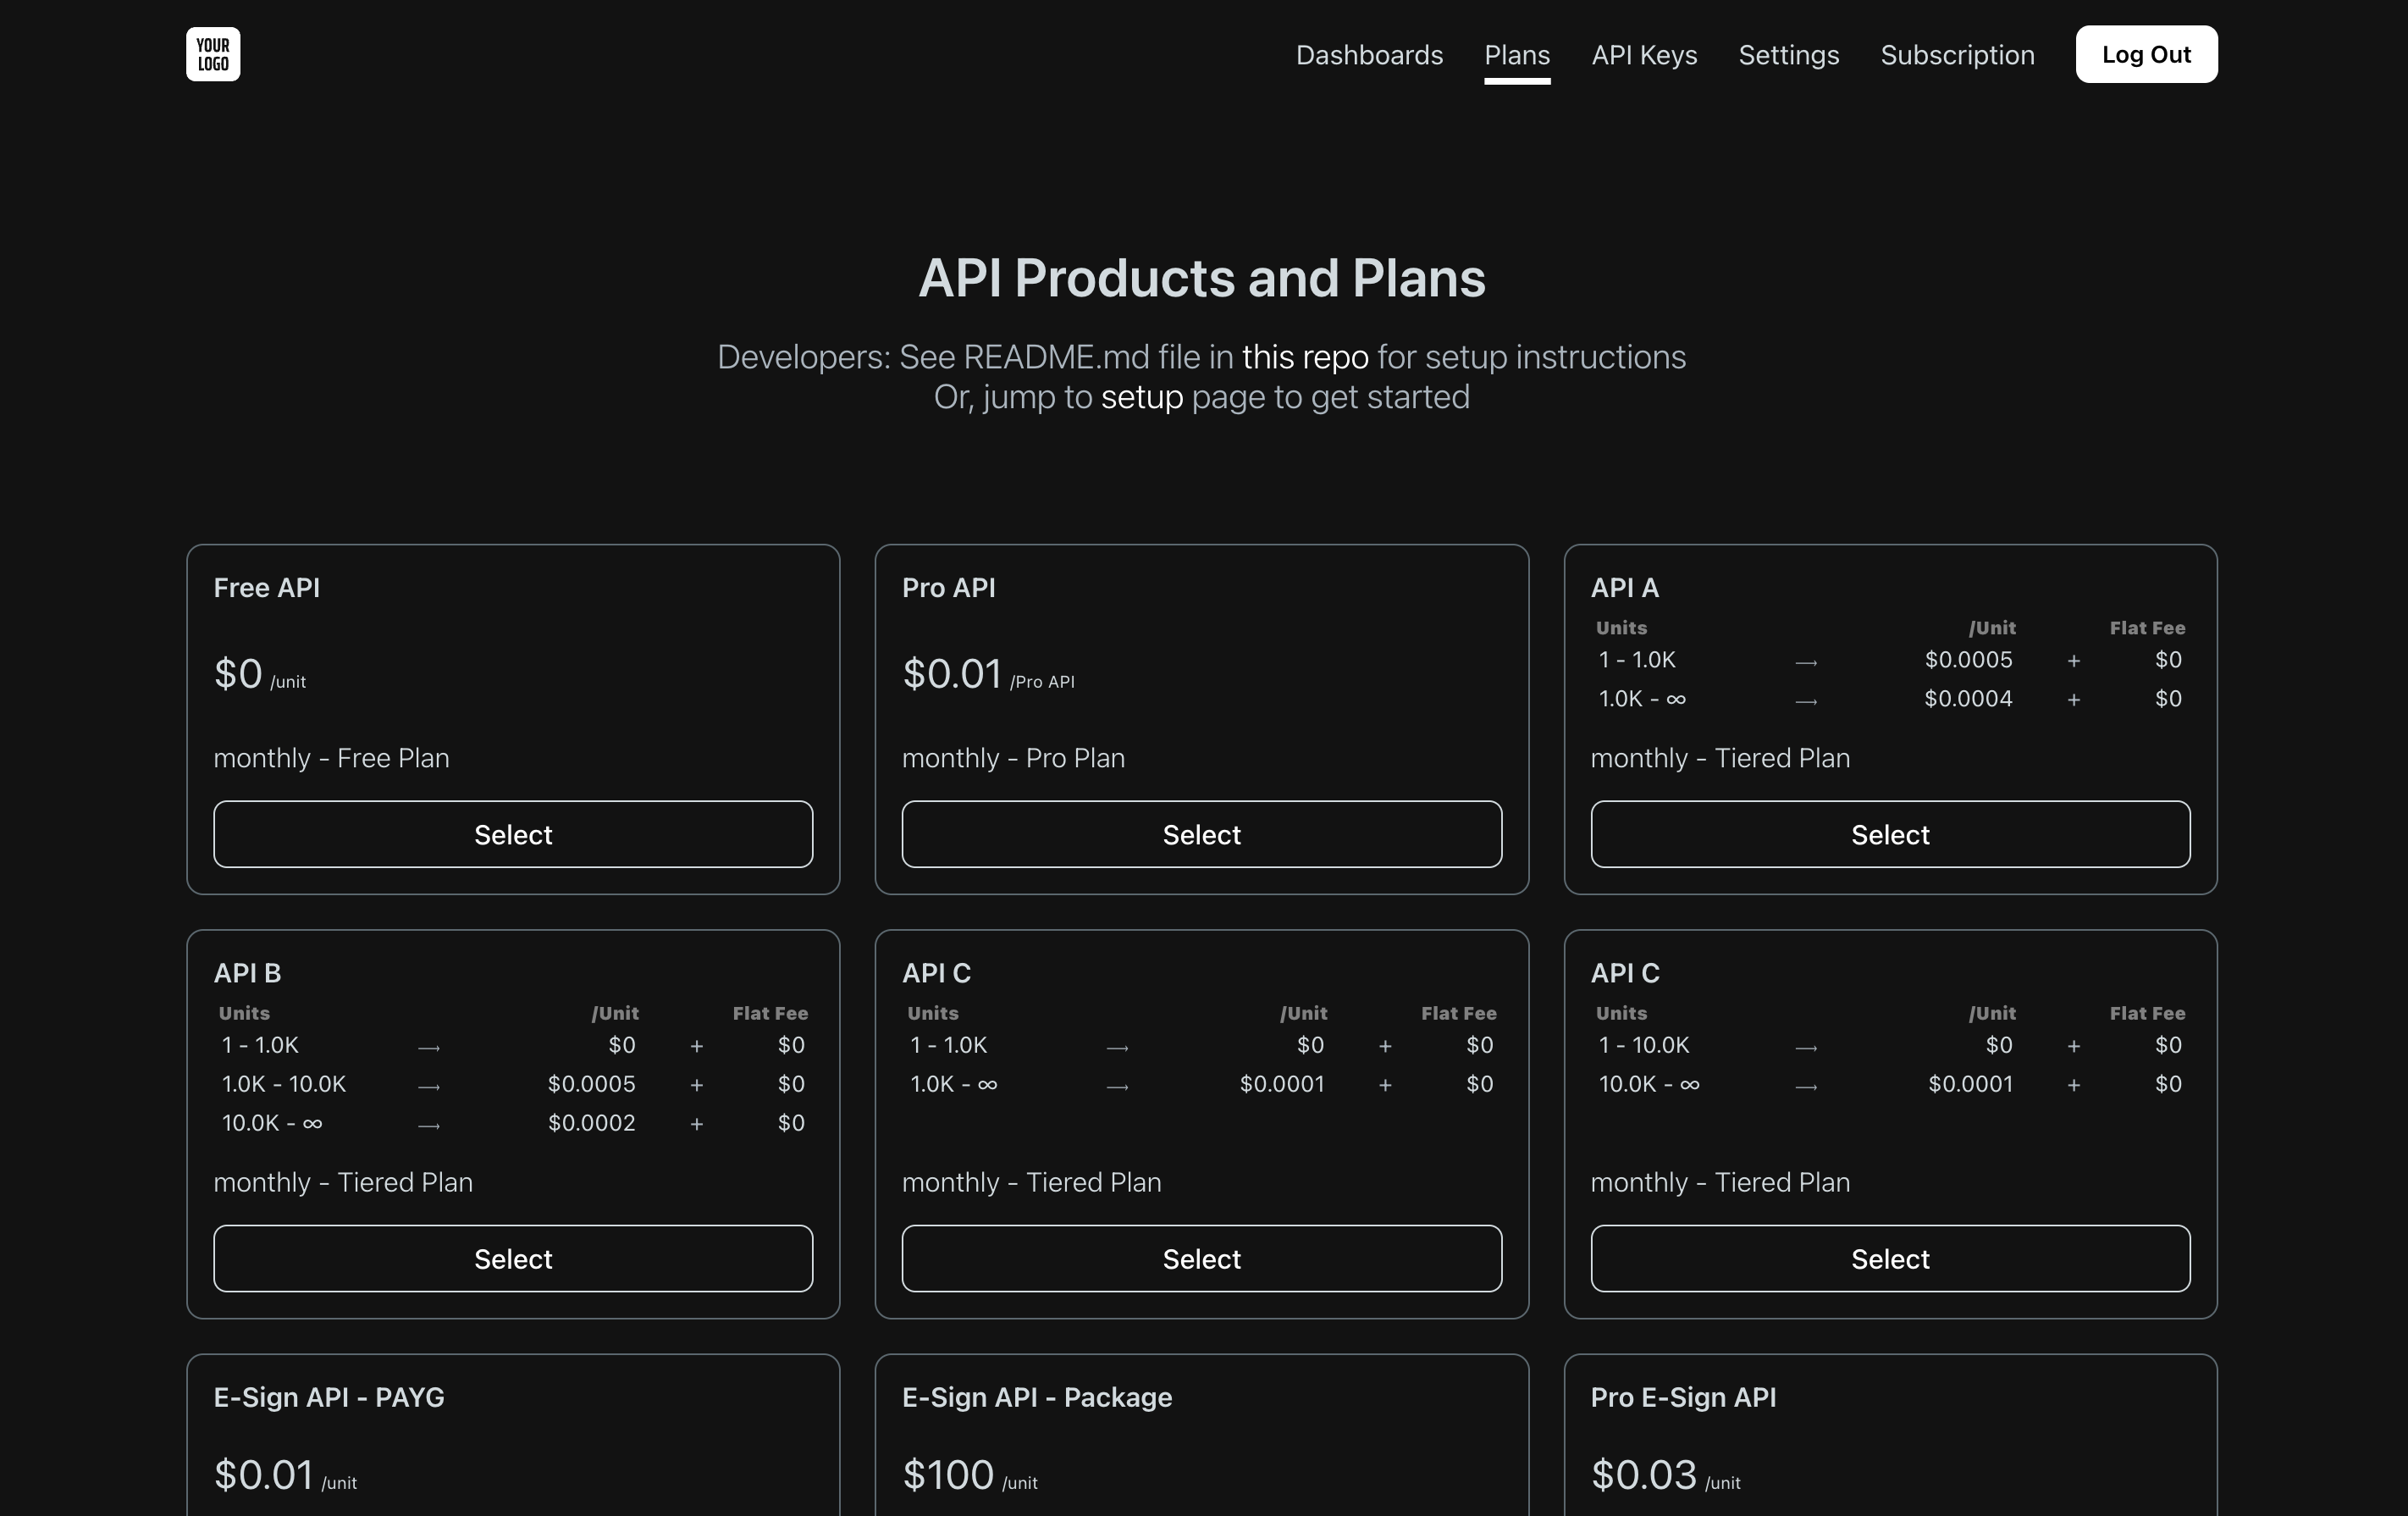
To start, navigate to your developer portal in the browser, and at the Home Screen of the Developer Portal click the Sign Up button in the top right. On the form that appears, create your user, select a product, and complete the checkout process, and then you should land in the Dashboard screen of the Developer Portal. At this point, you can confirm a few things that apply to your setup:

Auth0

In Auth0, on the User Management > Users screen, you should see your newly created user present, tracked by their email.

Okta

In the Okta console, on the Directory > People screen, you should see your newly created user present, tracked by their email.

Stripe

In Stripe, on the Customers screen, you should also be able to see your newly created user as well, tracked by their email. If you click on the customer, you should also be able to see their subscription. The subscription should match the one selected in the sign-up flow in the Developer Portal

Kong

In Kong, under Consumers, you should also see your new user added. For this entry, you should also see the custom_id field with the Stripe customer ID as well (will resemble cus_123abc).

AWS

With the amount of moving parts in the AWS implementation for the Moesif Developer Portal, it’s important to ensure that everything functions as intended.

Log the current user out of the Moesif Developer Portal if you have one logged in. Execute the following steps to confirm that the flow is working as intended:

  • In the Moesif Developer Portal, log in with an existing user OR create a new user, log out, and log back in.
  • Next, go to the Keys screen in the developer portal
  • From the Keys screen, generate a new key and copy it onto your clipboard
  • Navigate to www.jwt.io and go to the Debugger screen. Paste the key into the debugger and ensure that both the Stripe Customer and Subscription ID have been added to the token’s data under the stripeCustomerId and stripeSubscriptionId fields. For example, your payload data should look like this:
{
 "stripeCustomerId": "cus_OXDy3IqRlUfHOz",
 "stripeSubscriptionId": "sub_1Nk9WyCUAiurhyBq9qUzE9w1",
 "iss": "https://dev-zojlepeedyeleun3.us.auth0.com/",
 "sub": "auth0|64ecdd7f90d5900e79704f1e",
 "aud": [
   "http://127.0.0.1:3030",
   "https://dev-zojlepeedyeleun3.us.auth0.com/userinfo"
 ],
 "iat": 1693487303,
 "exp": 1693573703,
 "azp": "VFgqgySNsjhRJCl5DjsU6niftMDxIByT",
 "scope": "openid profile email offline_access"
}

Once the Stripe info is confirmed in the token, send a request to your AWS Gateway endpoint and confirm that the API call shows up in the Live Event Log in Moesif. The API call should have the Stripe Customer and Subscription ID added in the Moesif User and Company fields, respectively. Lastly, add an invalid token (the easiest thing to do is remove a few characters from your existing token to invalidate it) and ensure that the AWS Lambda Authorizer we added also rejects any unauthorized calls.

Tyk

After you create a key in the next step, head to the Tyk Dashboard, under System Management > Keys you should see a new key created. You should see the Alias / Key Hash Value associated with a Stripe customer ID (will resemble cus_123abc).

Next Steps

Next, in the Moesif Developer Portal, click on the Keys menu item at the top of the screen and open the Keys screen. On the Keys screen, click the Create Key button and generate an API key. Next, create an API request in Postman or Insomnia and attach the API key to the header. Once the API request is sent and the response is received, we can confirm a few more things:

In Moesif, in the Live Event Log, you should see your API call logged. You should also see, to the far right of the request entry, that your user’s Stripe customer ID and subscription ID are attached to the request.

Within the next 15 minutes, you should also see in Stripe that API call usage has been attached to the user subscription. This can be done by going to the Customers screen, clicking on the customer, and on the customer profile screen that appears, clicking on the Subscriptions entry for the subscription where the usage will be billed. Inside the subscription details screen, you’ll see under the Pricing header an entry and a link for View usage. This should reflect the API call usage.

A last step you can do is also do the Meter Test to ensure that all parts of the billing meter setup are working correctly.

Depends on how you deploy the my-dev-portal-api, weather you decides to use API gateway or not, you will want to make sure these APIs are protected so that they can only be called by my-dev-portal UI.

With all parts of the ecosystem working properly, the Moesif Developer Portal can be released to your users!

Updated: