Profile Dashboards
Profile Dashboards share much of their functionality with Dashboards. This guide assumes you are familiar with Dashboards already. If not, please review our high-level docs on API Dashboards as well as our docs on Creating Dashboards.
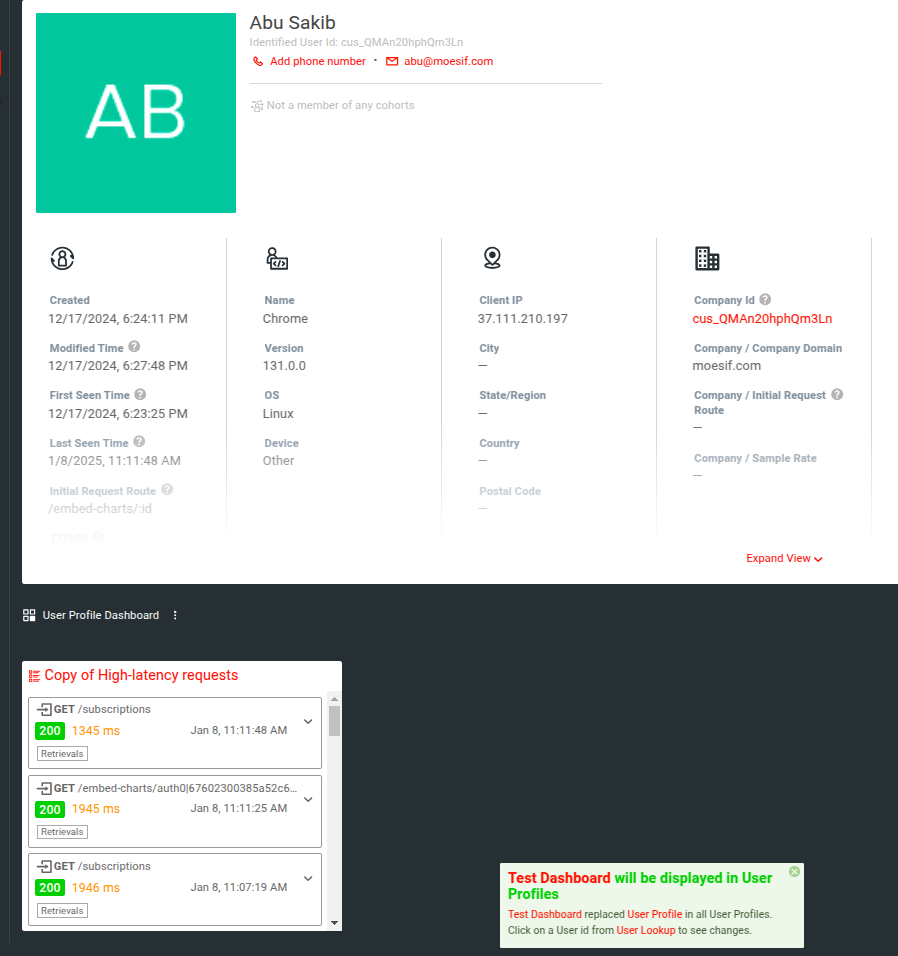
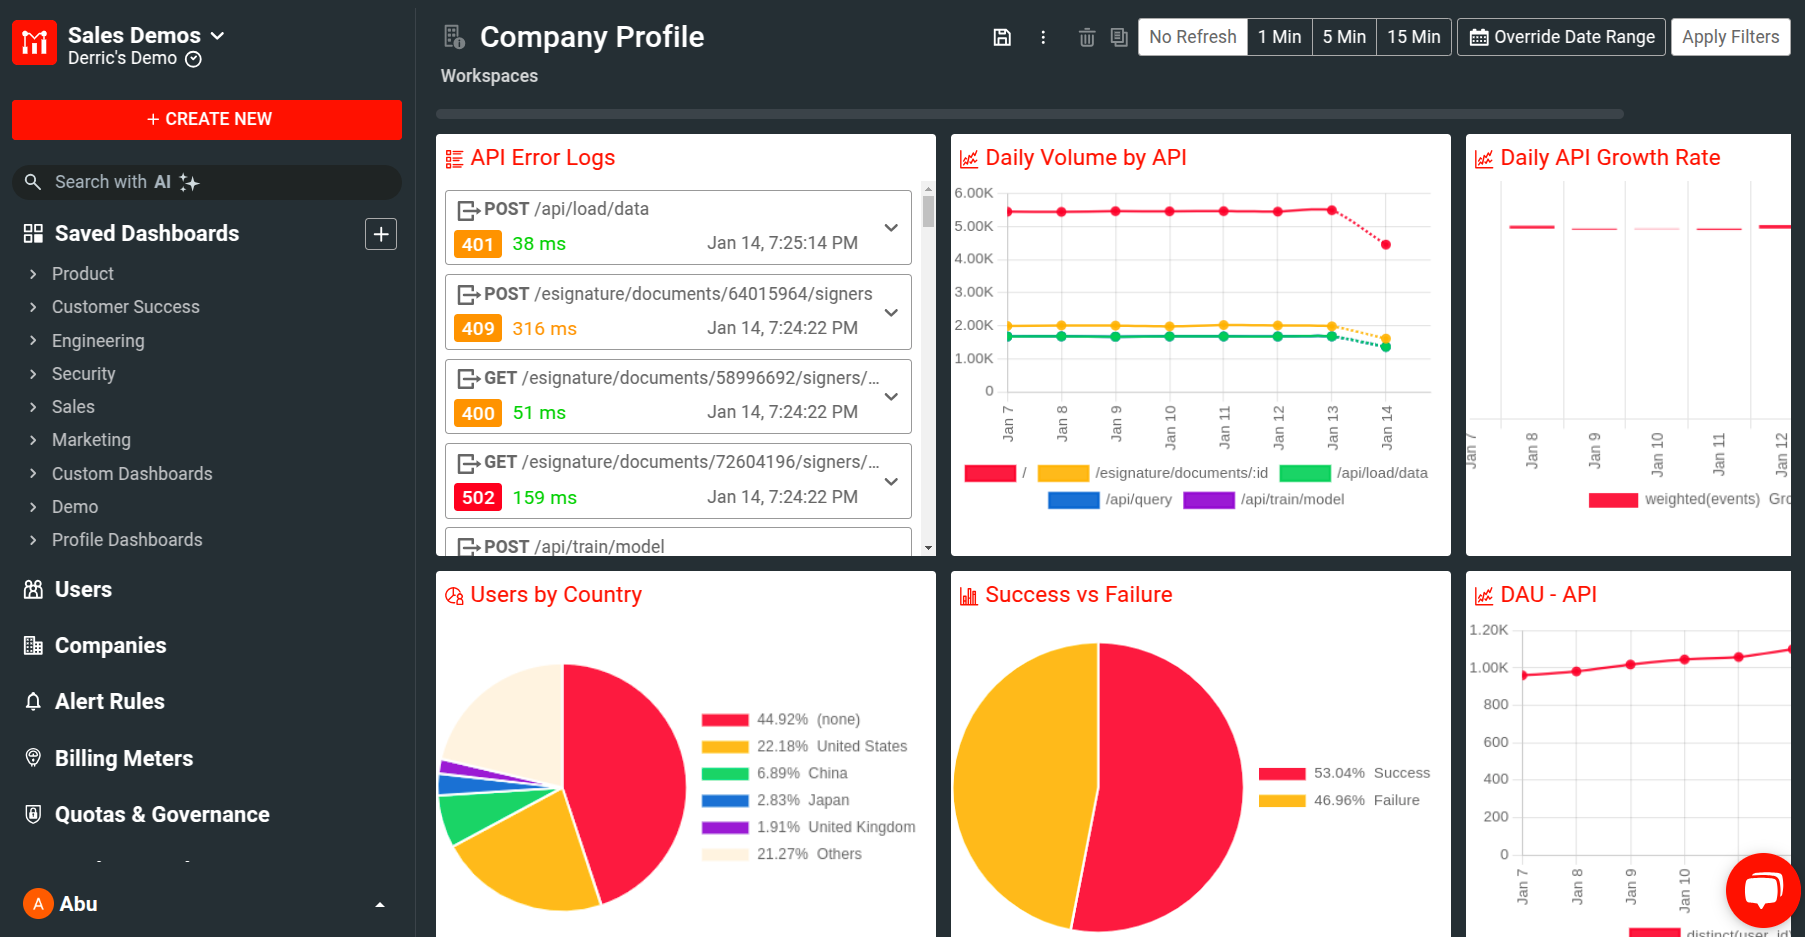
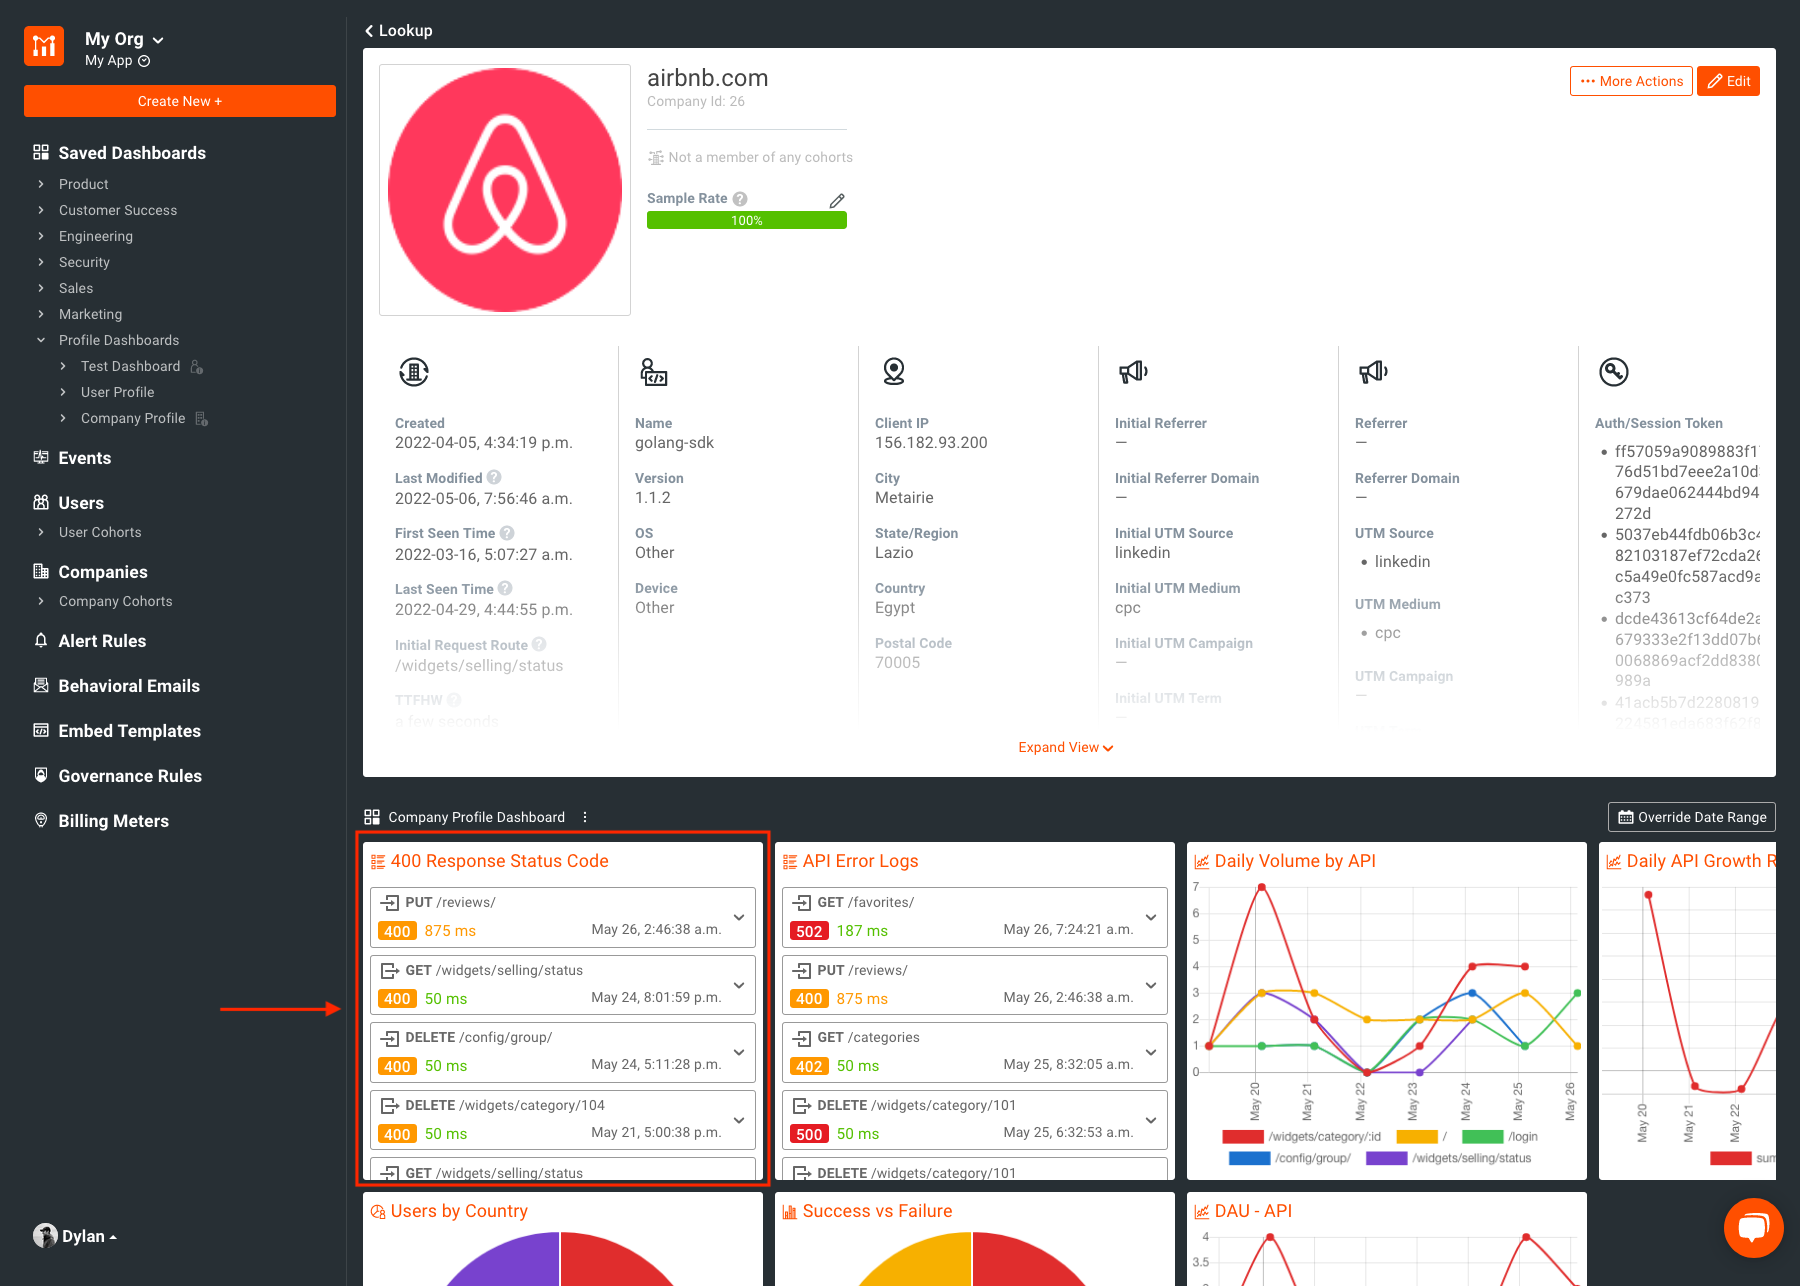
Profile Dashboards enable you to see key API metrics for specific users and companies. They provide individualized account metrics across your entire customer base. This is accomplished by providing a customizable template that is applied to each user’s or company’s profile page. Profile Dashboards are located at the bottom of any user or company profile page.
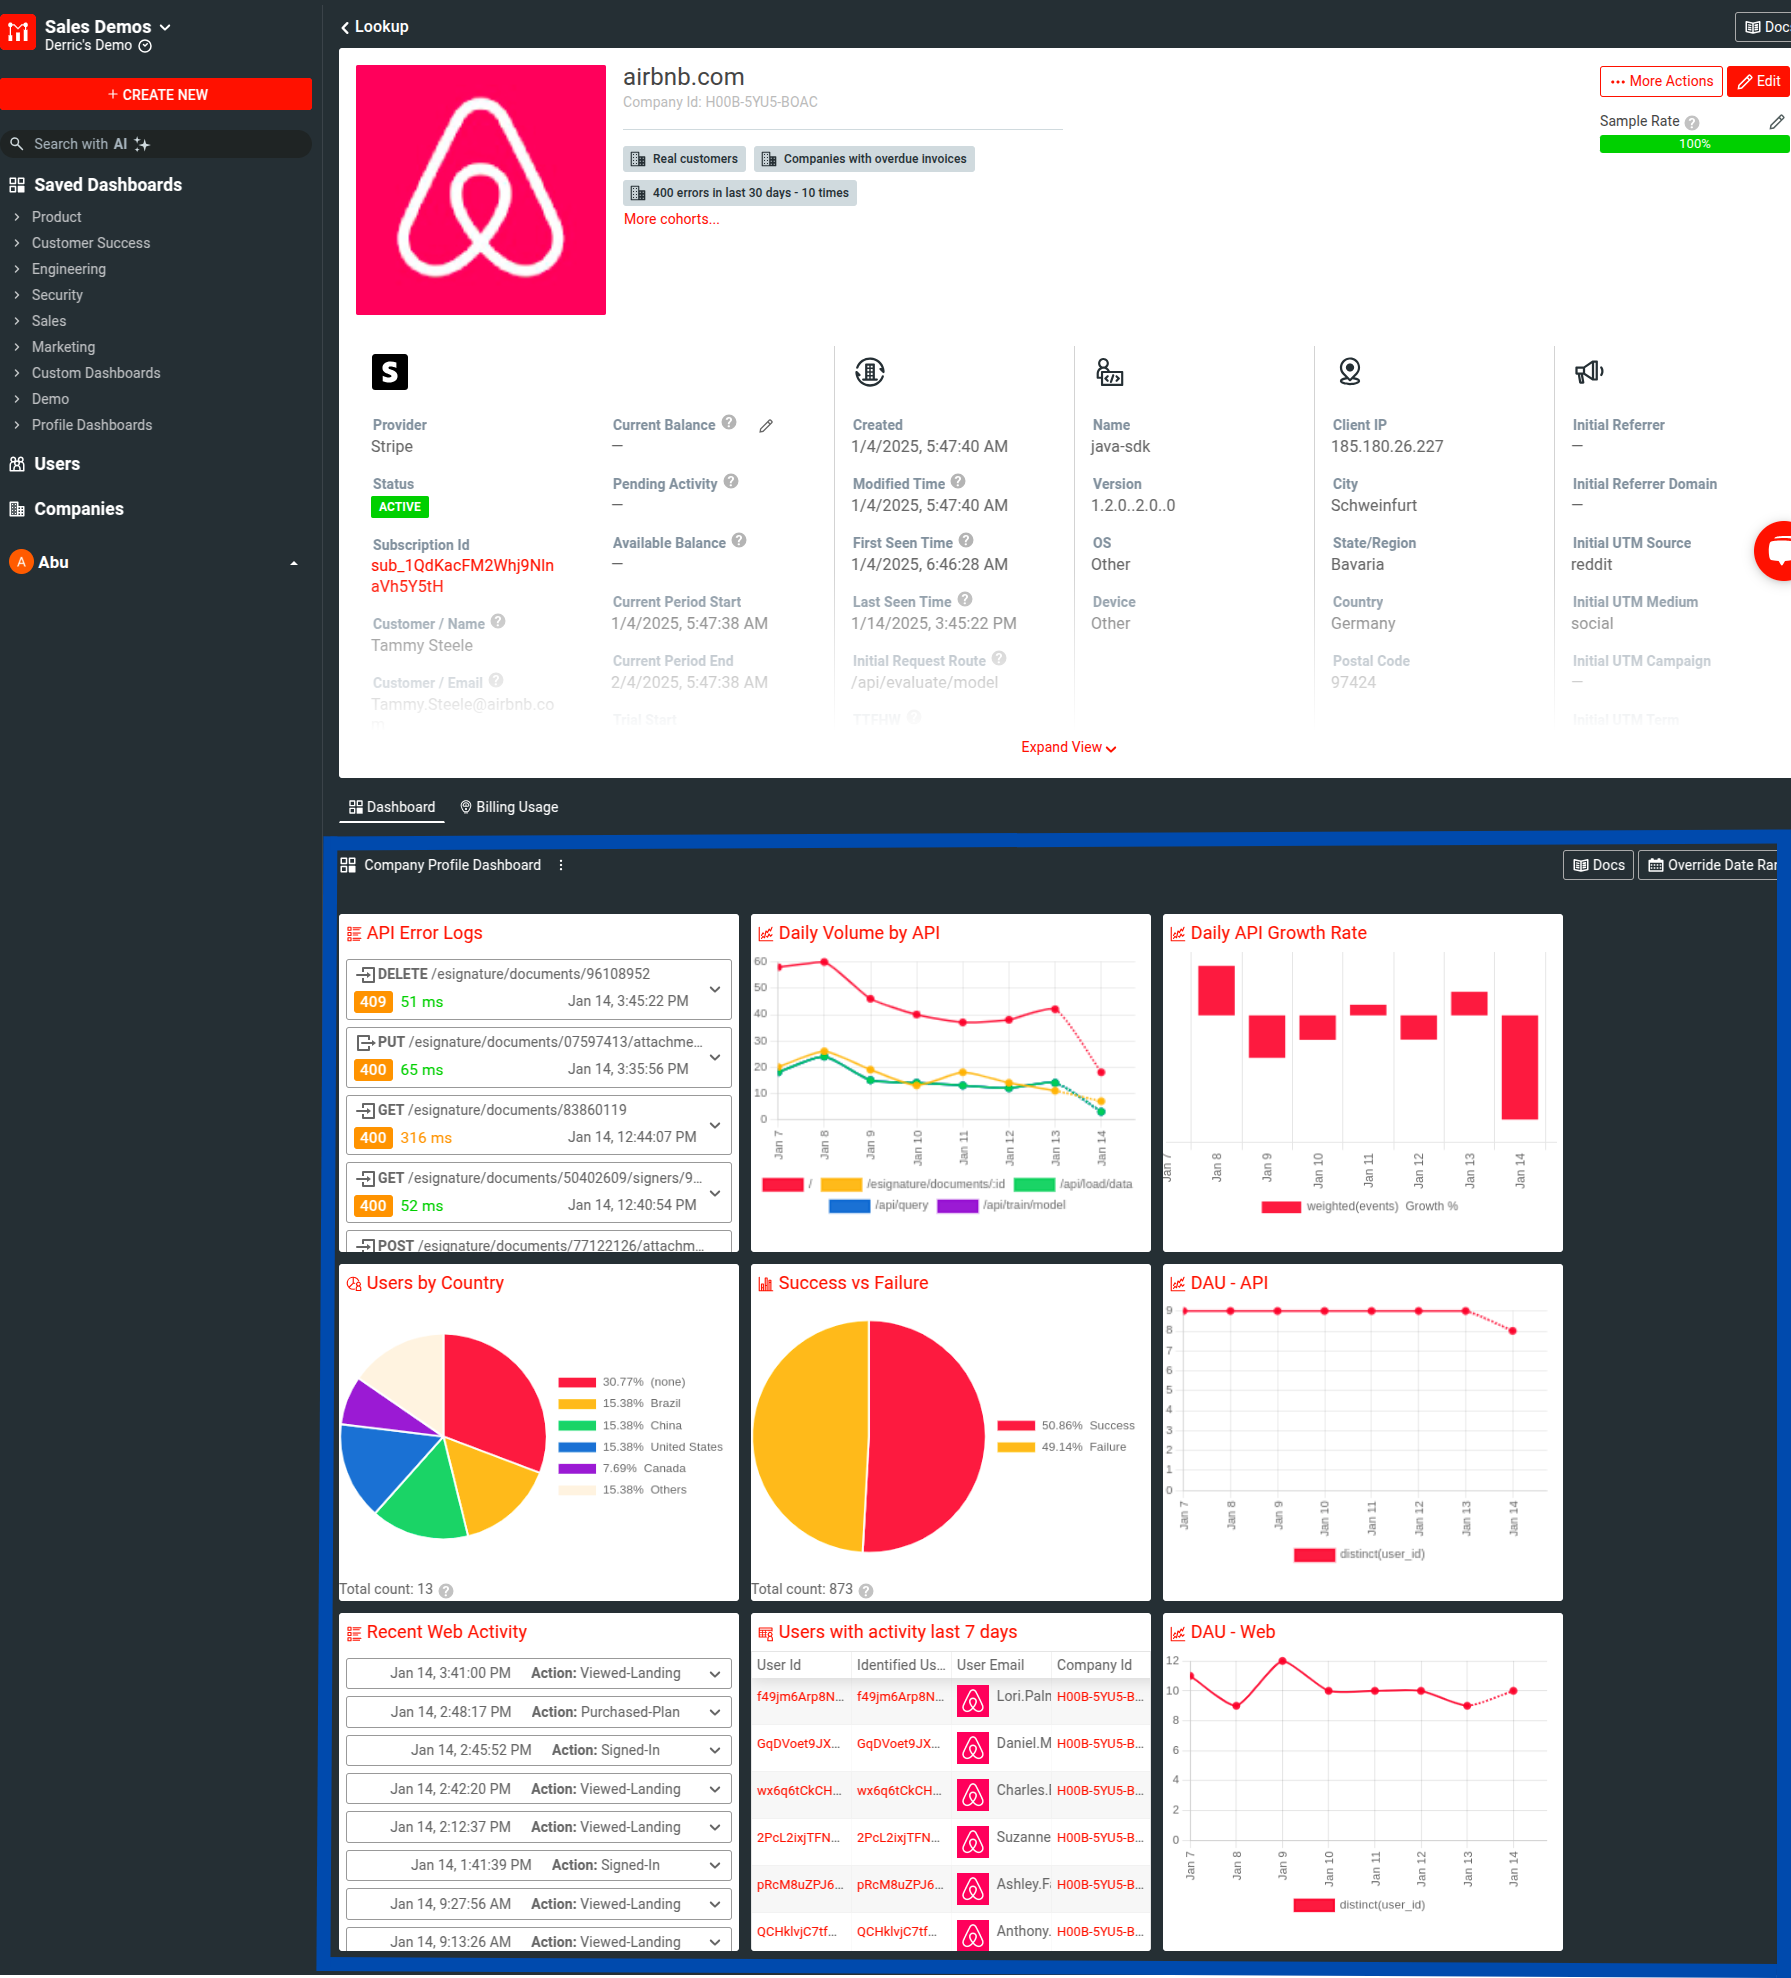
There are two pre-configured Profile Dashboard templates provided initially. A template for user profiles and another for company profiles. Additional templates can be created, configured, and quickly switched between.
Viewing Profile Dashboard templates
You can access profile dashboard templates in two ways:
-
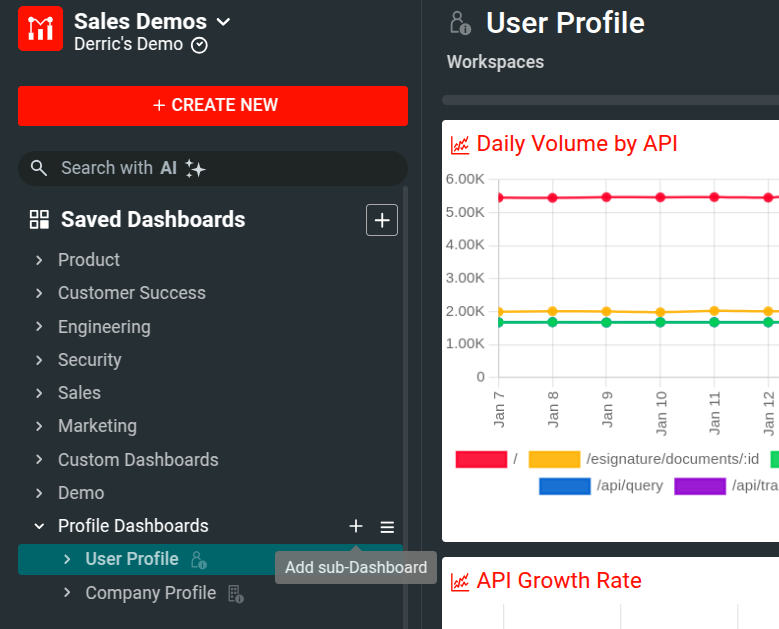
Select the Profile Dashboards dropdown under
![Dashboard icon]() Saved Dashboards and select either User Profile or Company Profile.
Saved Dashboards and select either User Profile or Company Profile.![Profile Dashboard Dropdown]()
-
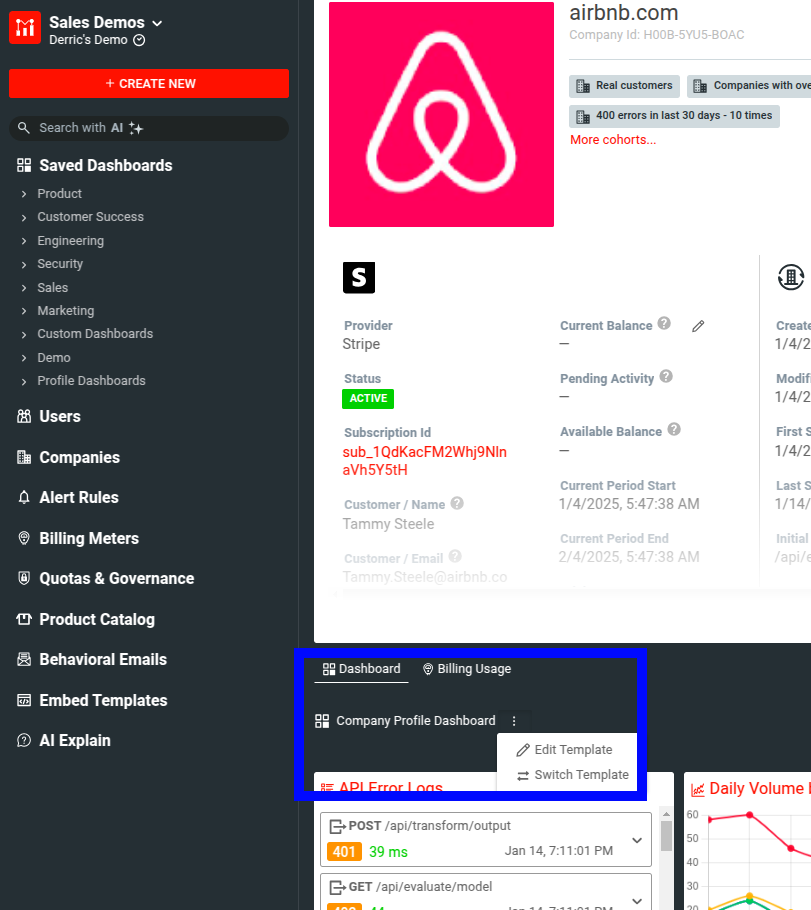
From a user or company profile page, select the
![Vertical elipsis icon]() vertical elipsis beside Company Profile Dashboard or
User Profile Dashboard and then select Edit Template.
vertical elipsis beside Company Profile Dashboard or
User Profile Dashboard and then select Edit Template.![Edit Dashboard Via Profile Page]()

After that, you can start configuring the template.
Editing existing Profile Dashboard templates
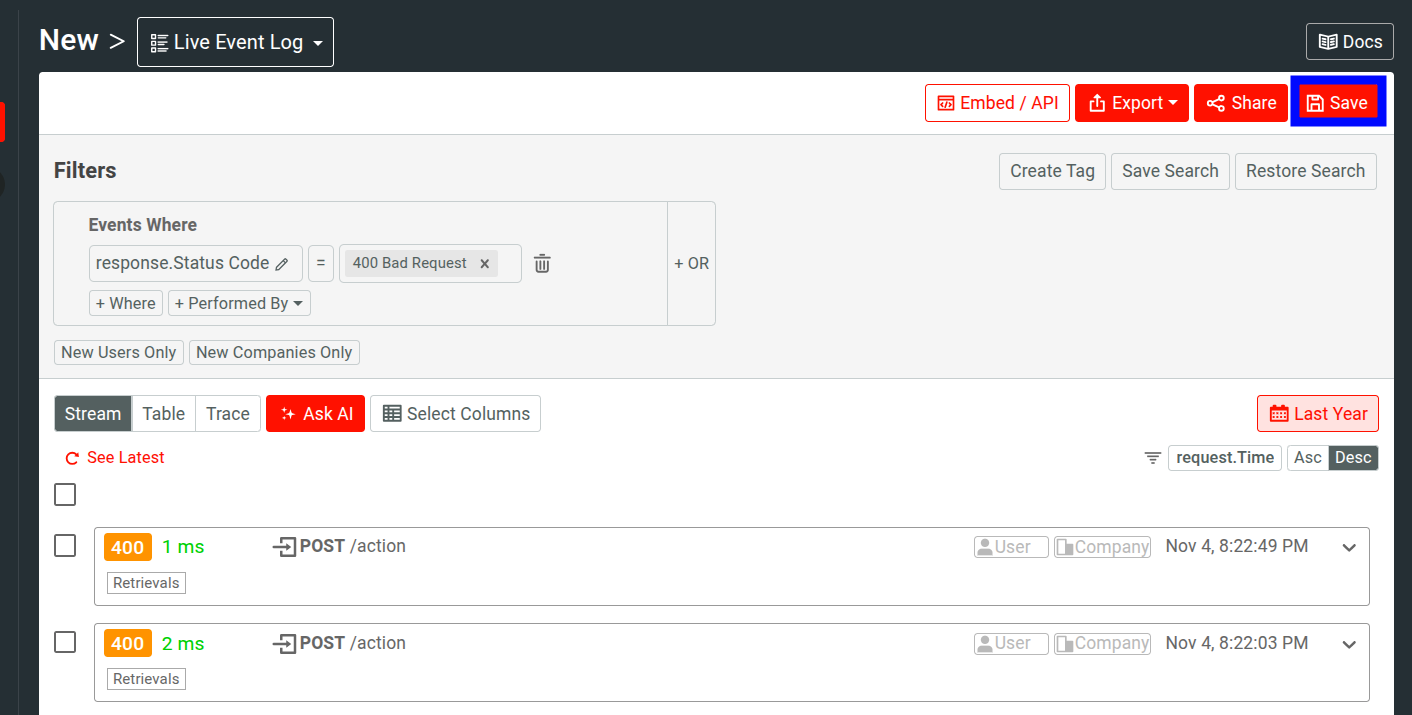
You can save almost every chart you see in Moesif to a profile dashboard. This includes live event logs, time series, bar chart, heatmap, and funnels. To get started, navigate to the Users or Companies screen to start a new analysis. Within the chart view, set up the filters, group by, and time range options for your chart.
You can use only event-type workspaces in user profile dashboards.
Once you create a new analysis or chart and are ready to add it to a profile dashboard, select ![]() Save.
Save.
The Save Workspace modal then appears. Select Profile Dashboards from the Select Dashboard menu and select the profile dashboard you want to save the workspace to.
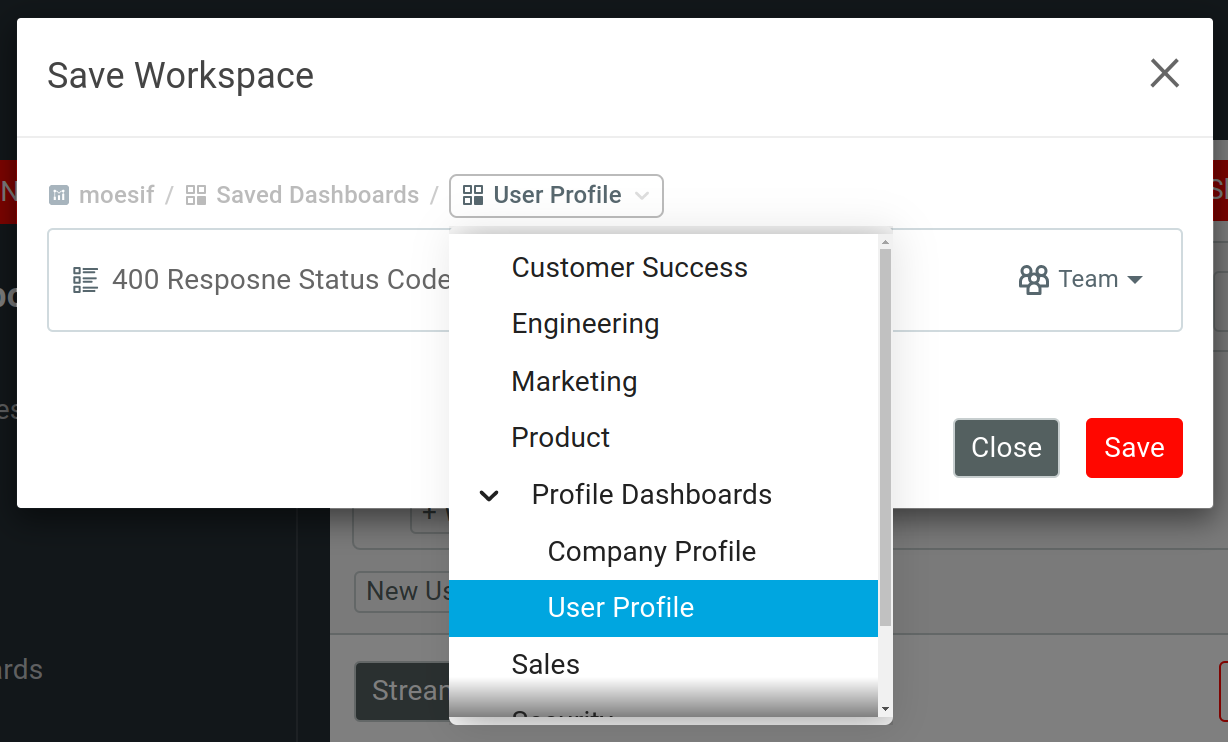
Then enter your workspace name and then select Save to add the workspace to the profile dashboard you want, Company Profile or User Profile.
To navigate back to the profile dashboard you have been editing, select the Profile Dashboards dropdown and select either User Profile or Company Profile.
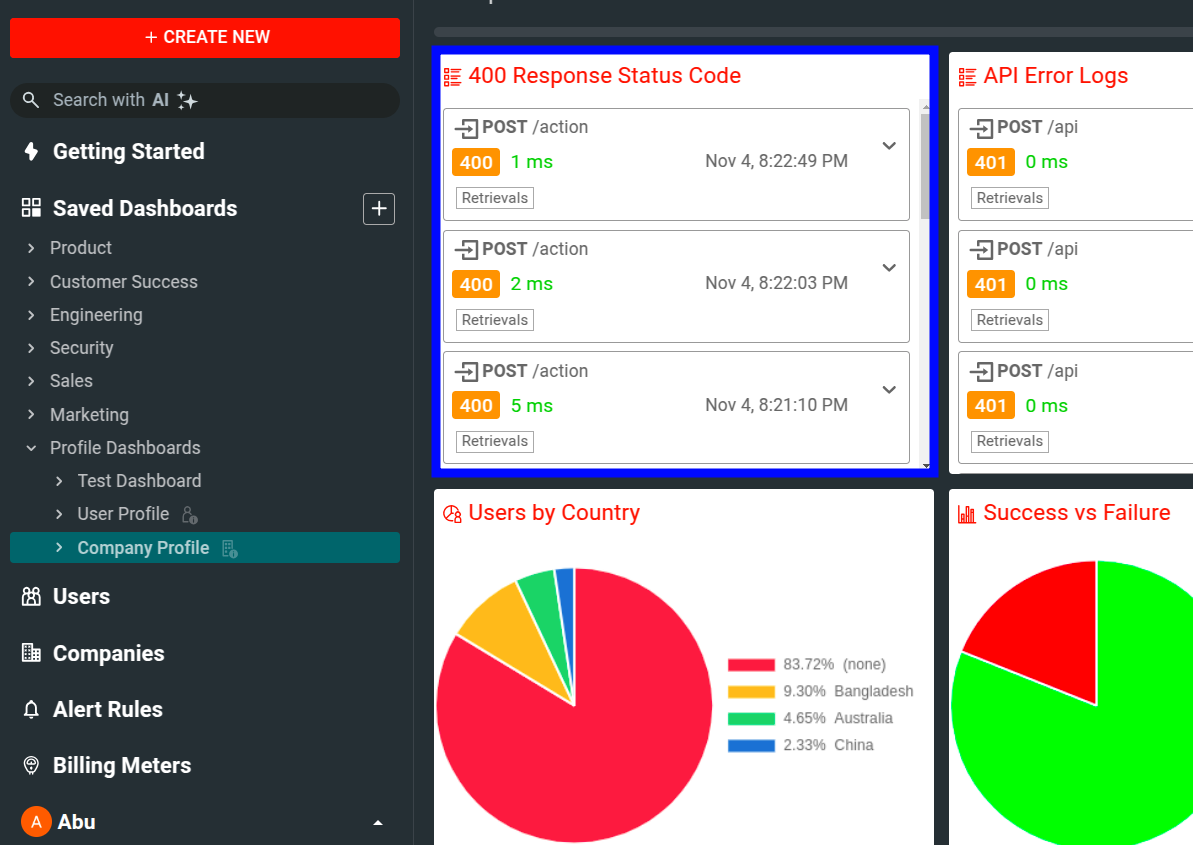
You can see the new workspace appear in your profile dashboard template. You can access this workspace immediately when viewing the respective user or company profile dashboard.
Creating new Profile Dashboard templates
You can create additional profile dashboards to provide more versatility for your team and gain additional insights into your customers without cluttering up a single dashboard.
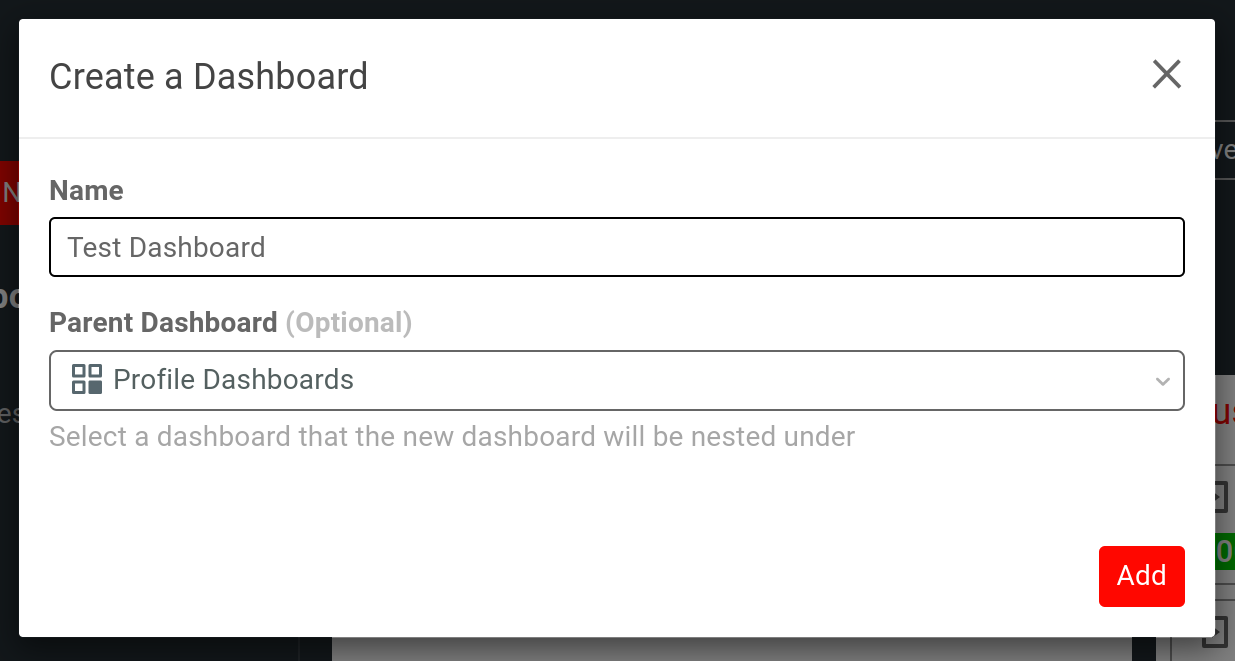
To create a new profile dashboard template, select + Add sub-Dashboard beside the Profile Dashboards dropdown.
Give your new sub-dashboard a name and select the Add.
Your new sub-dashboard then appears under Profile Dashboards.
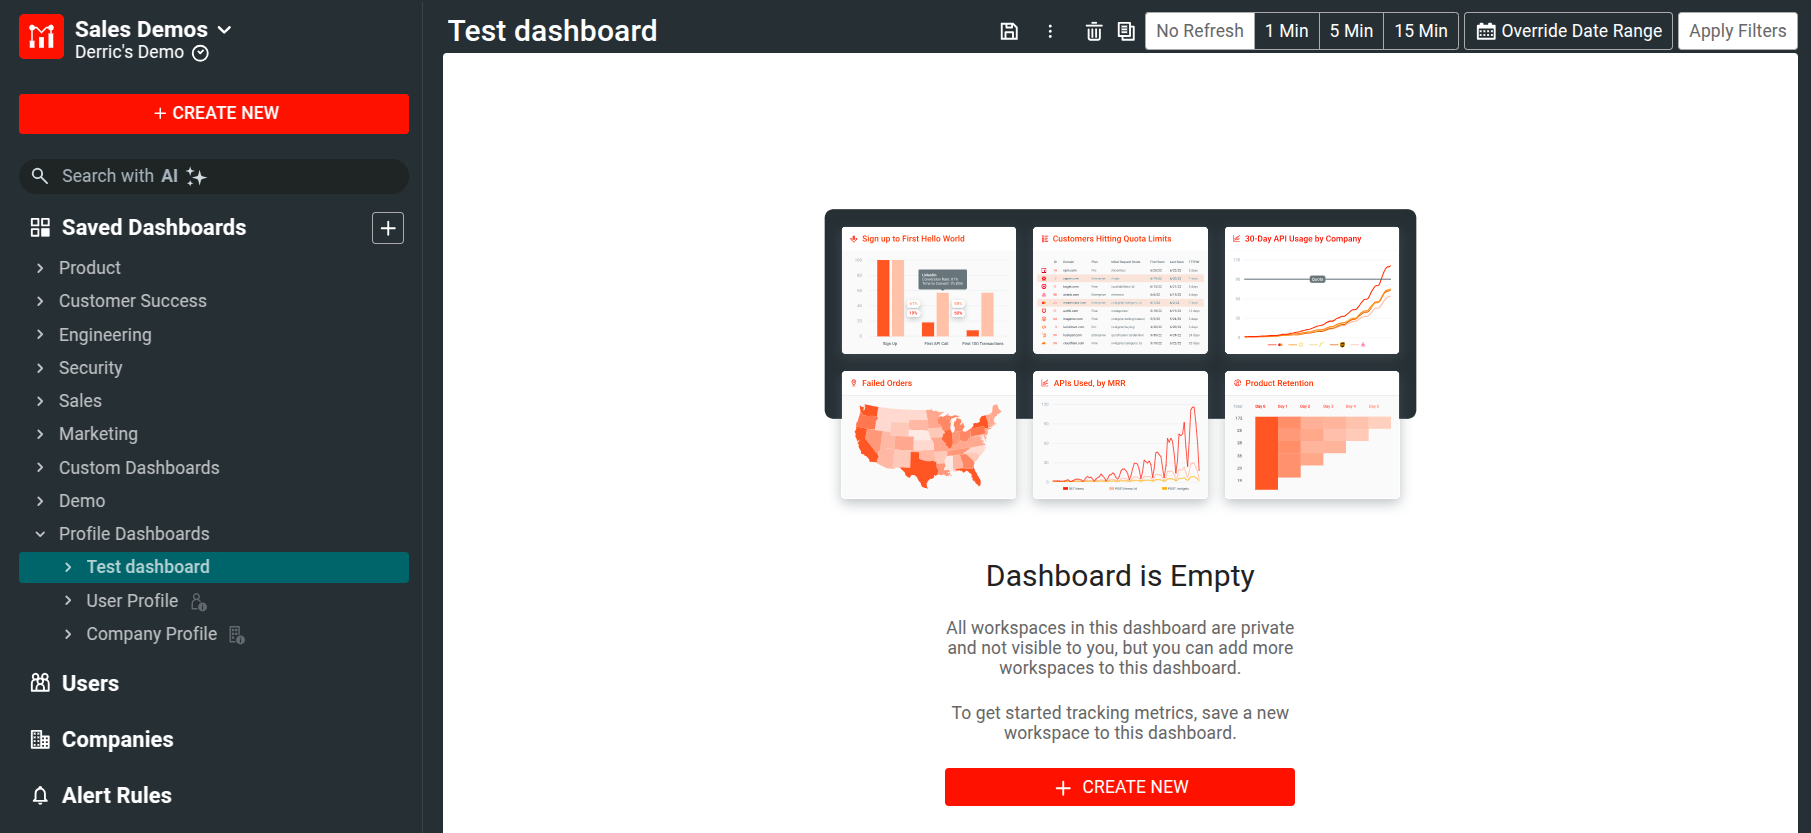
You can populate this new sub-dashboard by following the instructions in Editing Existing Profile Dashboard Templates.
Switching between Profile Dashboard templates
You can leverage multiple profile dashboard templates and quickly switch between them to capture greater insights into your customer base.
To specify which template your profile dashboards use, do one of the following:
-
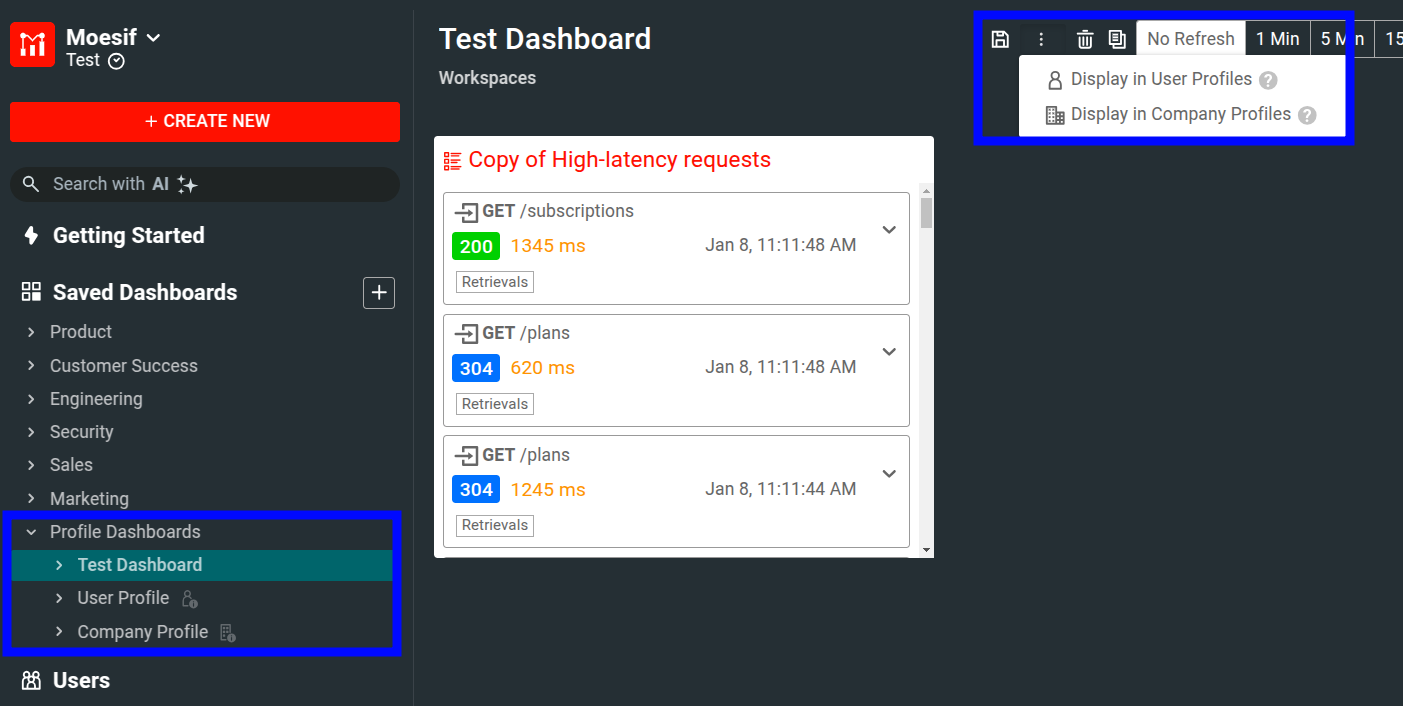
Navigate to the profile dashboard template you want to apply from Profile Dashboards. Select the
![Vertical elipsis icon]() vertical elipsis and then select either Display In User Profiles or Display In Company Profiles.
vertical elipsis and then select either Display In User Profiles or Display In Company Profiles.![Display Template in Profile]()
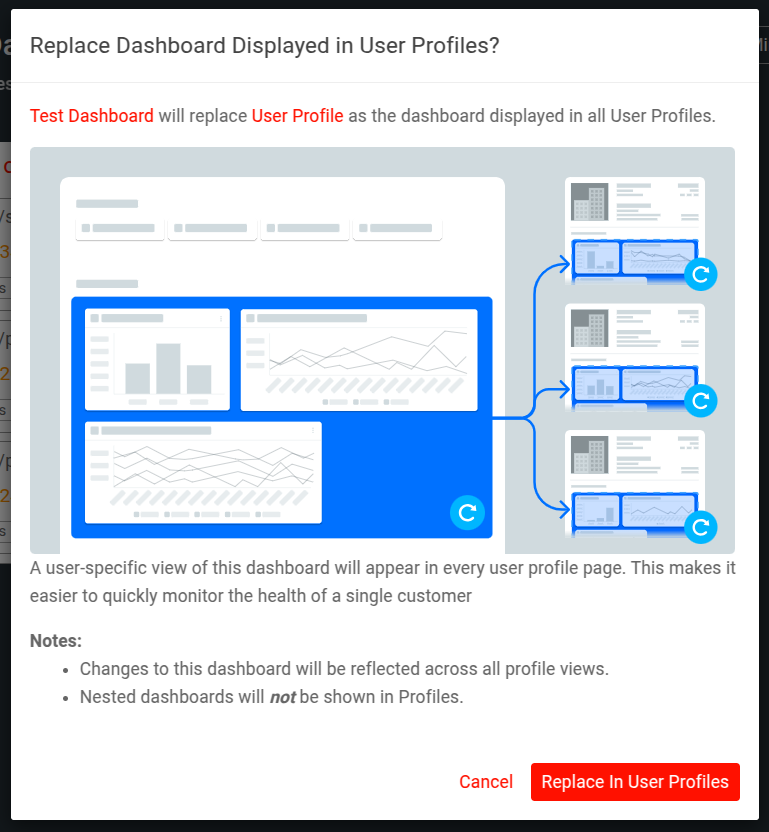
A modal then appears requesting confirmation of the change. Based on your prior selection, select Replace in User Profiles or Replace in Company Profiles.
![Replace Dashboard Screen]()
A confirmation message then lets you know the change has been accepted and applied to the profile.
-
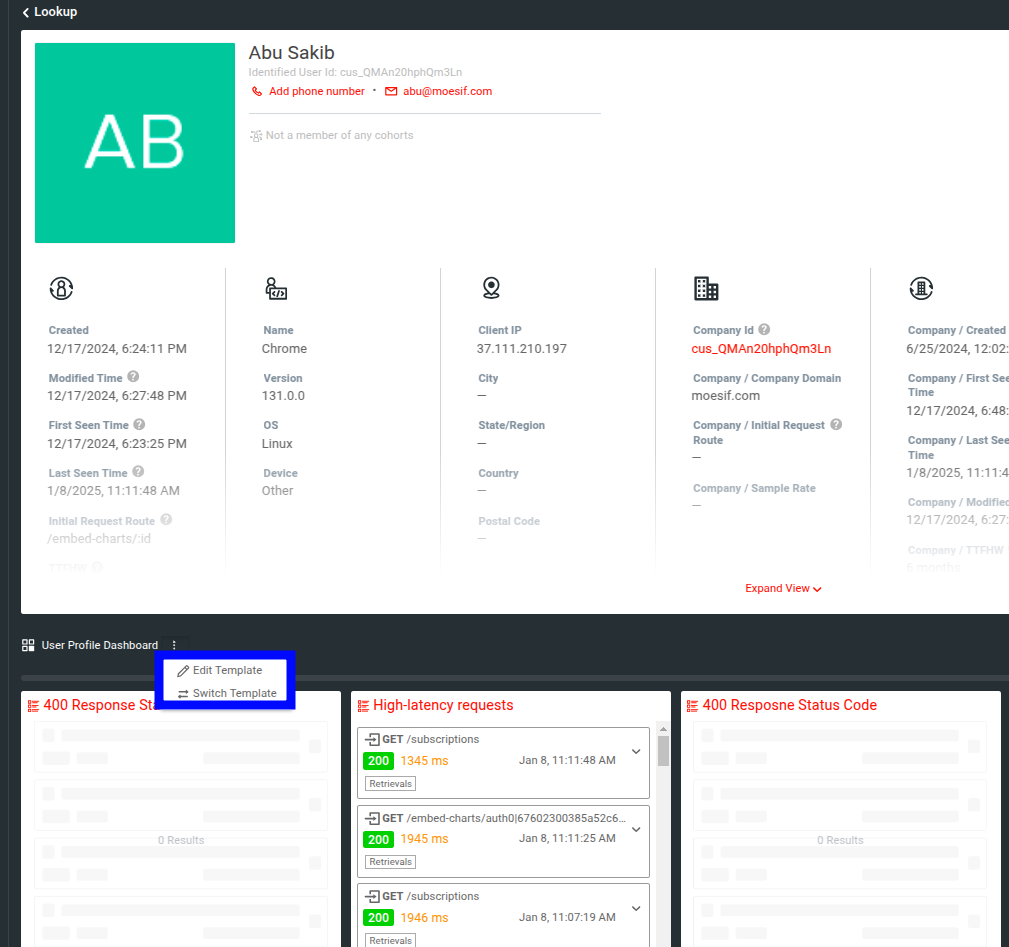
When viewing a profile dashboard on a Users or Companies profile page, select the
![Vertical elipsis icon]() vertical elipsis and then select
vertical elipsis and then select ![Vertical elipsis icon]() Switch Template.
Switch Template.![Switch Template in User Profile]()
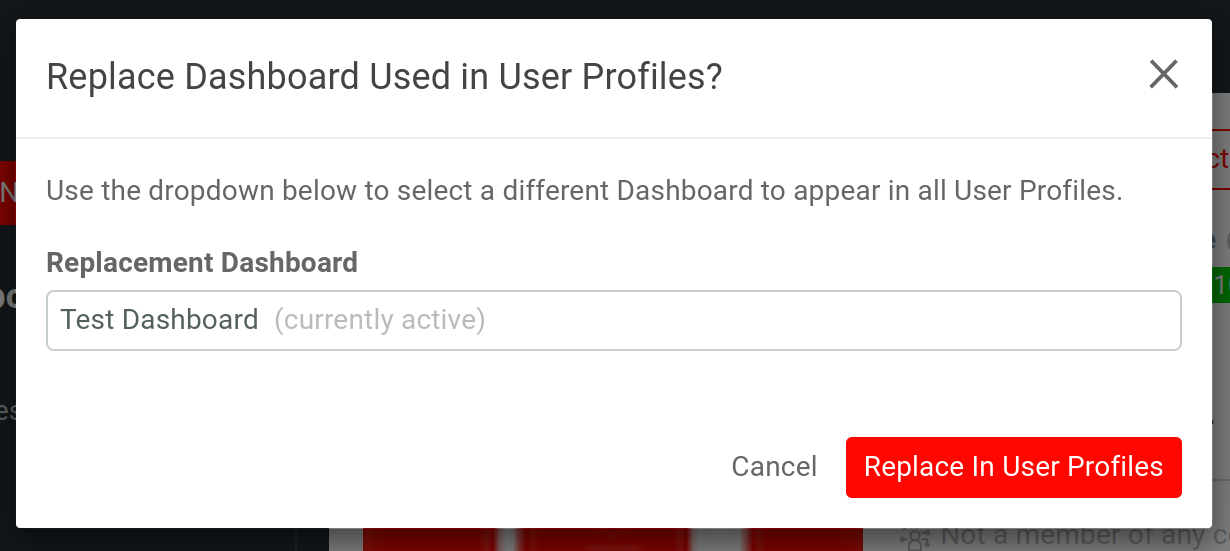
A modal then appears asking which dashboard you want to use as a replacement. Make your selection and then click Replace In User Profiles or Replace In Company Profiles.
![Replacement Dashboard Selection]()
A dialog appears confirming the selected replacement dashboard change which is immediately viewable within the Profile Dashboard section.
![Replacement Dashboard Confirmation]()