Managing Embedded Templates
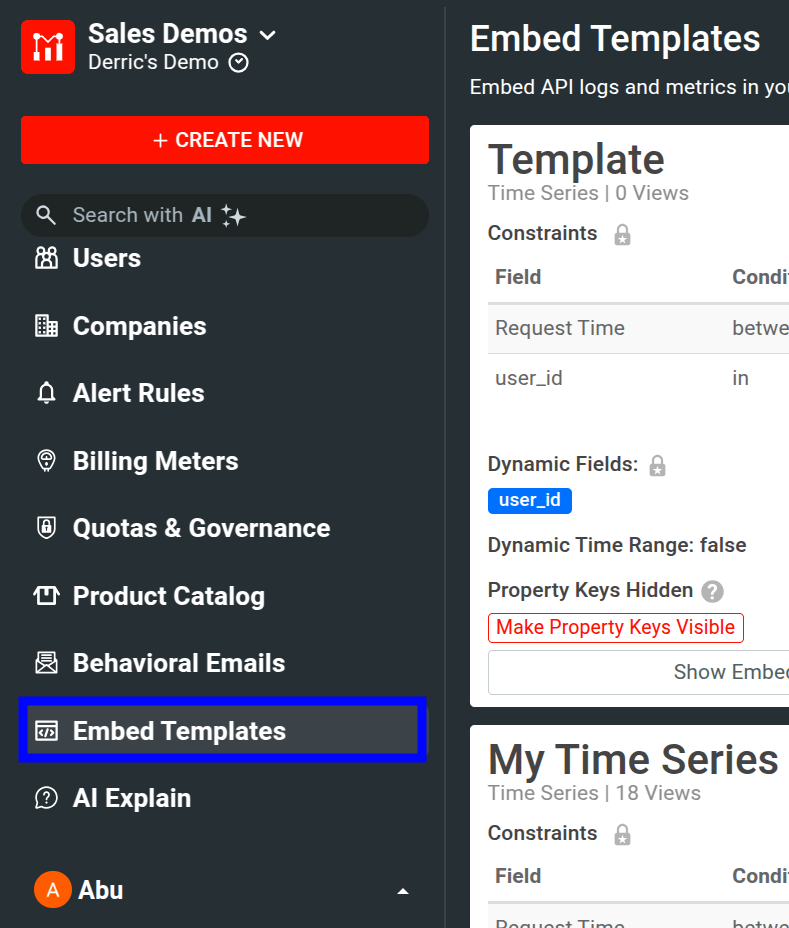
The Embed Templates screen allows you to manage all your existing embedded templates. Select the Embed Templates menu item from the navigation menu to access the screen.
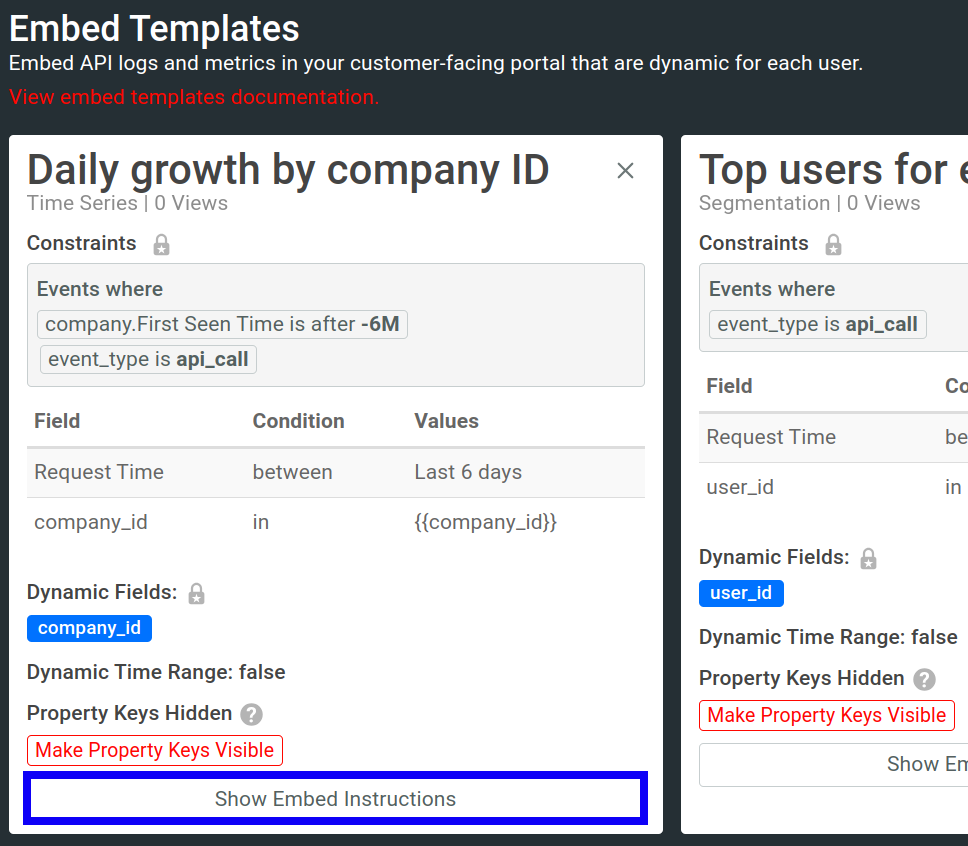
The Embed Templates screen shows a list of all embedded templates that you have created. You can see the various settings of each template, as well as the view count and the corresponding chart type of each template. As the templates get views, the view counts increase.
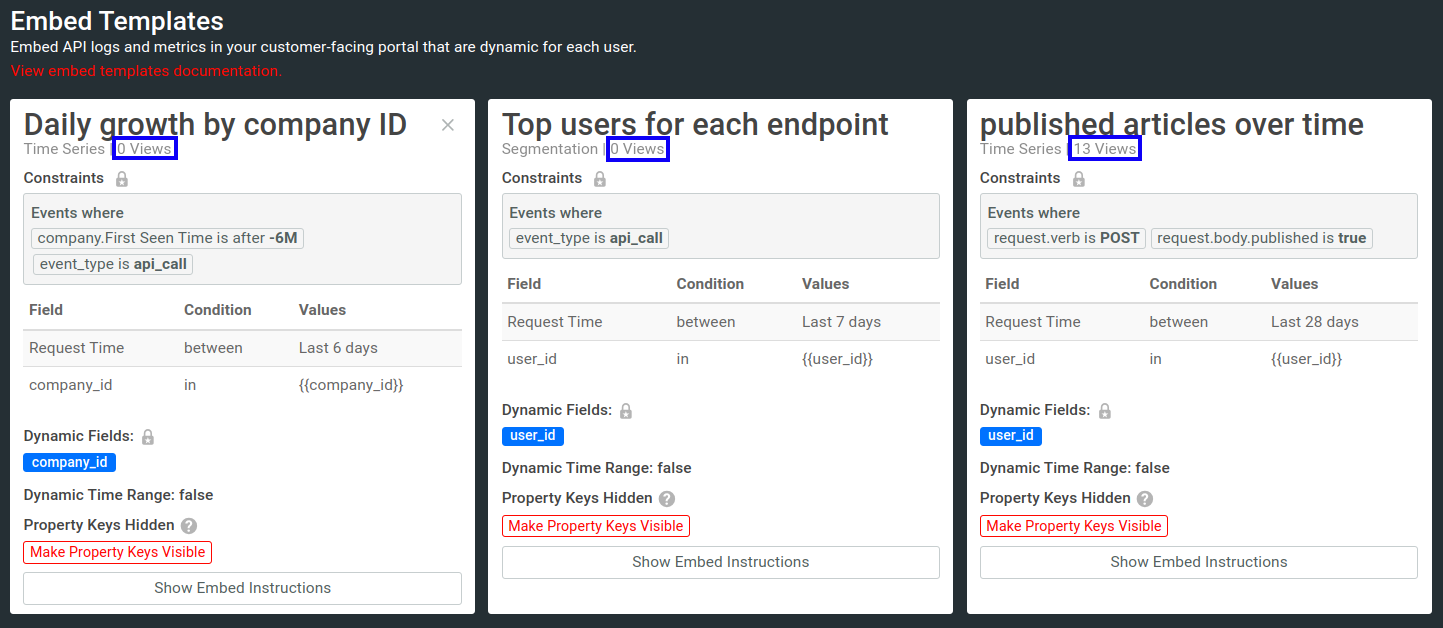
Any template with zero views may no longer be used since no one has accessed it.
Access the Embed Instructions
When you create an embedded metric, you can see the embed instructions after selecting Get Embed Code. You can access those instructions anytime by selecting Embed Templates and then selecting Show Embed Instructions in a template.
Edit a Template
Moesif allows you to change almost every aspect of a template, including the chart’s filter, dynamic fields, and settings. For example, you can hide or expose header and body keys.
Rename a Template
To rename a template, select Show Embed Instructions from the Embed Templates screen in the template you want to rename. Type the new name in the Name field. Then select X.
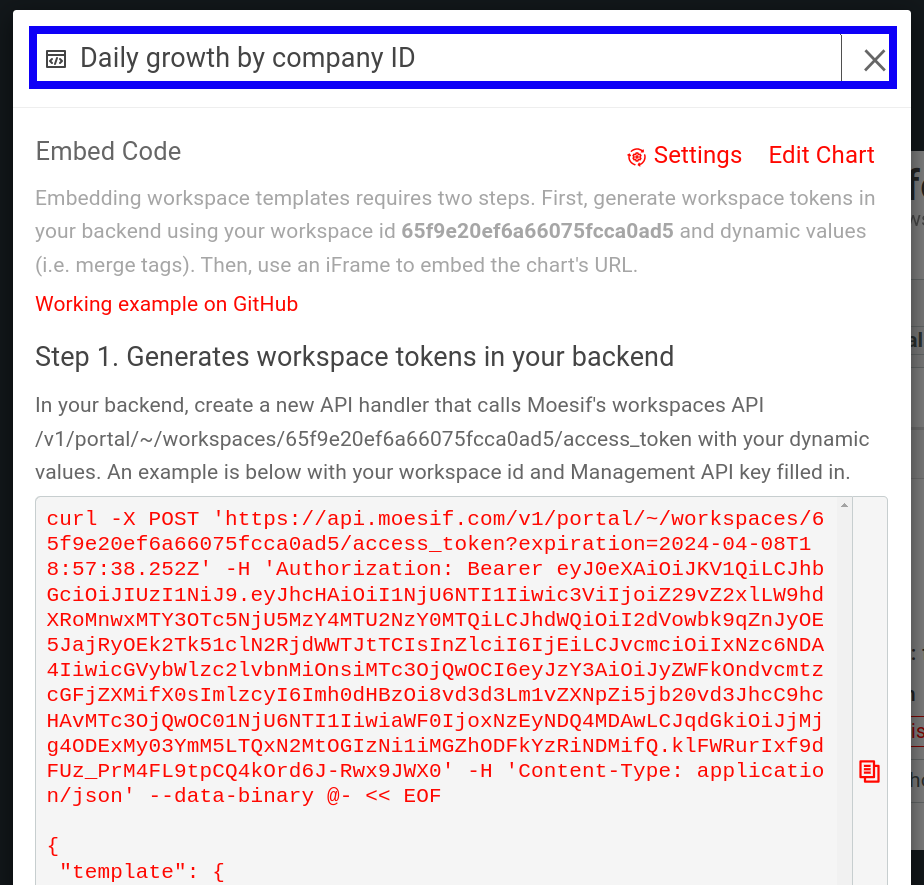
Moesif automatically saves the new name when you exit. You don’t need to manually save it.
Edit Chart
To edit your template’s chart, from the Embed Templates screen, select Show Embed Instructions and then select Edit Chart. After making your edits, select Save.
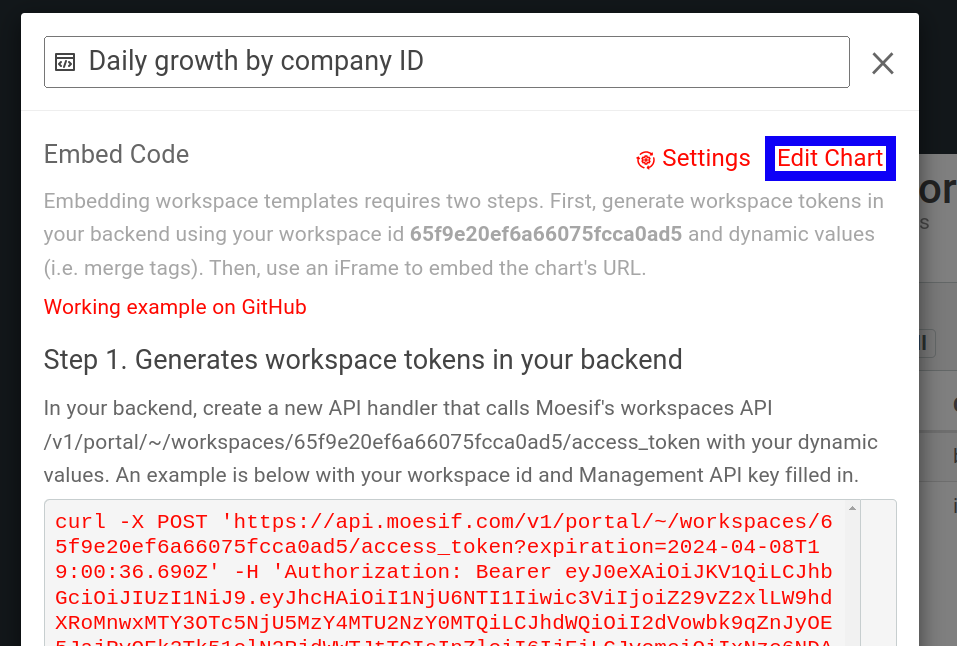
It takes some time for the changes to take effect and become visible. If you change any dynamic fields, make sure that you update the corresponding application code. Any current embeds that you have of this chart might stop functioning temporarily, and users might need to refresh the browser or application.
Edit Settings
To change the embed settings of your template, from the Embed Templates screen, select Show Embed Instructions and then choose Settings. After making your edits, select Update.
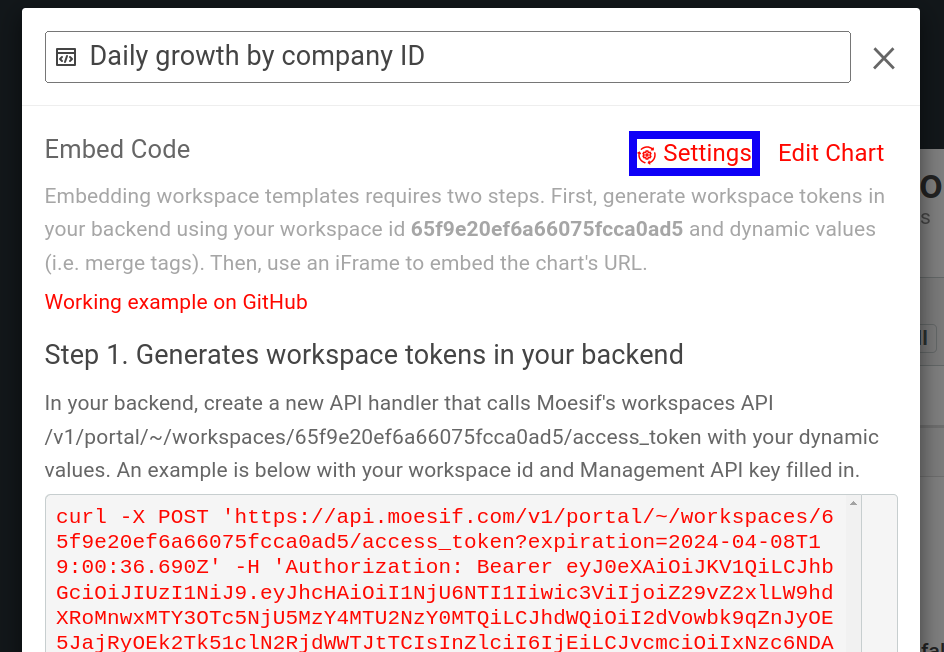
It takes some time for the changes to take effect and become visible. If you change any dynamic fields, make sure that you update the corresponding application code. Any current embeds that you have of this chart might stop functioning temporarily, and users might need to refresh the browser or application.
Delete a Template
To delete an embedded template, hover over the template you want to delete and select X. Then select Delete from the confirmation dialog. Remember that after you delete a template, any embeds you have of this template workspace stop functioning.
Secure Access to Embedded Metrics
To maximize the security of your embedded metrics and maintain proper access control, follow these best practices for different embed types:
For Static Embeds
For static embeds, you can use a passcode-protected link. This lets you selectively choose who can access your static embeds with a secure link.
The <iframe> HTML element Moesif generates for a static embed contains the same passcode you see in the Passcode tab. You can establish some logic in your application that dynamically requests the passcode from the user before rendering the <iframe> element.
Remember that you can always revoke access to your static embed by deleting the corresponding workspace.
For Embedded Templates
- Set dynamic properties like user and company IDs to sandbox data and access. You can add as many dynamic properties as you want. For secure generation of IDs, use a library like Nano ID.
- Maintain caution when you expose the header and body keys of your API requests. Moesif disables this feature by default.
- Set an expiration date for the generated workspace token. For an example, see Creating an Endpoint in our embedded templates guide.
- If necessary, manually generate a Management API key with an expiration date.
- Use environment variables to store secrets like your Moesif Management API key and workspace ID.
For Search API
The Search API only requires the Management API key for a valid request to Moesif’s Management API. Therefore, follow best practices to keep your API keys secure. For example, instead of hard-coding API keys, use environment variables or key stores. You can also manually generate Management API keys with custom expiration dates.
Management API keys
You can manually generate Management API keys with custom expiration and authorization scopes. This allows you to add another layer of security over embedded metrics that require Management API keys like embedded templates and the Search API.
To generate a Management API key manually, follow these steps:
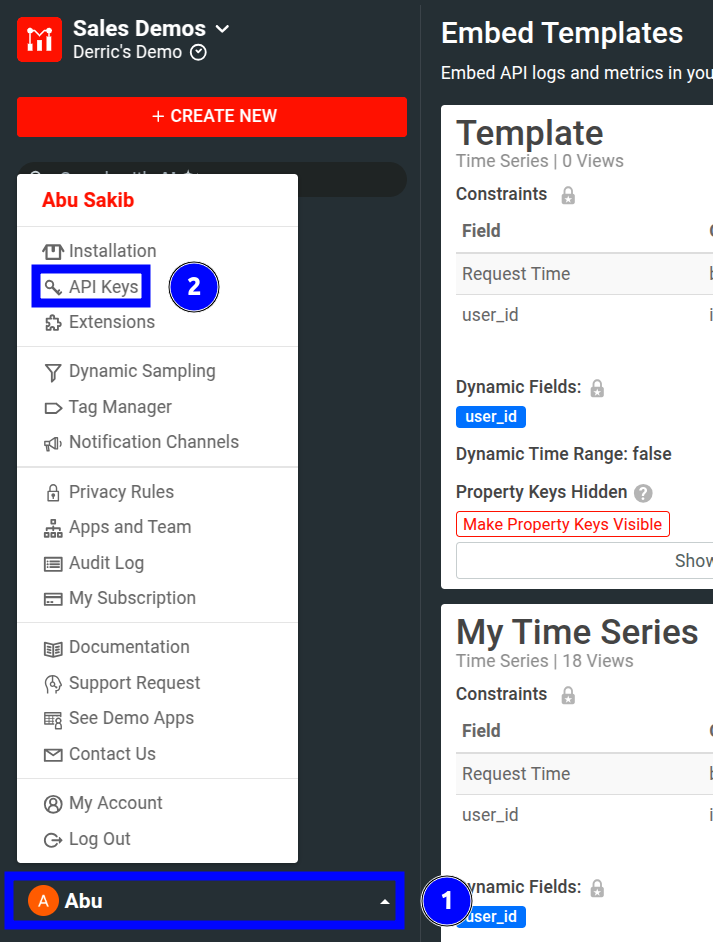
- Select the account icon to bring up the settings menu.
- Select API Keys.
![Accessing the settings menu]()
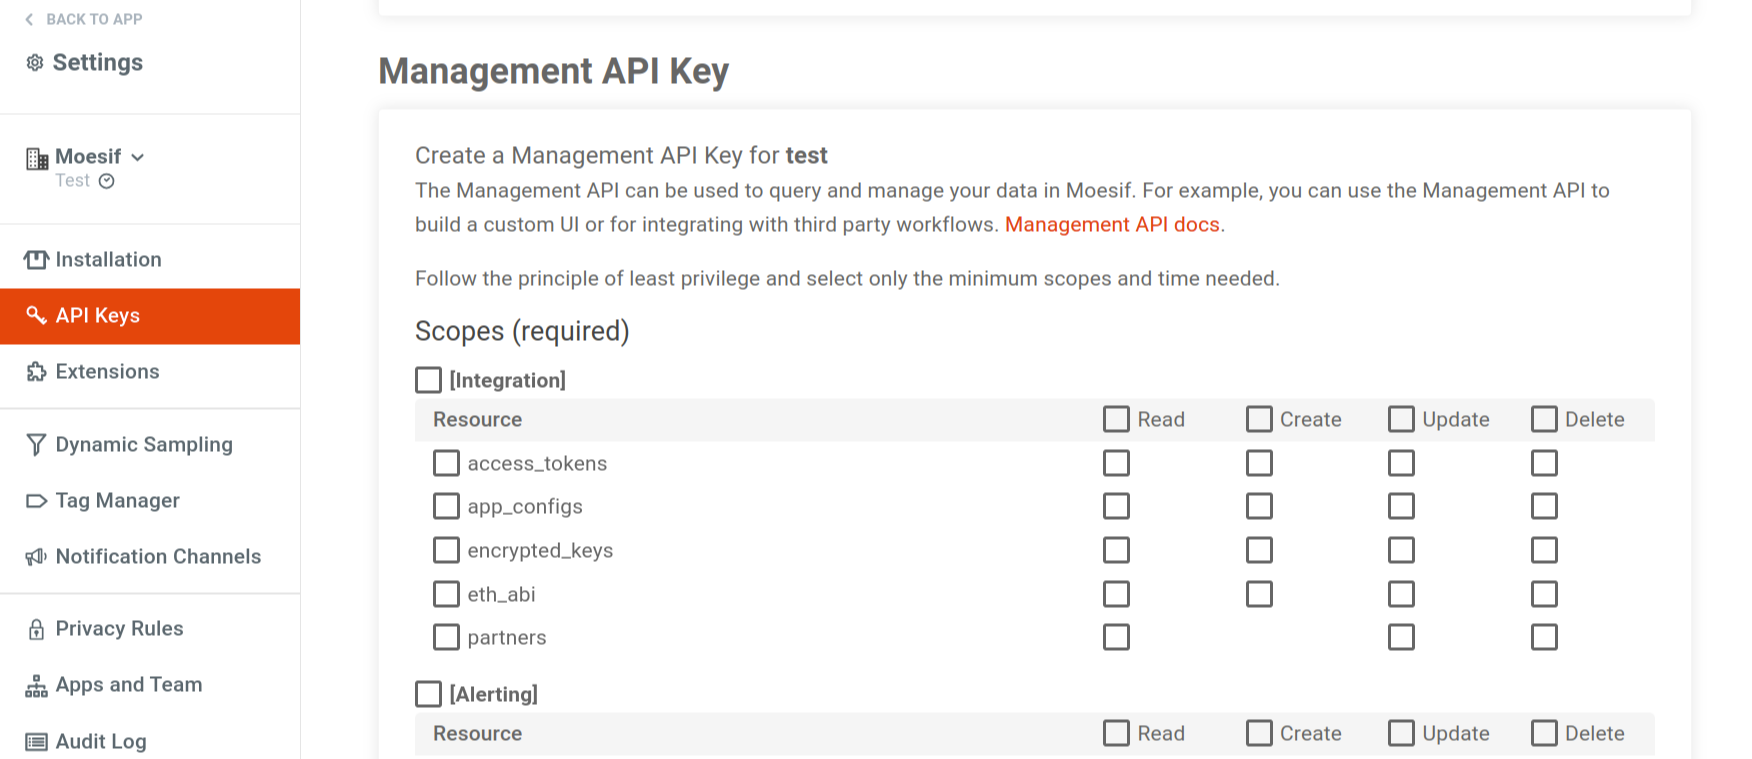
- From the Management API Key section, select the authorization scopes you need and set the key’s expiration time.
![The Management API Key section in settings]()
- Select Generate Token.