Moesif’s Marketo Extension
The Moesif Marketo extension enables you sync your Moesif data to Marketo. This enables you to trigger Marketo marketing campaigns that are hyper-personalized such as when a customer makes their first API call. For example, you can leverage Smart List and Smart Campaign filters to trigger different drip campaigns based on whether the customer integrated, and how much volume.
Overview
Any field that is part of a user or company profile in Moesif can be synced to a Marketo lead property. This sync occurs regularly and may take up to 15 minutes for an update to be reflected in Marketo.
How Moesif data is mapped to Marketo
- A user in Moesif maps to a lead in Marketo.
- A company in Moesif maps to a company in Marketo.
- A Behavioral Cohort in Moesif maps to a Group List in Marketo.
- Cohort Membership in Moesif is logged as an activity in Marketo.
How it works
This integration syncs behavioral cohorts created in Moesif to Marketo as a Group List.
Once you create the behavioral cohort in Moesif, Moesif dynamically sends that list of users to Marketo, and keeps it up to date as users enter and exit the behavioral cohort criteria. This makes it easy to trigger behaviorally-driven email campaigns in Marketo without any custom code.
Marketo’s API requires an email in order to update leads correctly. This means that users in Moesif must have an email associated with their profile. Moesif users without an email field will not be synced to Marketo. View docs on user profiles to see how to add and populate the email field for a user in Moesif.
Creating the Roles and Users for the integration
Step #1 - Create the Role in Marketo
Once you’ve logged into Marketo, you will select the Admin function from the My Marketo dropdown menu at the top of the screen.
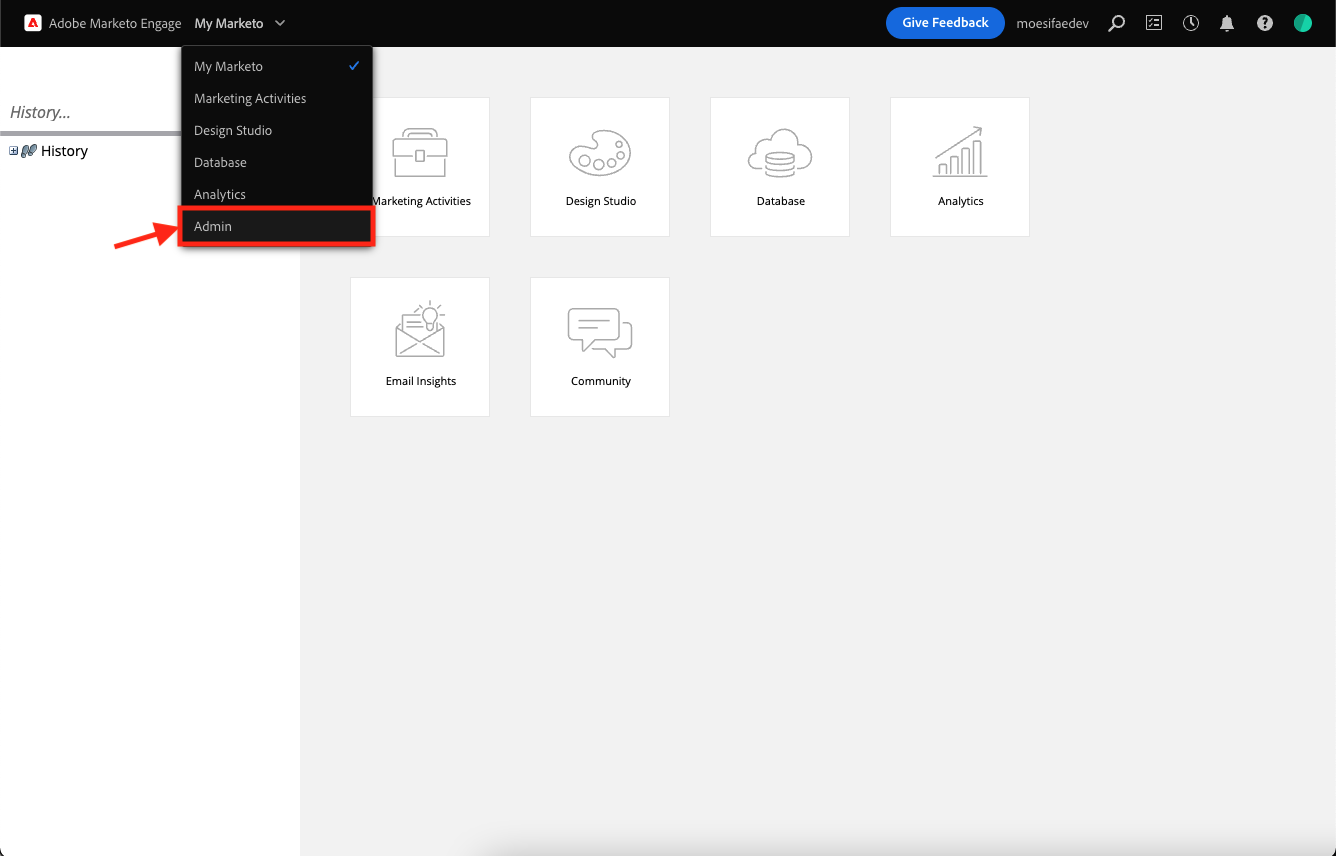
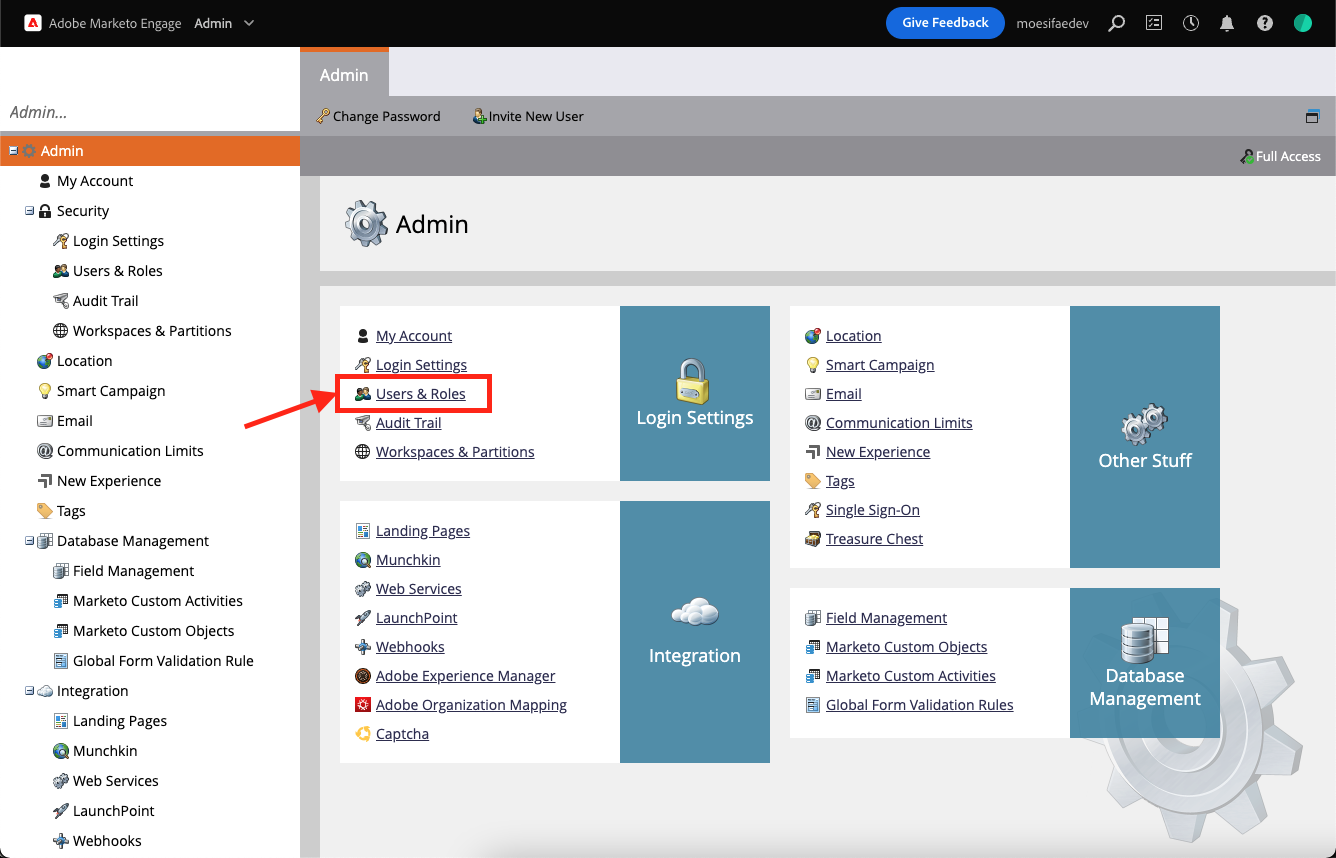
From the Admin screen, select Users & Roles option.
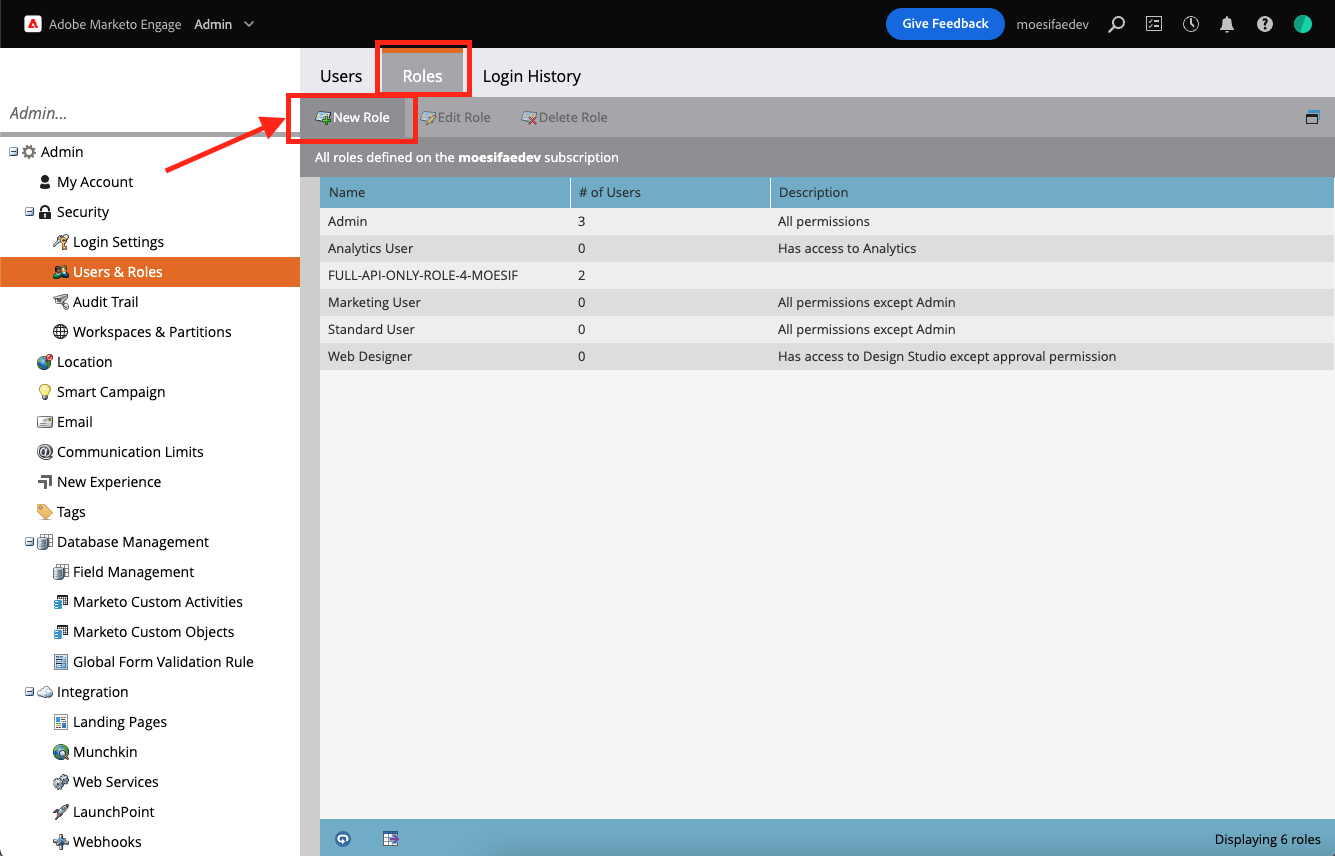
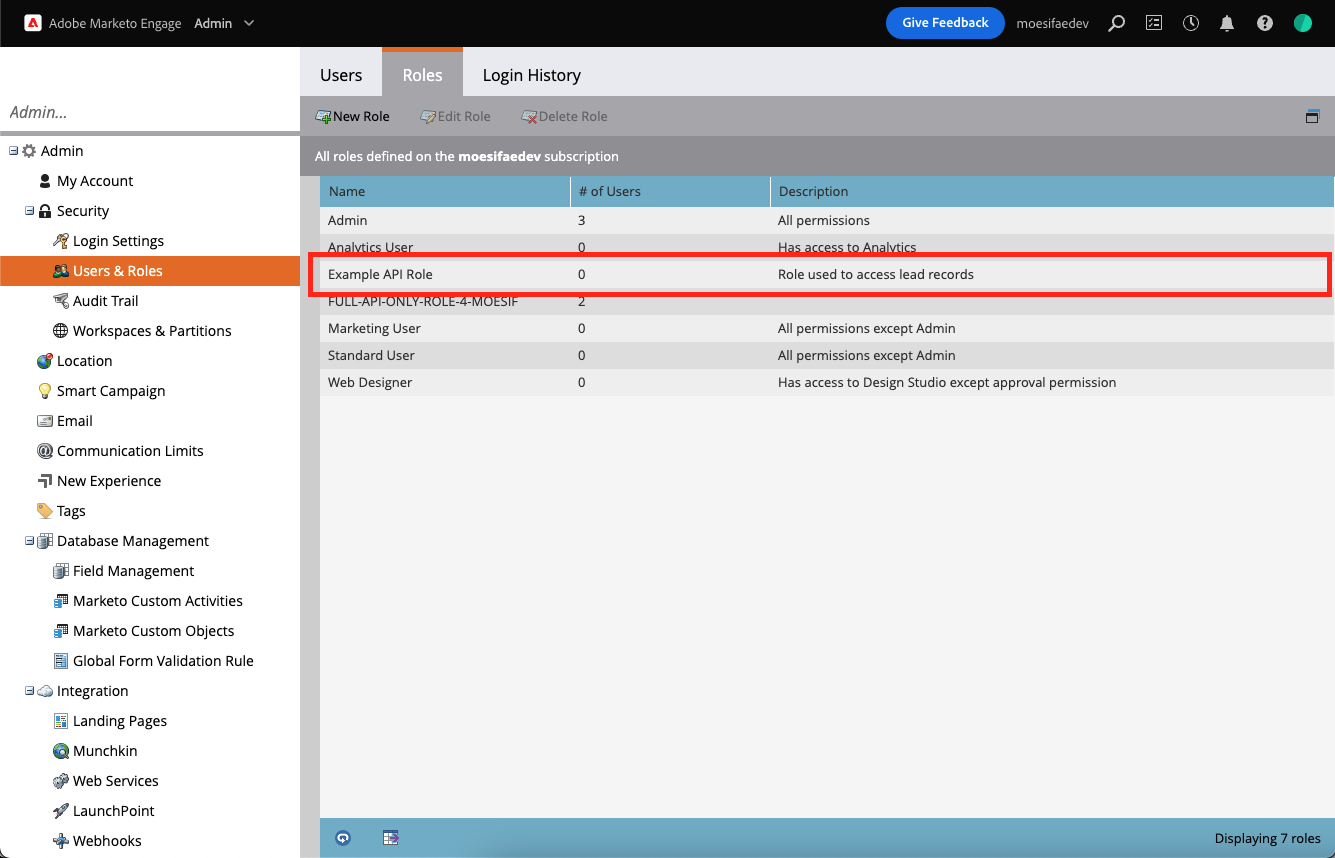
From the Users & Roles screen, navigate to the Roles tab and select New Role.
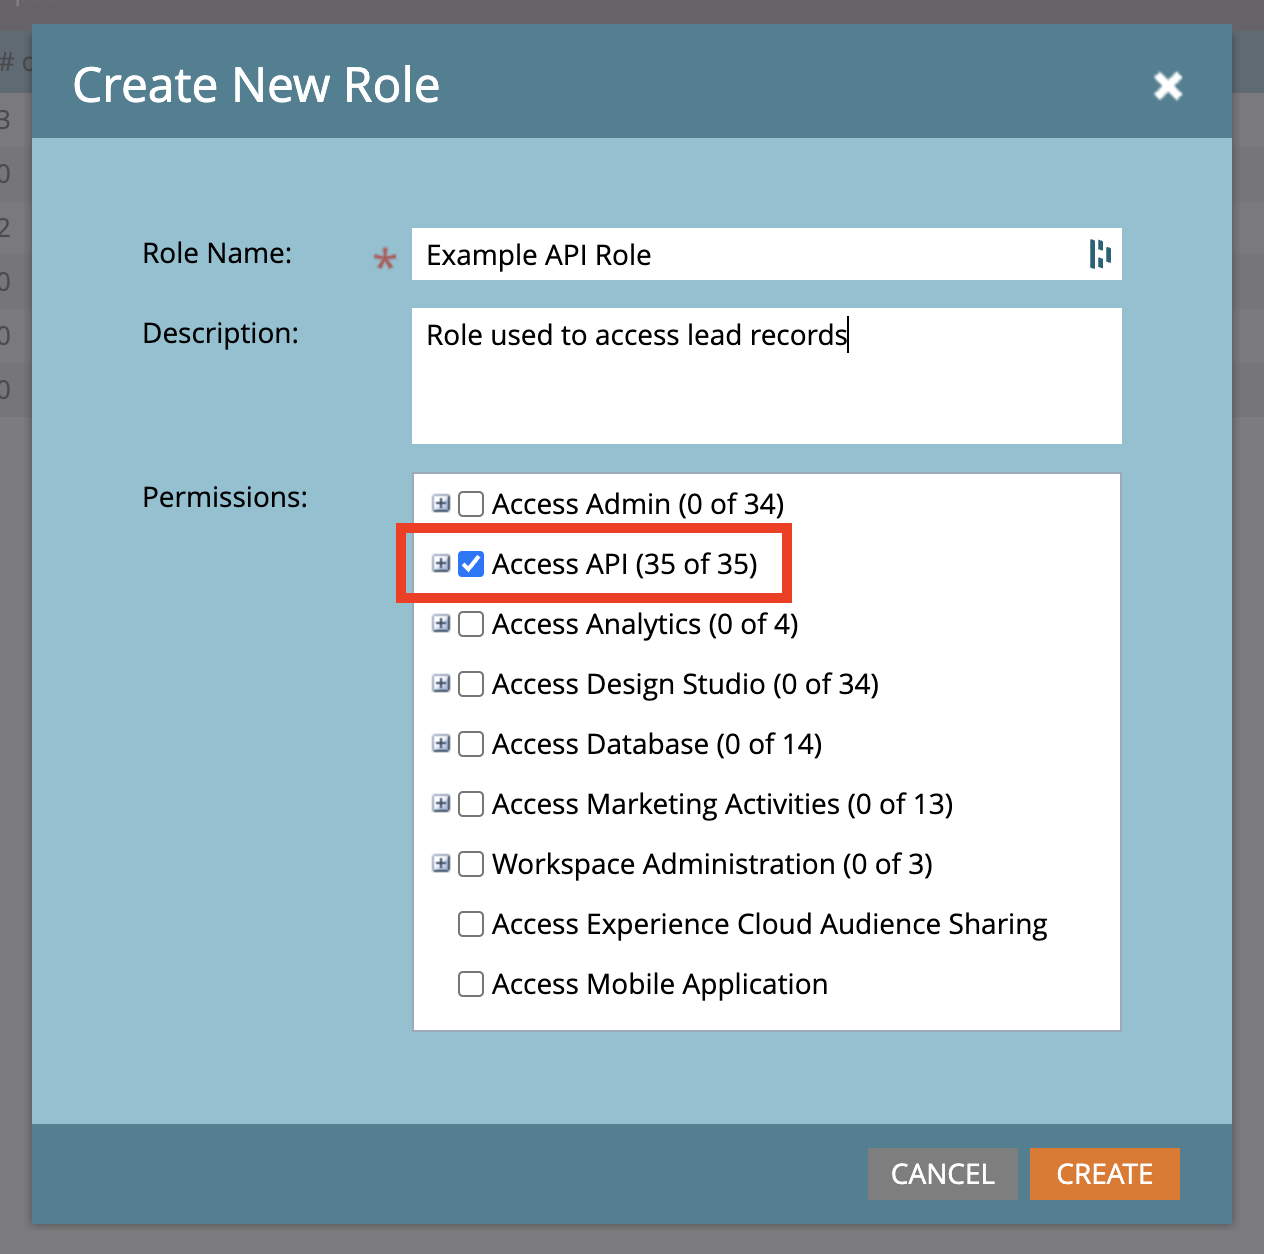
In the modal that appears, Add in details for Role Name, Description, and select API Access in the Permissions display. After these details are input, click Create.
You will now see the role added to your available roles in Marketo.
Step #2 - Create an API Only User in Moesif
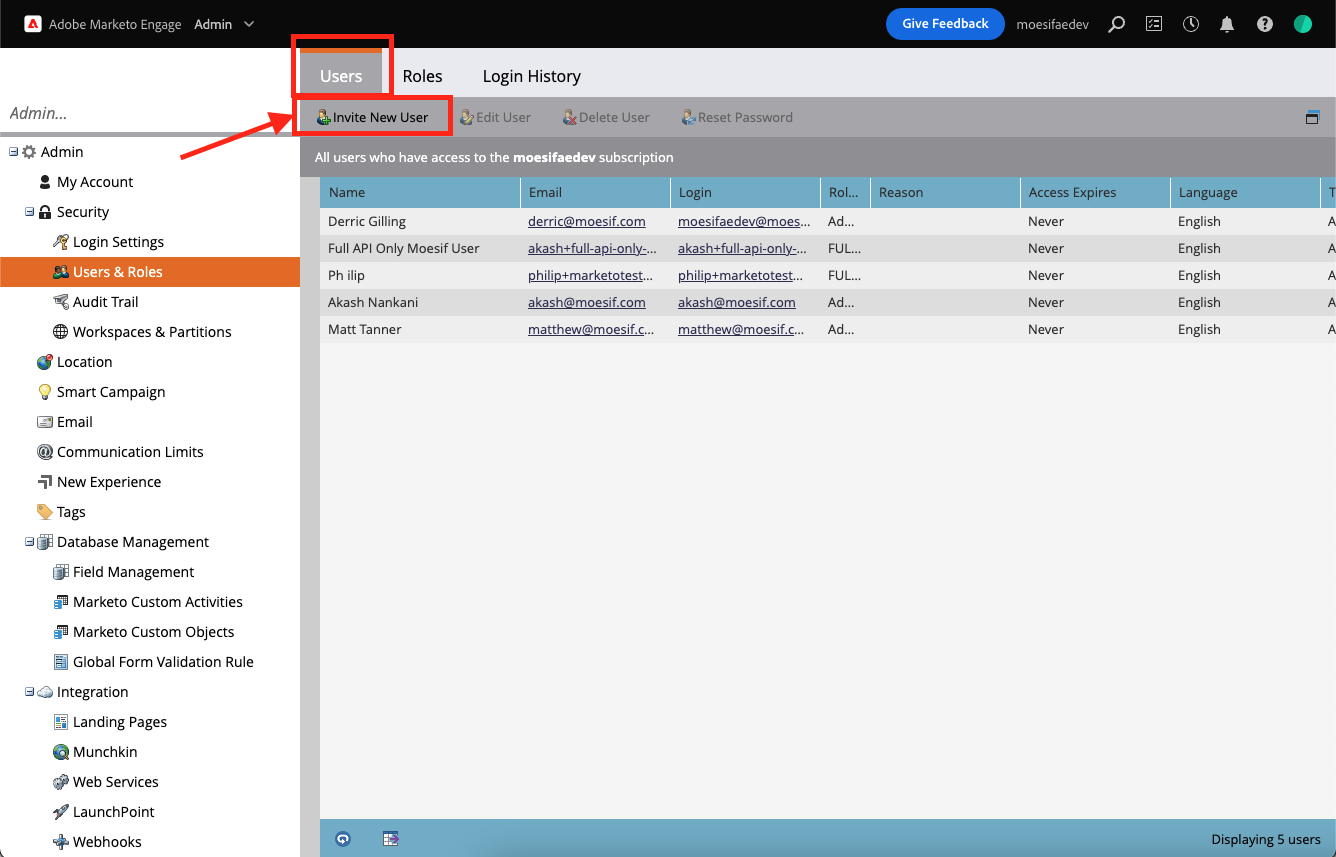
While on the Users & Roles screen, select the Users tab and select Invite New User.
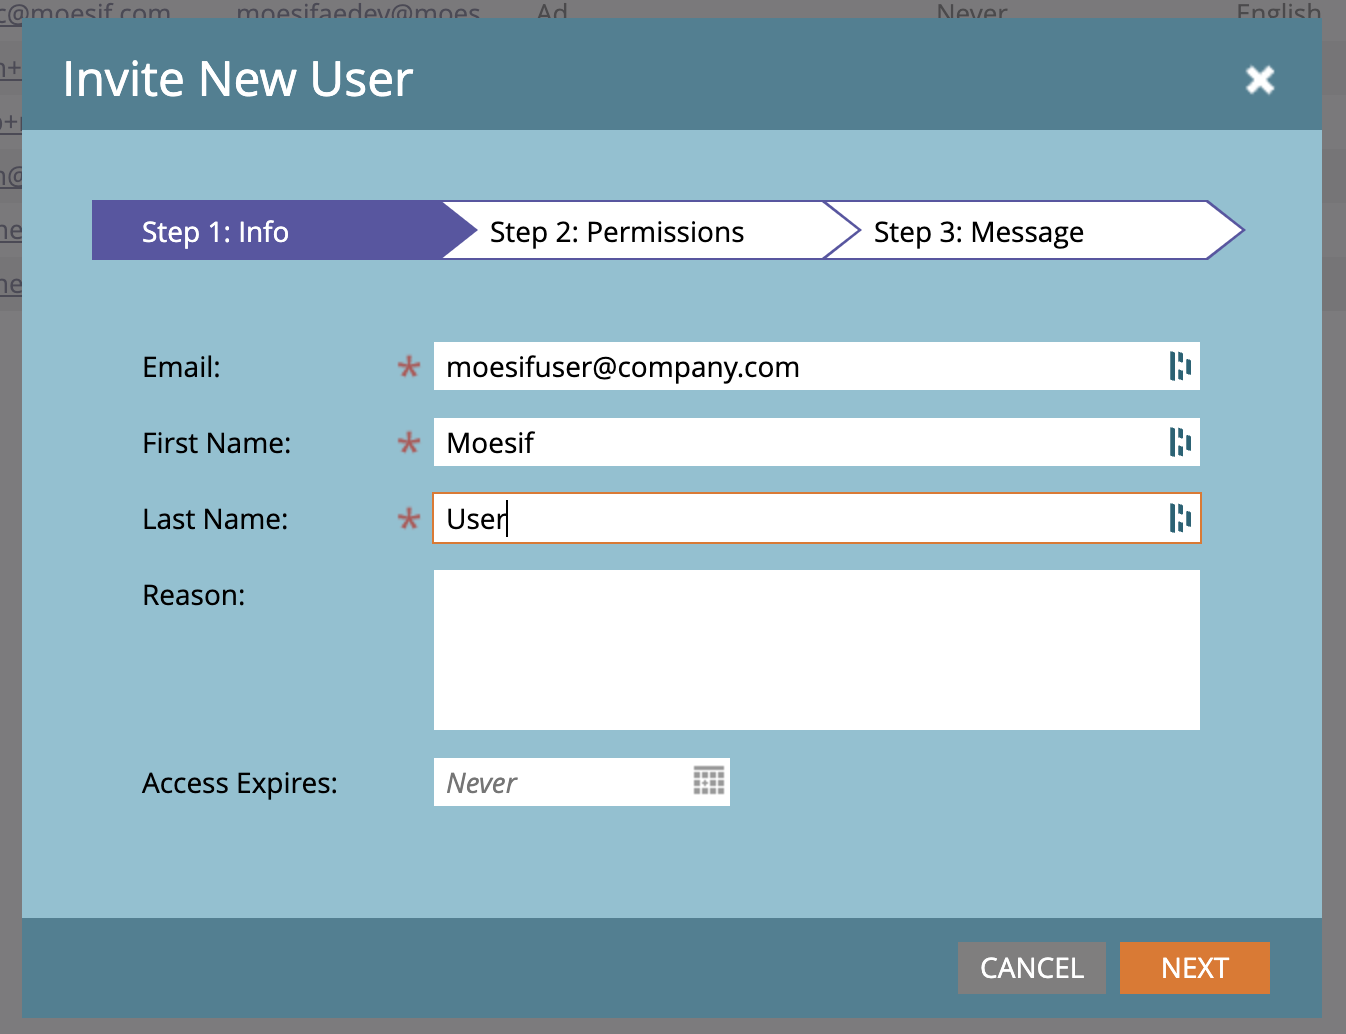
In the modal that appears, you’ll fill out the fields for Email, First Name, and Last Name. Once filled in, click Next.
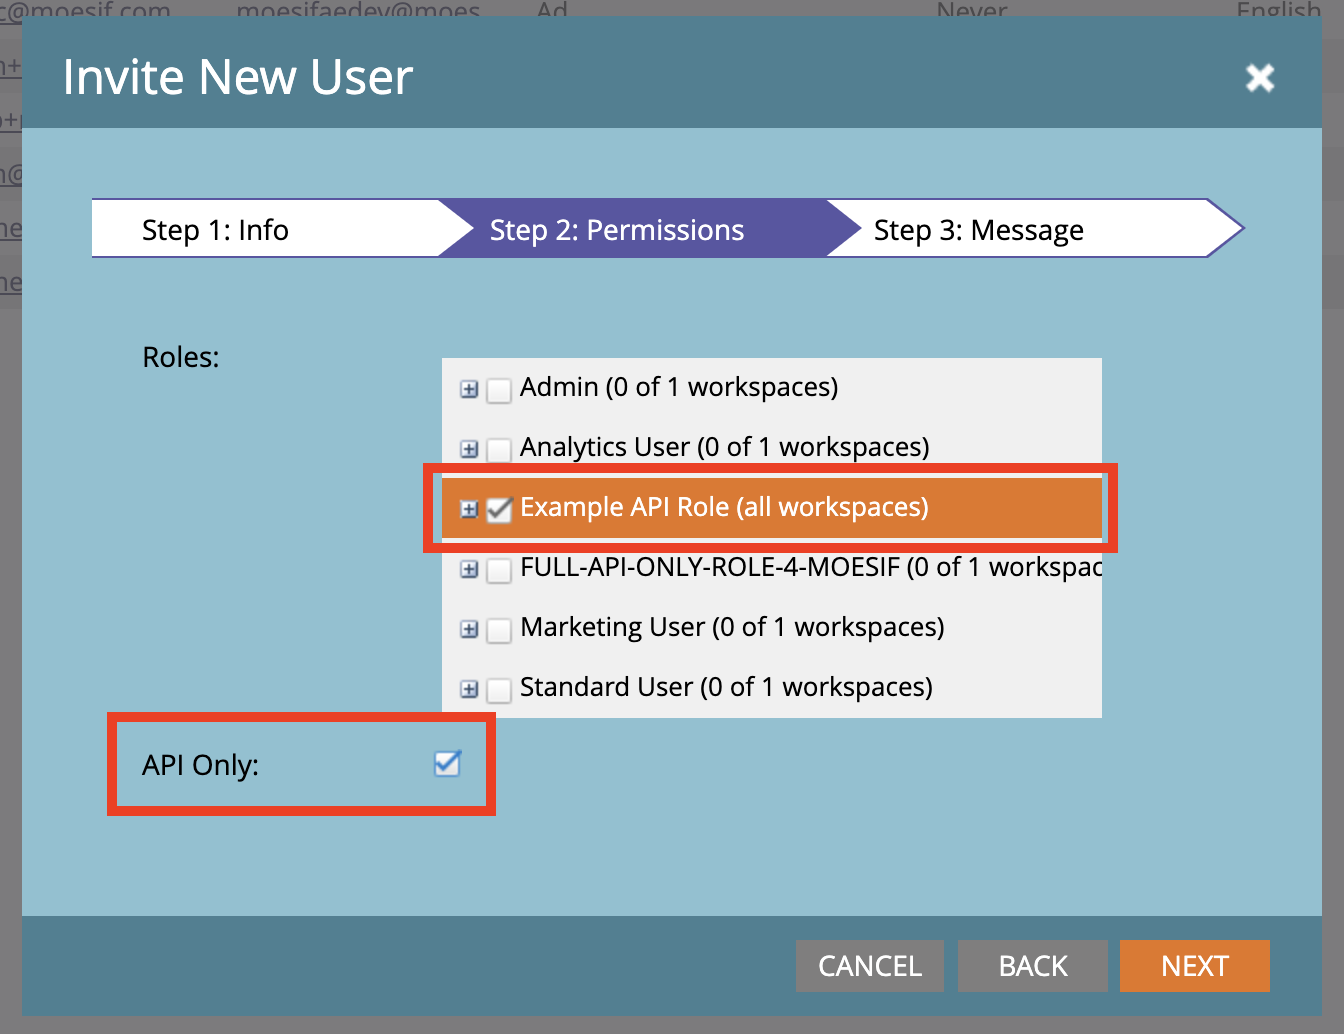
On the next screen, you will assign the role that you created in the previous step. You’ll also check off the checkbox for API Only, then click Next.
Lastly, you’ll click Send on the final screen.
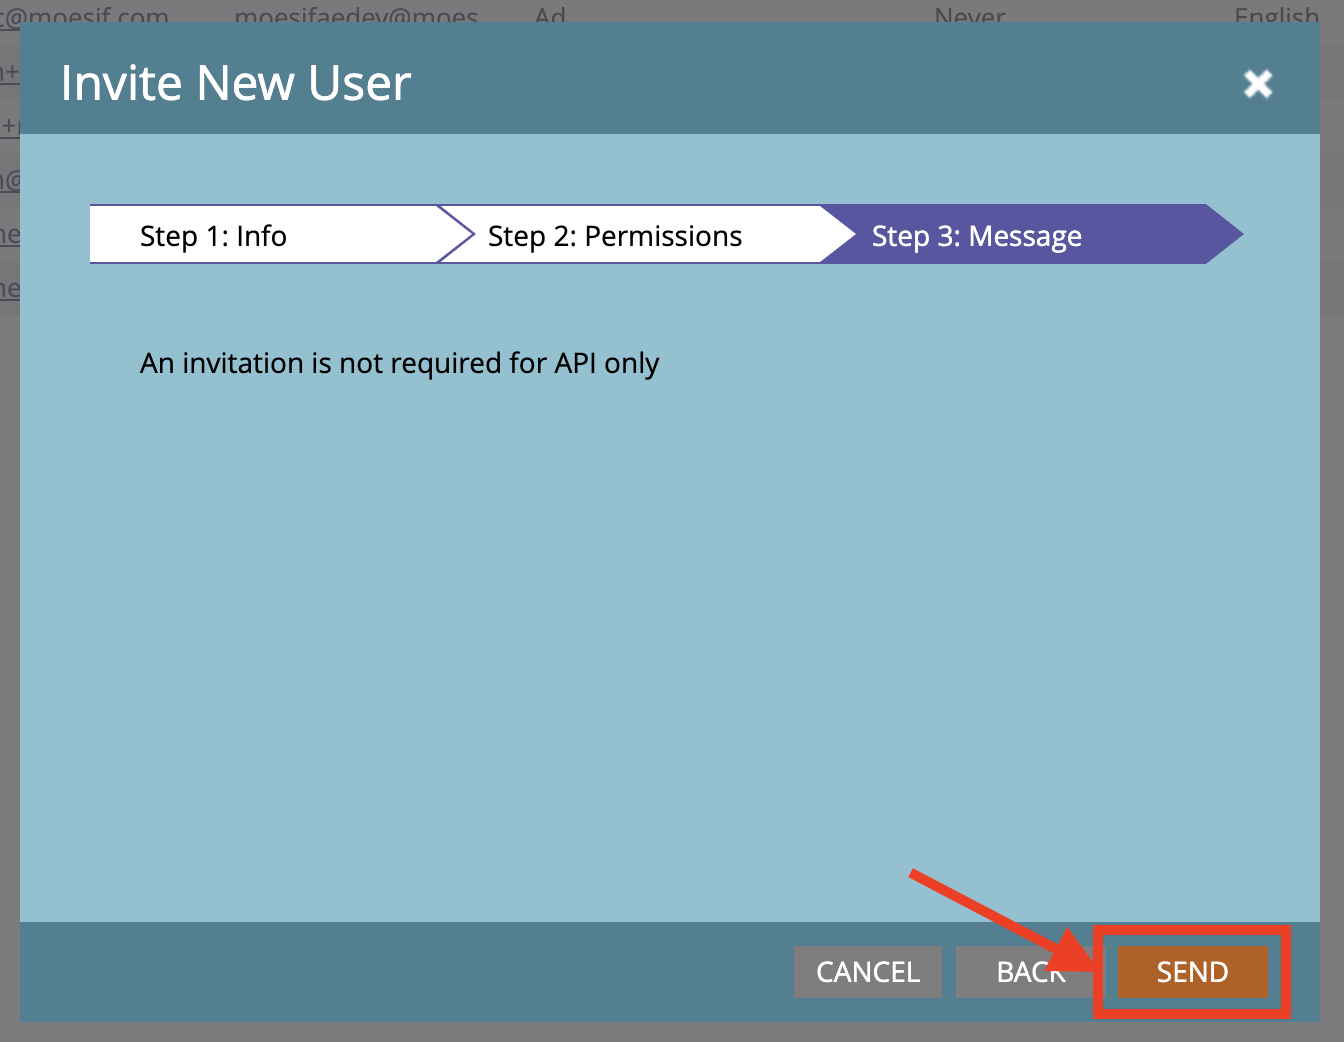
For an API Only user, no welcome email needs to be sent. For a regular user, this screen will be populated with a welcome message template. For Moesif, an API Only user is required.
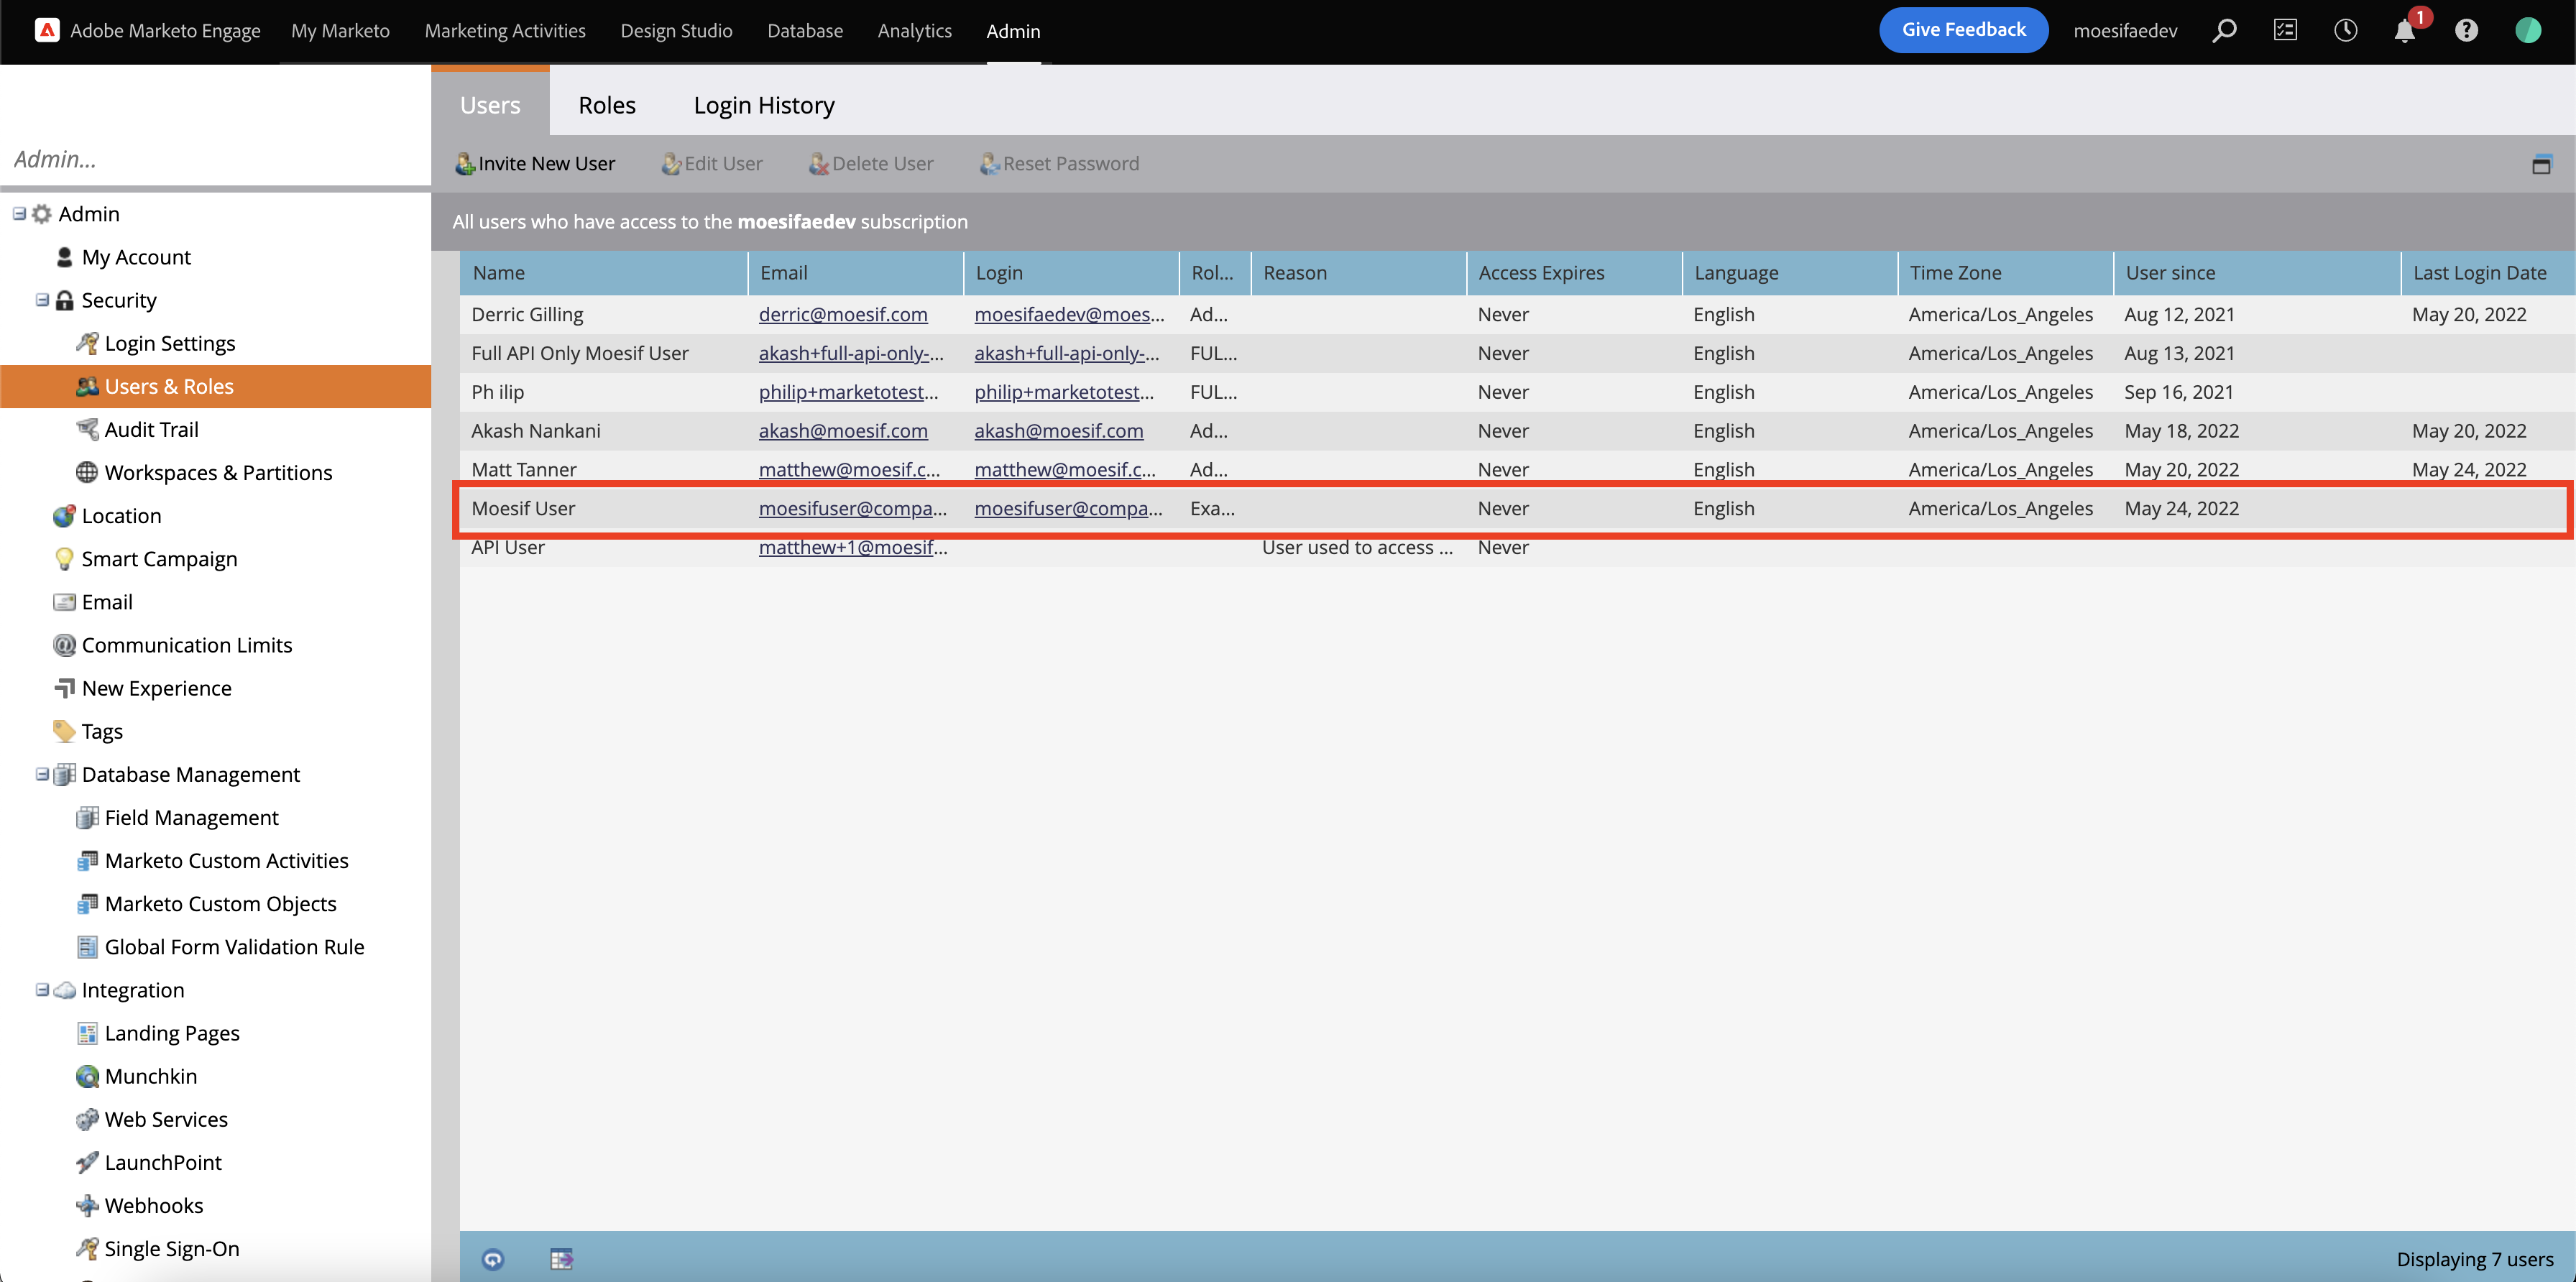
You should now see your created user displayed in the list of available users.
Enabling the extension
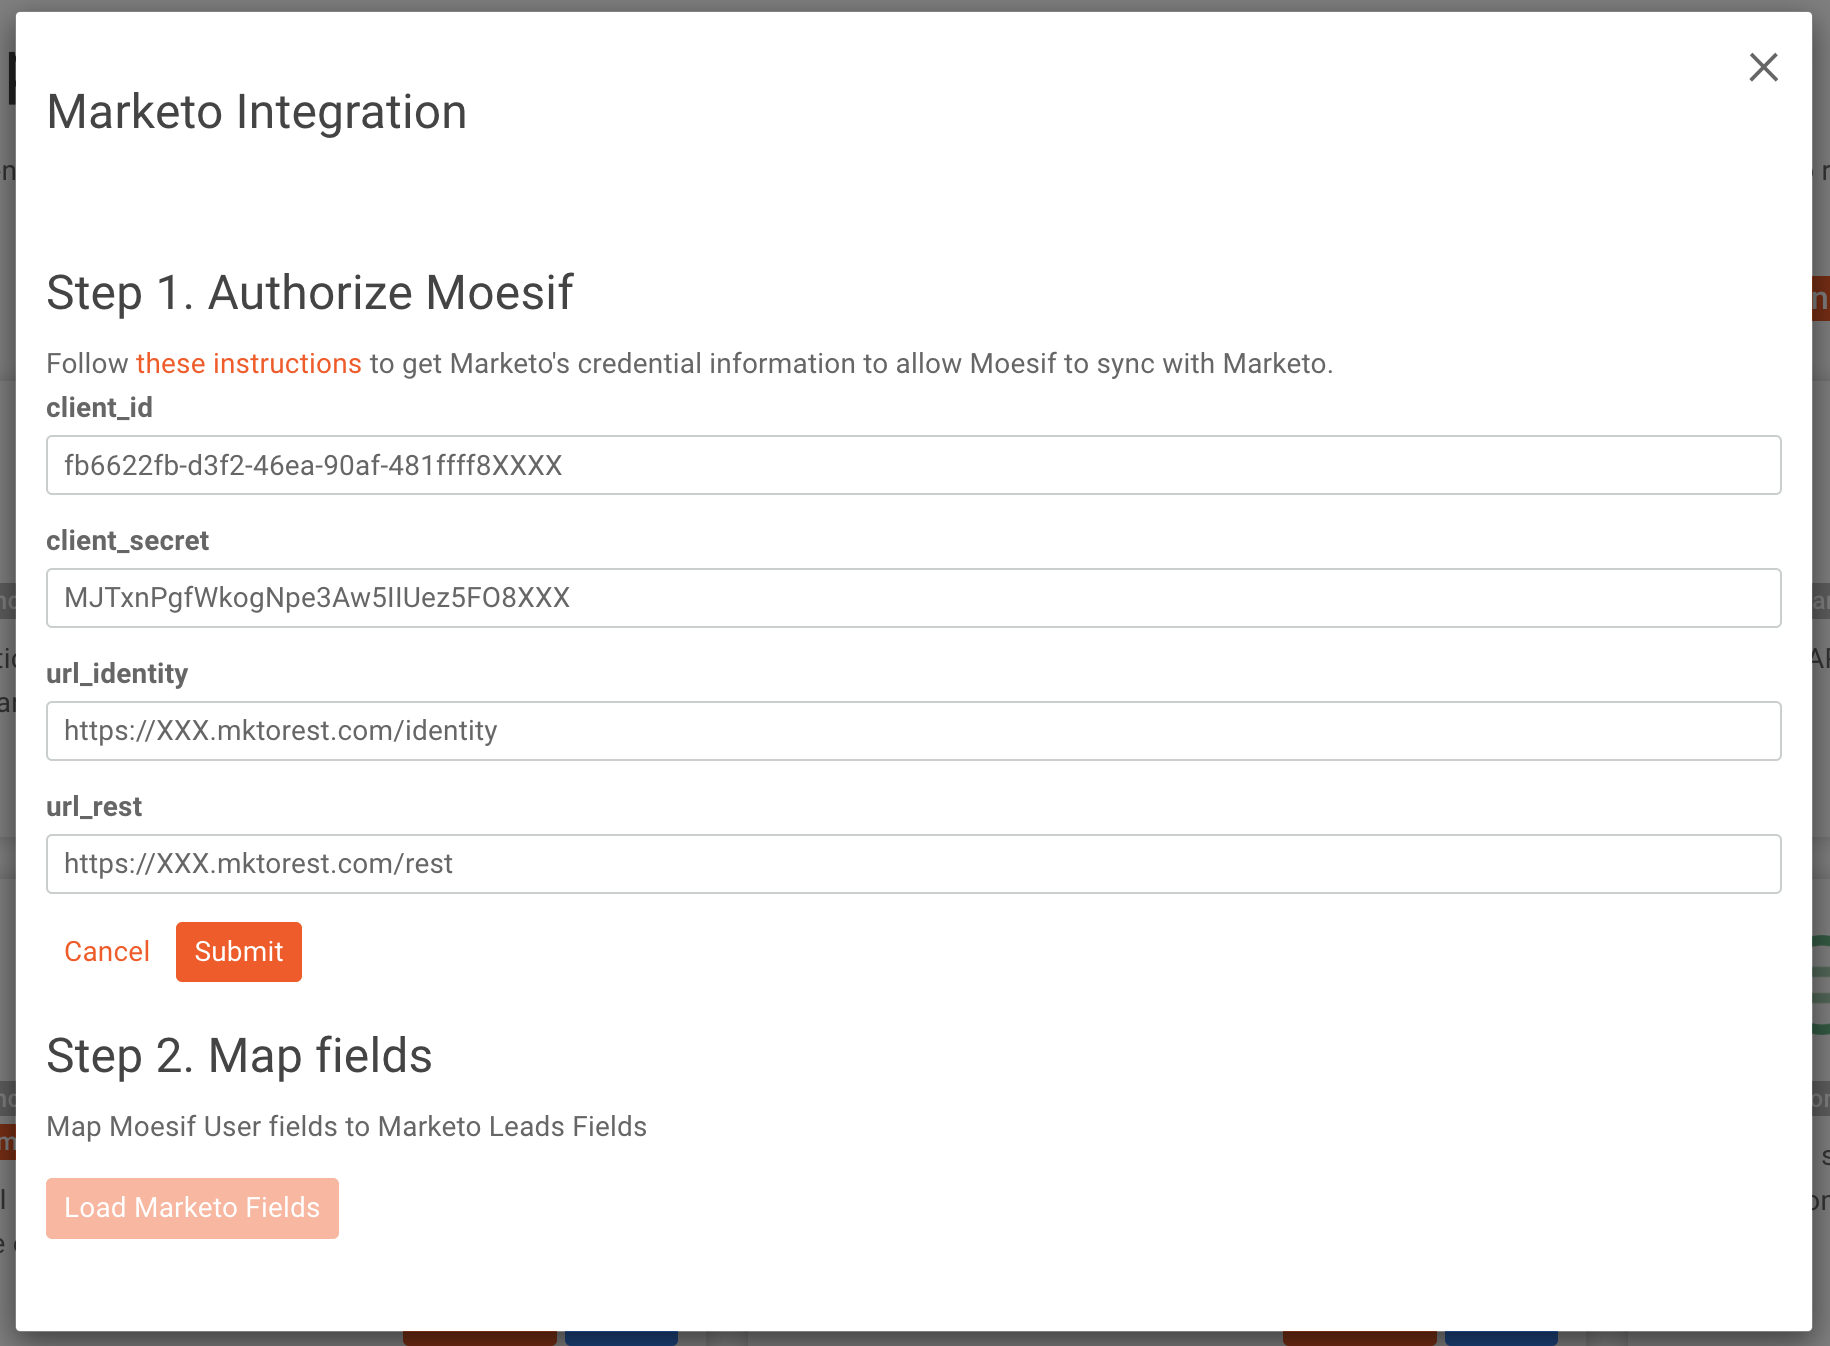
Step #1 - Add your Marketo credentials
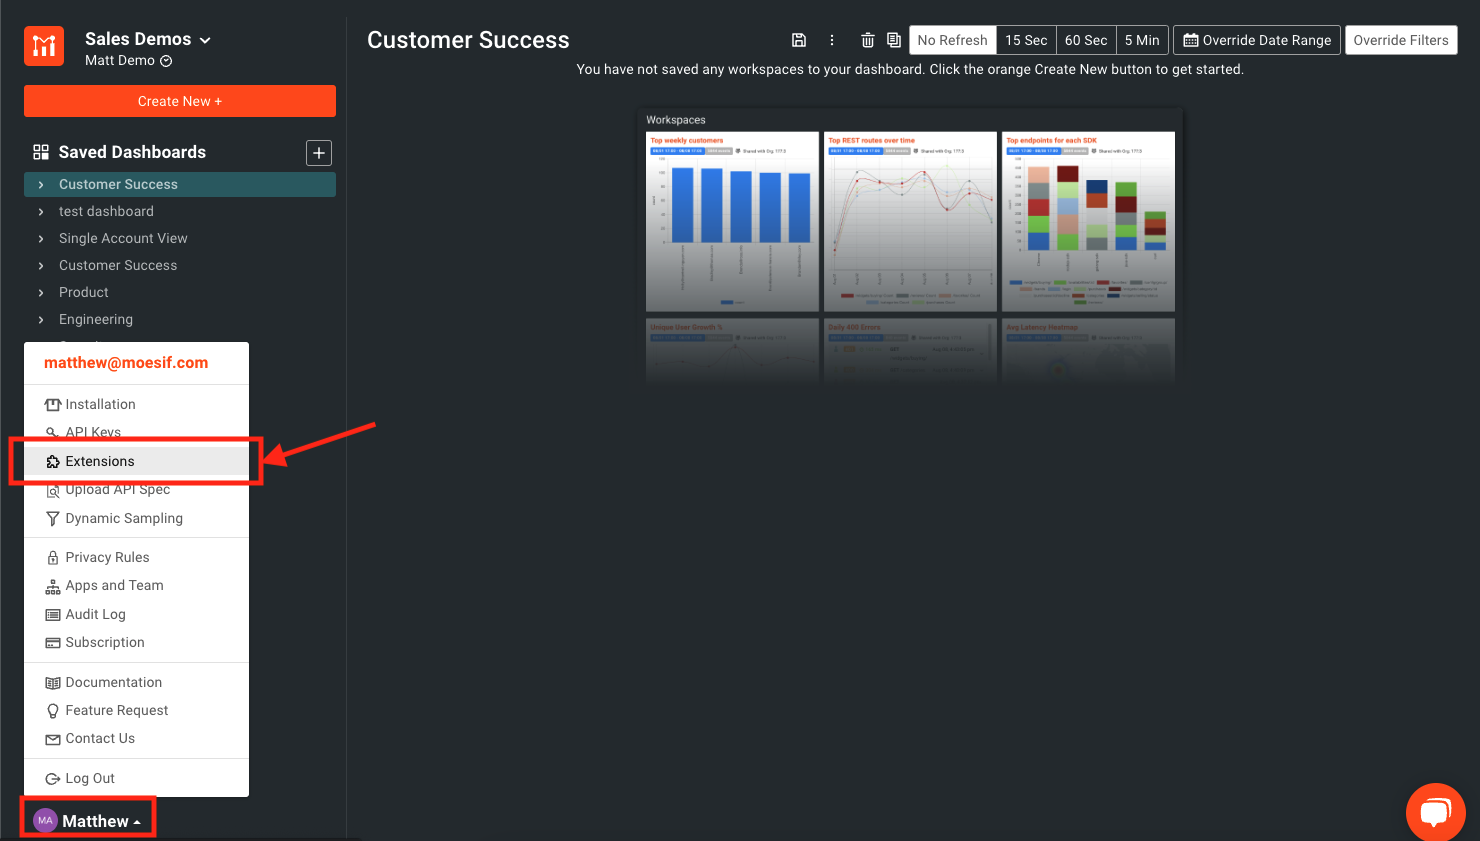
Log into your Moesif account and select Extensions from the account menu in the bottom left of the screen.
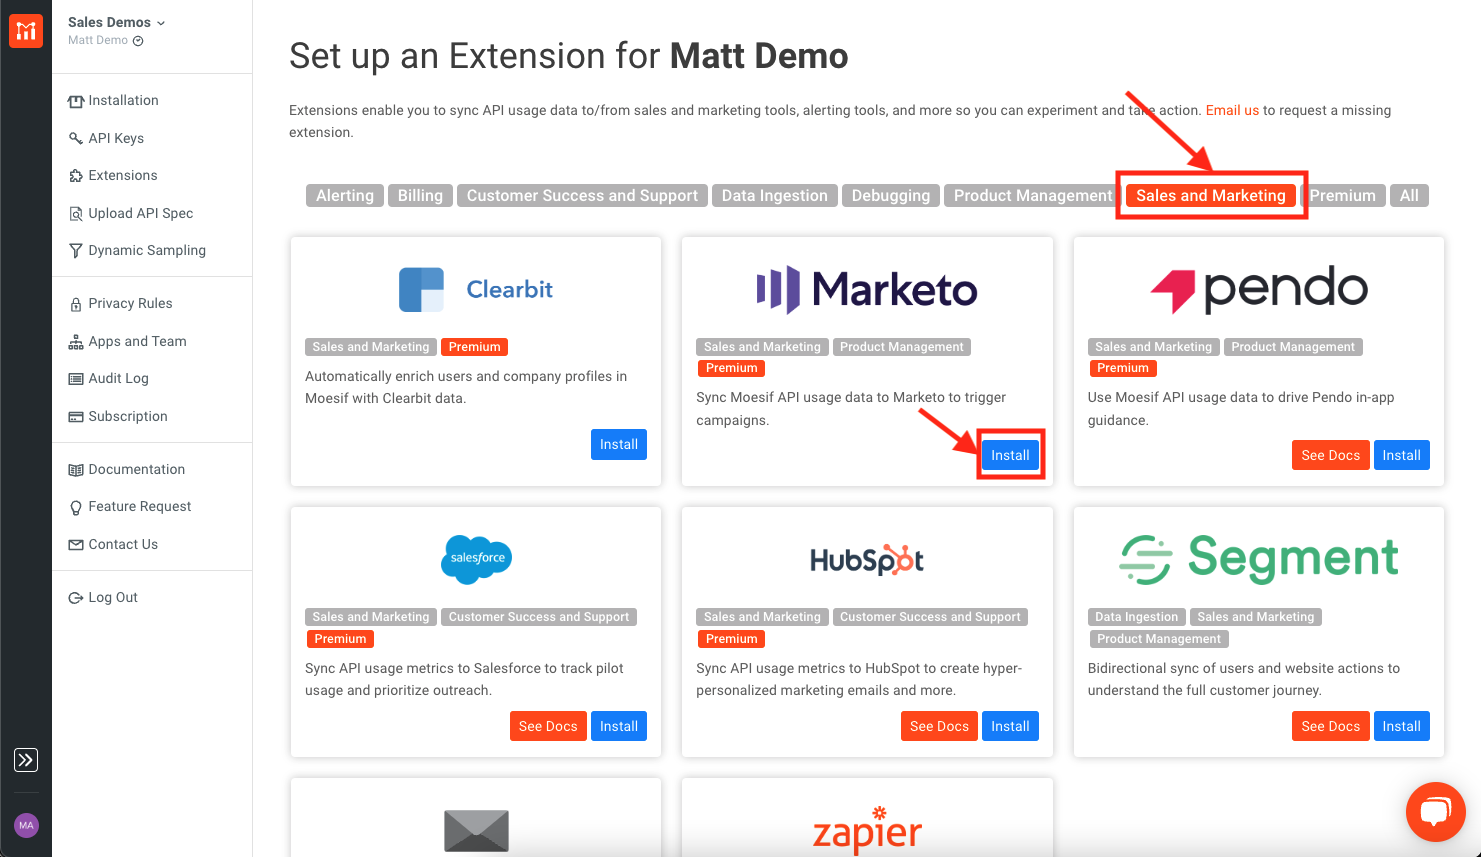
Within the extensions gallery, find the Marketo extension, under the Sales & Marketing category, and click the orange Install button.
Once the Install button is clicked, you will then see a modal appear.
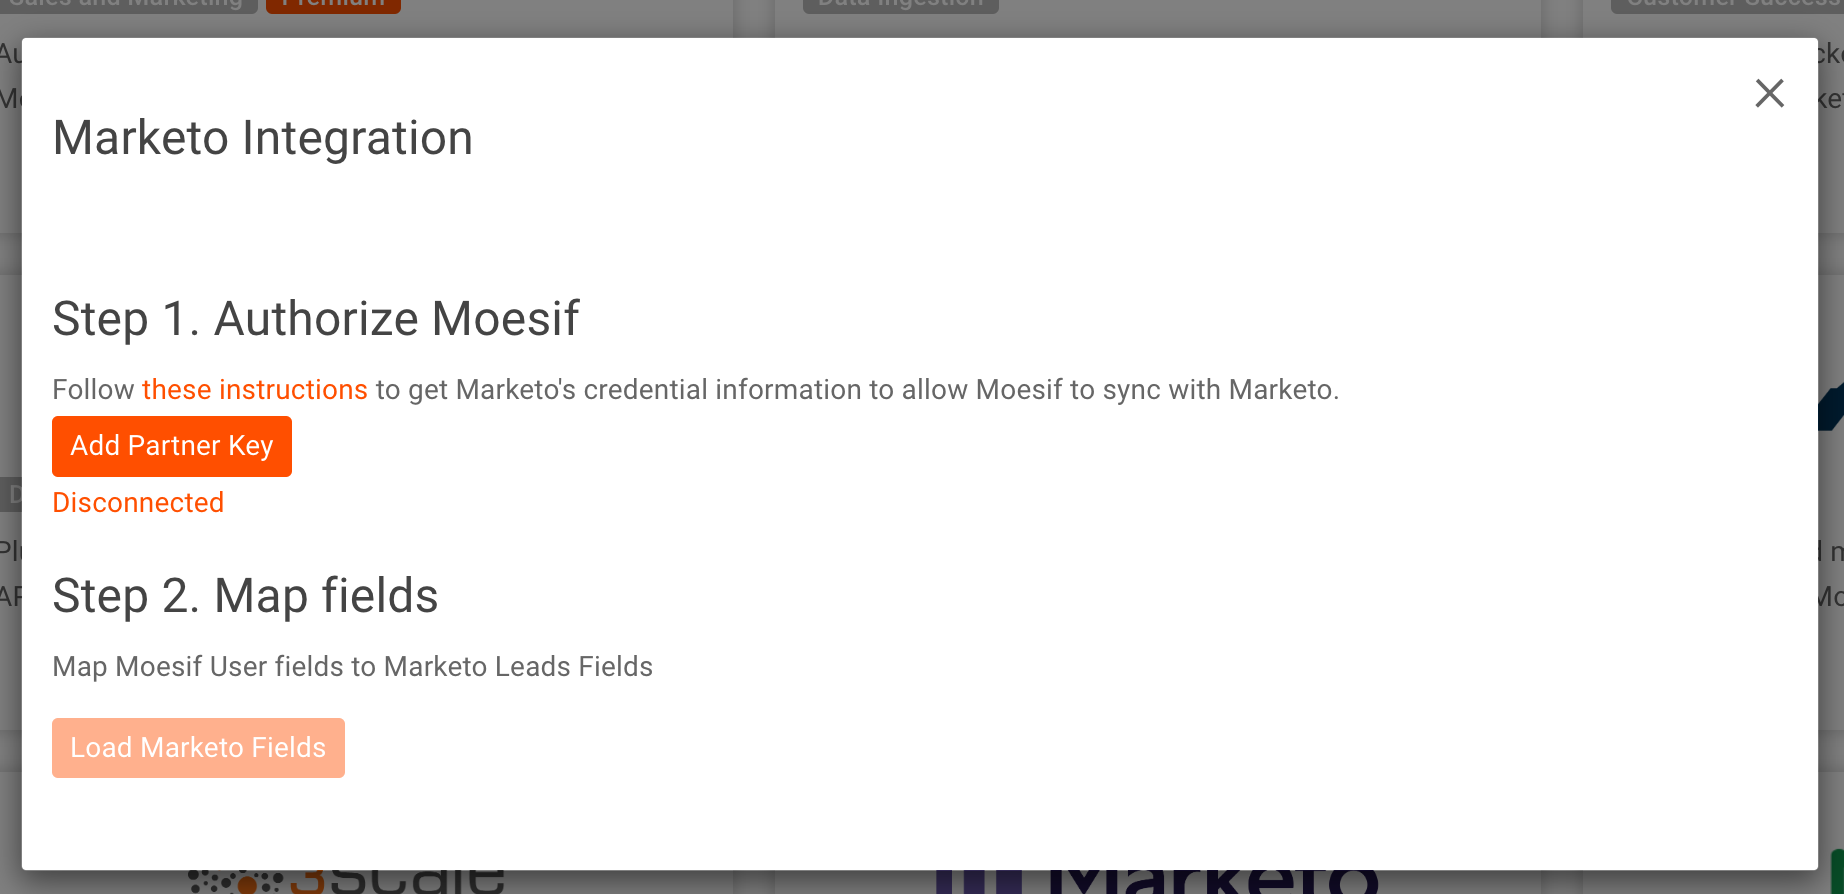
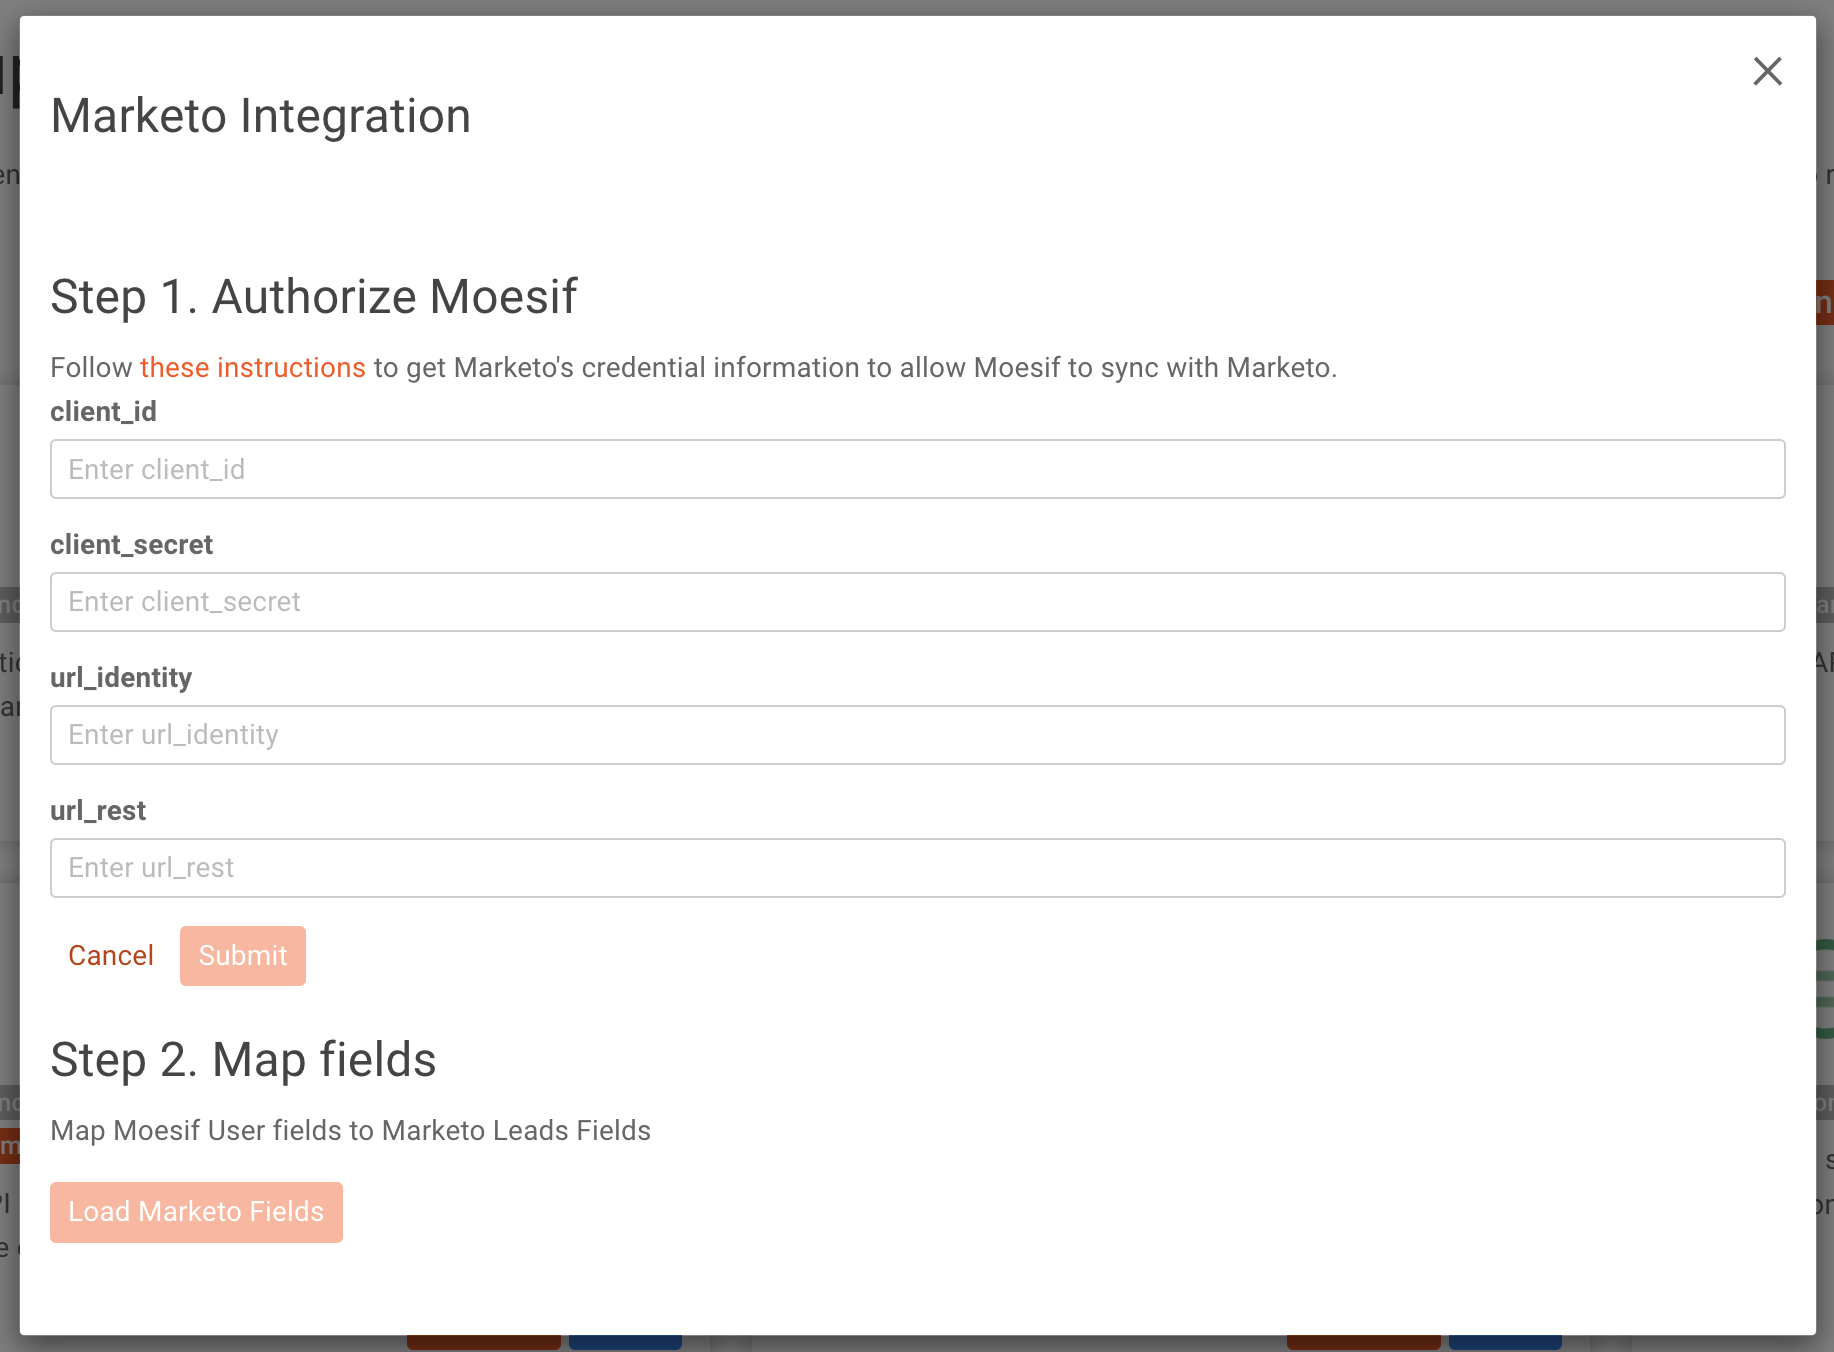
In the popup, click the orange Add Partner Key. You will need to enter the following information from your Marketo account:
- client_id
- client_secret
- url_identity
- url_rest
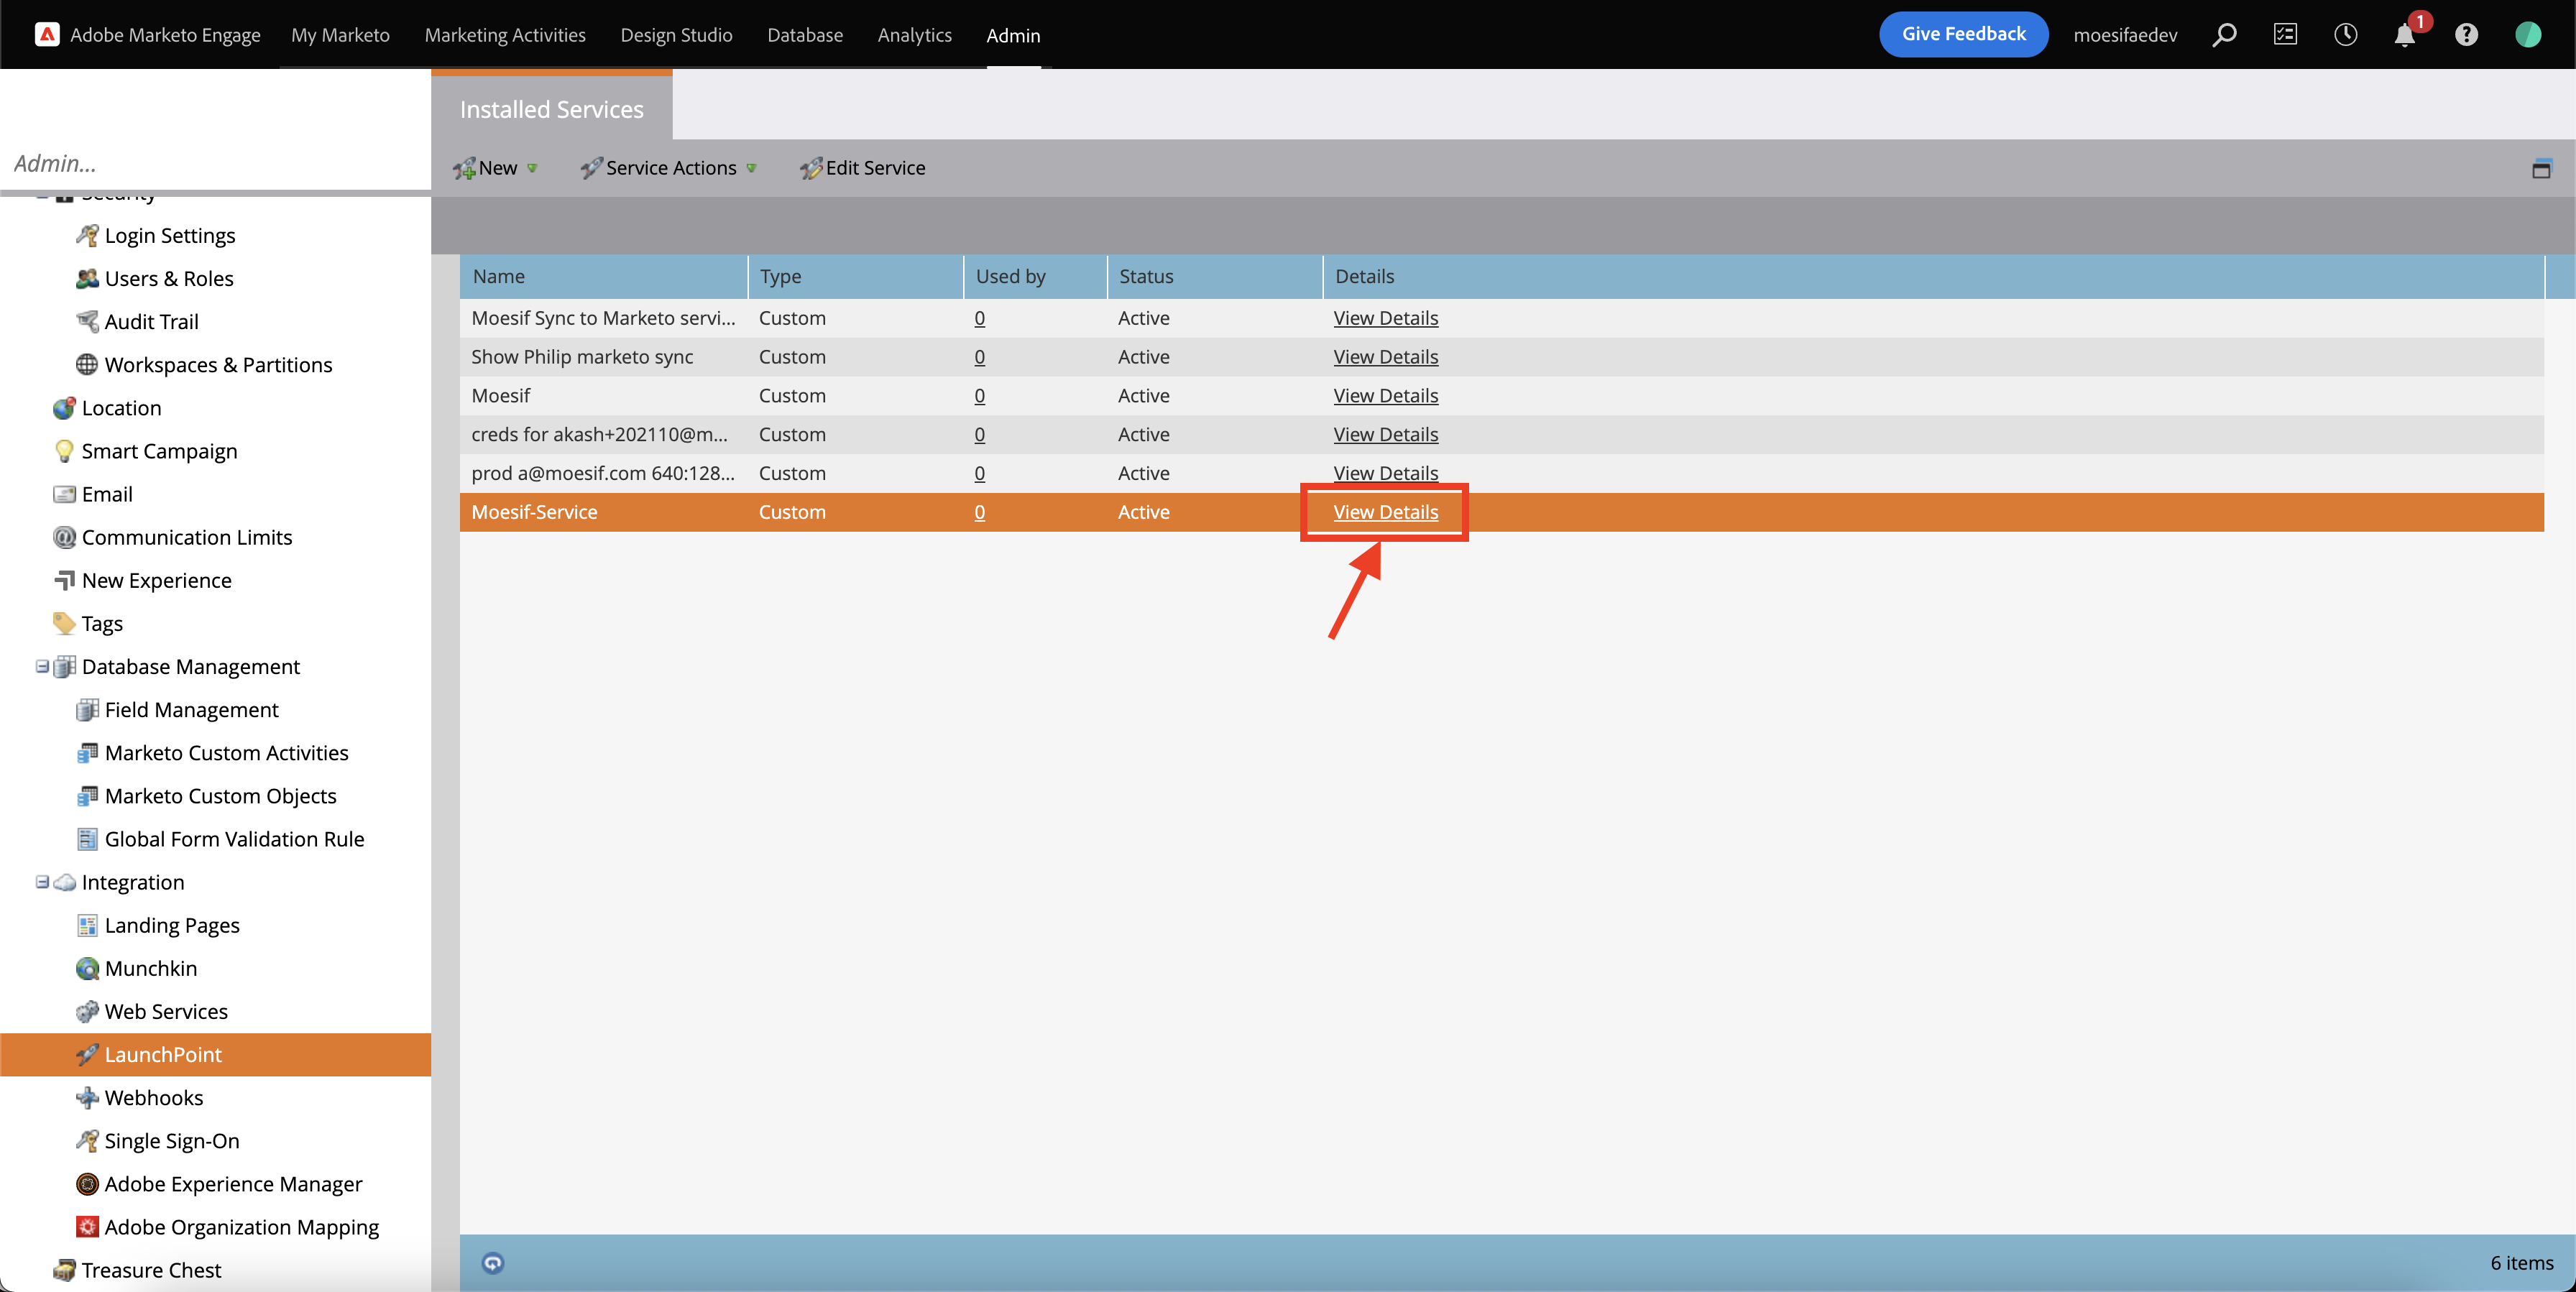
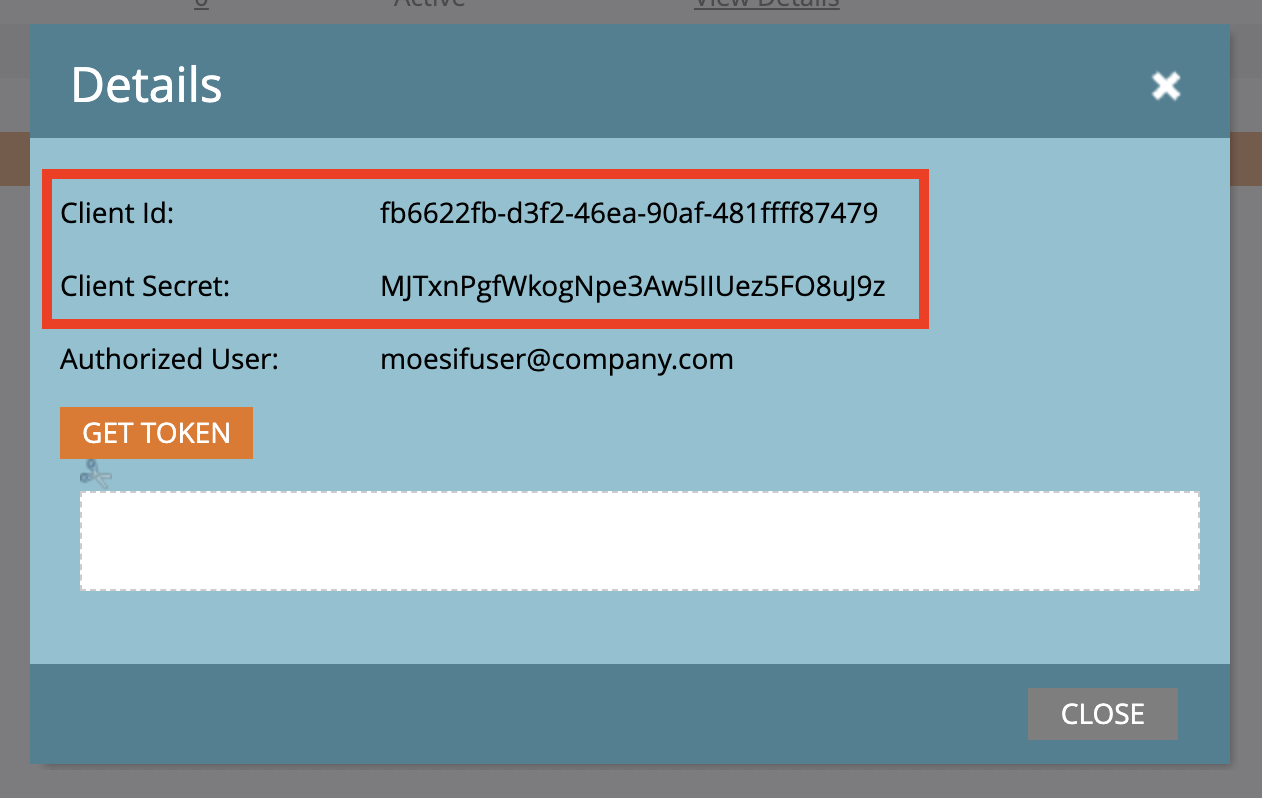
The credentials for the client_id and client_secret can be found by going to LaunchPoint in Marketo (accessed through the side menu). You can then get the credentials for the service we created in earlier steps by clicking on View Details at the end of the service entry in the list.
The client ID and Secret will then be shown.
The credentials for the url_identity and url_rest can be found by going to Web Services in Marketo (accessed through the side menu). The field values are then displayed under the REST API heading.

After plugging these details into Moesif, you can click Submit.
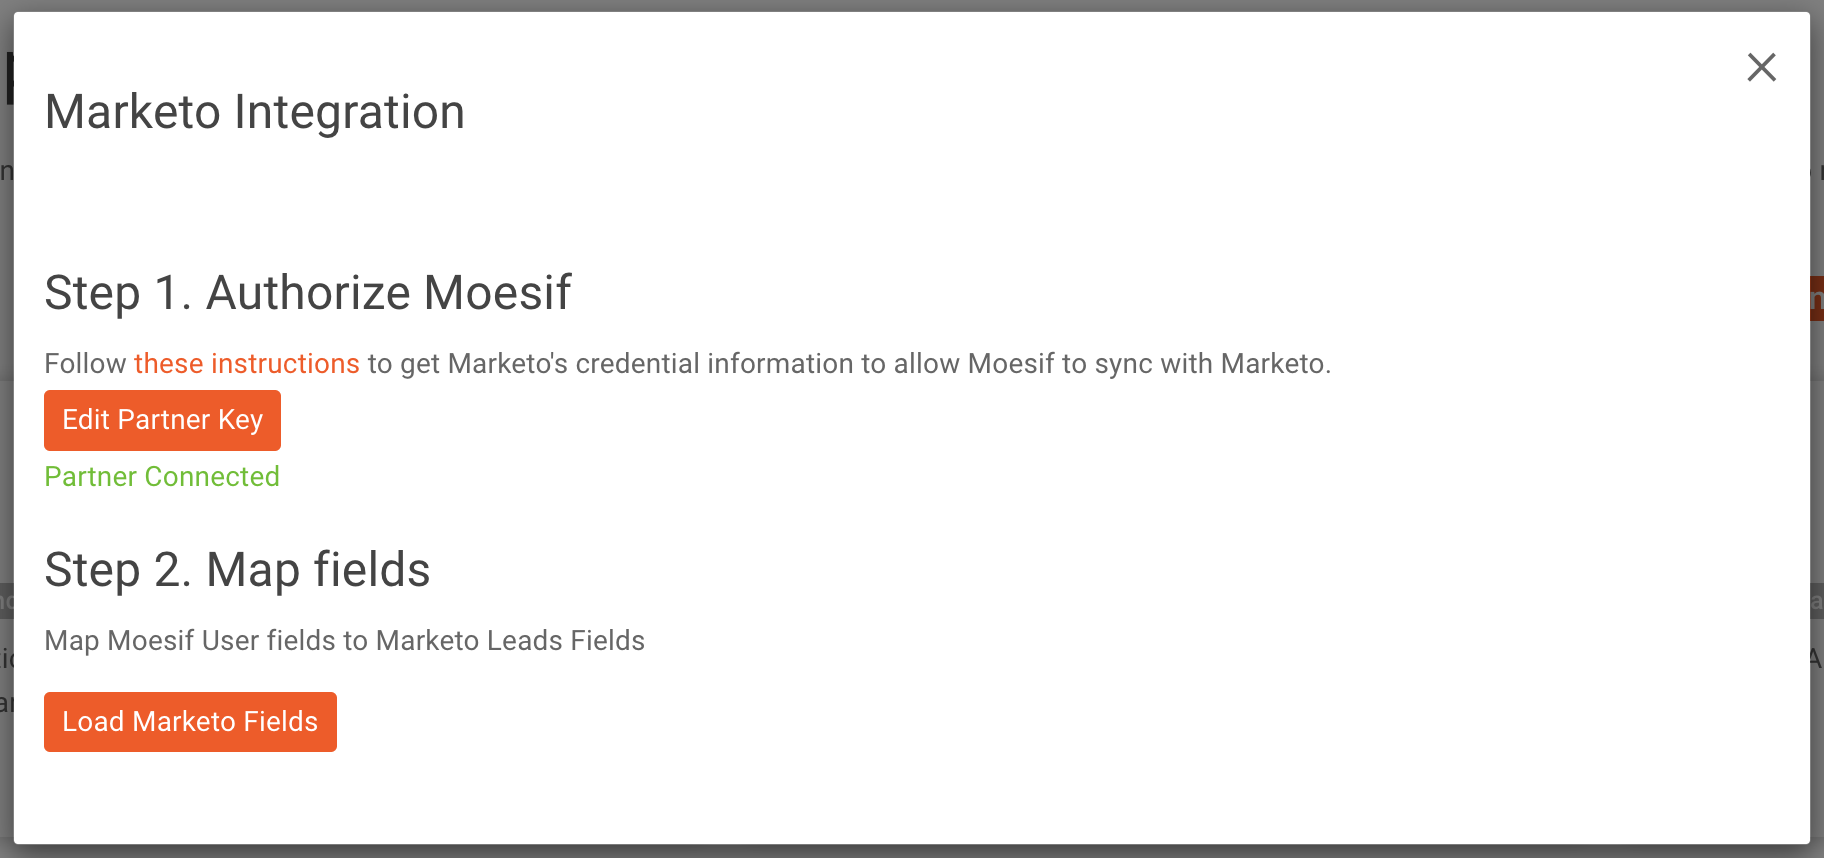
Once clicked, if successful you will see “Partner Connected” displayed in green underneath the Edit Partner Key button. You will then click the Load Marketo Fields button to load the fields from Marketo.
Step 2. Map your Marketo properties
Once your account is connected, click the Load Marketo Fields. This will discover all the properties found in your Marketo account. Add each field you would like Moesif to sync to Marketo. The field must be of the same type. (i.e. a string in Moesif must be a string in Marketo). If you do not select a field, it will not be synced.
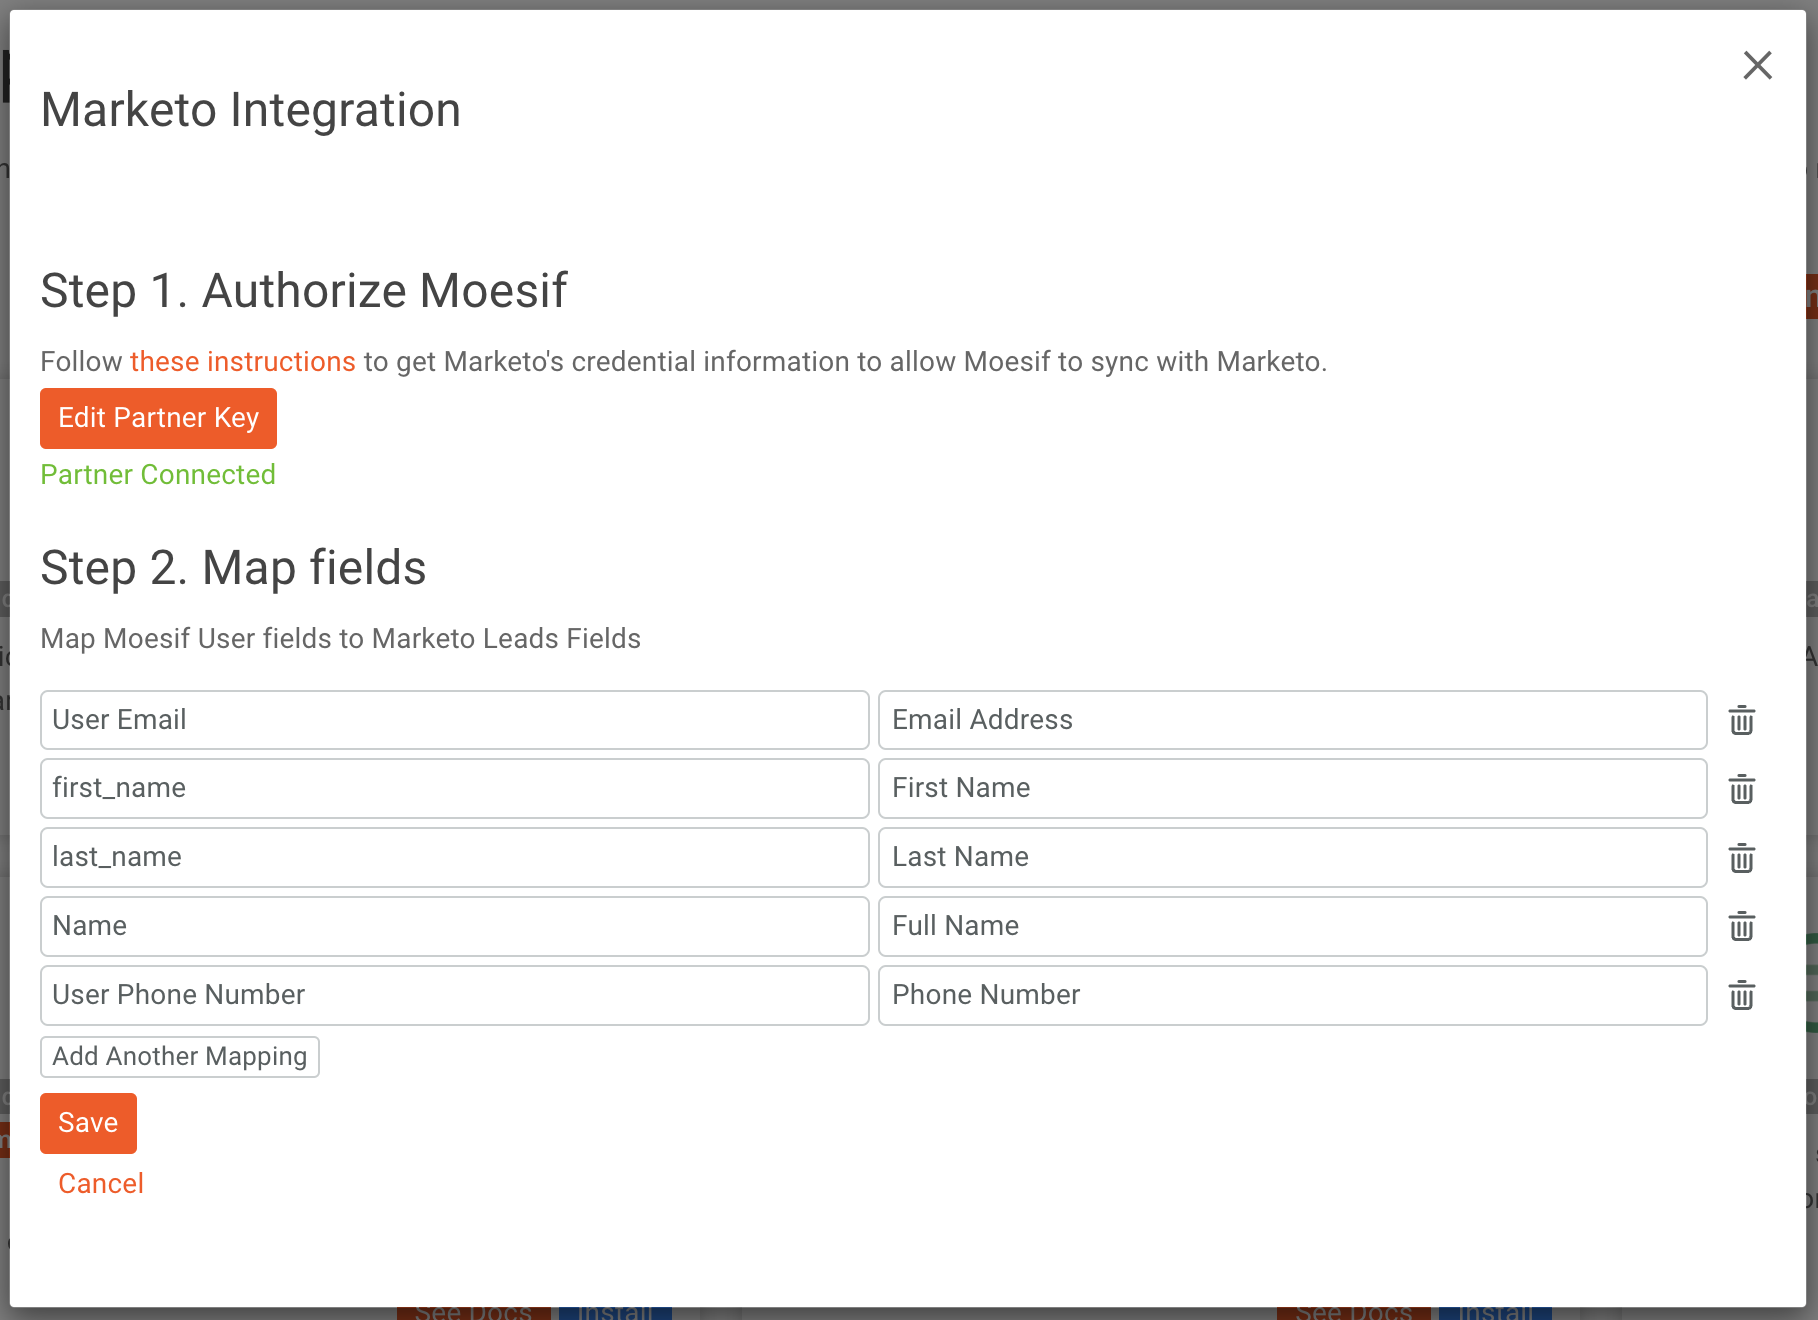
If you haven’t created your Marketo properties yet, create them within your Marketo account. Once done, you can refresh the properties by clicking Load Fields again.
Create a behavioral cohort
Create a behavioral cohort in Moesif with your API usage criteria. As customers in Moesif match your criteria, they will be added to the behavioral cohort which will be synced to Marketo.
The behavioral cohorts will then be available in Marketo for you to use. These are accessible through Group Lists > Moesif Cohort Lists. From here you will see your imported cohorts.
The Moesif to Marketo sync tales takes about 5 minutes. If you do not see your cohort in Marketo, wait a few minutes.
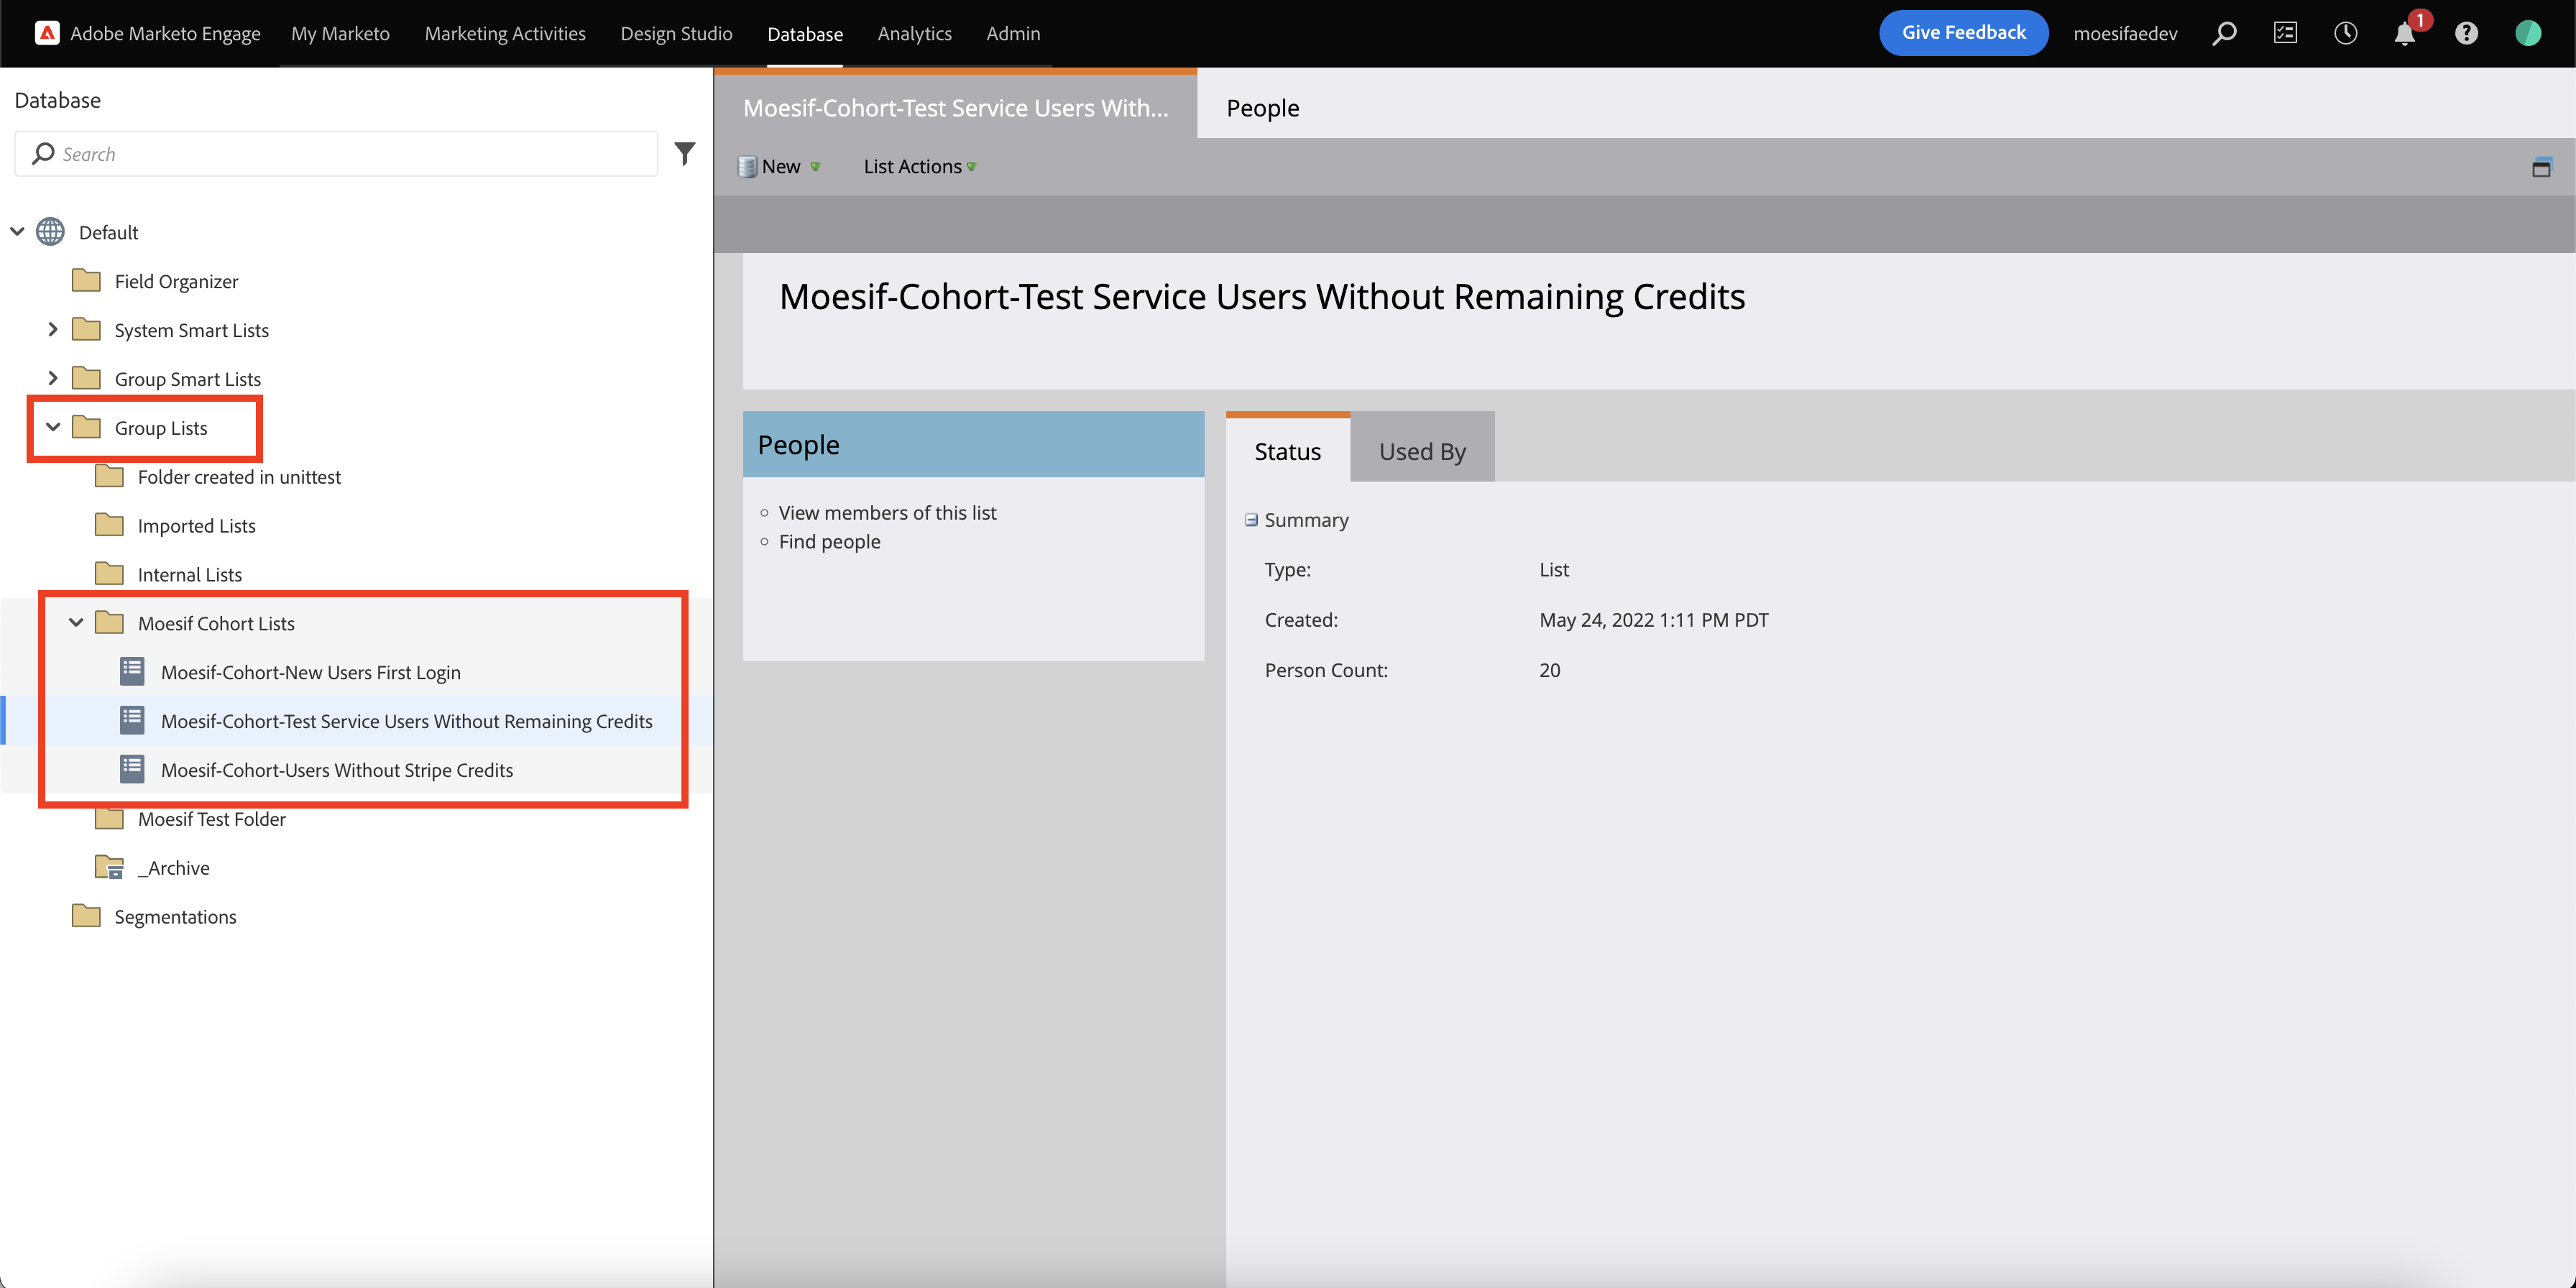
The Group Lists are accessible by going to the Database menu option at the top of the screen in Marketo.
As Moesif users (Marketo Leads) match your behavioral cohort criteria, they will be dynamically added to your Group List in Marketo.
Create a Campaign
Use the generated Group List as a trigger to generate a new email campaign. Moesif will continuously enroll or disenroll leads from the list based on your behavioral cohort criteria.
For questions, reach out to your dedicated account manager or email support.
Limitations
- Marketo does not support two leads having the same email address whereas two Moesif users can have the same email as the user_id is used for deduplication. Only one lead wil be synced to Marketo.
- A Marketo List does not support
+which is sometimes used by gmail users such asjohn+1@example.comandjohn+2@example.com. Those leads will skip being synced. You can develop a separate process to clean these emails. - Users without emails will not be synced to Marketo
- Sync may take at least 5 minutes before changes are reflected in Marketo