Integrating with AWS API Gateway
AWS API Gateway is an extremely popular way to quickly and securely manage your RESTful APIs. Moesif is a great addition on top of AWS API Gateway to cover everything from analytics to helping you set up metered billing.
Building your API is just the first step. Once built, you need to keep customers and services using the API happy. Moesif is the tool to help you do exactly that. Integrating Moesif with your AWS API Gateway instance can be done in a few simple steps.
How It Works
The integration works by Logging API calls to a Kinesis Data Firehose which sends access logs in batches to Moesif. Besides tracking typical API parameters like URI route and status code, the integration also tracks the user identity which makes them perfect for user behavior analytics tools like Moesif.
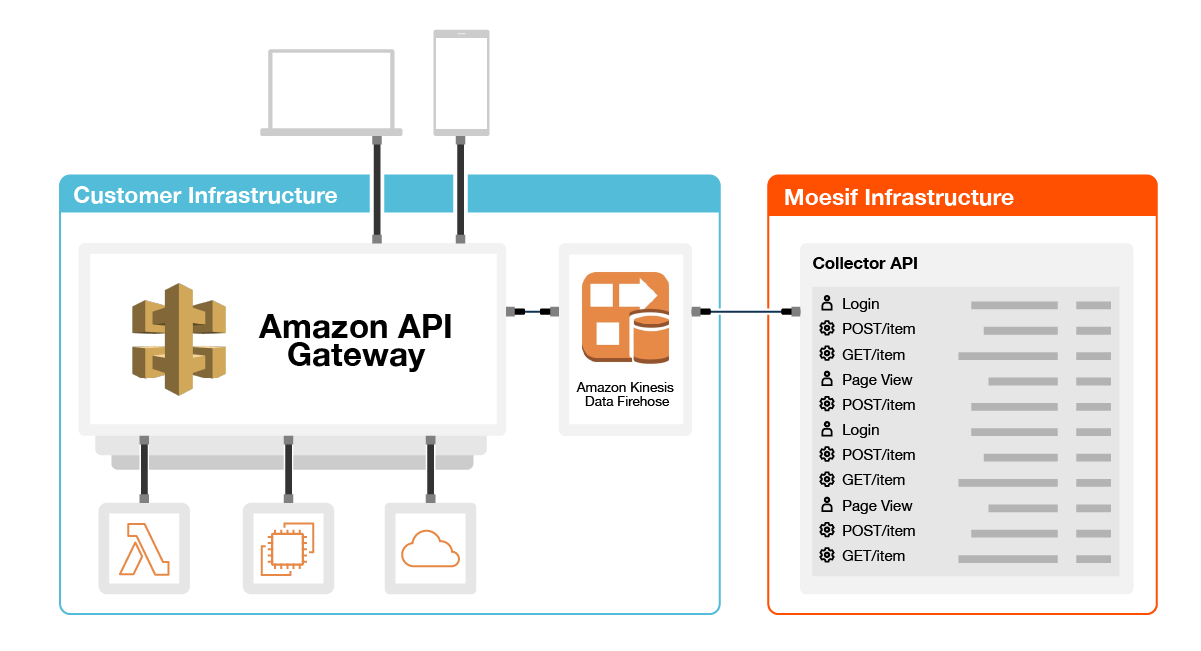
Because you are monitoring at the API gateway itself, you also gain visibility into rejected requests that never reach your underlying service such as AWS Lambda or EC2.
Step 1: Create Your Moesif Account
If you don’t already have a Moesif account, You’ll want to sign up. Once you’re registered you’ll need to add in a few details.
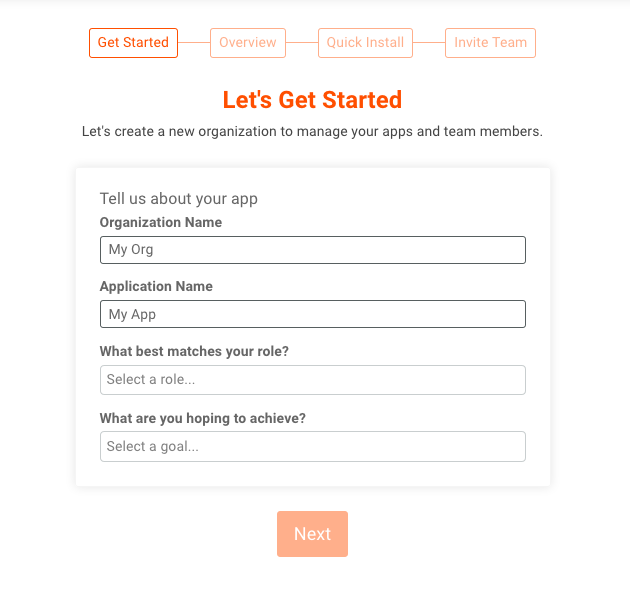
These include:
- Organization Name the name of your organization or company
- App Name the name of the app you are integrating with Moesif
- What best matches your role? Here you can describe what your current role is at your organization. This helps us to assist you with relevant hints and tips in the future.
- What are you hoping to achieve? Here you can let us know how you'll use Moesif to help your organization or project.
Once you’ve filled out these details, click Next. After this, you’ll be presented with a brief overview of Moesif.
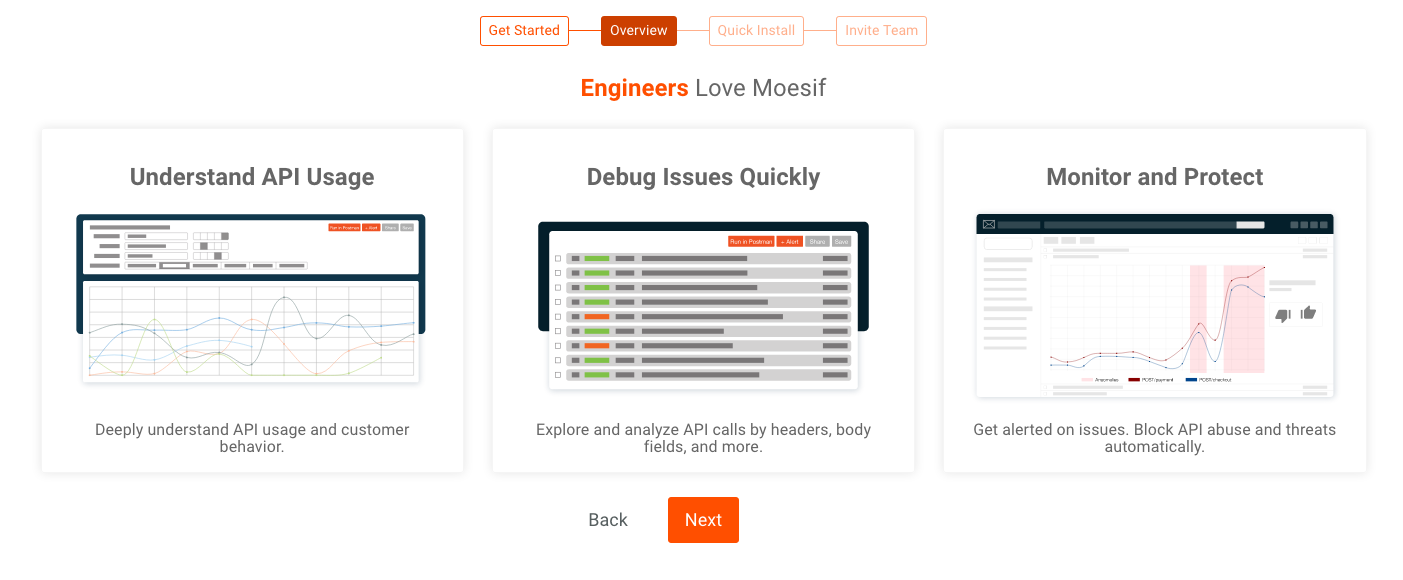
Click Next once again.
Step 2: Create the Kinesis Firehose for Moesif
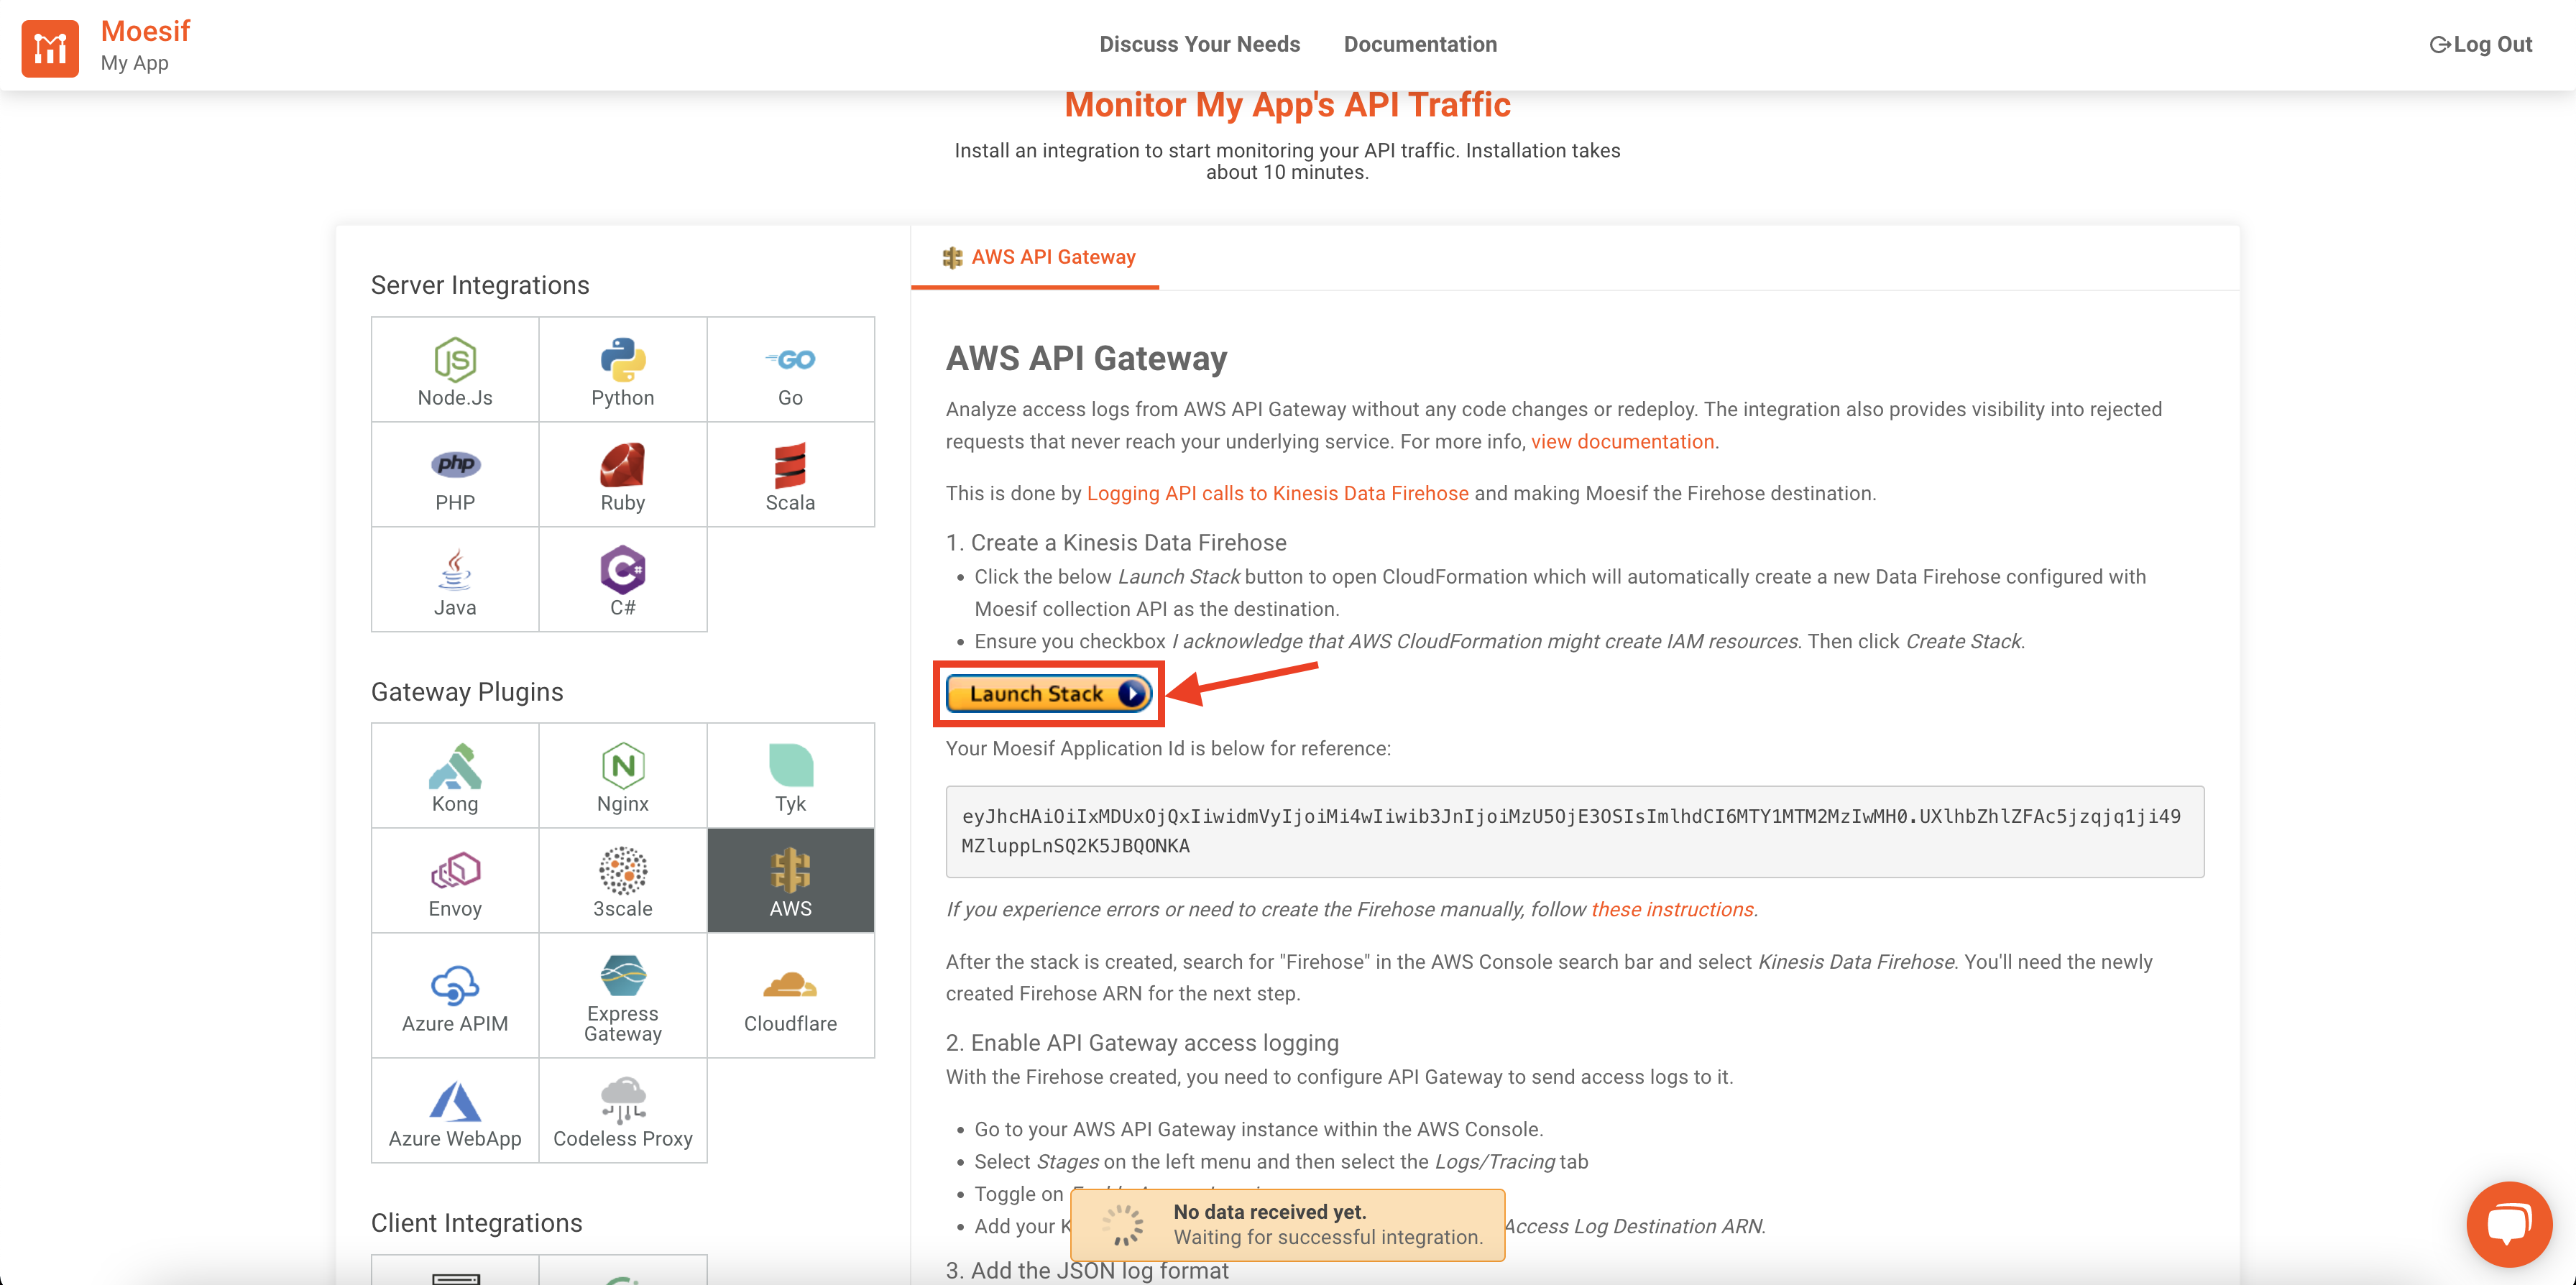
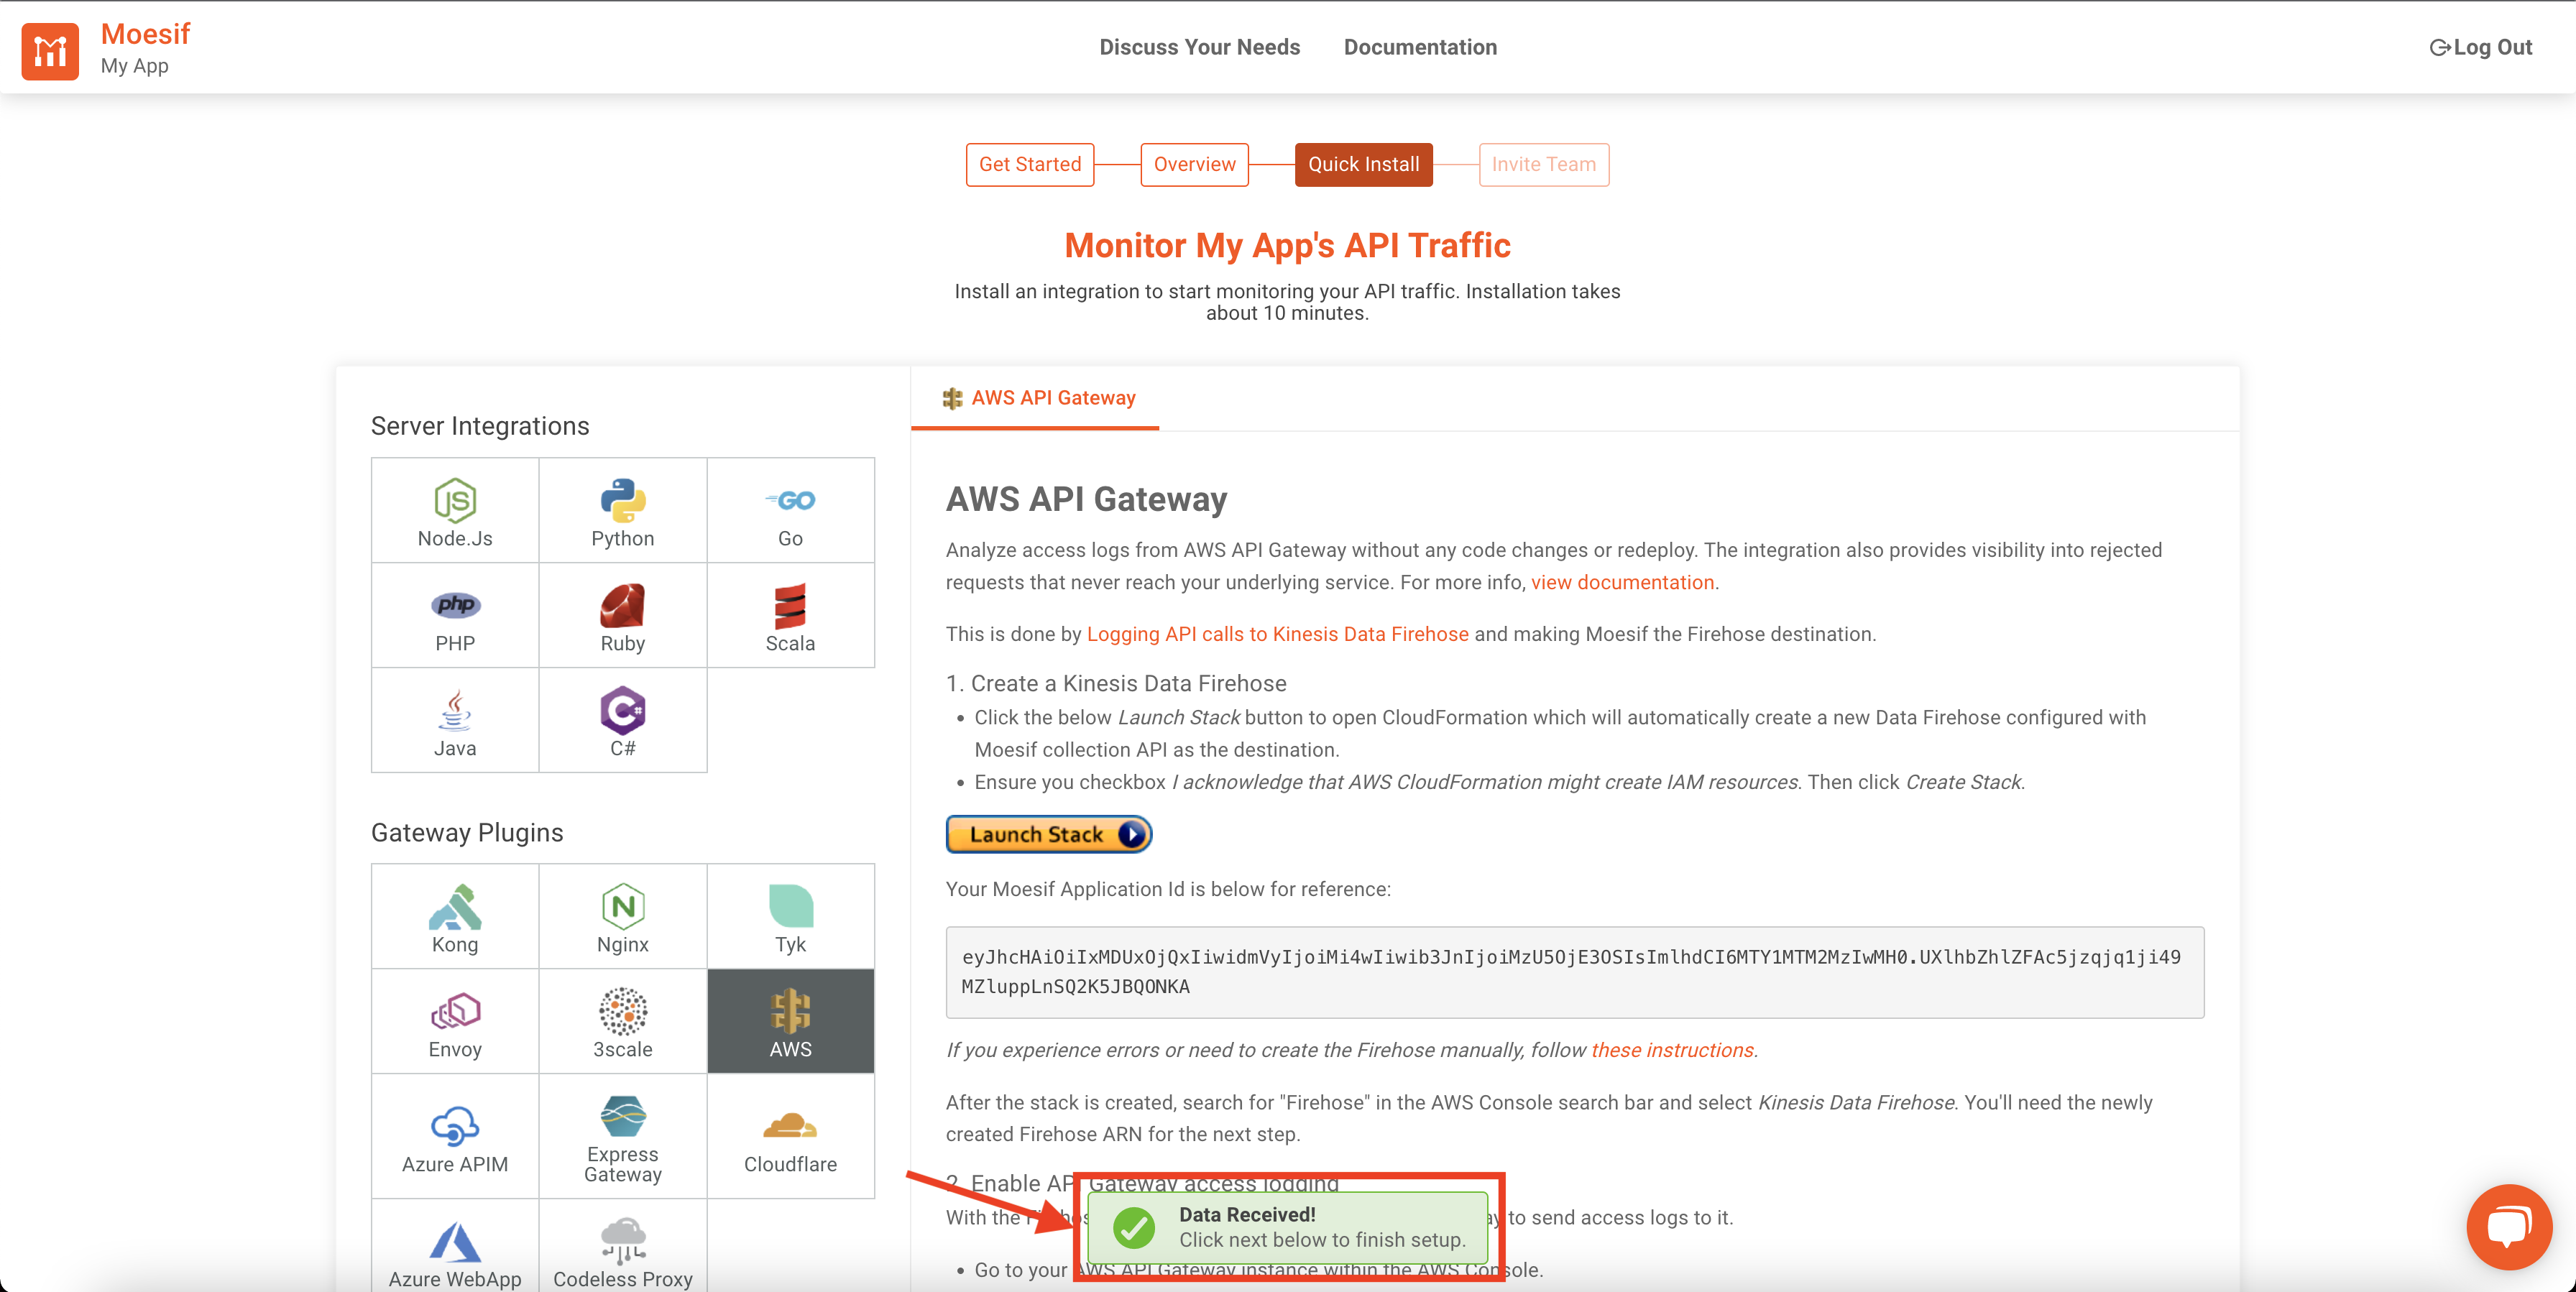
After the Overview screen, you’ll be presented with the Quick Install screen. Here you can pick from any different server integrations and plugins. For AWS API Gateway we want to make sure AWS is selected in the left pane and that the AWS API Gateway walkthrough is displayed on the right.
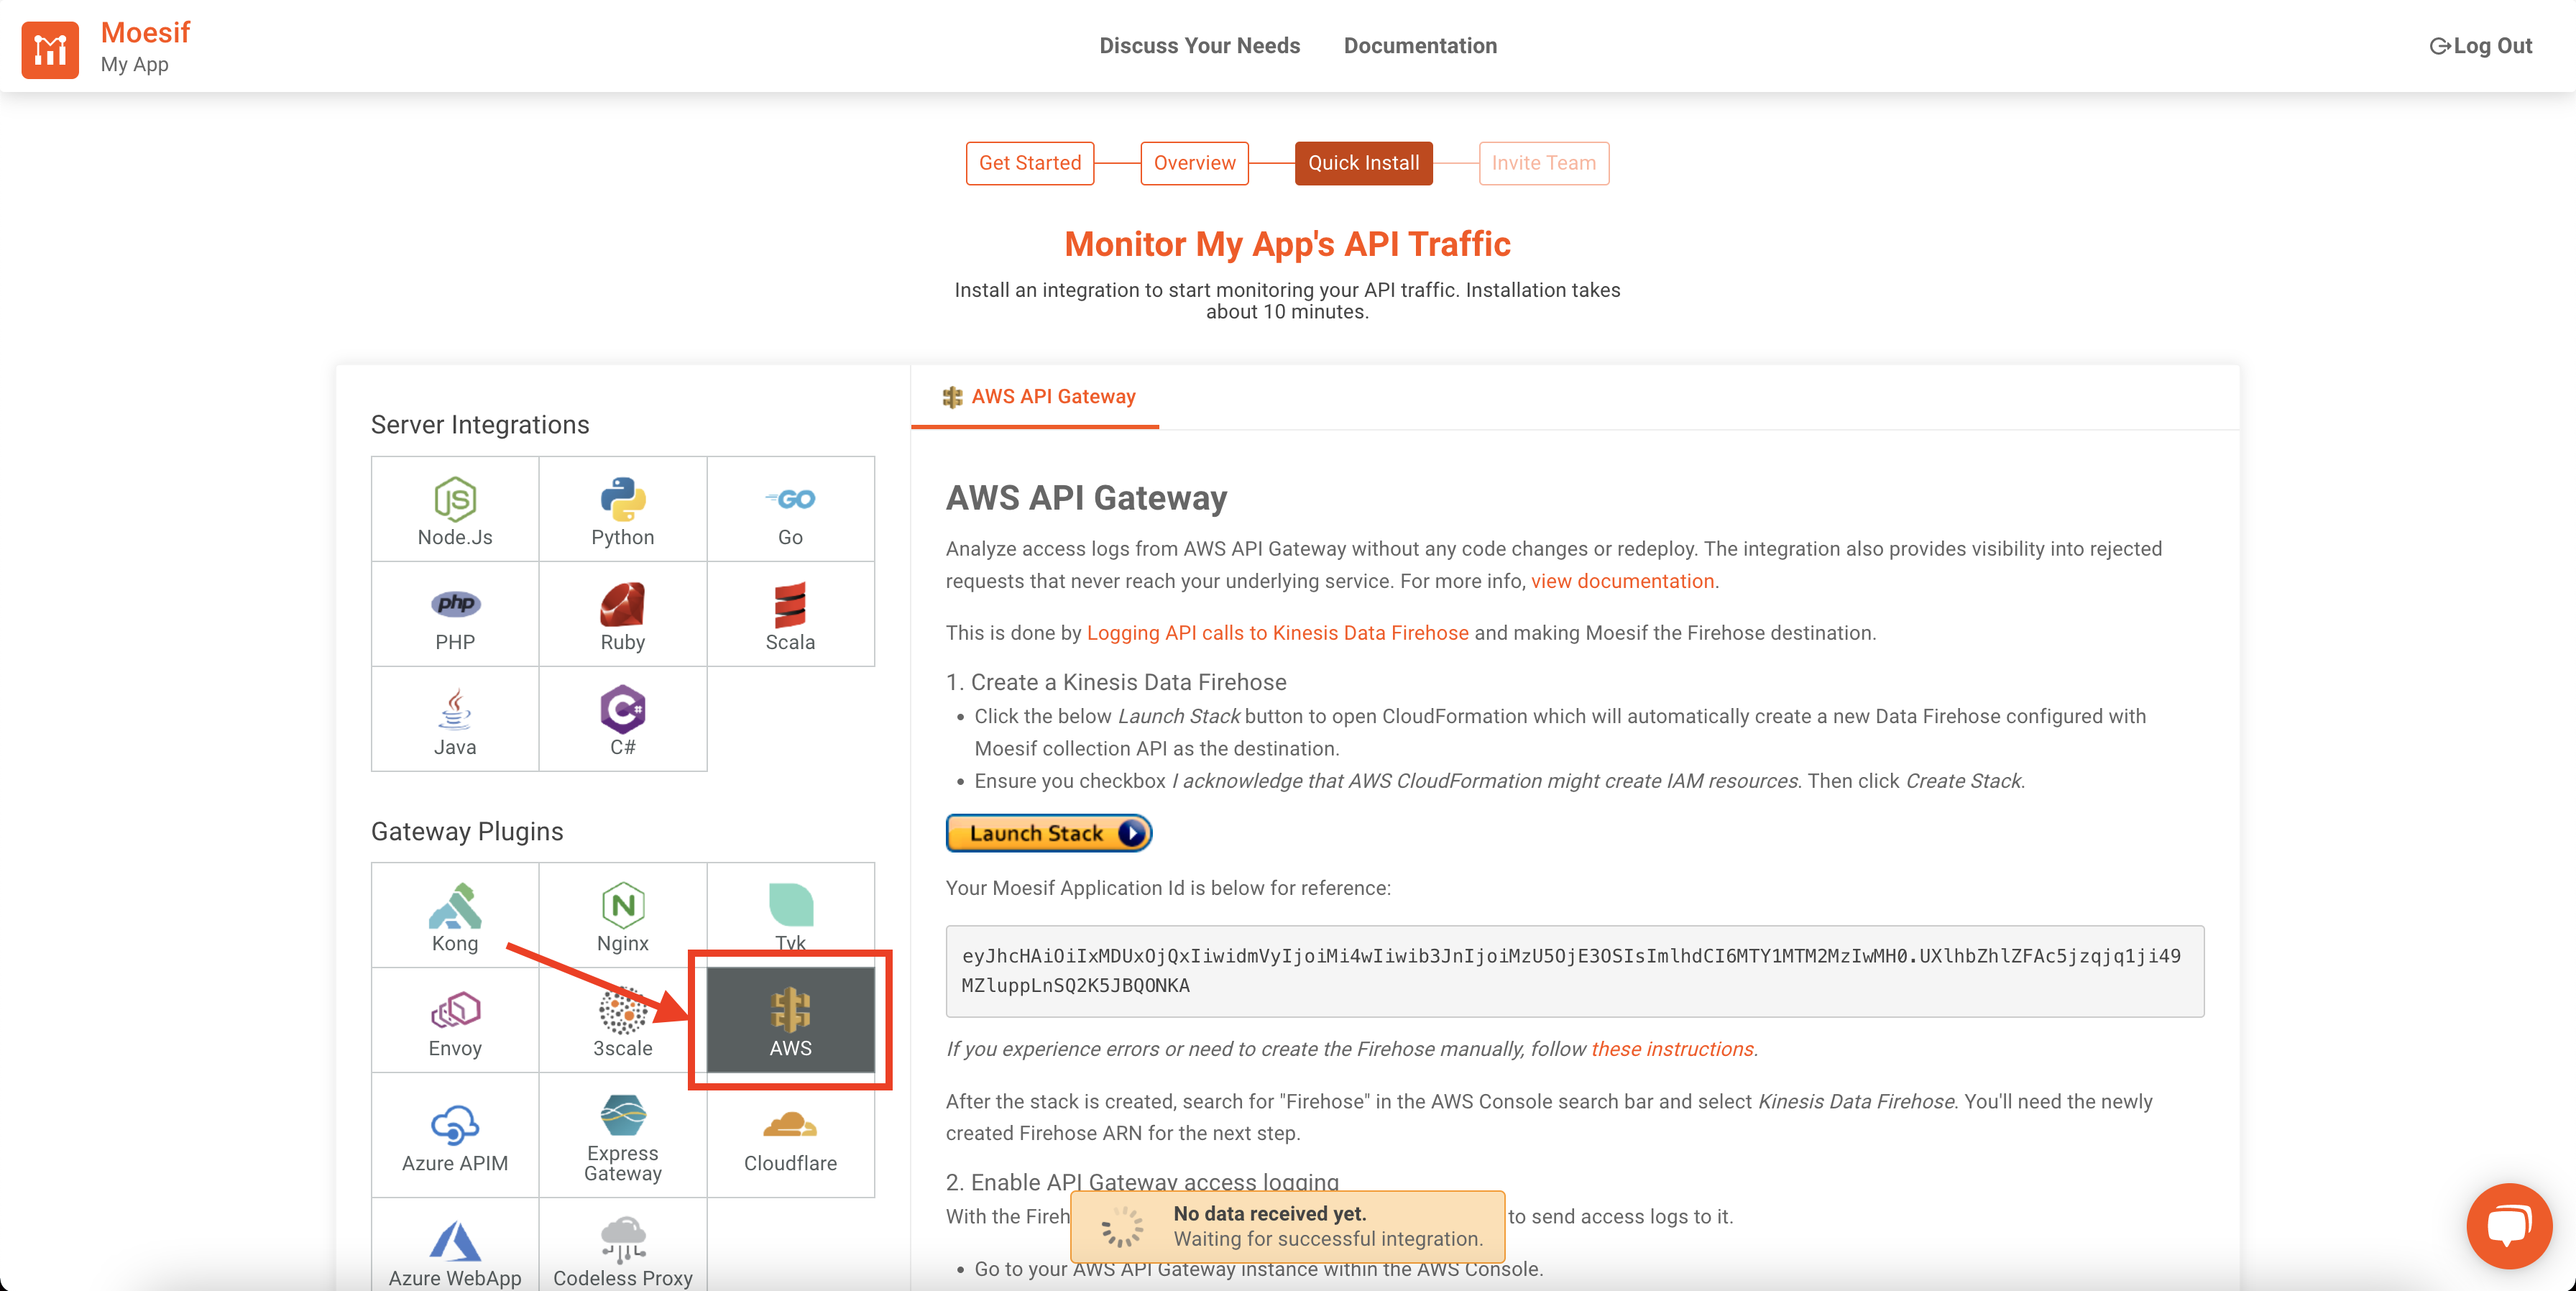
Once selected, follow Step 1 on the screen and create the Kinesis Firehose for Moesif. To do this, click on the Launch Stack button in the instructions.
You’ll then be redirected to the CloudFormation screen to create the stack in AWS. The details will be pre-filled on the CloudFormation screen. The only thing you’ll need to do is check off the box allowing for IAM Resources to be created. The last step is clicking Create stack.
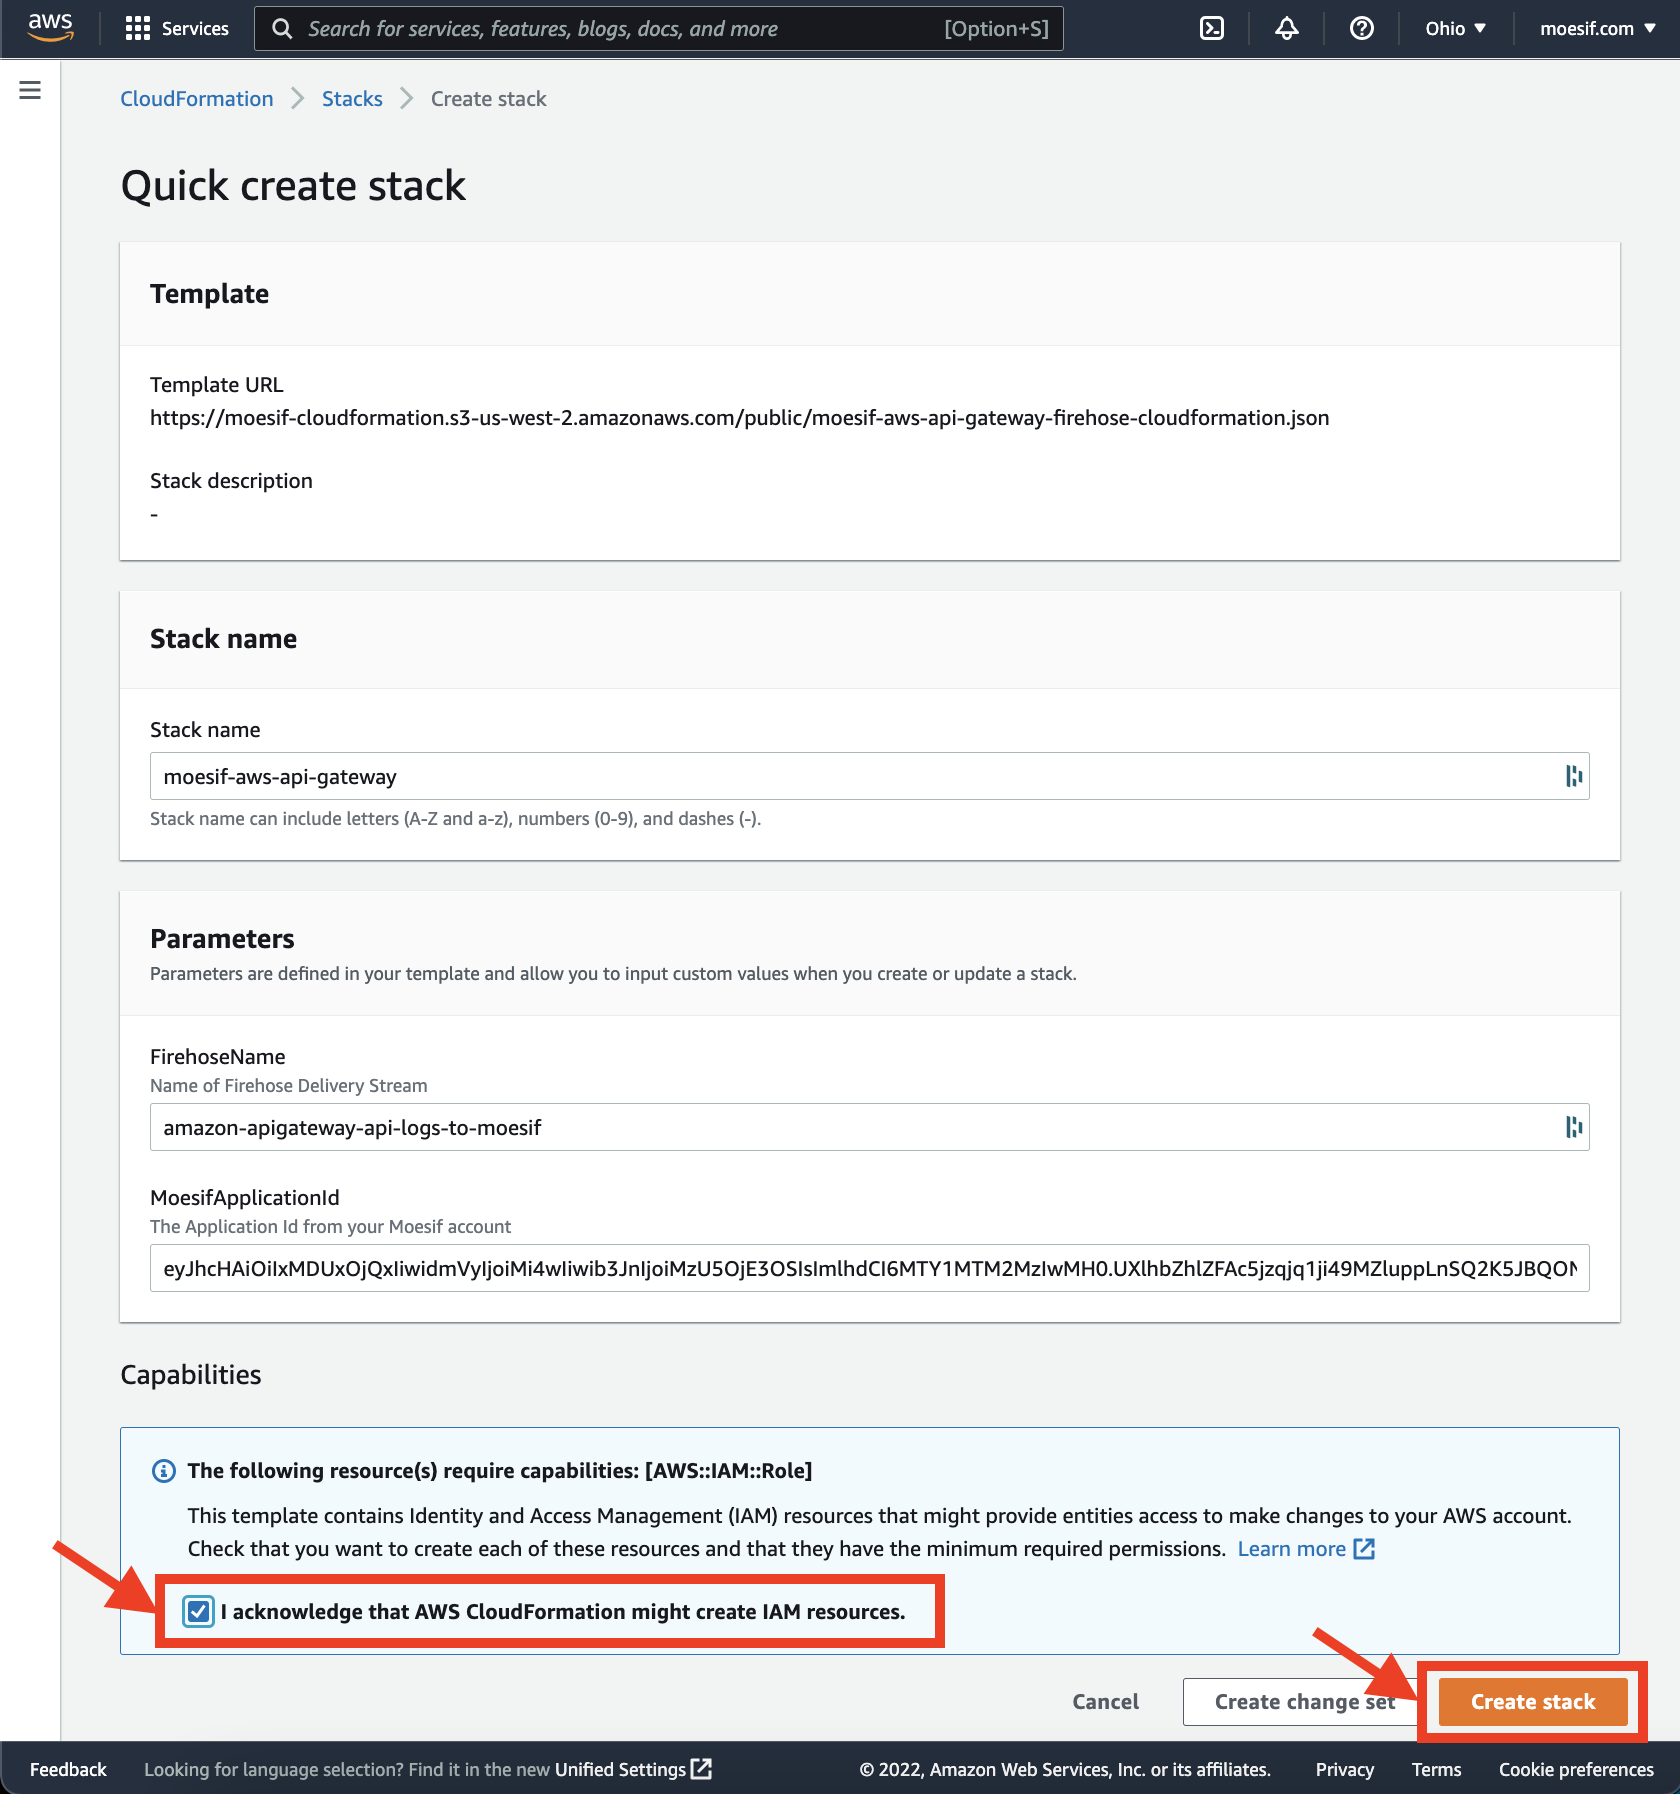
Your stack will then be created along with your Kinesis Firehose.
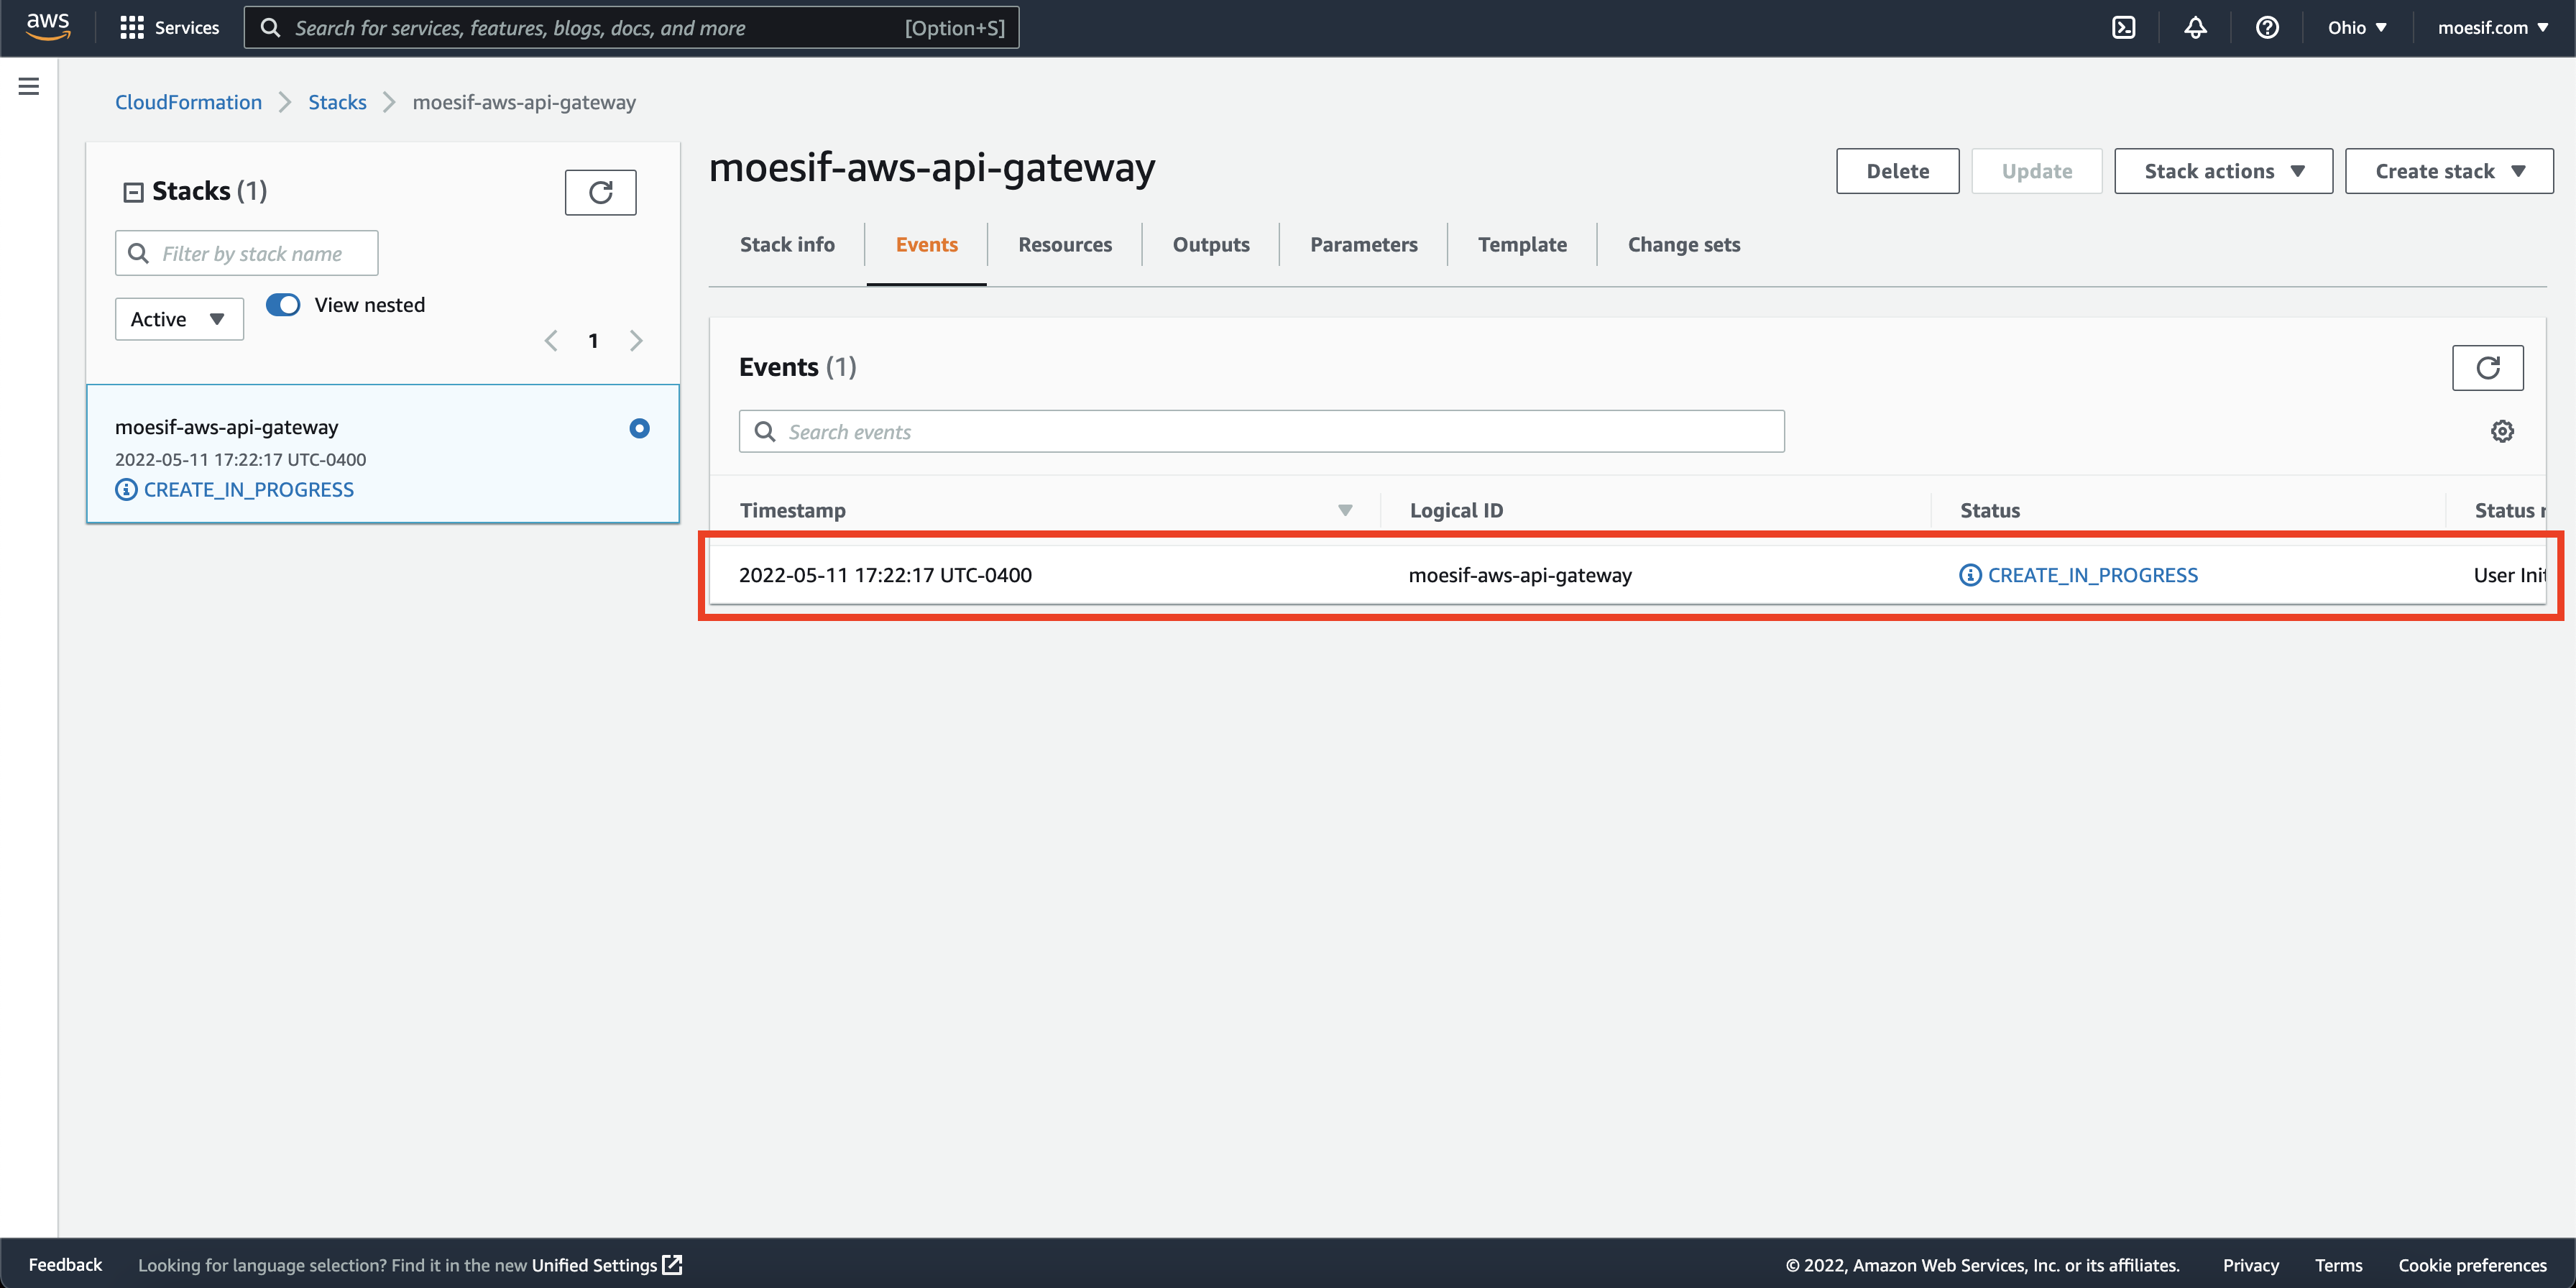
Next, we will grab our Kinesis Firehose ARN. To do that, in the search at the top of the screen, type in “Kinesis” nd click on the Kinesis entry.
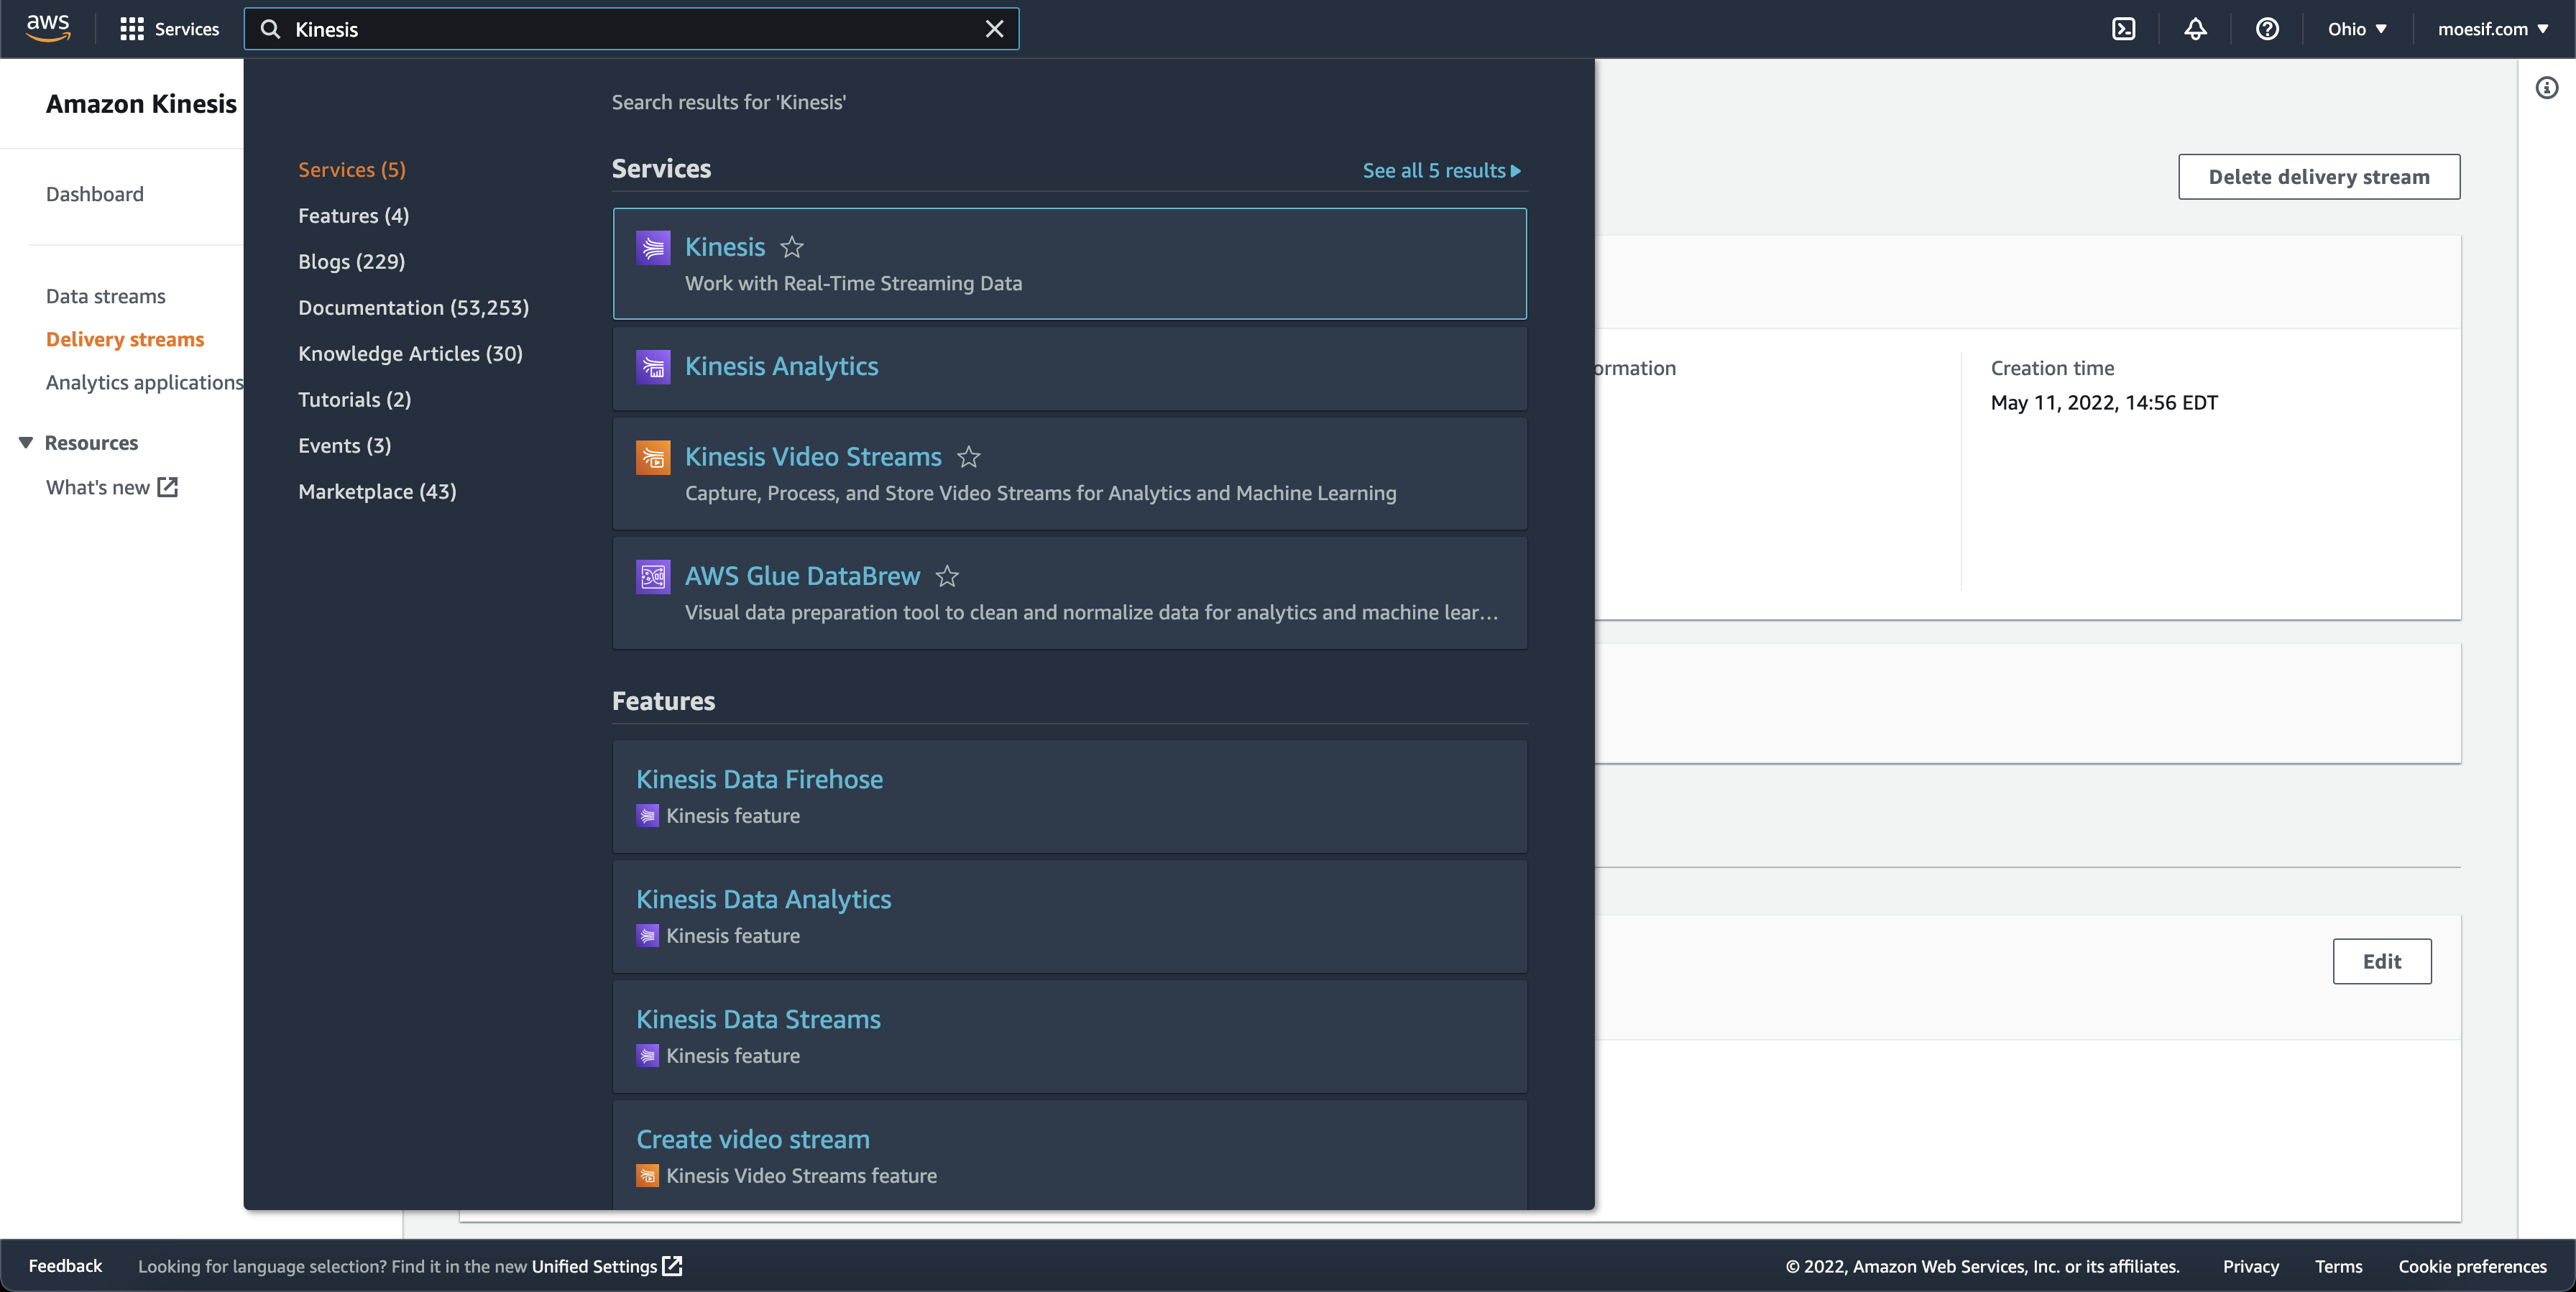
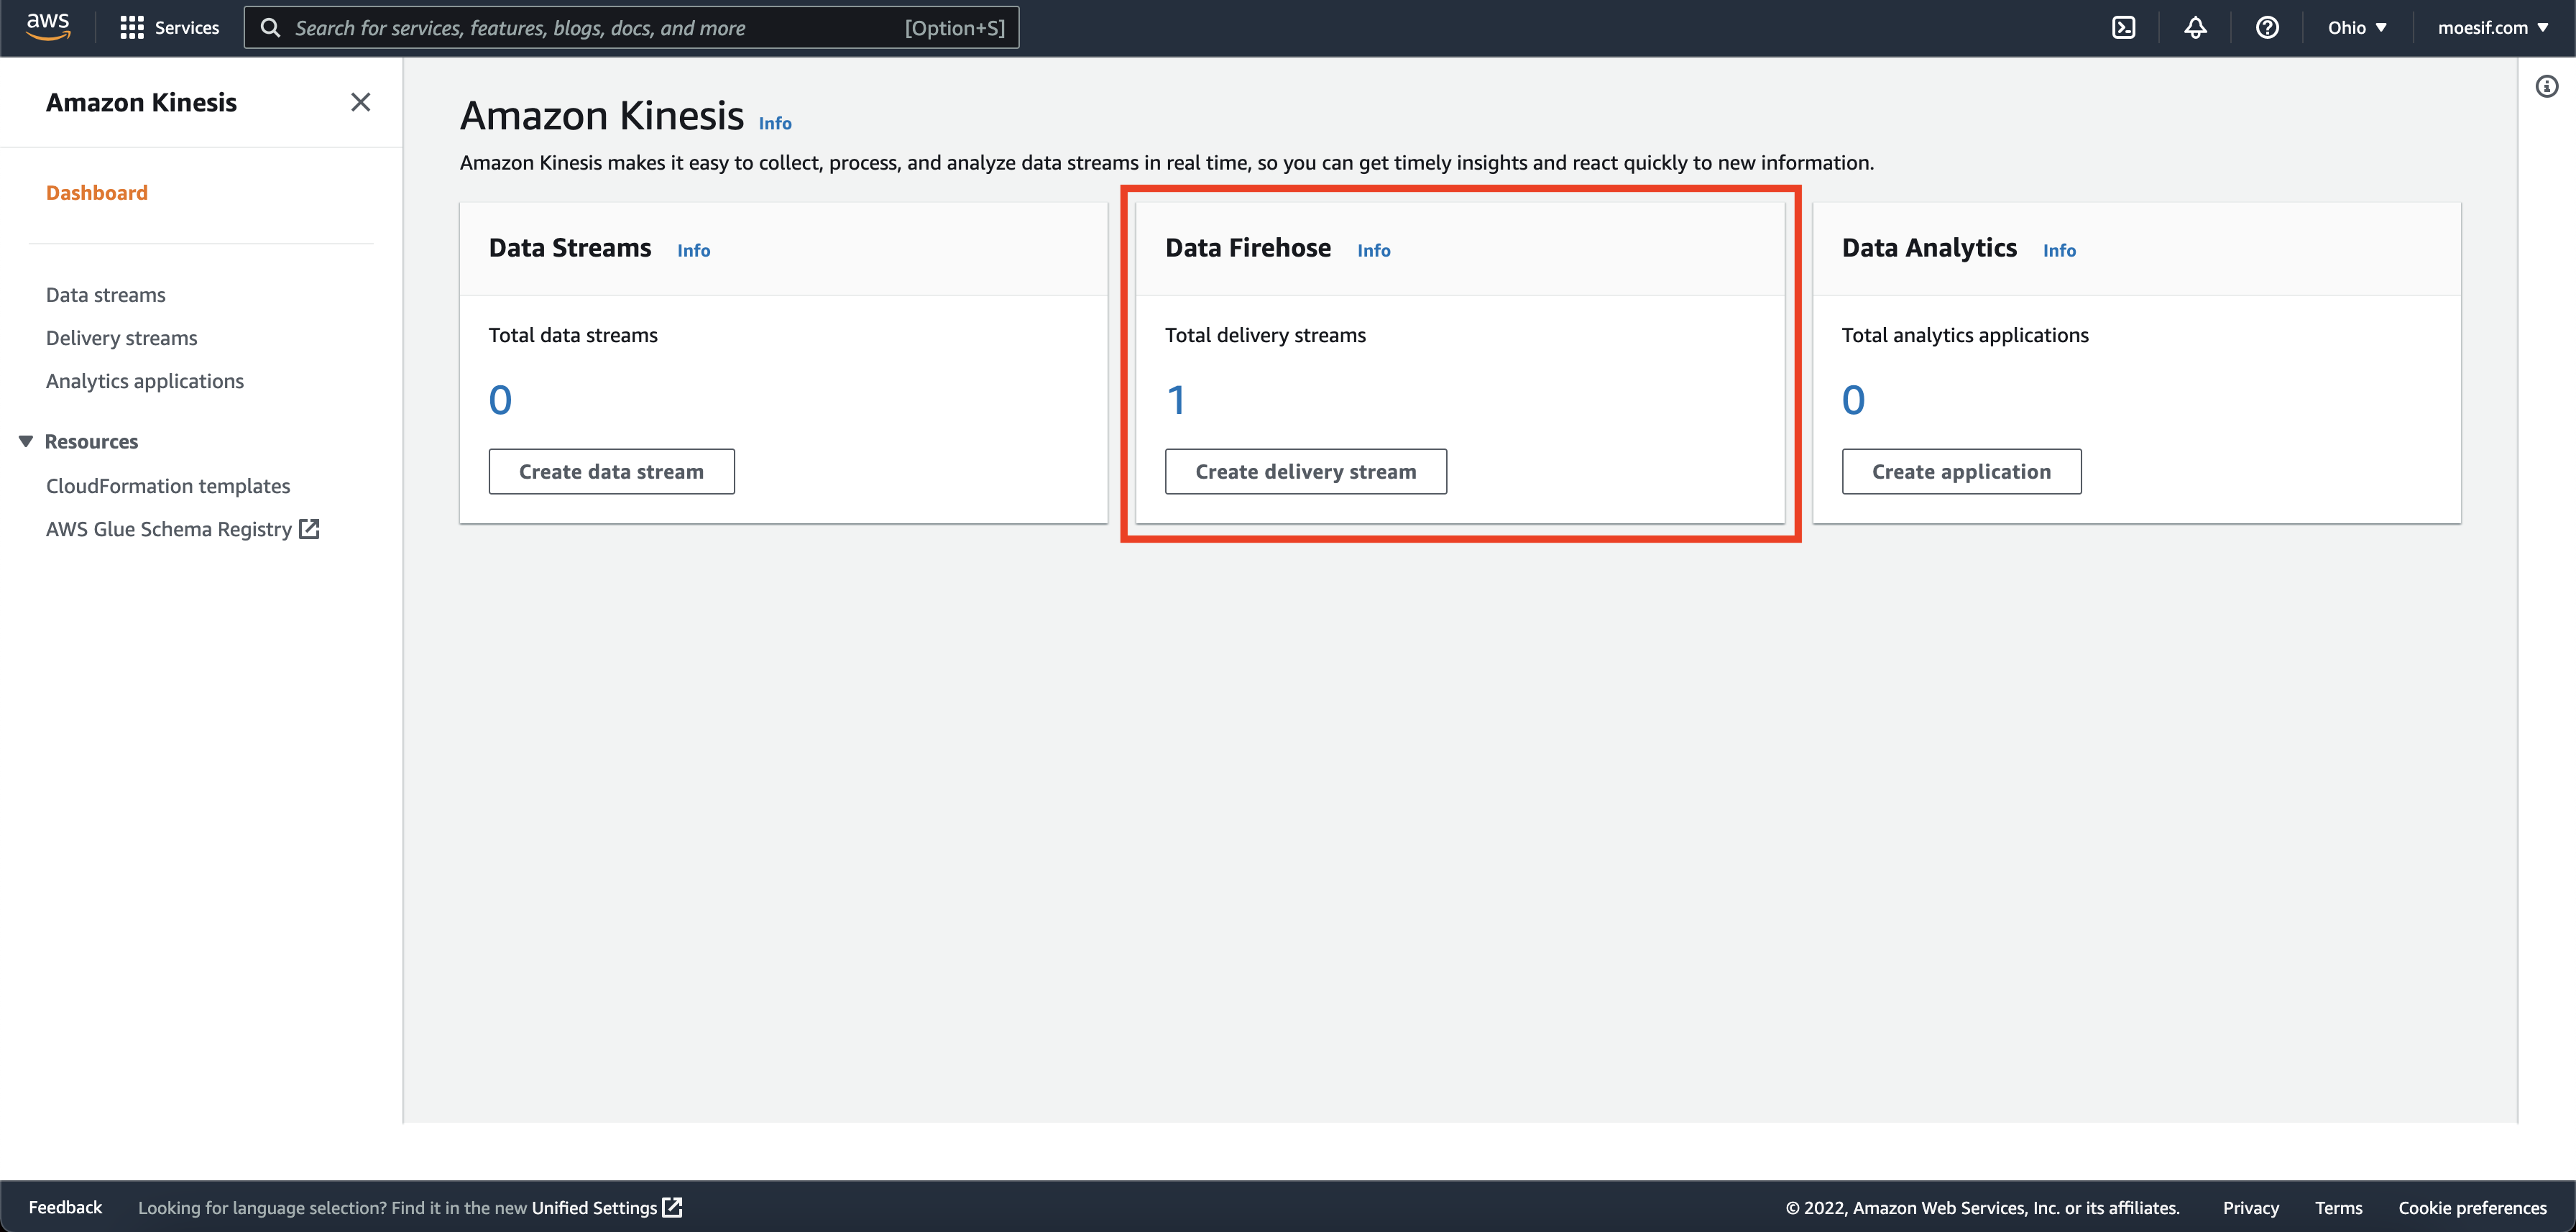
Once on the Kinesis home screen, you’ll click on the Data Firehose entry.
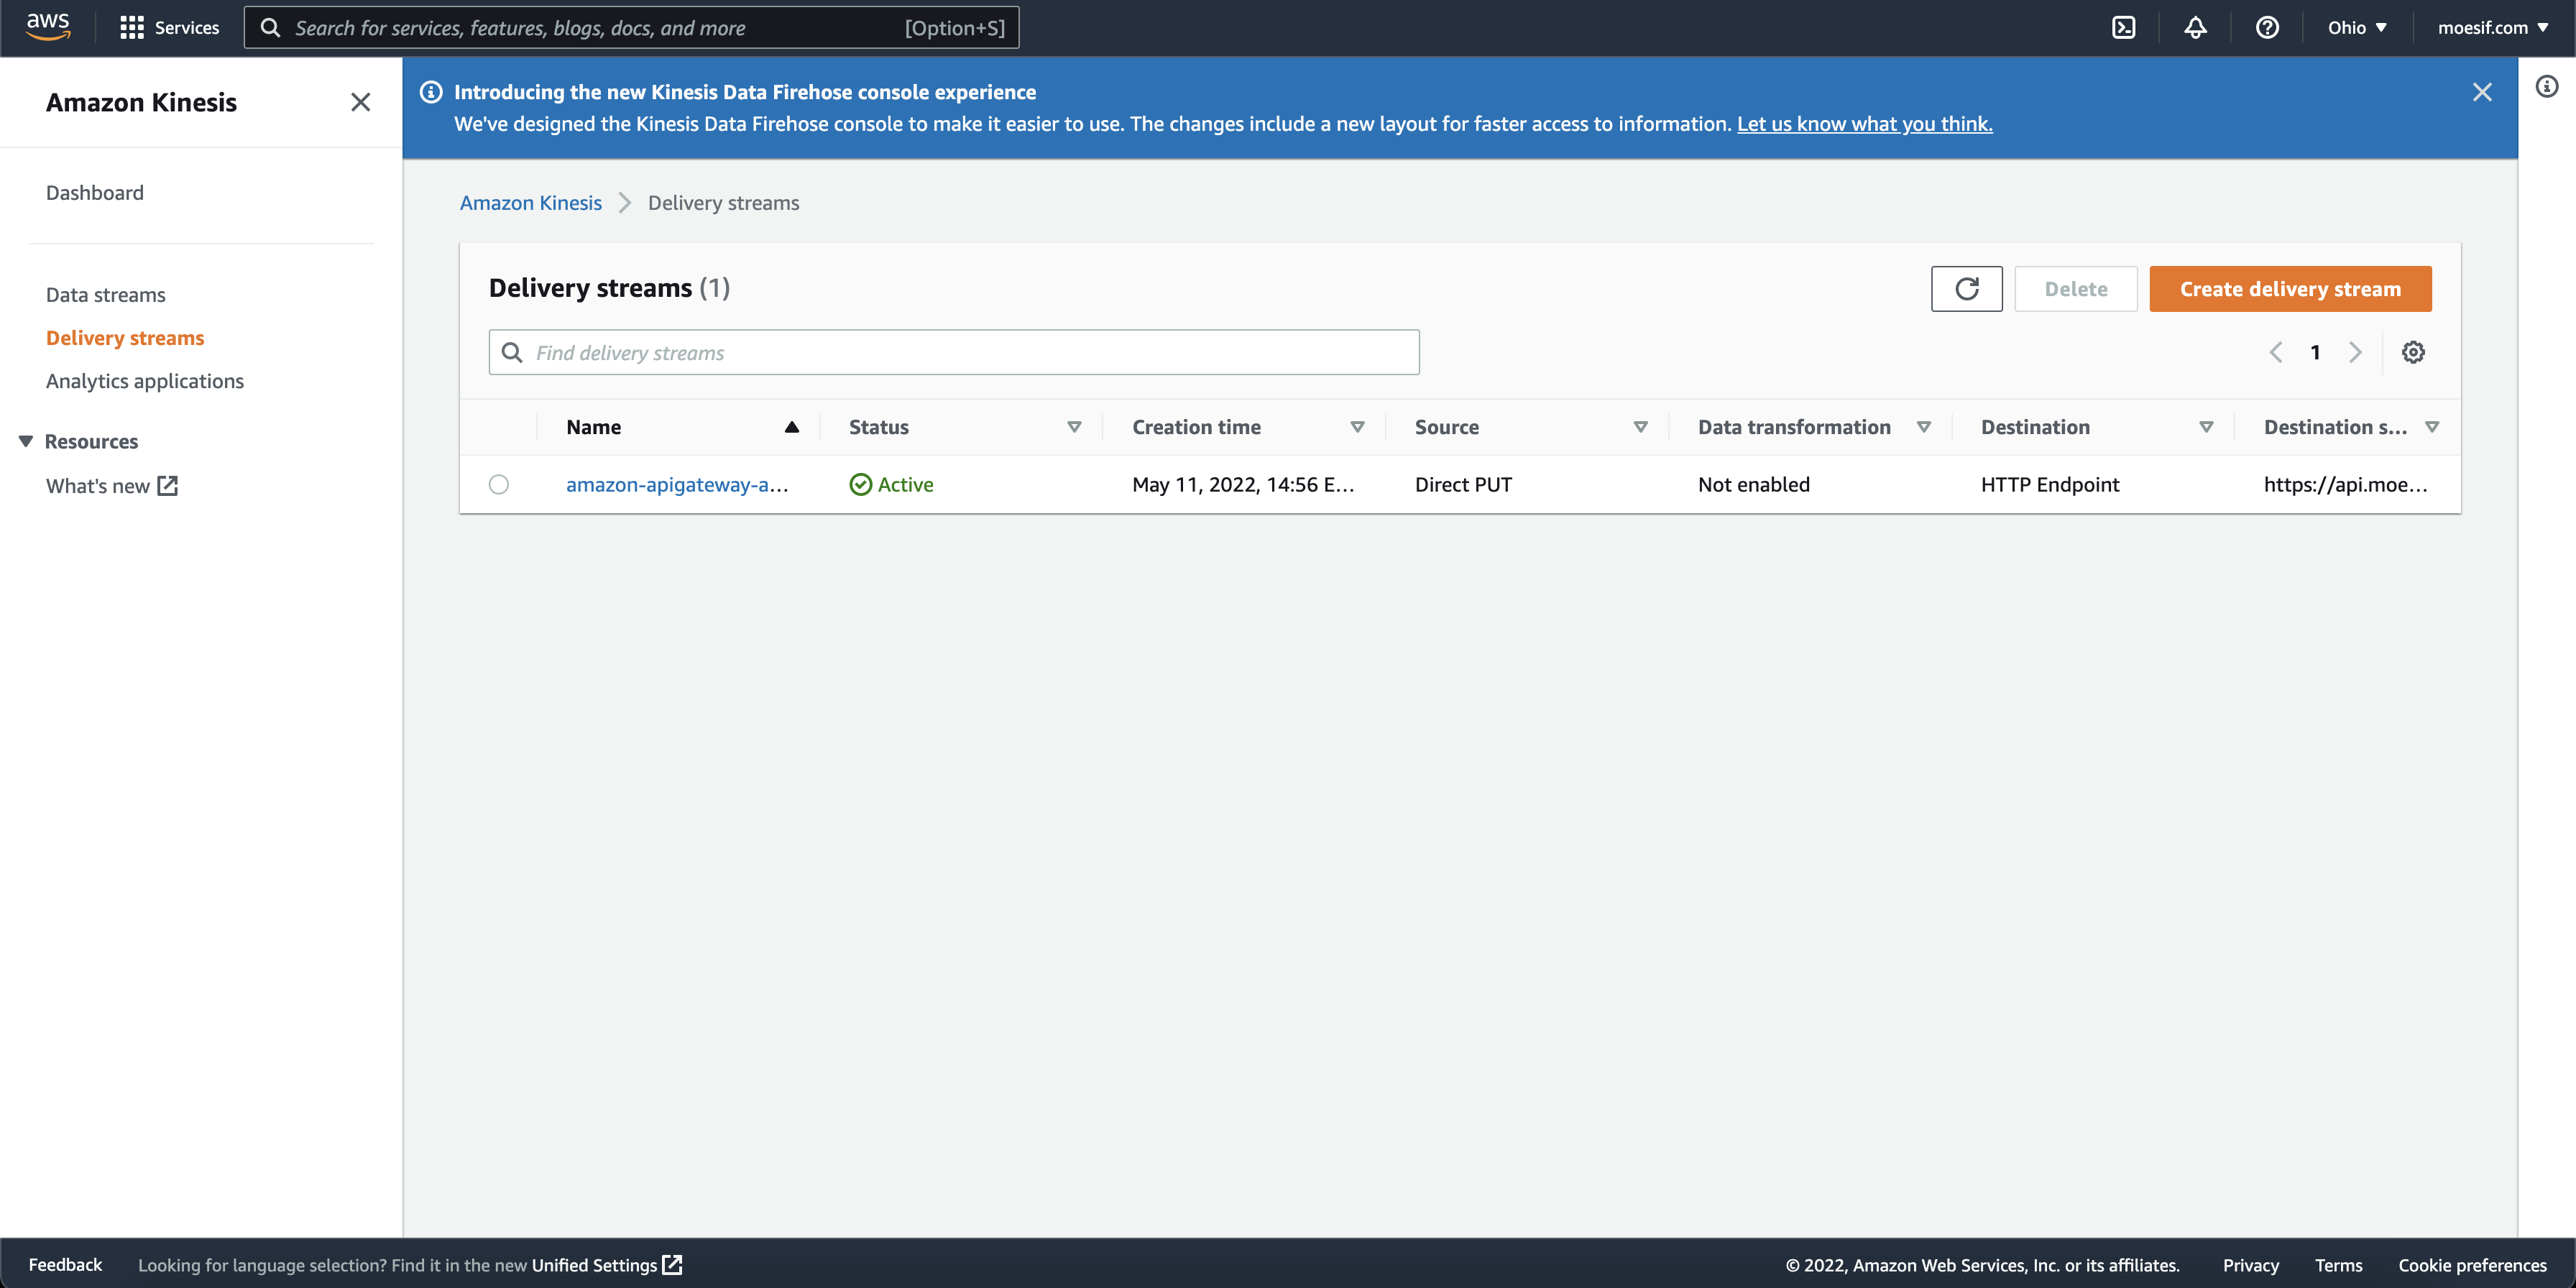
The next screen will show you the available Delivery Steams. Click on the one that you just created with Cloudformation (the name will be amazon-apigateway-api-logs-to-moesif).
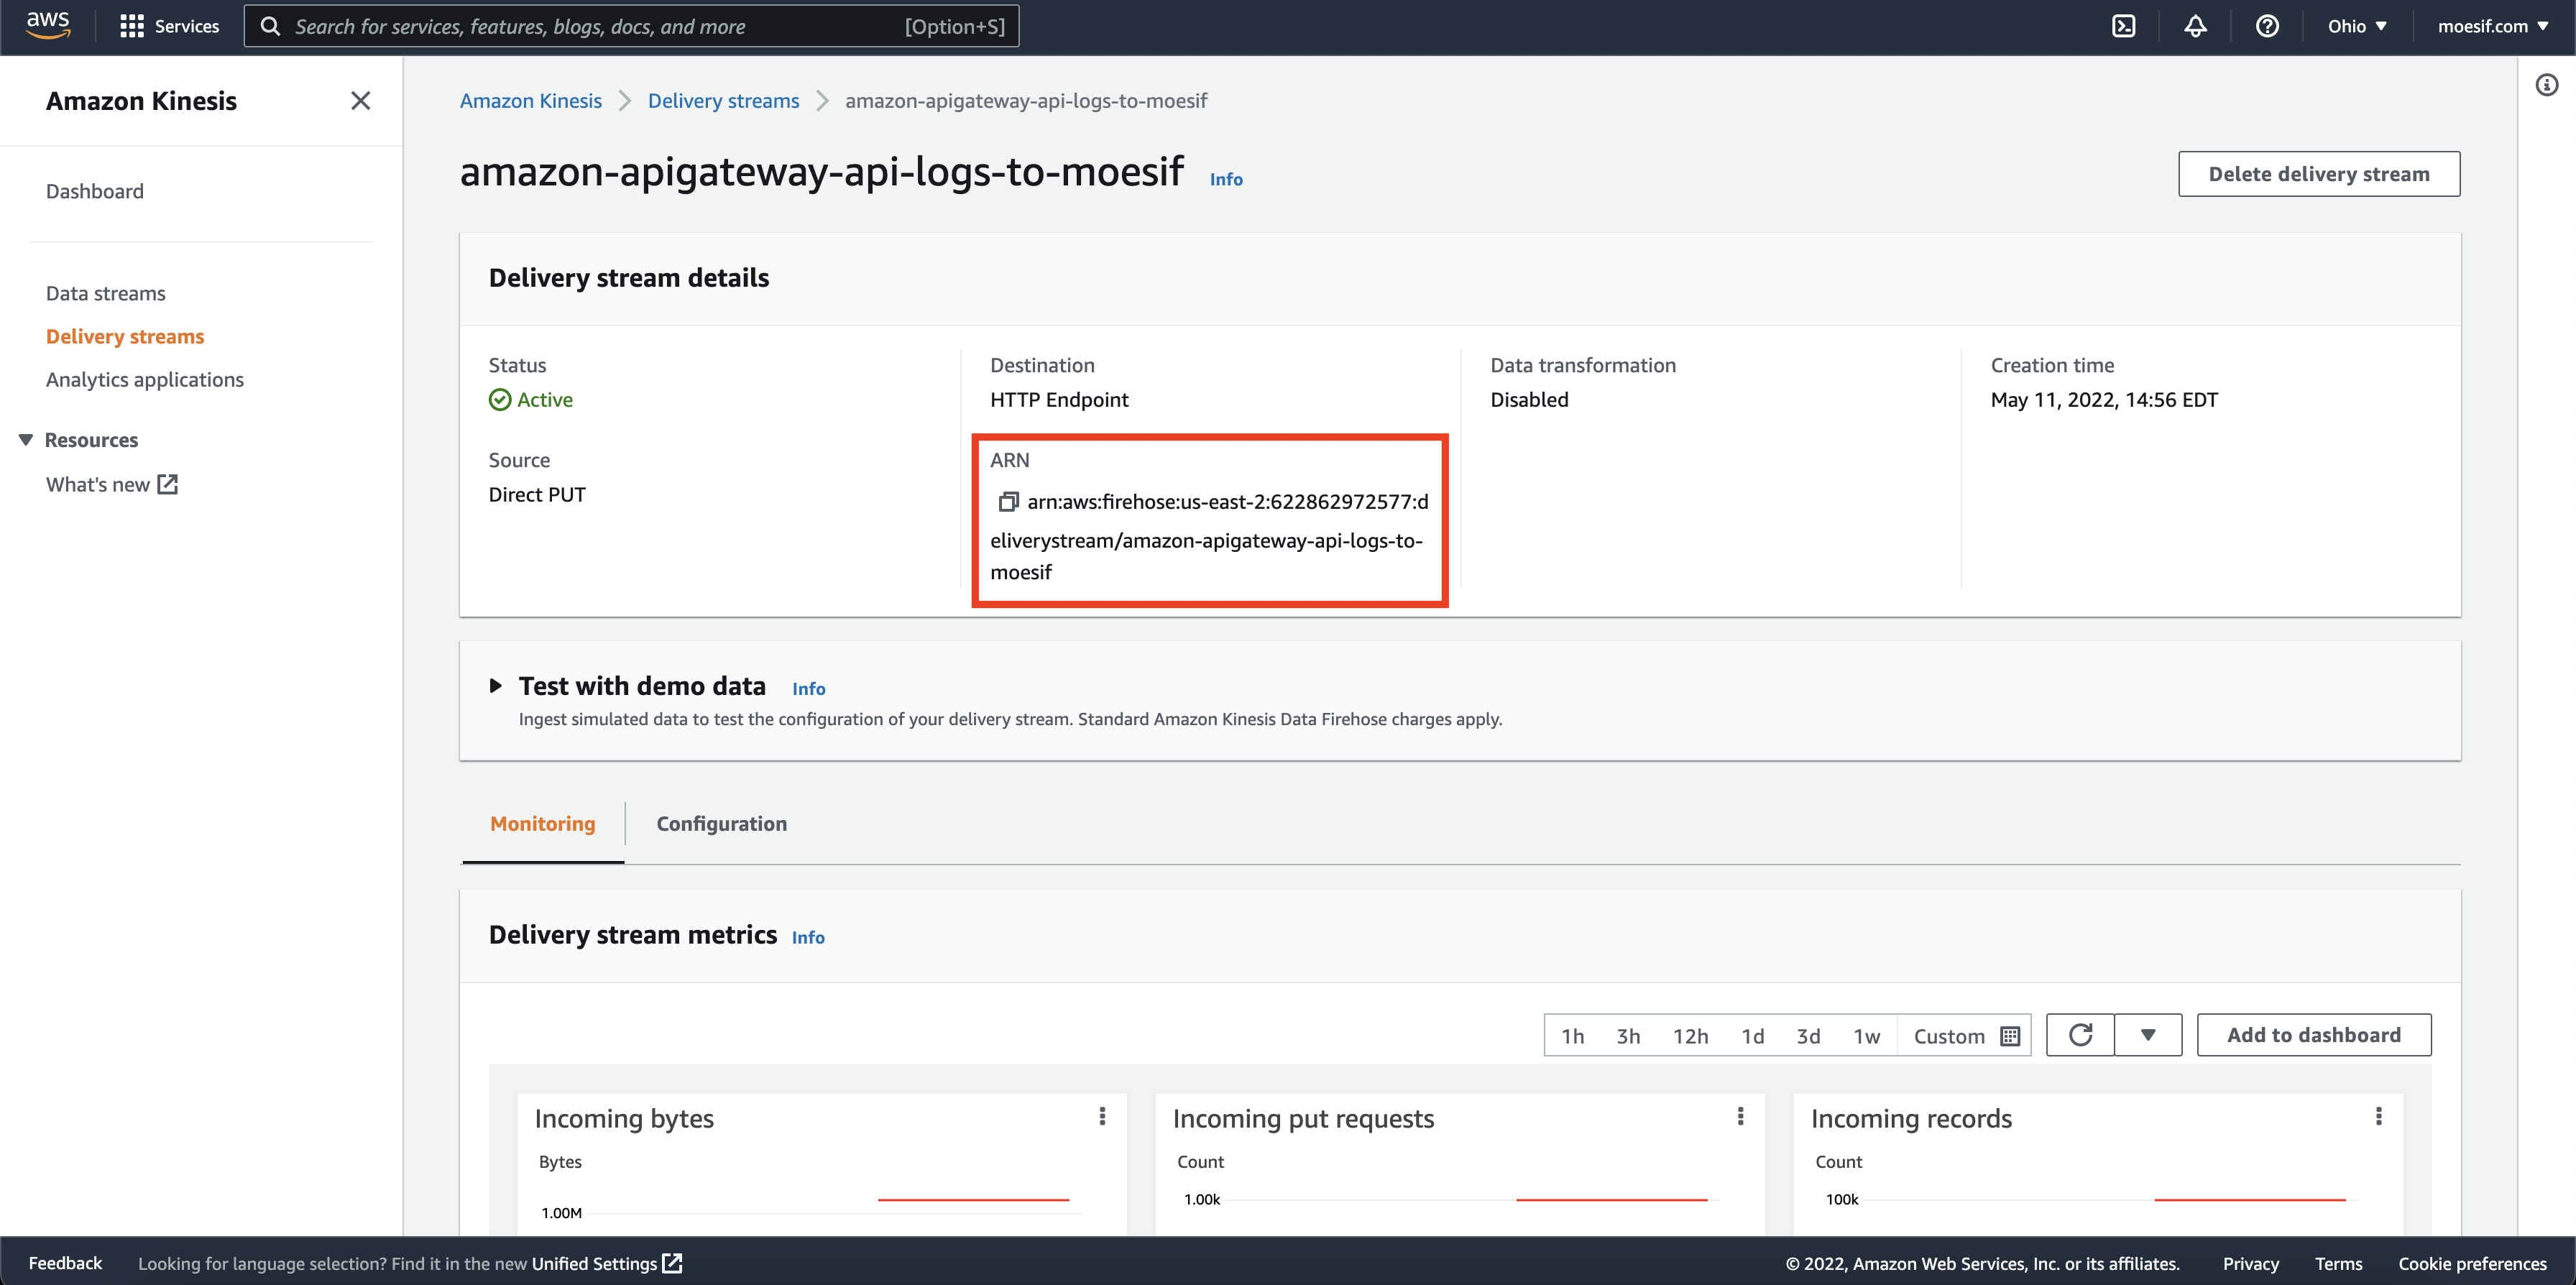
Lastly, we will grab the ARN so that we can plug it into the gateway configuration. Copy the ARN to your clipboard for later.
Step 3: Add the Data Firehose to Your Gateway Configuration
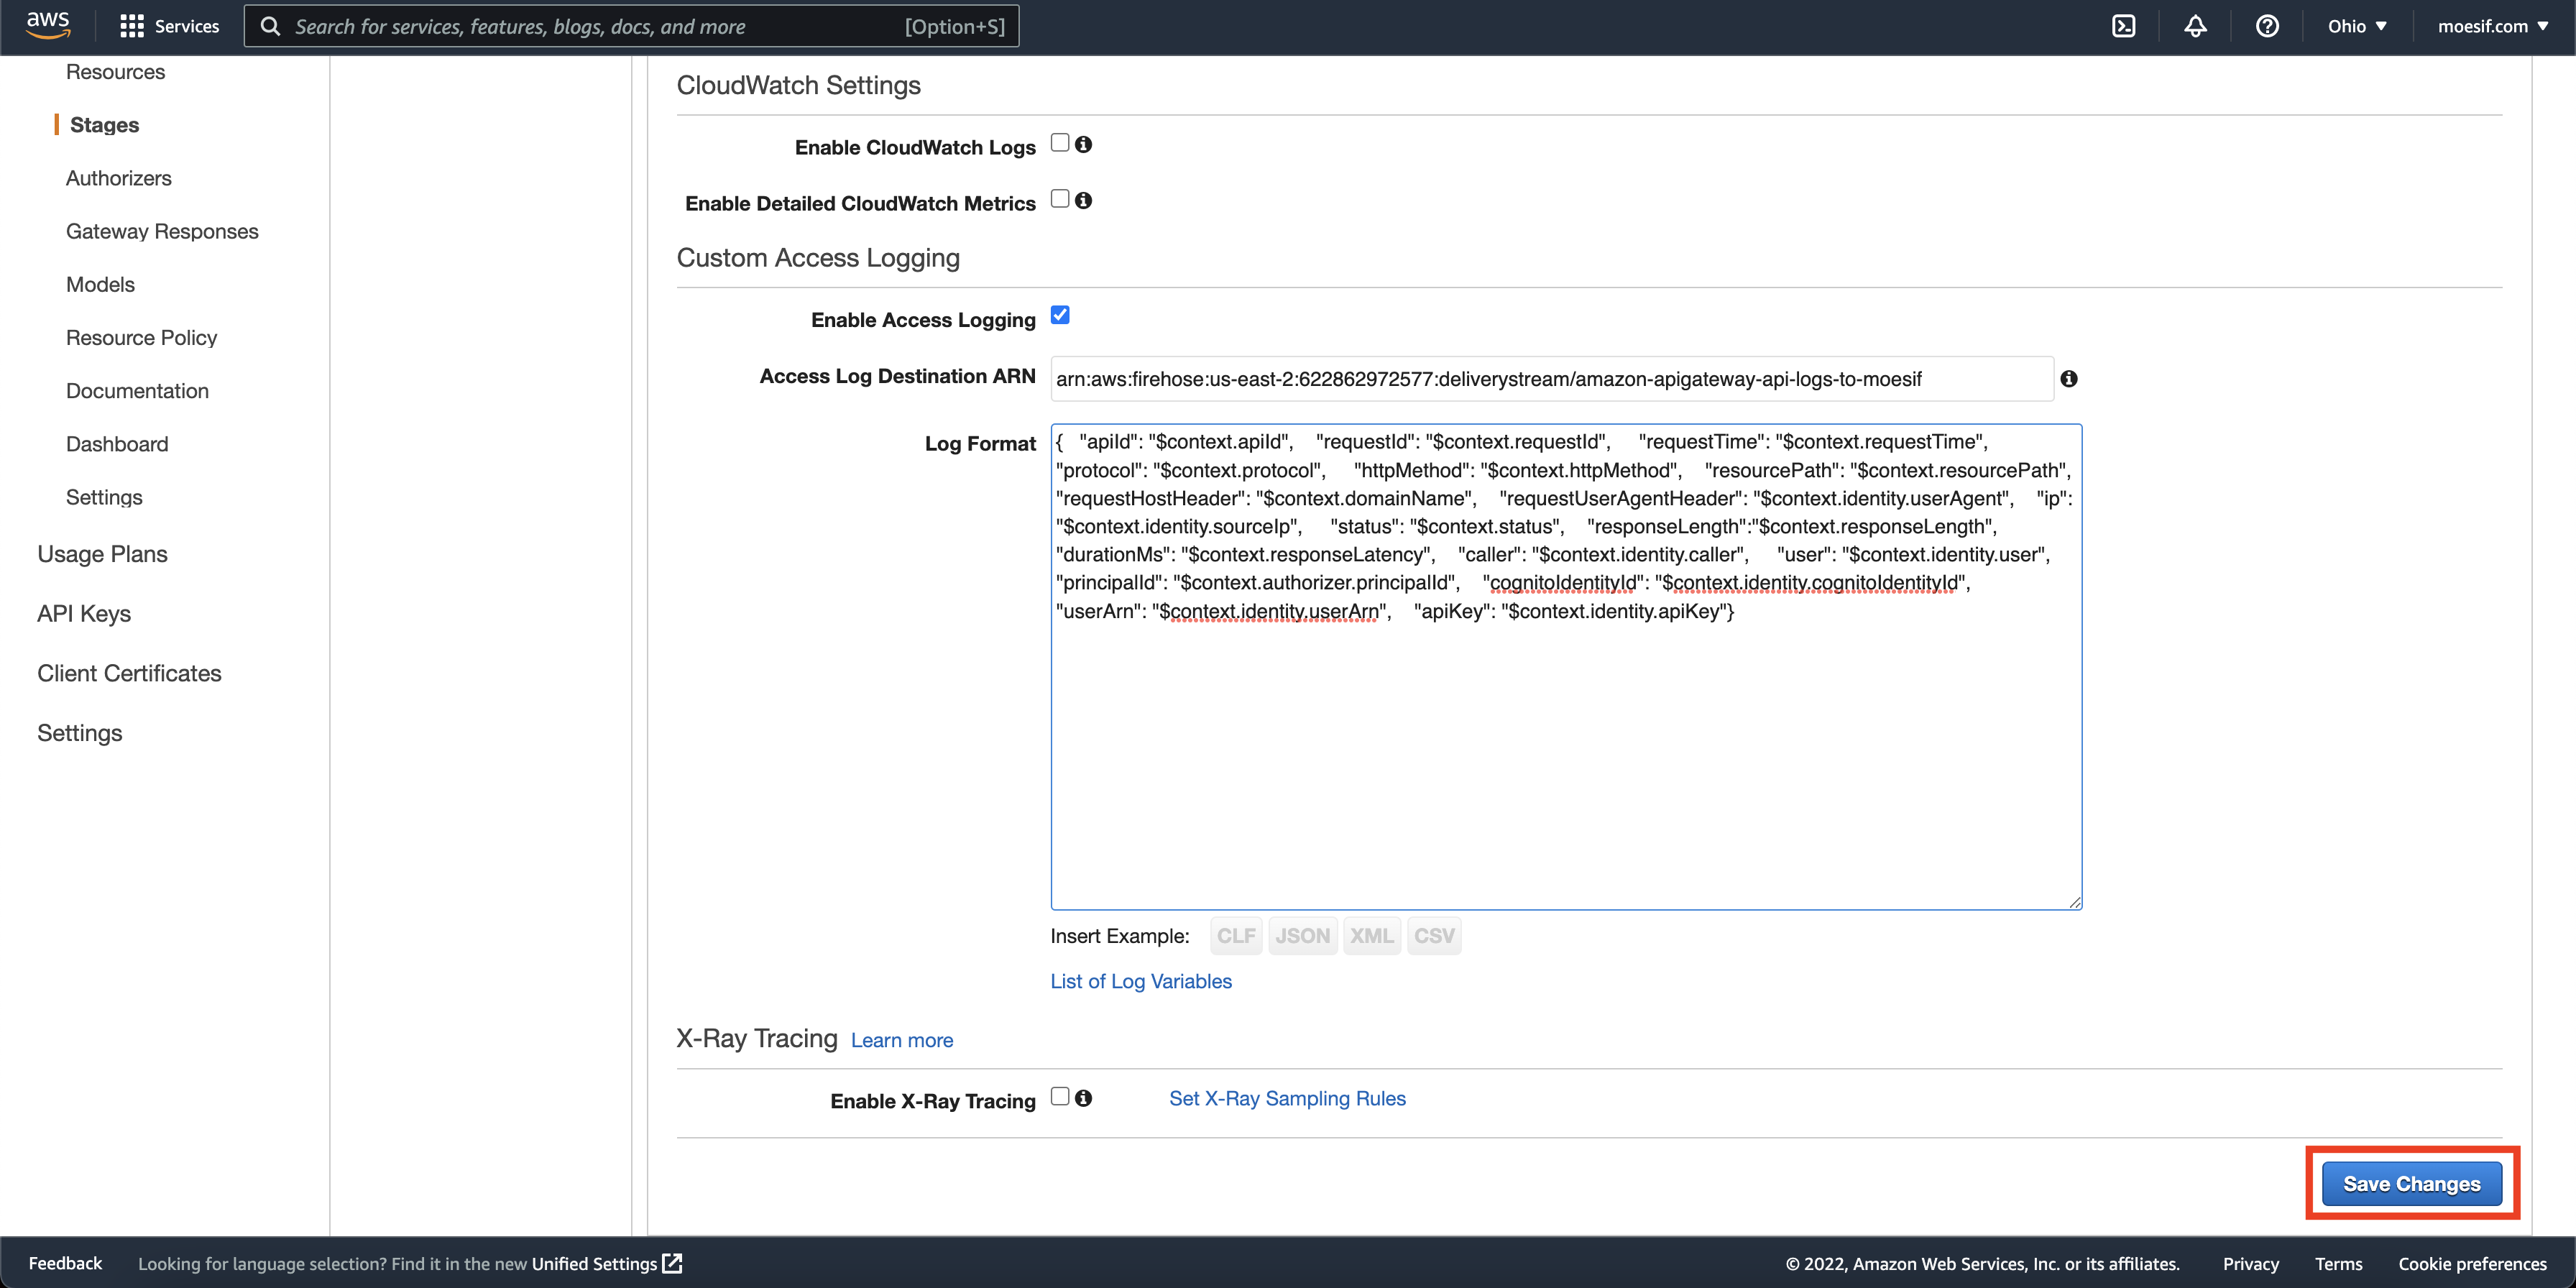
Now that your Kinesis Data Firehose is created, you can add it to your gateway so API analytics are forwarded to Moesif. Navigate to your AWS API Gateway instance. Once there, click on Stages in the left-side menu. On the Stages screen, click on the Stage you’d like to add the Kinesis Firehose to. Then, you’ll click on the Logs/Tracing tab. On this screen, check off Enable Access Logging and in the appearing fields add your Firehose ARN from earlier. The Log Format field can be filled in with the following JSON:
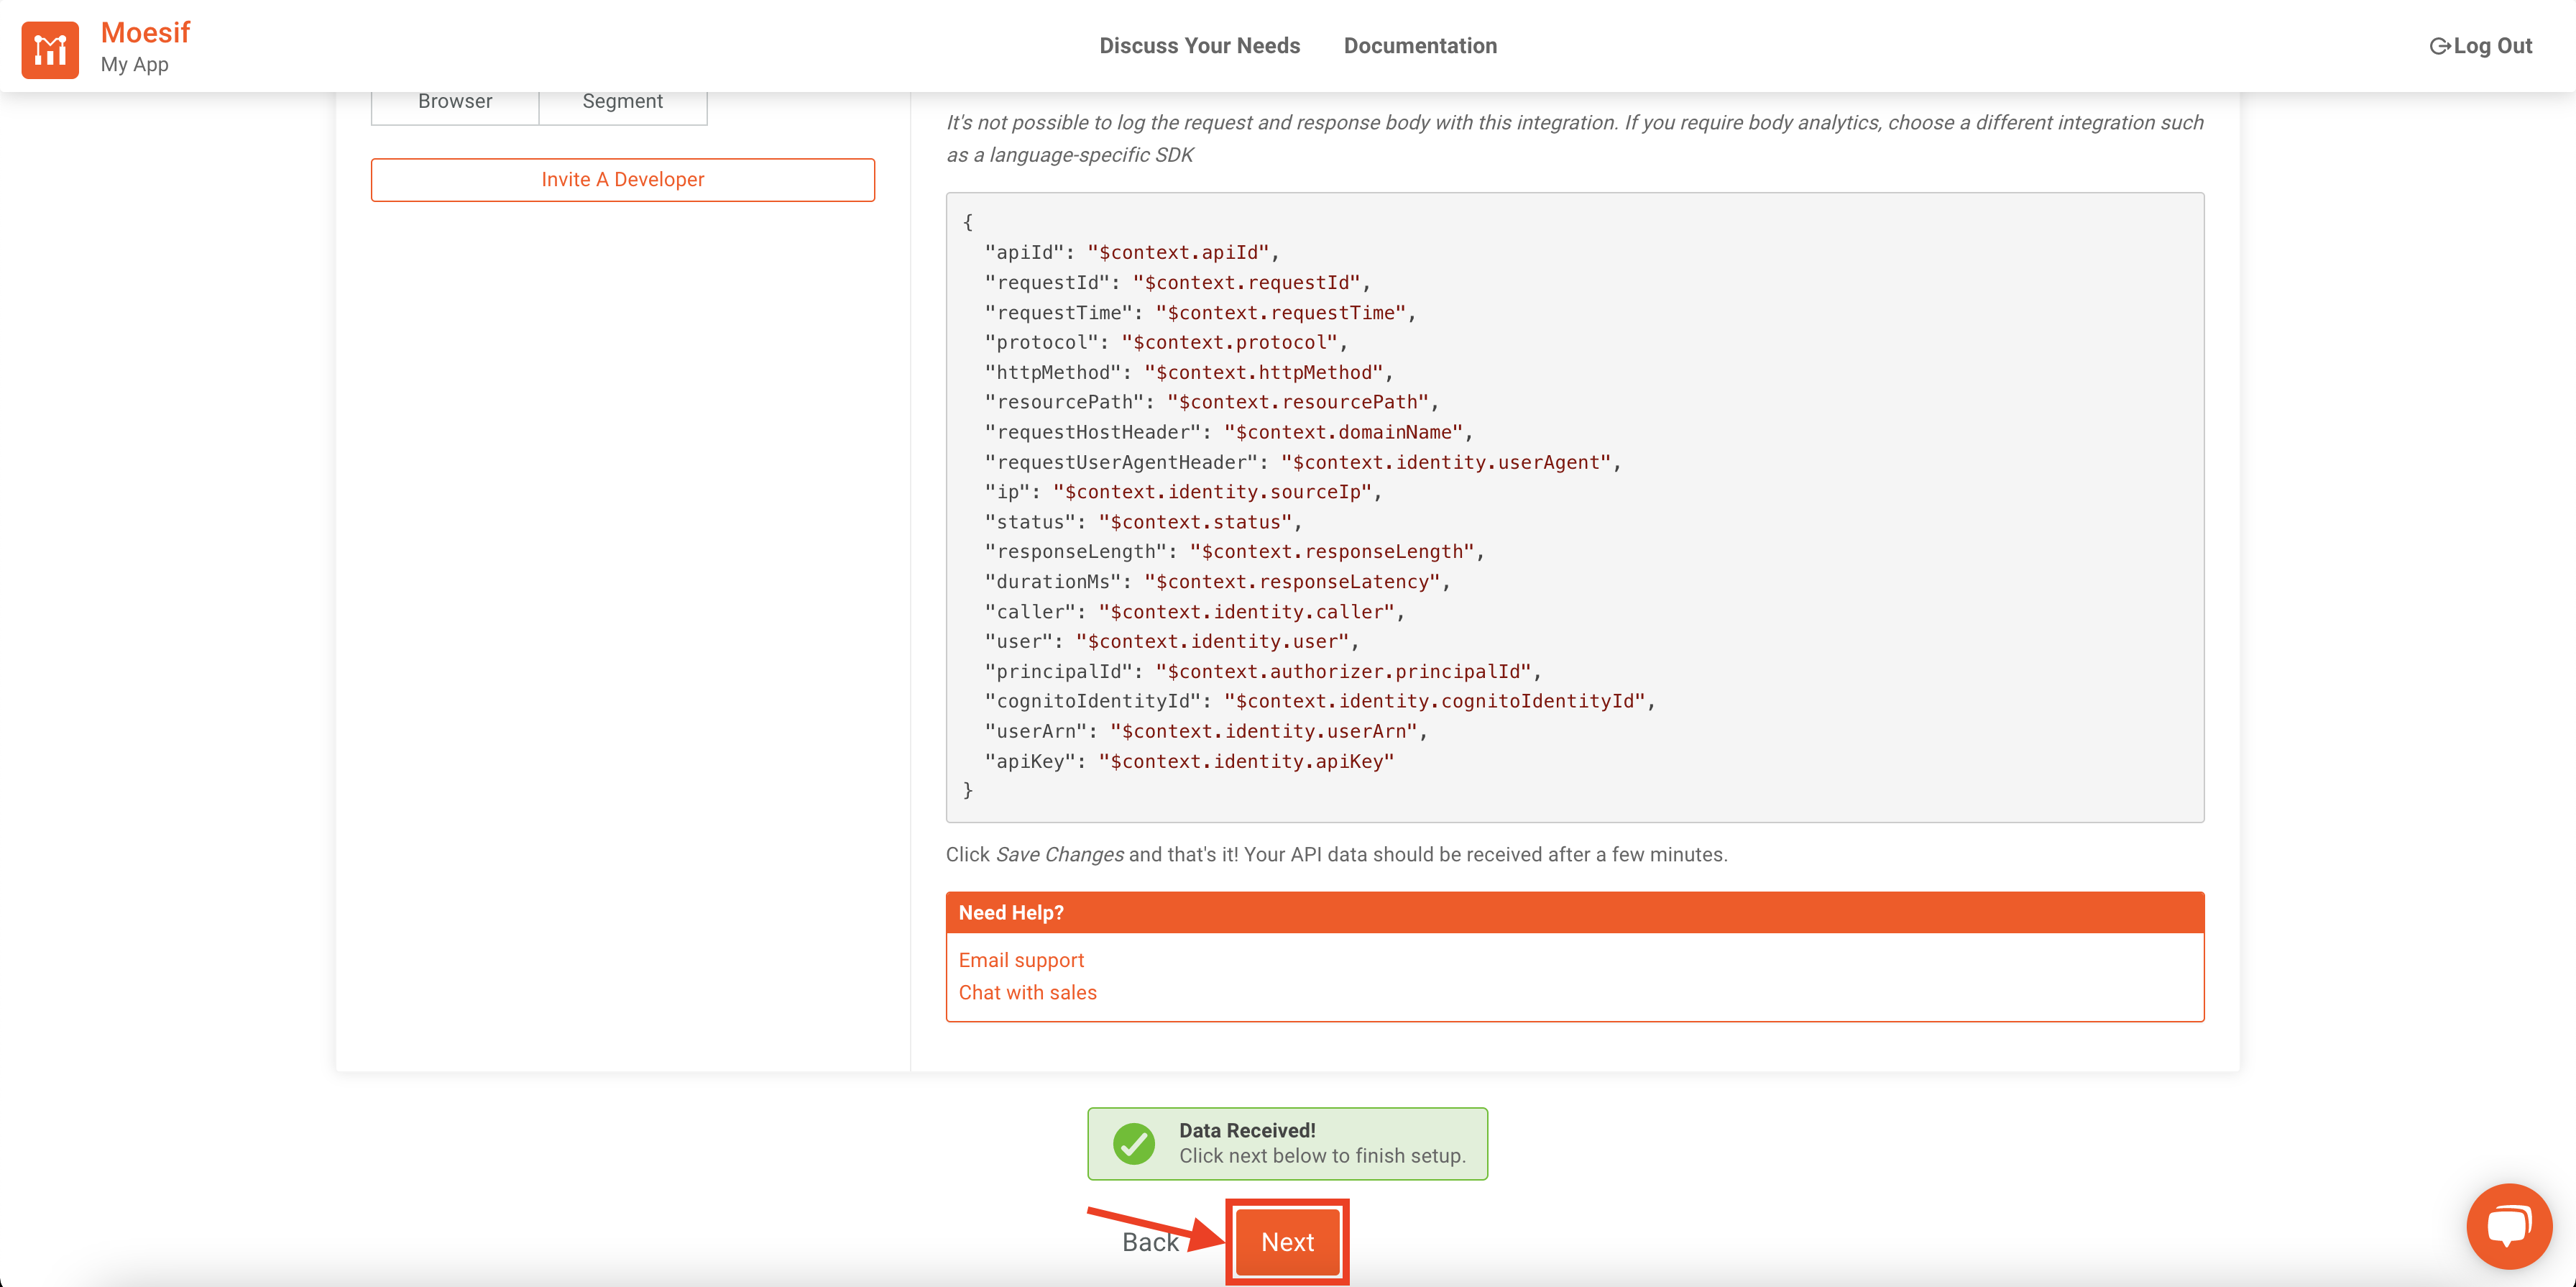
{   "apiId": "$context.apiId",
    "requestId": "$context.requestId",
    "requestTime": "$context.requestTime",
    "protocol": "$context.protocol",
    "httpMethod": "$context.httpMethod",
    "resourcePath": "$context.resourcePath",
    "requestHostHeader": "$context.domainName",
    "requestUserAgentHeader": "$context.identity.userAgent",
    "ip": "$context.identity.sourceIp",
    "status": "$context.status",
    "responseLength":"$context.responseLength",
    "durationMs": "$context.responseLatency",
    "caller": "$context.identity.caller",
    "user": "$context.identity.user",
    "principalId": "$context.authorizer.principalId",
    "cognitoIdentityId": "$context.identity.cognitoIdentityId",
    "userArn": "$context.identity.userArn",
    "apiKey": "$context.identity.apiKey"
}
The settings should now look like this:
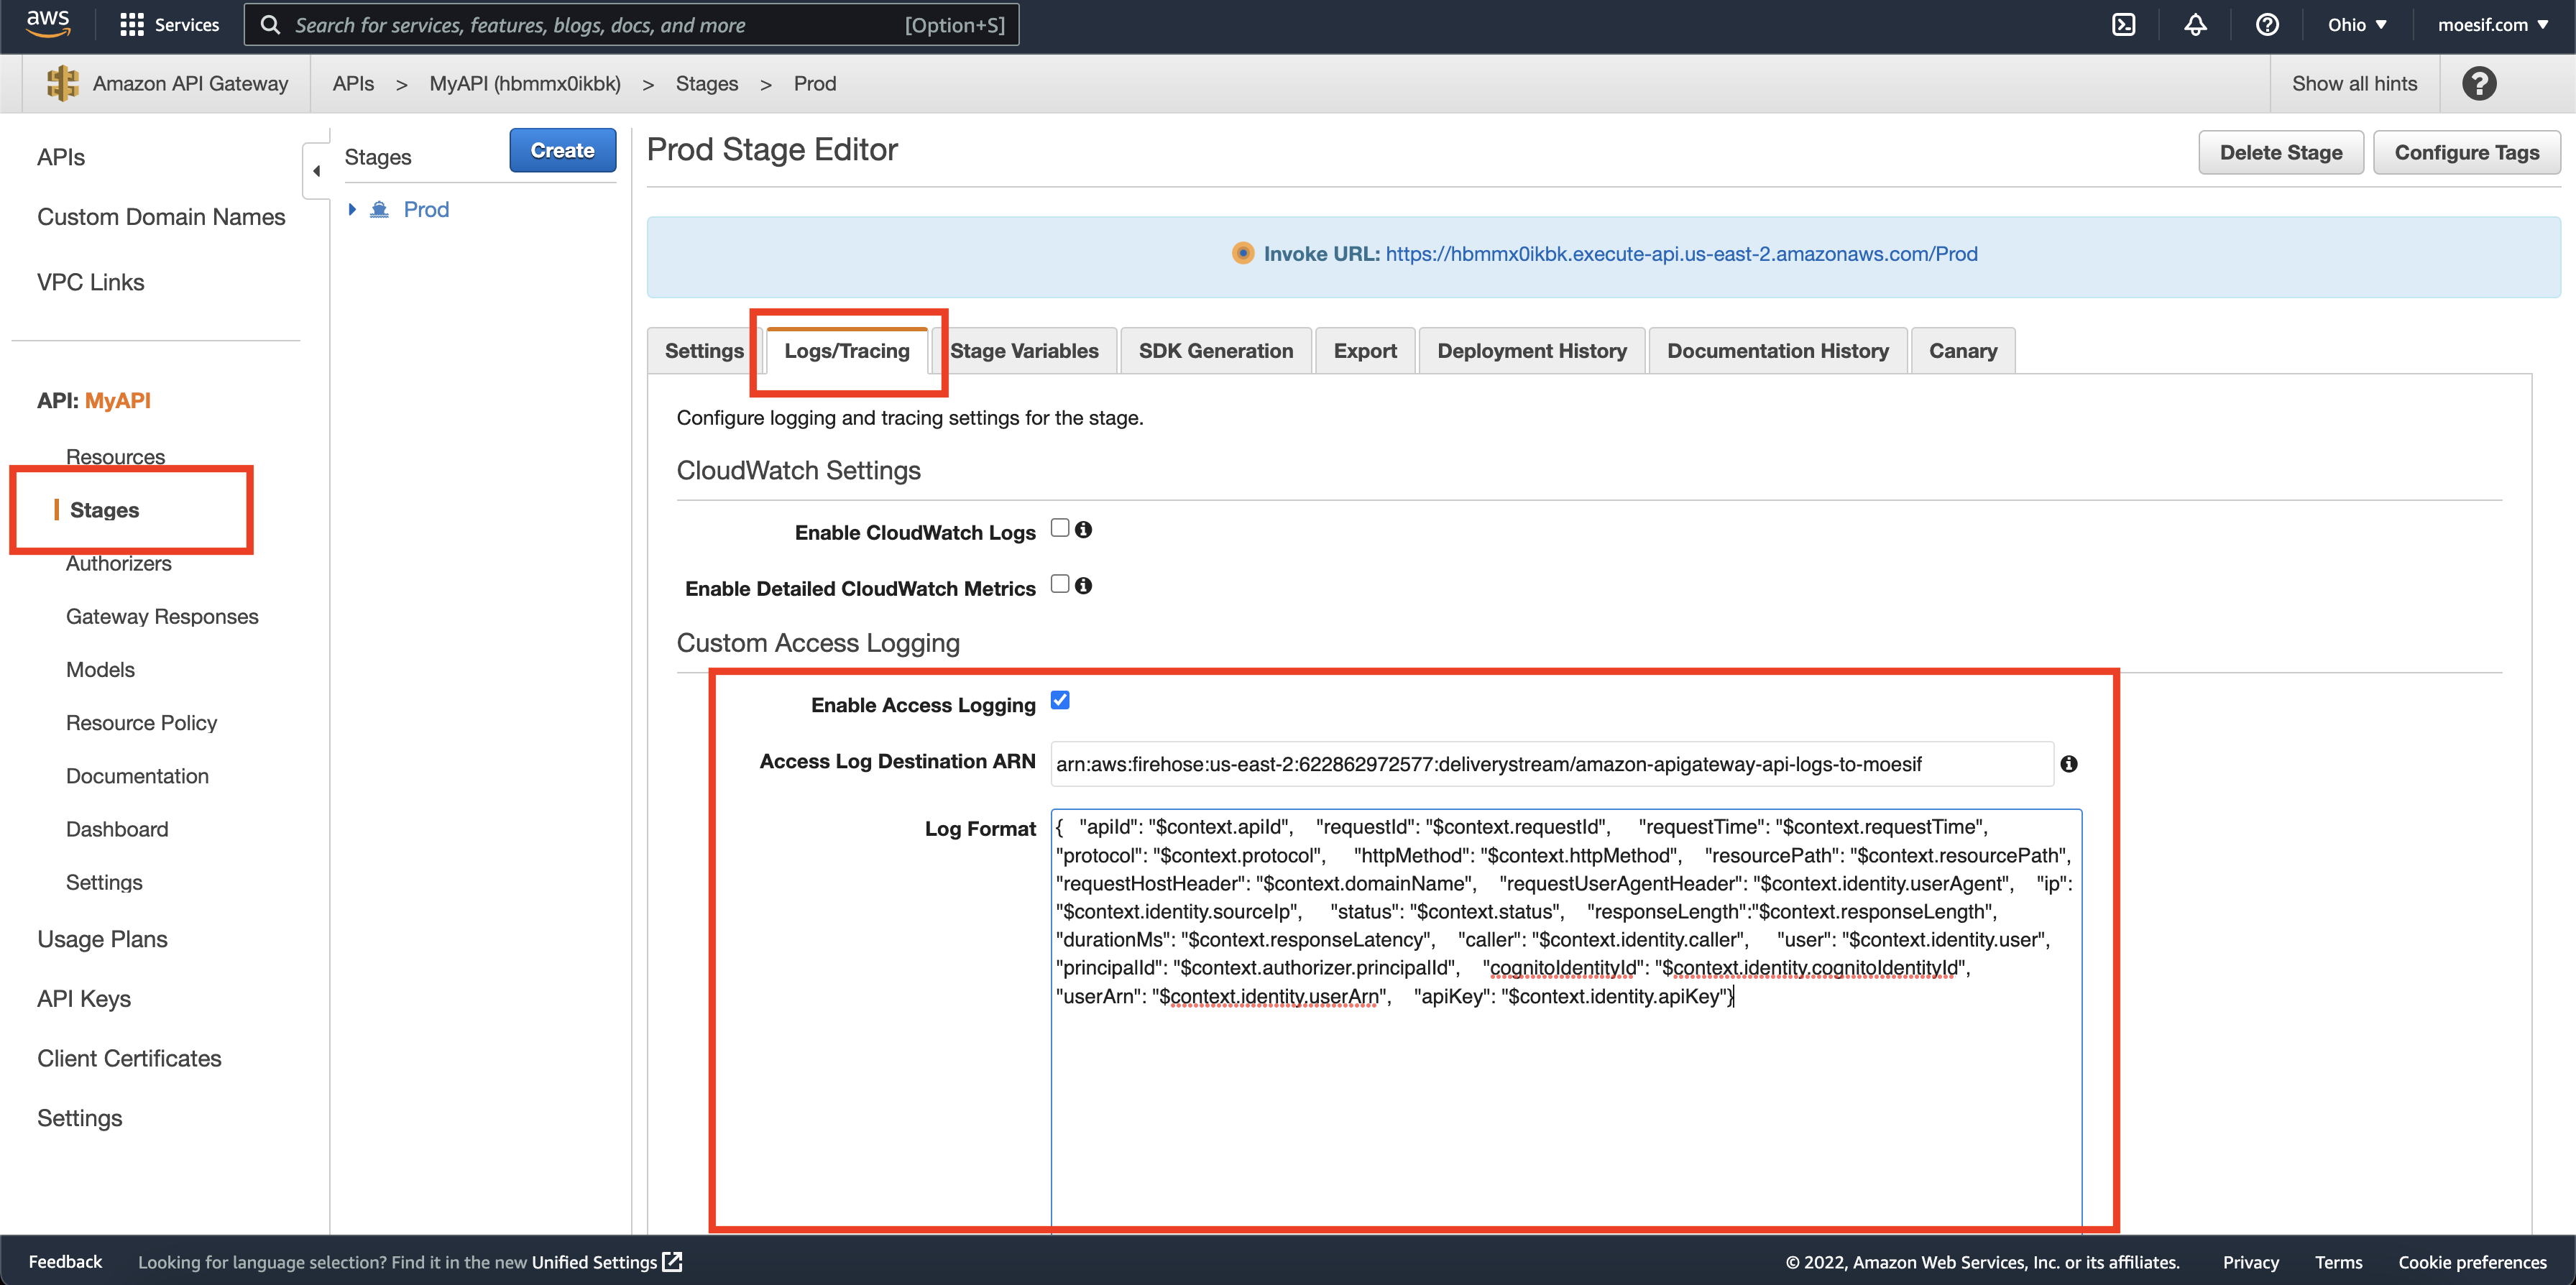
Once these settings are in place, you’ll click Save at the bottom of the screen.
Step 4: Send a Request to Your Endpoint
Using your application or favorite tool, send a request to your endpoint. Once sent, give it a few minutes to propagate into Moesif.
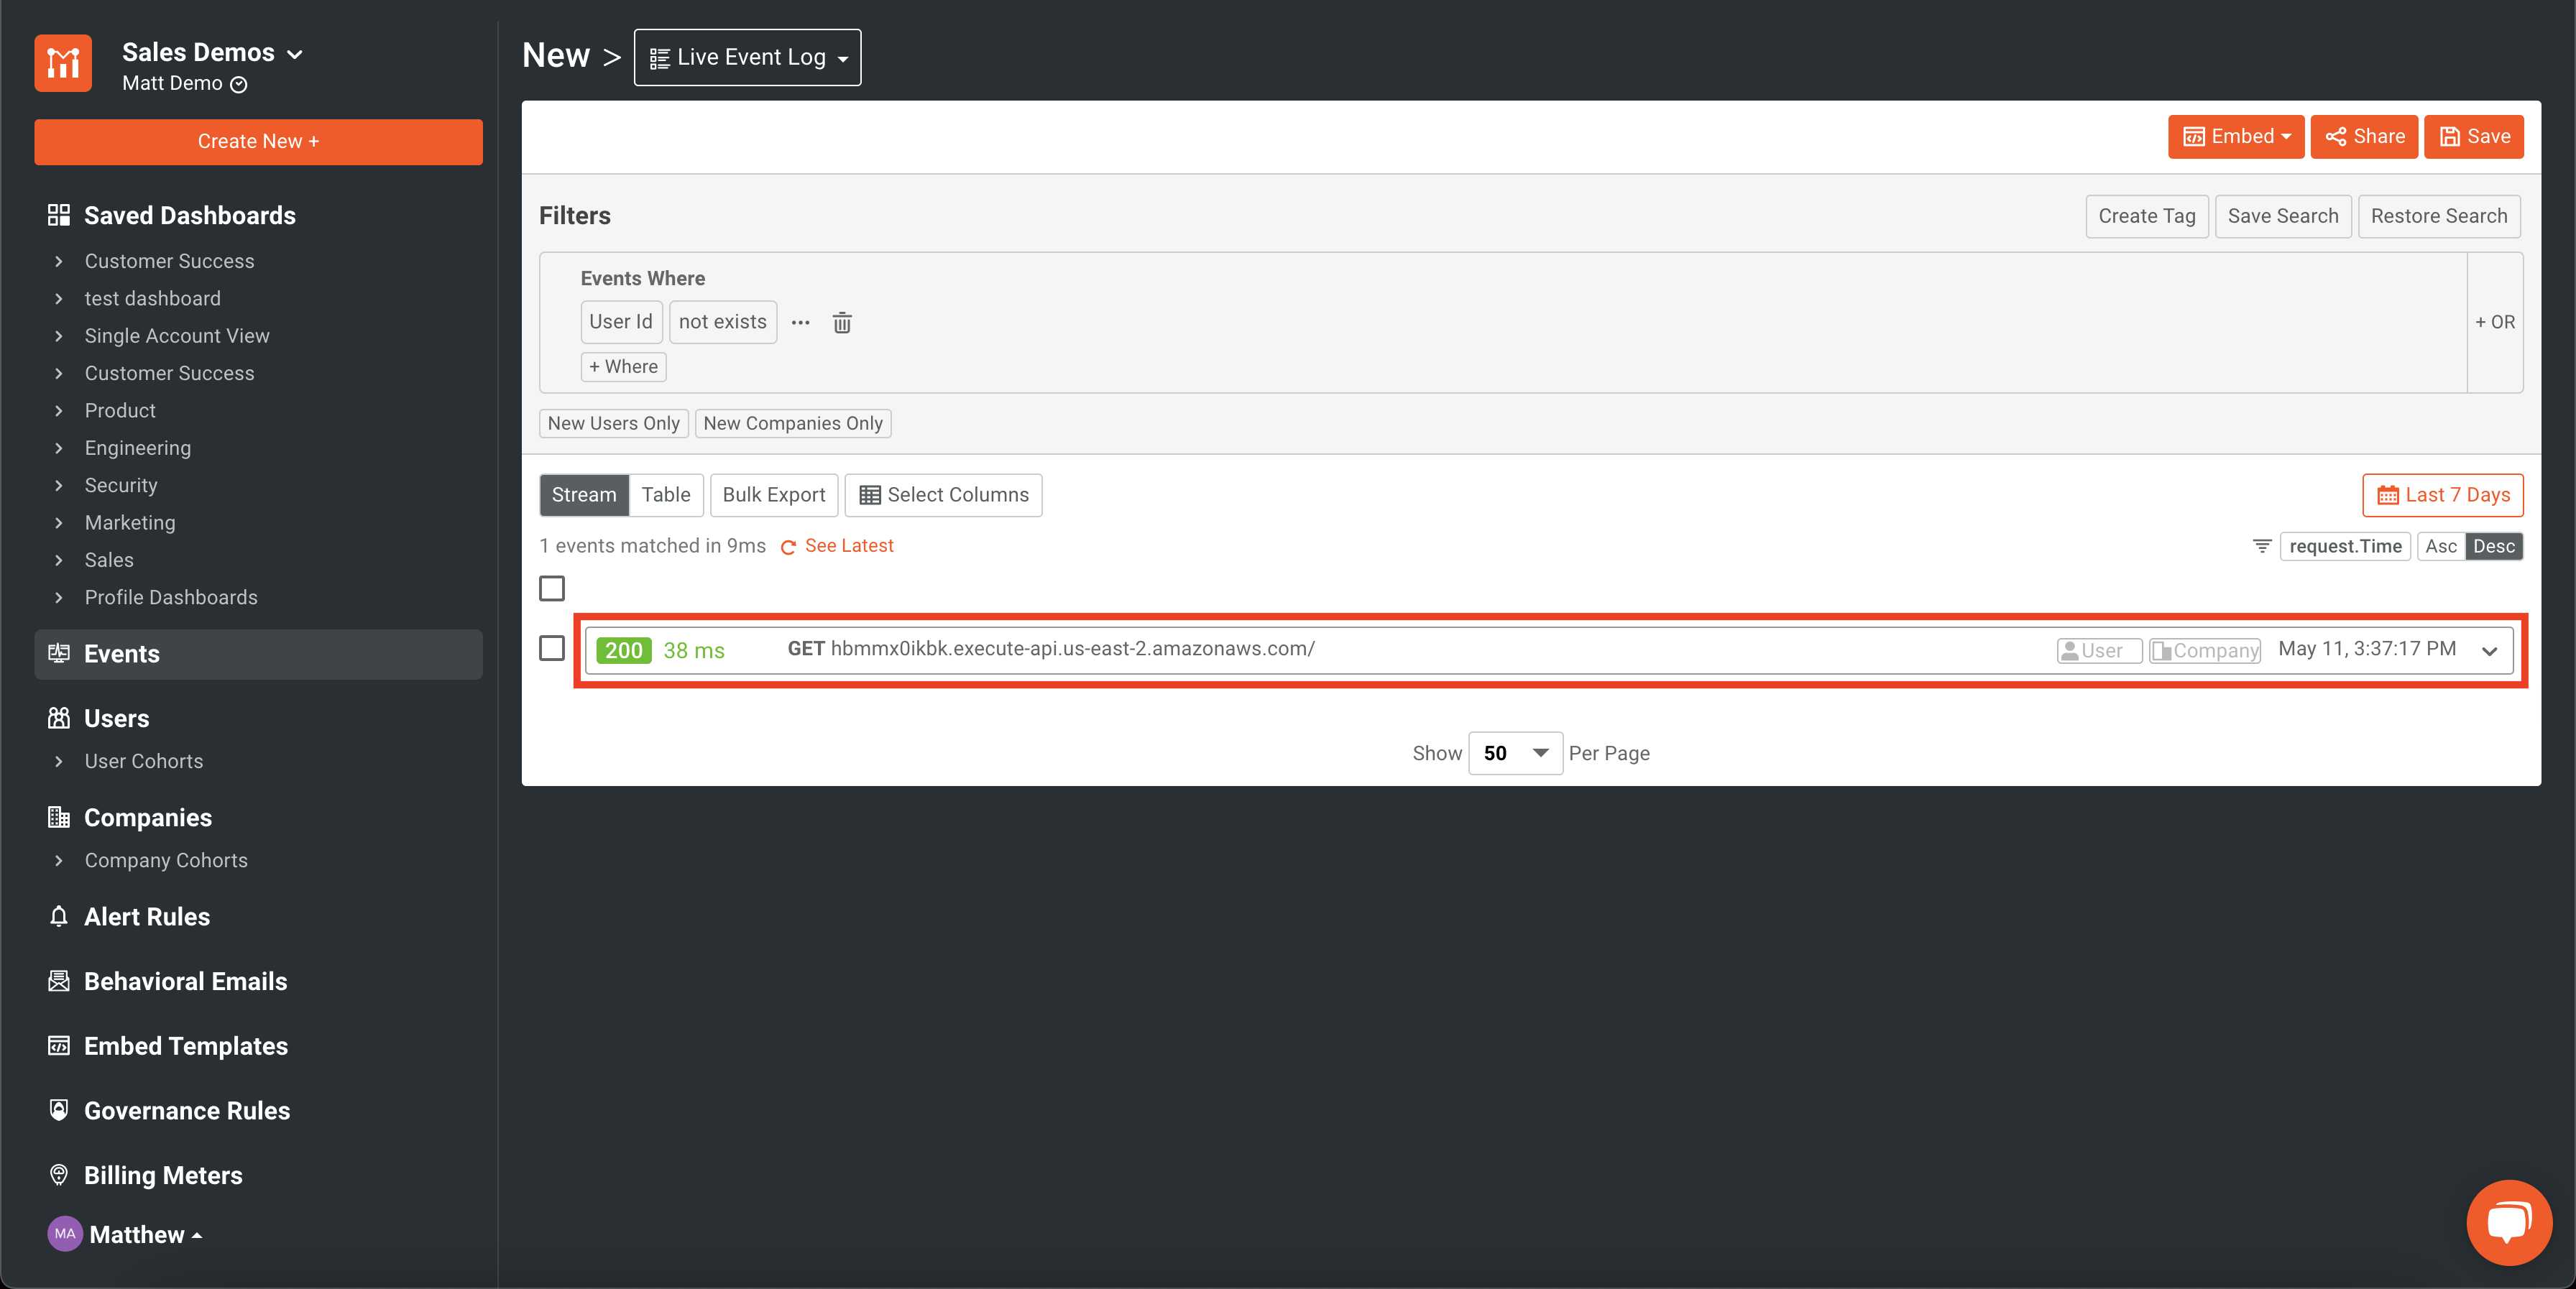
Step 5: Confirm Your Integration
After the request is sent, Moesif should receive the event and data. This may take a few moments for the first request to reflect in the system once sent. Once received, Moesif will confirm that you are ready to move forward. The previous prompt will turn green and show “Data Received!”.
Lastly, scroll to the bottom of the screen and click Next.
Step 6: Invite Your Team
The final step in the setup is to invite your team. The next screen is where you can do this quickly and easily.
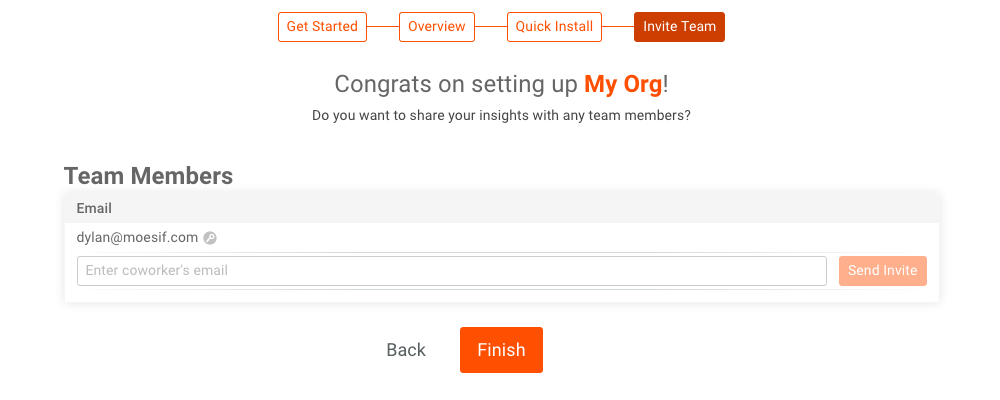
If you’d like to add a team member, simply add their email and click Send Invite.If you don’t have any team members yet or want to skip this step, you can always add team members later.
Once you’ve added all the team members you want, click Finish.
Explore Moesif
You’ve now successfully integrated your API application with Moesif. You should now see the Moesif dashboard in the browser, ready to explore.
Now that your API is integrated and moving data into Moesif you can start to explore. Check out our docs to find everything from API analytics, monitoring and alerts, and more!