Integrating with Zuora
This page assumes that you already have a Zuora Billing account created and have already created products with corresponding plans and prices. To sign-up and create a Zuora account, visit the Zuora website.
How it works
A billing meter is created via the Moesif UI for a specific metric and filter criteria that you want to charge for.
- The filter criteria defines what the meter should include such as specific endpoints, certain customers, or other filter criteria.
- The metric is what is metered. It could be number of API calls, unique users, an aggregation on a header or body field, or any other metric trackable by Moesif.
Once the meter is created, Moesif will automatically meter the usage for each company and charge your customers via Zuora. Moesif billing meters support a variety of billing models including prepaid, postpaid, Pay As You Go (PAYG) and more. If you have different features or metrics you need to charge on, you can create multiple meters in Moesif, each linked to a different Plan and Price in Zuora. The integration also syncs subscription and revenue data from Zuora to Moesif so you can understand how API usage translates to revenue.

Prerequisites
- You must have permissions to create new users in Zuora such as a Platform Admin.
- You must have permissions to create Custom Events in Zuora such as a Platform Admin.
Create a Webhook in Zuora
A custom event type needs to be created in Zuora in order for Moesif to receive all the data it needs to access Zuora plans and prices and send usage data.
1. Navigate to the area ‘Create Custom Event’, following the screenshots below
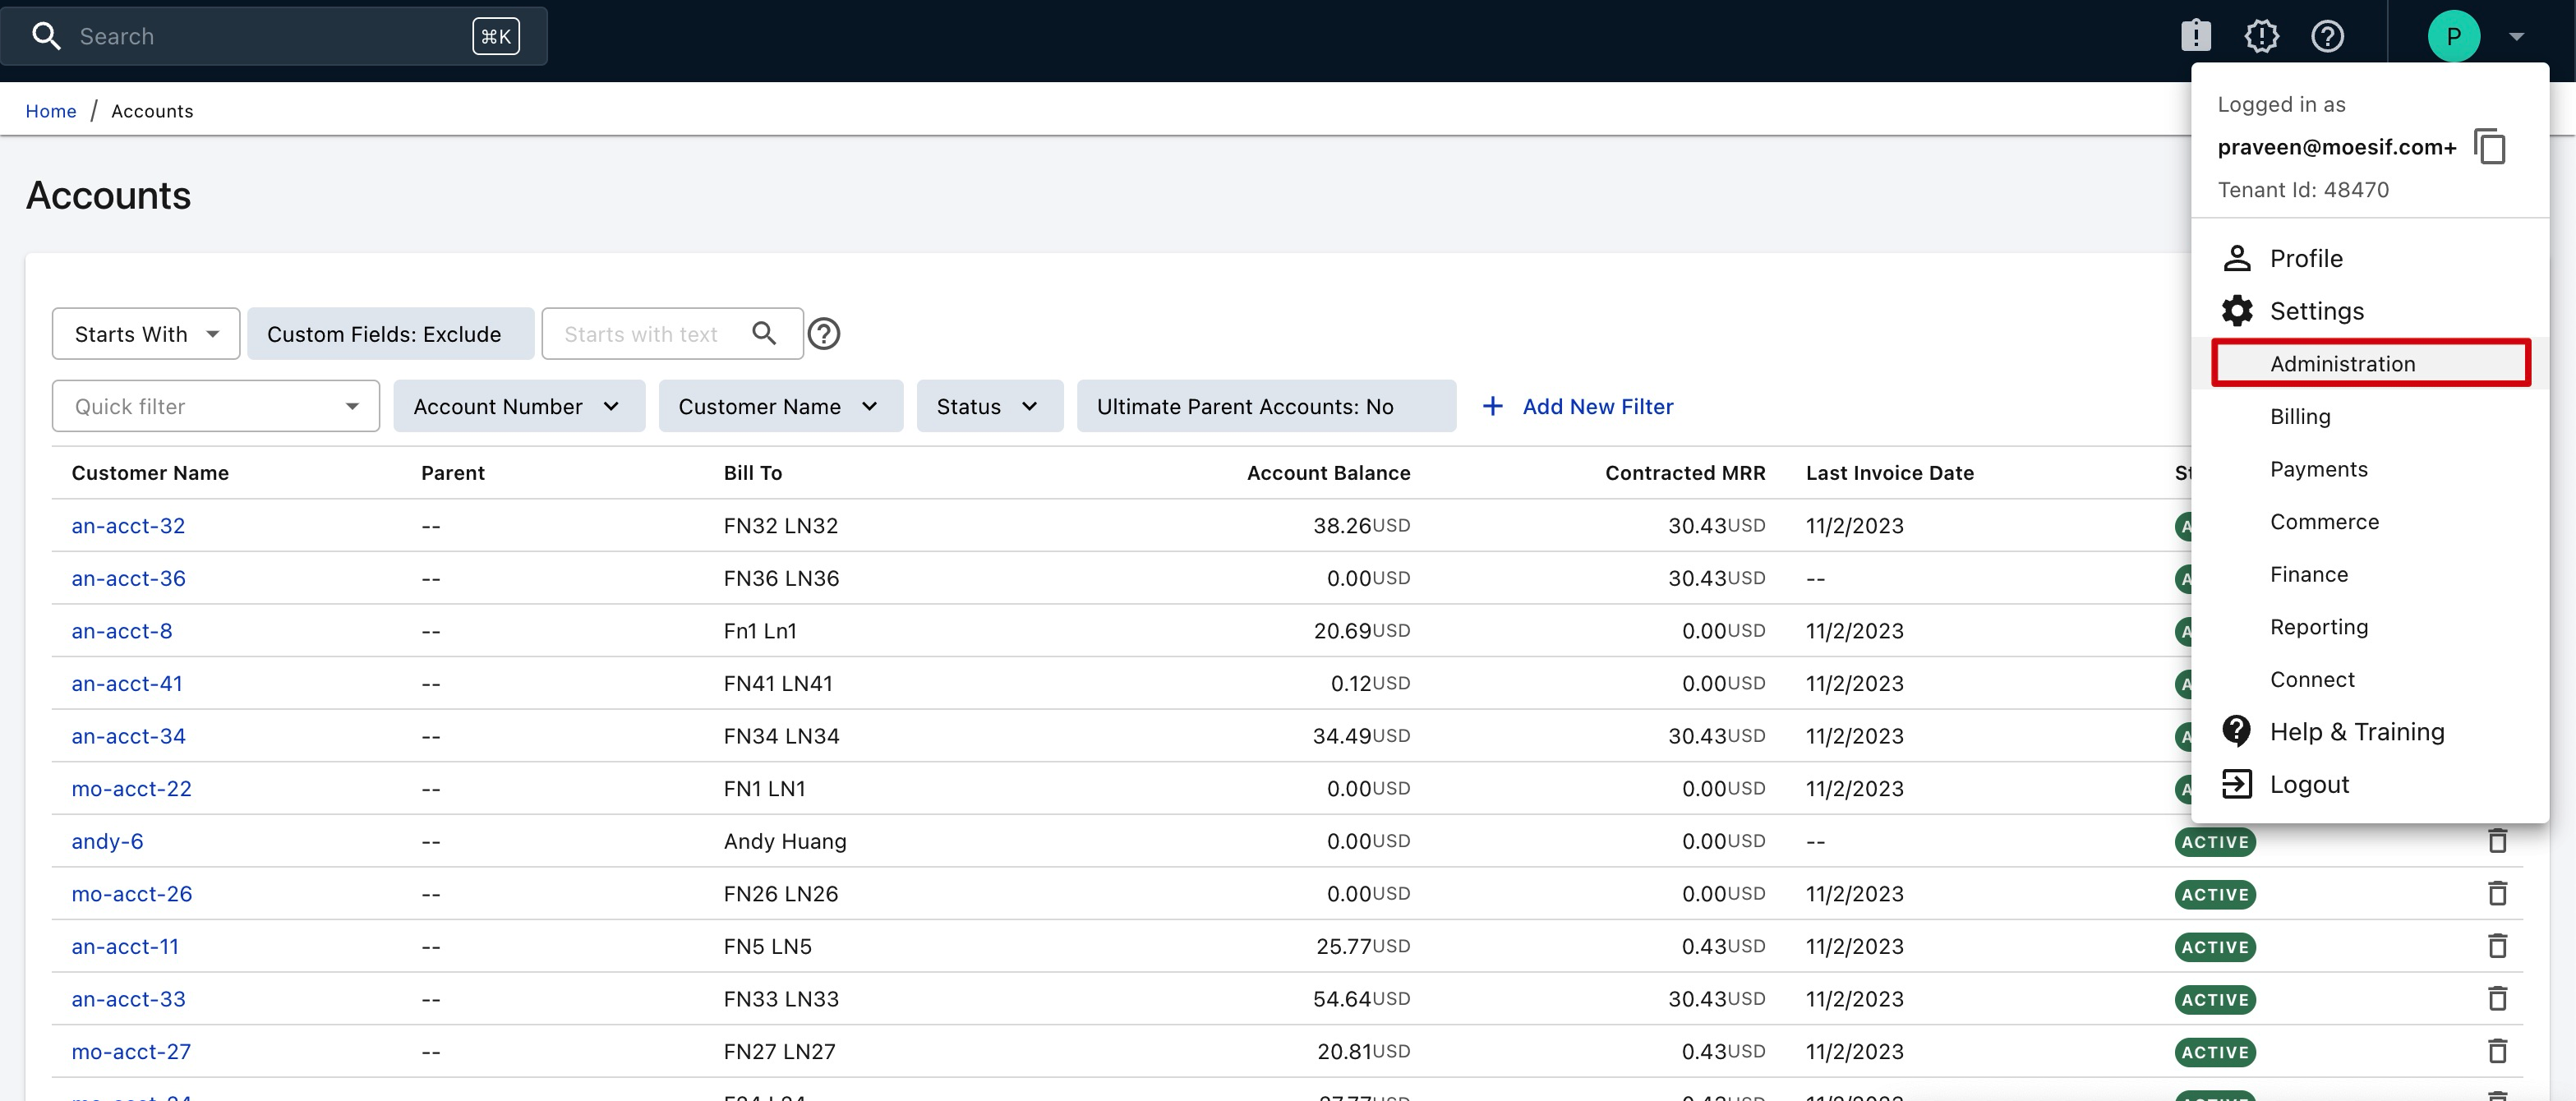
While logged in to your Zuora Billing Account, click the top-right avatar menu and navigate to the Administration option.
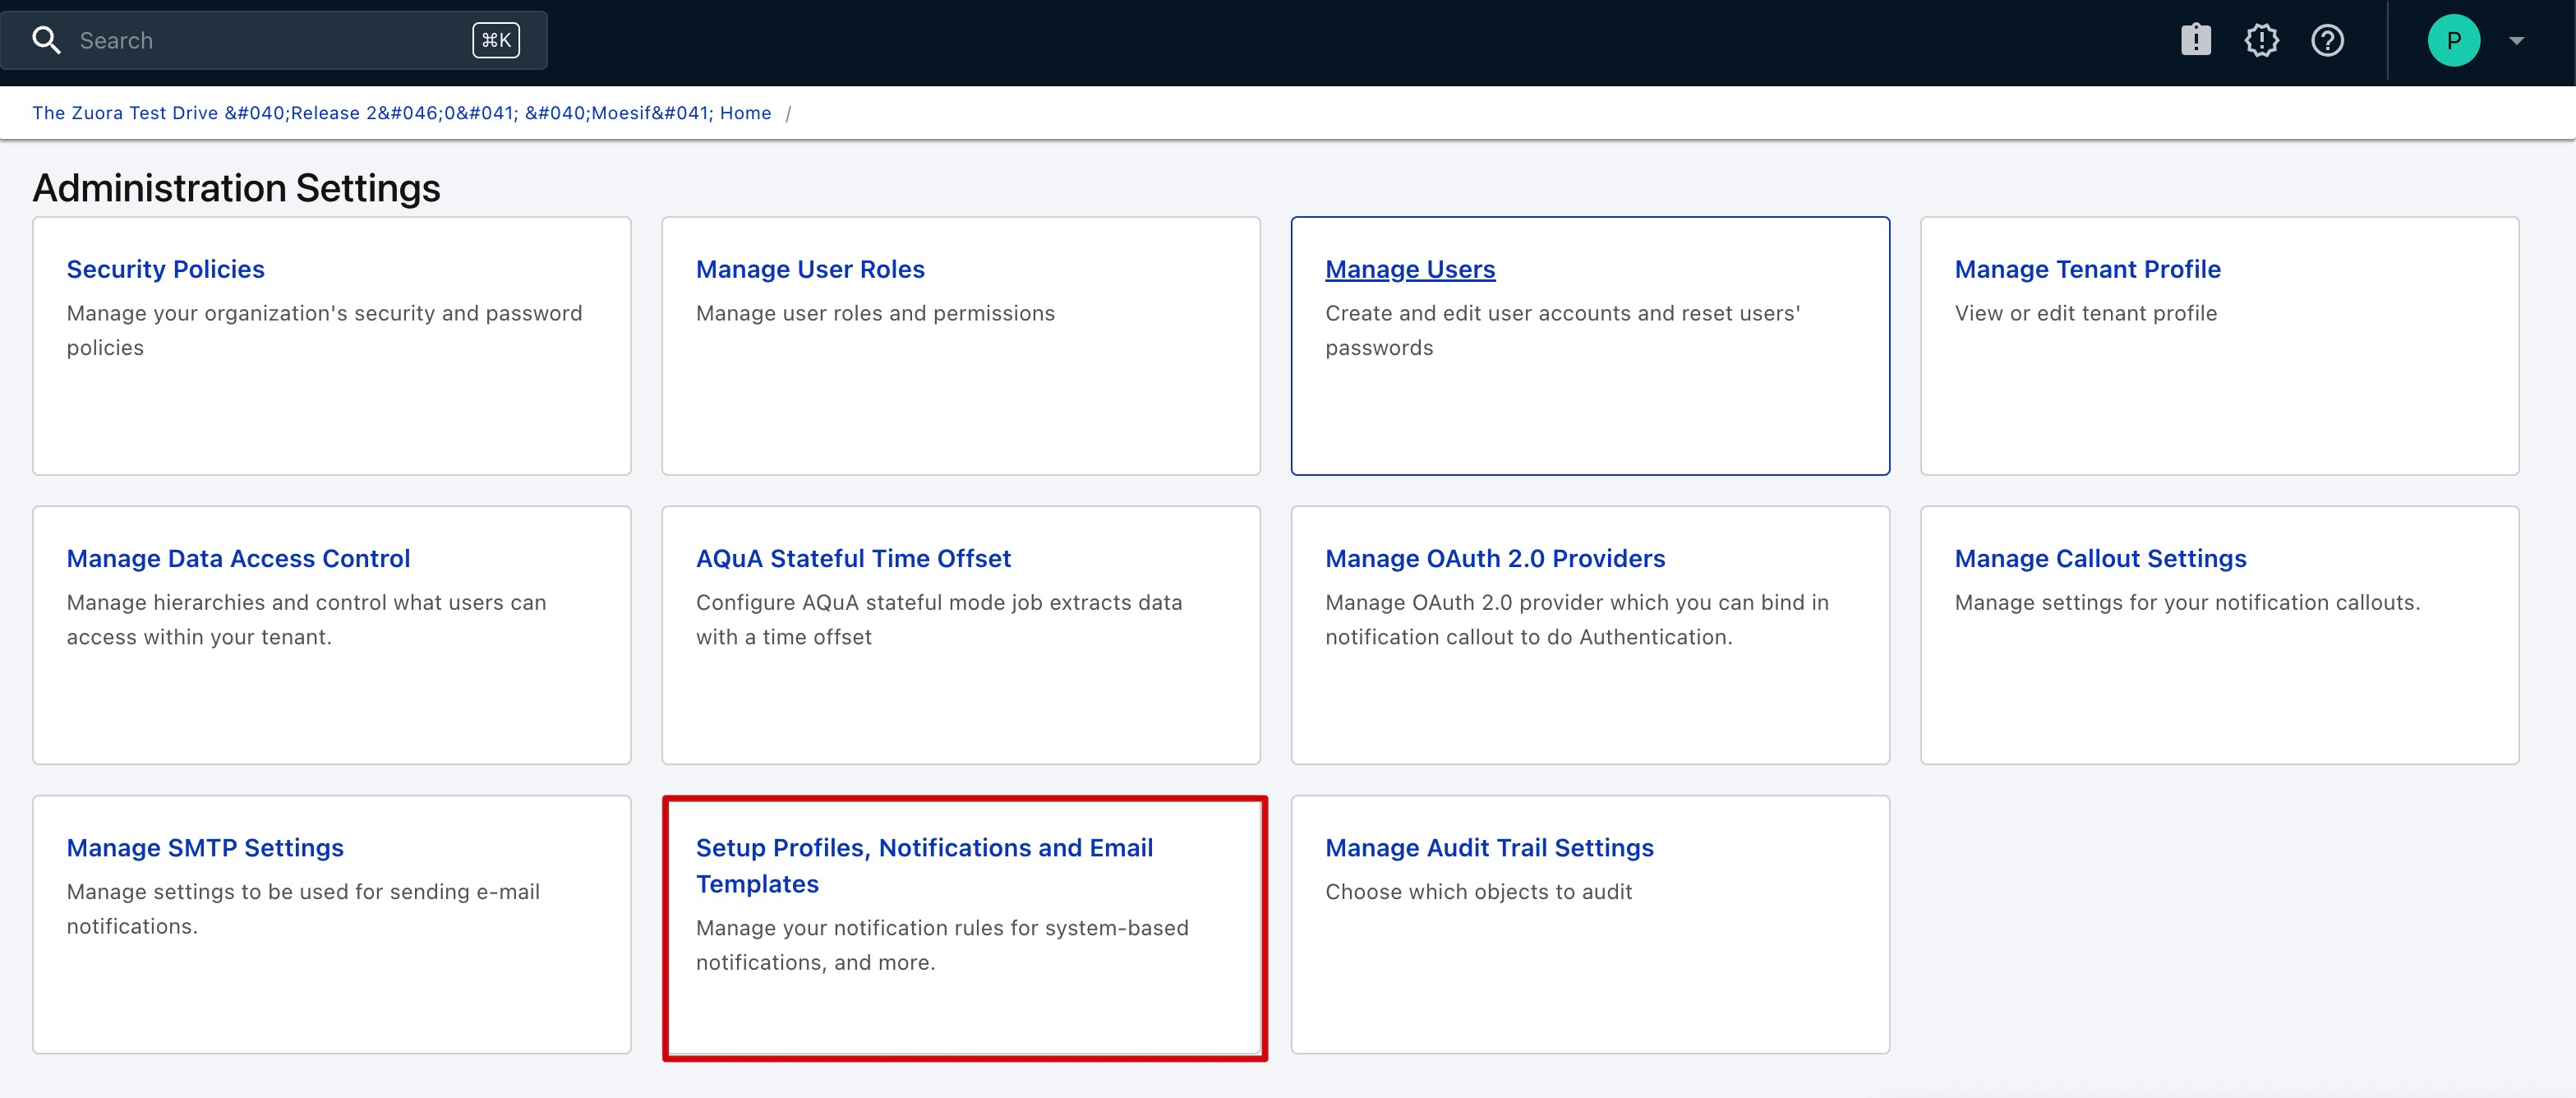
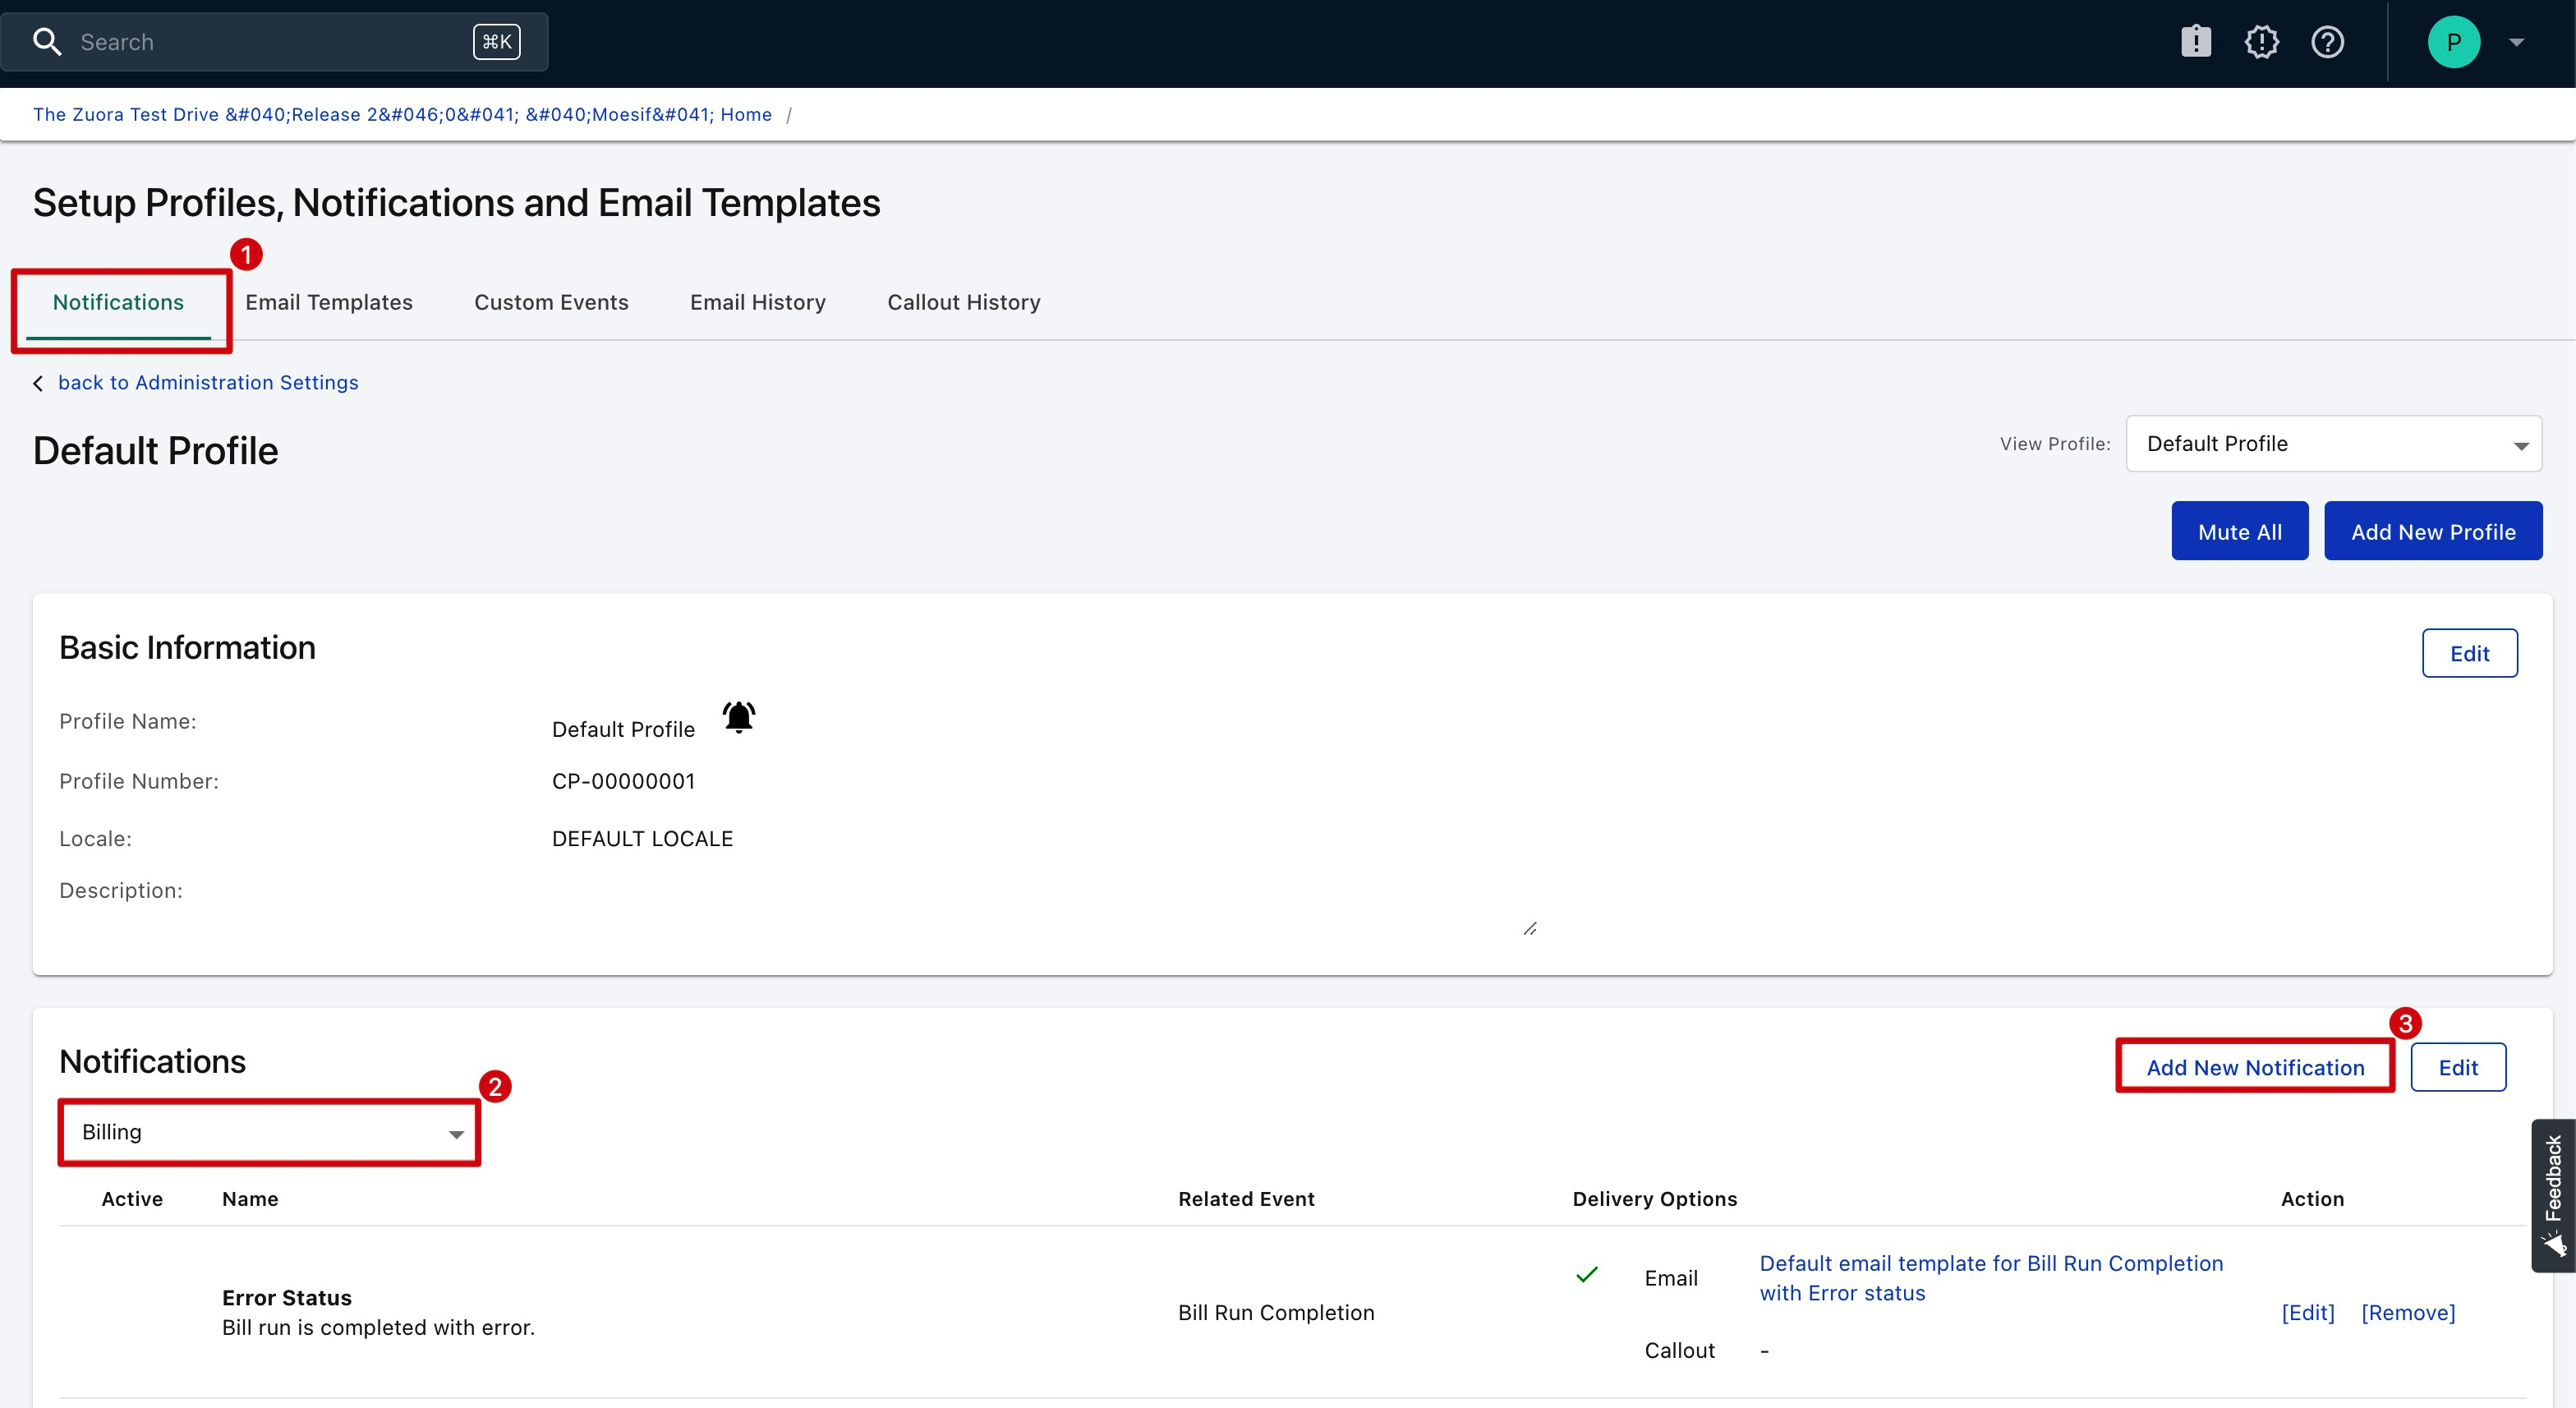
Click on Setup Profiles, Notifications and Email Templates
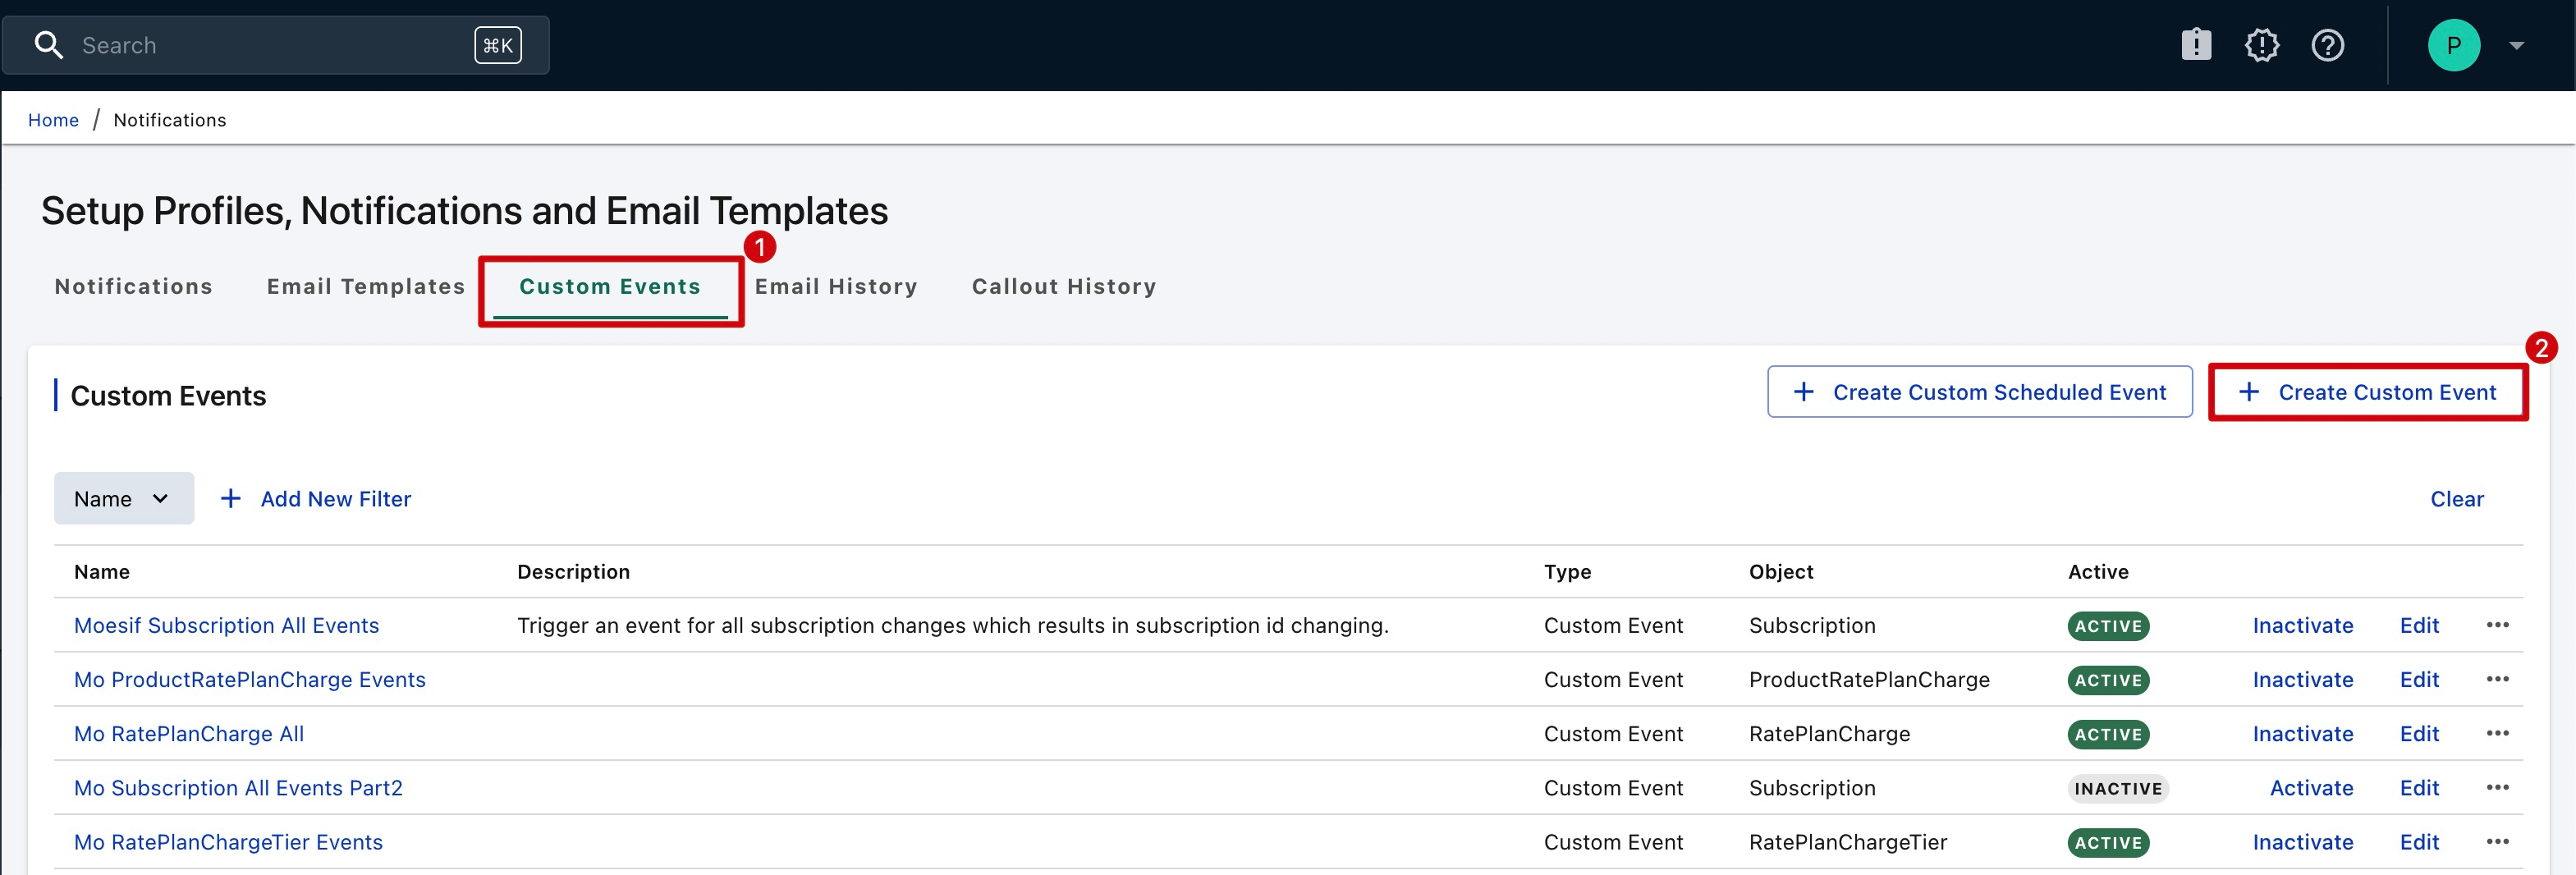
Select Custom Events tab from the top of the screen and click on Create Custom Event button on the right side. It will launch create custom event modal.
2. Create Custom Event for ‘Subscription’
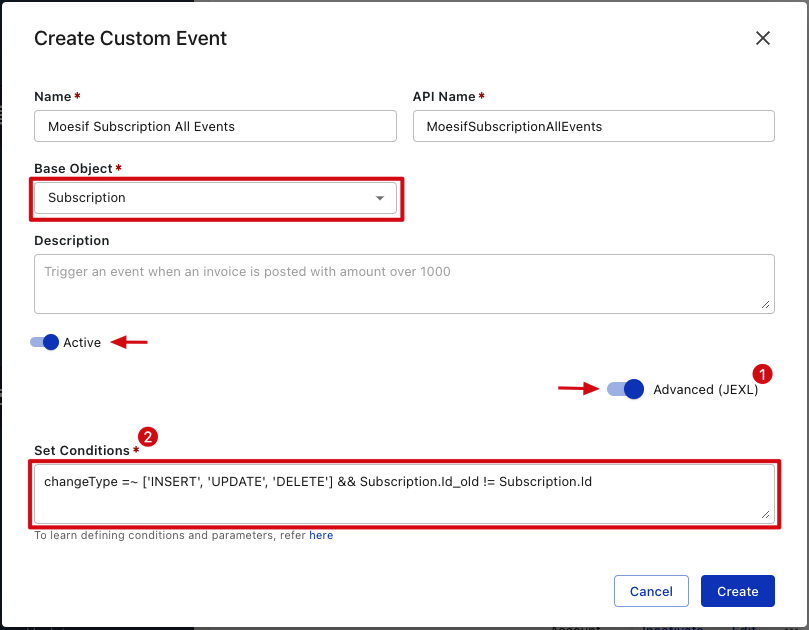
- Name and API Name can be any arbitrary name.
- API Name should not contain any whitespace.
- Advanced (JEXL) needs to be selected to enable freeform entry for Set Conditions
- Paste the following into Set Conditions:
changeType =~ ['INSERT', 'UPDATE', 'DELETE'] && Subscription.Id_old != Subscription.Id
- Paste the following into Set Conditions:
- Click the Create button once all the fields are configured correctly.
Now that the custom event has been created, we will create a notification that is triggered by the event.
3. Follow the screenshot below to navigate to Add New Notification for Billing Notifications
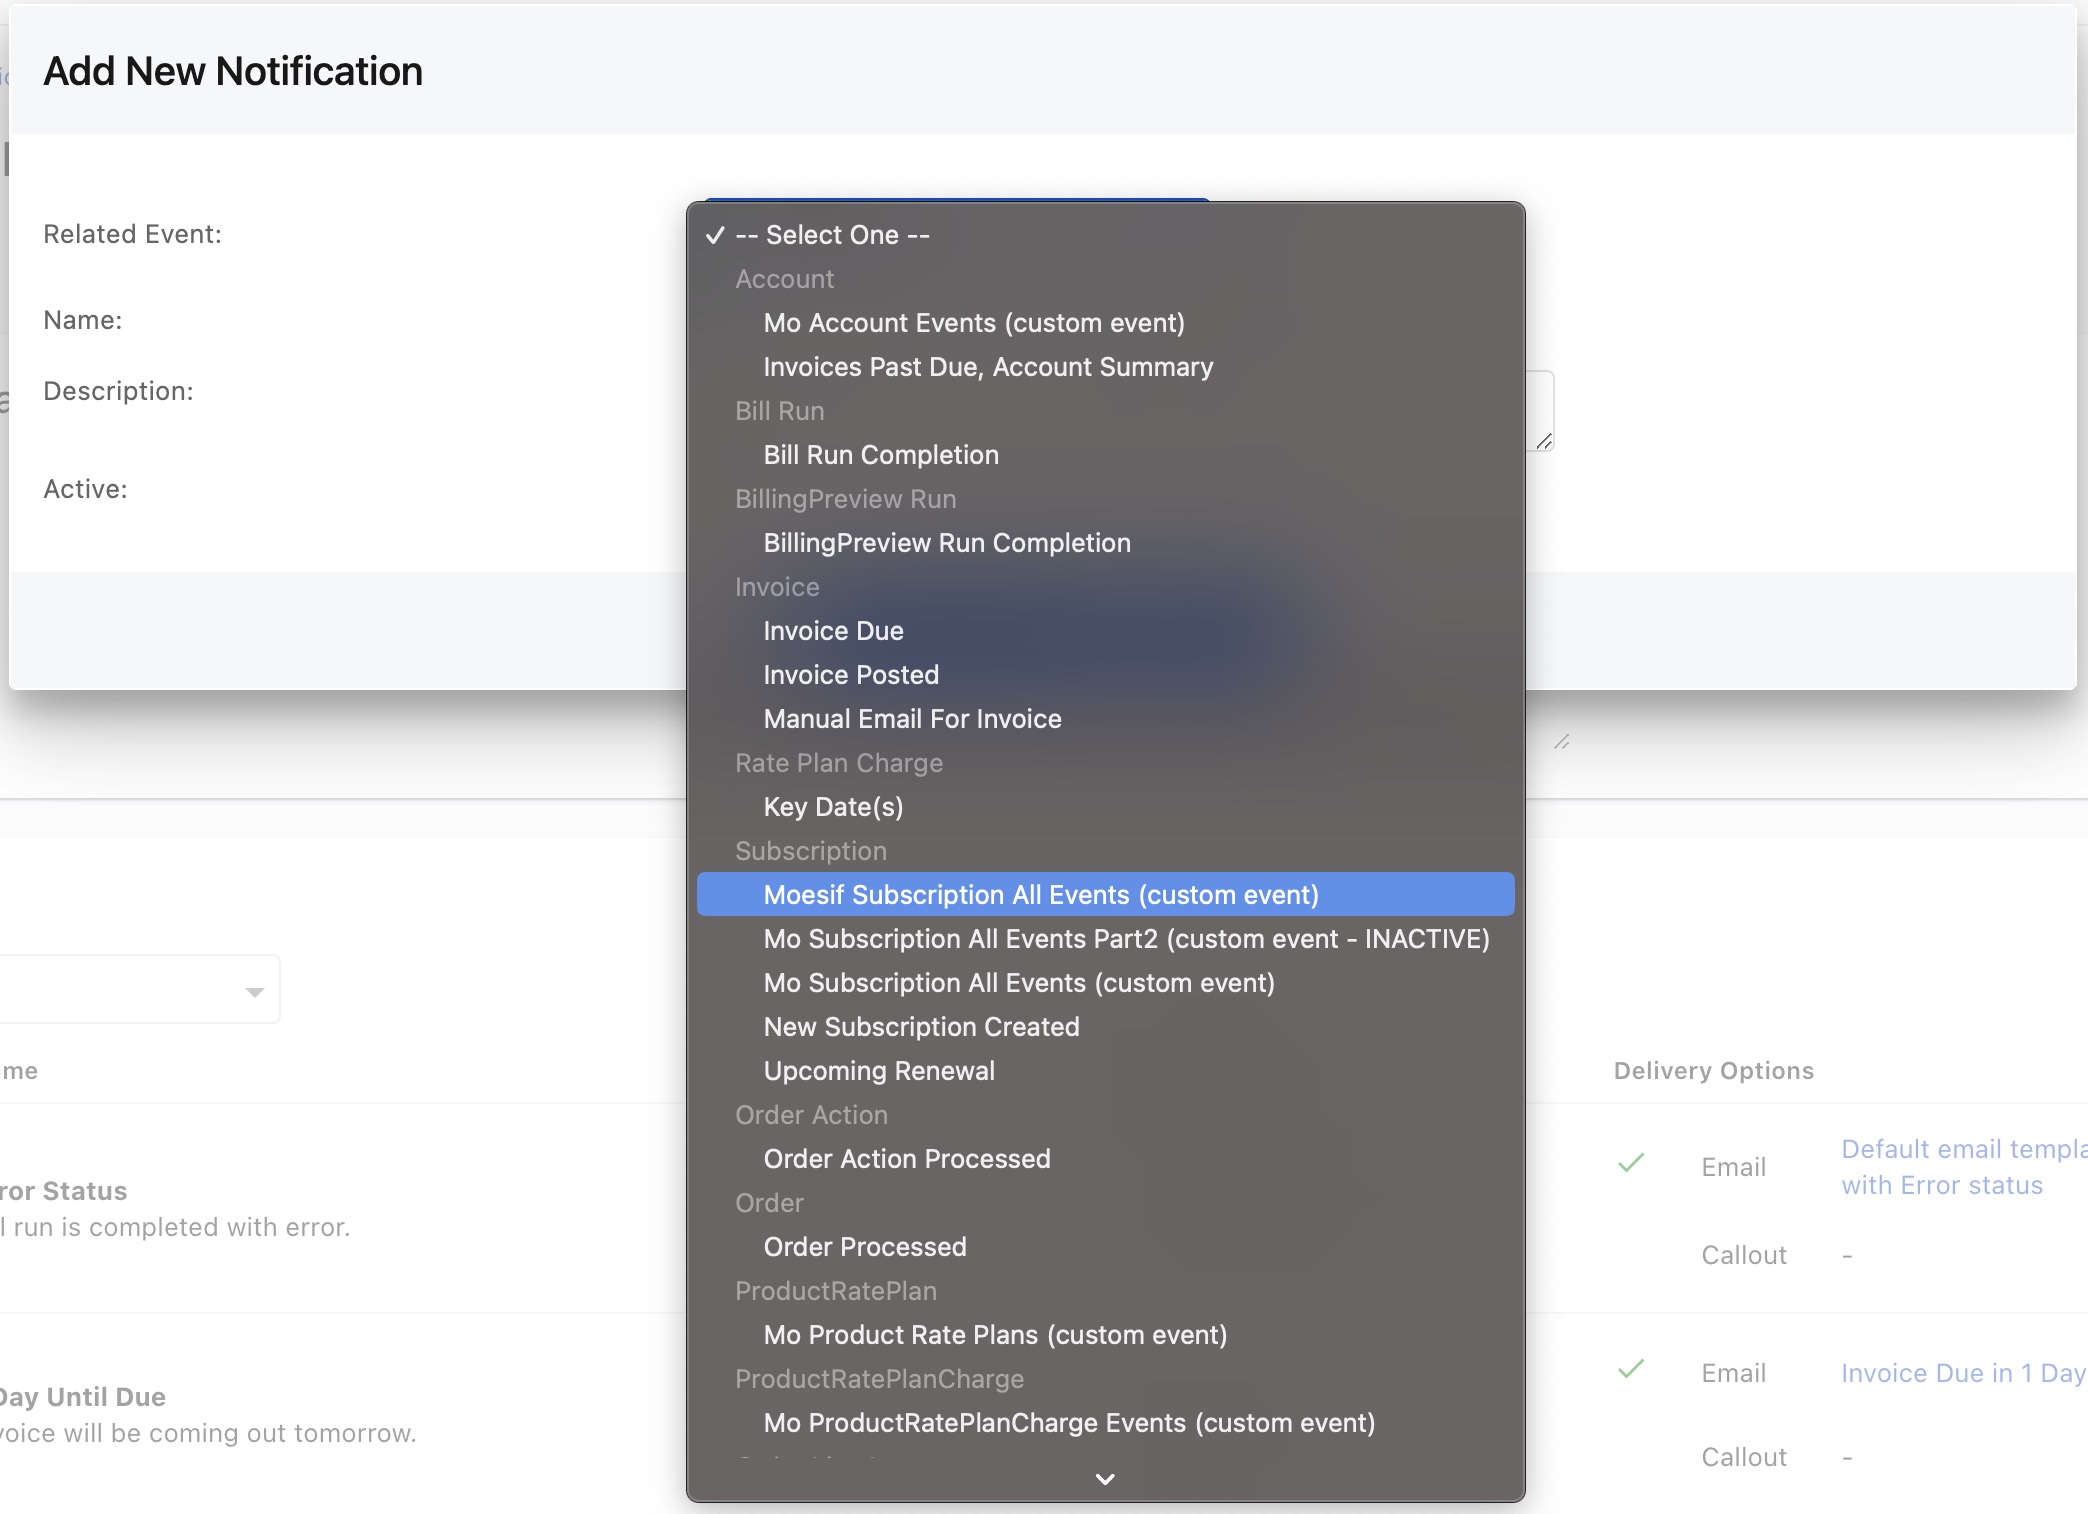
4. Select the Custom Event you created in Step 2
It should be listed under Subscription in the dropdown
5. Fill out the rest of the form accordingly
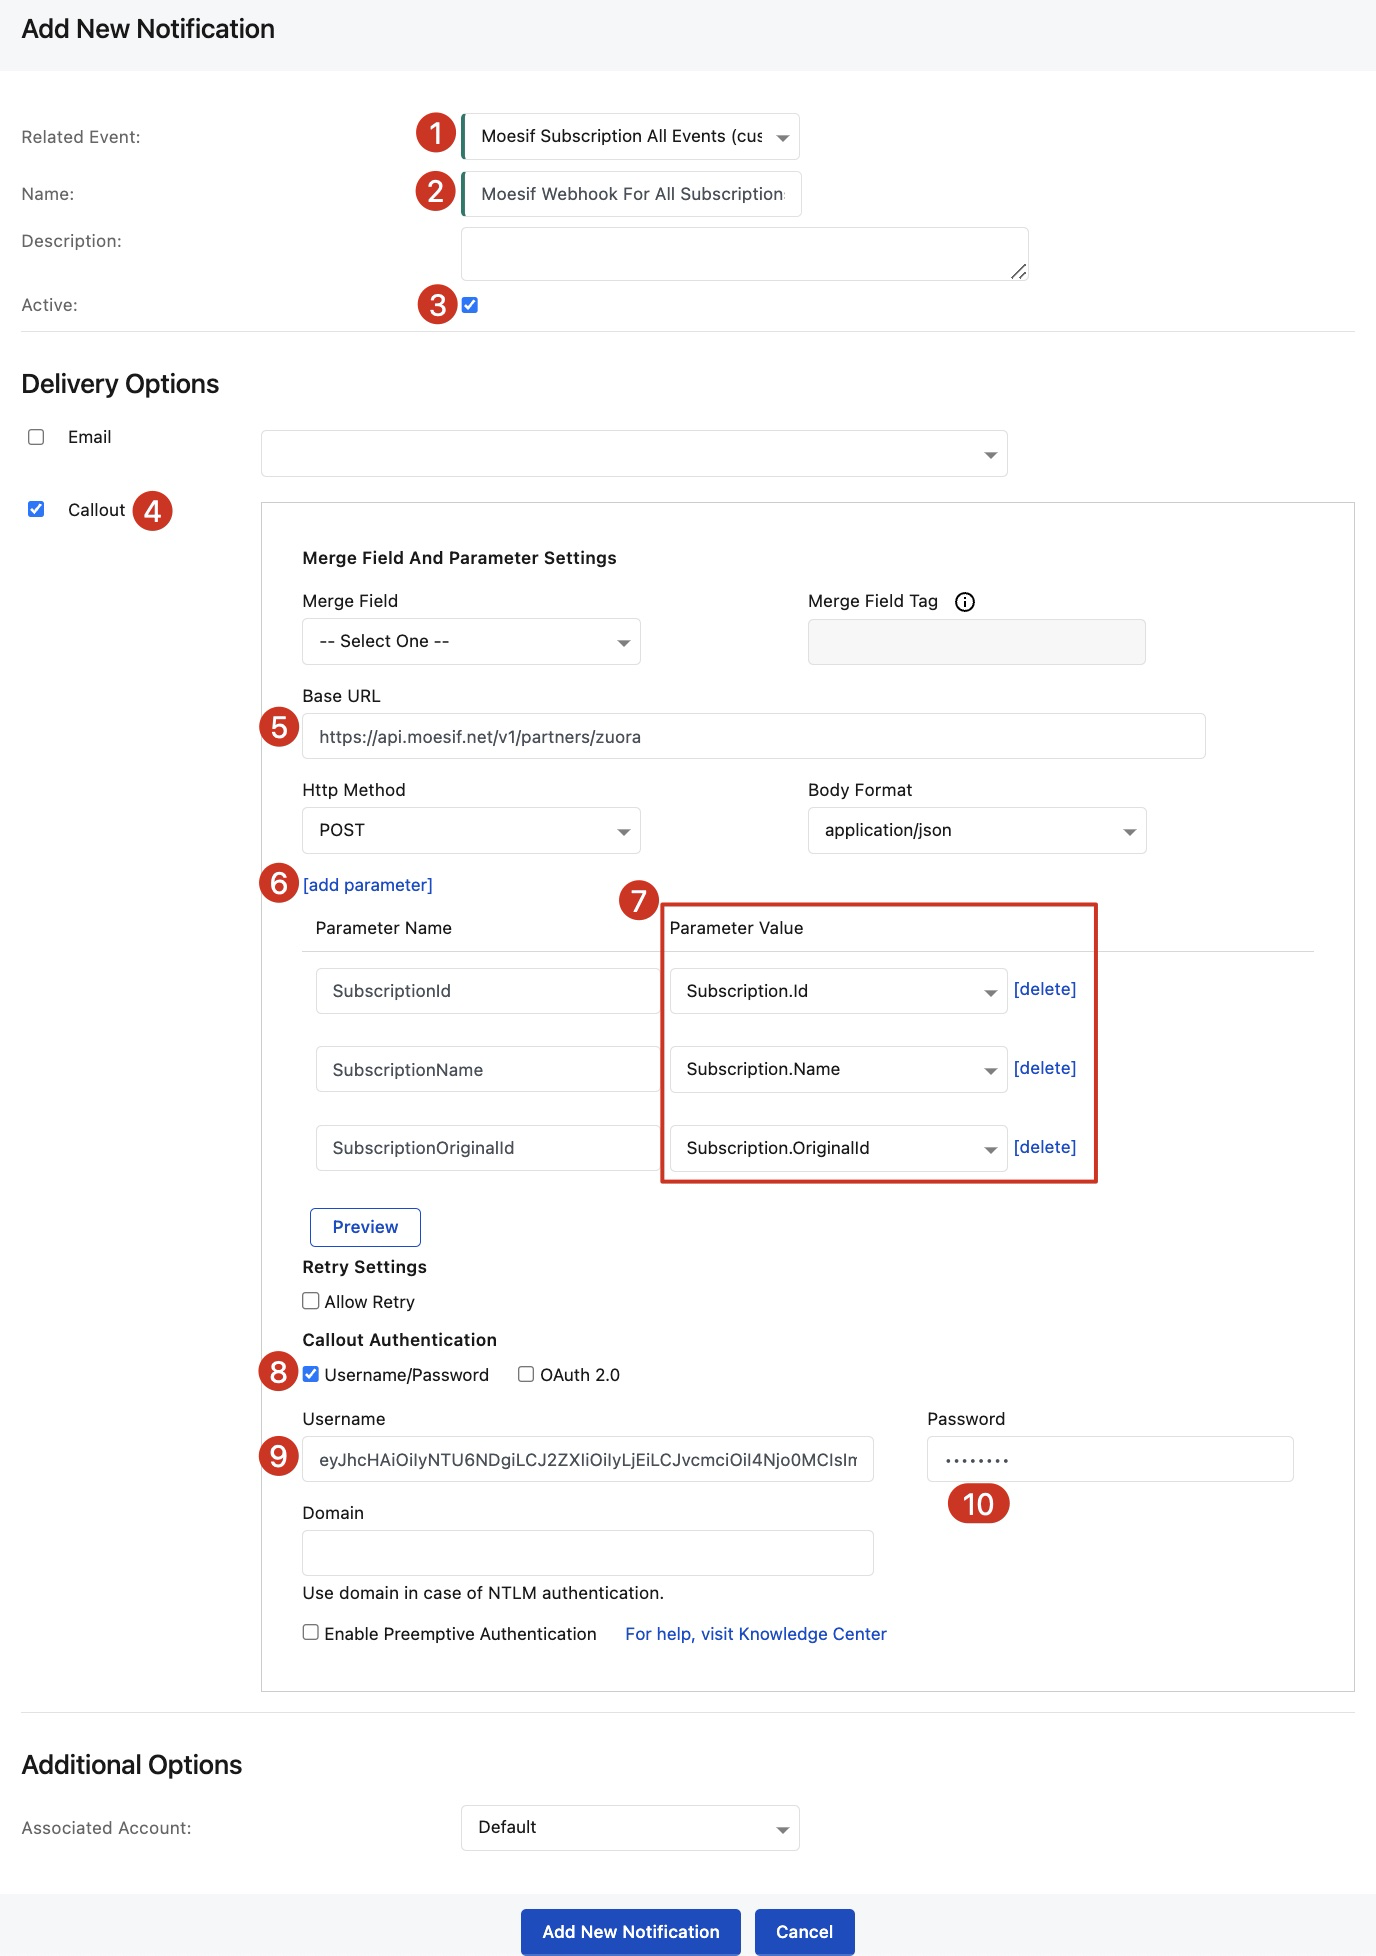
- Custom Zuora event created in Step 2
- Arbitrary name that describes the notification
- Make sure to activate notification
- Callout is Zuora's equivalent for a webhook
- Base URL should be
https://api.moesif.net/v1/partners/zuora - Need to add 3 parameters
- Use the dropdowns to select the 3 parameters shown above
- IMPORTANT: Do not change the Parameter Names, or Moesif will not recognize the Zuora webhook
- Select Username/Password
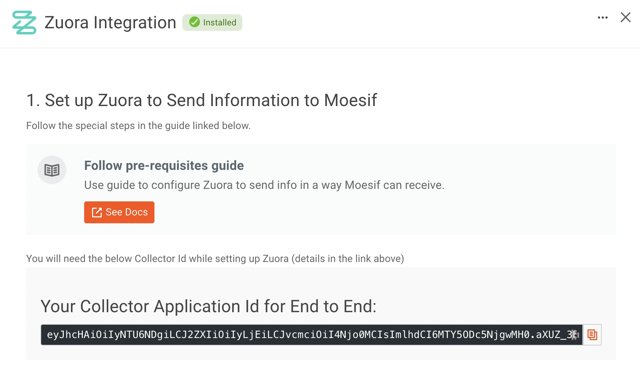
- Username should be your Moesif app's Application ID
- This can be found in Moesif's Zuora Extension setup page or Moesif's API Keys page
- Enter any arbitrary field for Password. Moesif does not use this value, but Zuora does not allow the field to be blank.
Configure settings in Moesif
Now that the Zuora custom Subscription event and webhook has been setup, now we can configure Moesif to interpret the Zuora webhooks it receives.
To access the Zuora setup details screen, you can follow one of these methods:
Access From Account Settings Menu
- Select your account icon to bring up the settings menu.
- Select Extensions.
- Search and select Zuora.
Access From Billing Meters Page
- Select Billing Meters in the navigation menu to open the Billing Meters screen.
- Select Edit Billing Providers dropdown
- Select Zuora.
Access From New Billing Meter Creation Page
- Select Billing Meters in the navigation menu to open the Billing Meters screen.
- Select + Add Billing Meter.
- Select Set up Zuora from the Select Billing Provider dropdown.
The first part of the setup instructions links back to this page, so we’ve come full circle! Let’s continue the setup.
1. Create OAuth Client in Zuora
Next we need to add Zuora OAuth credentials in the Zuora UI into Moesif.
To do so, we need to create a new API User. For more details, see Zuora docs on Creating API Users.
- Log into Zuora UI and go to Administration -> Manage Users
- Create a new user such as a “Moesif API User”
- The user must have at least the permission Platform “API Write Access”
- Scroll to bottom of the created user. Enter a client name for “New OAuth Client” and click “Create”
- Add the client id and client secret in your Moesif settings panel.
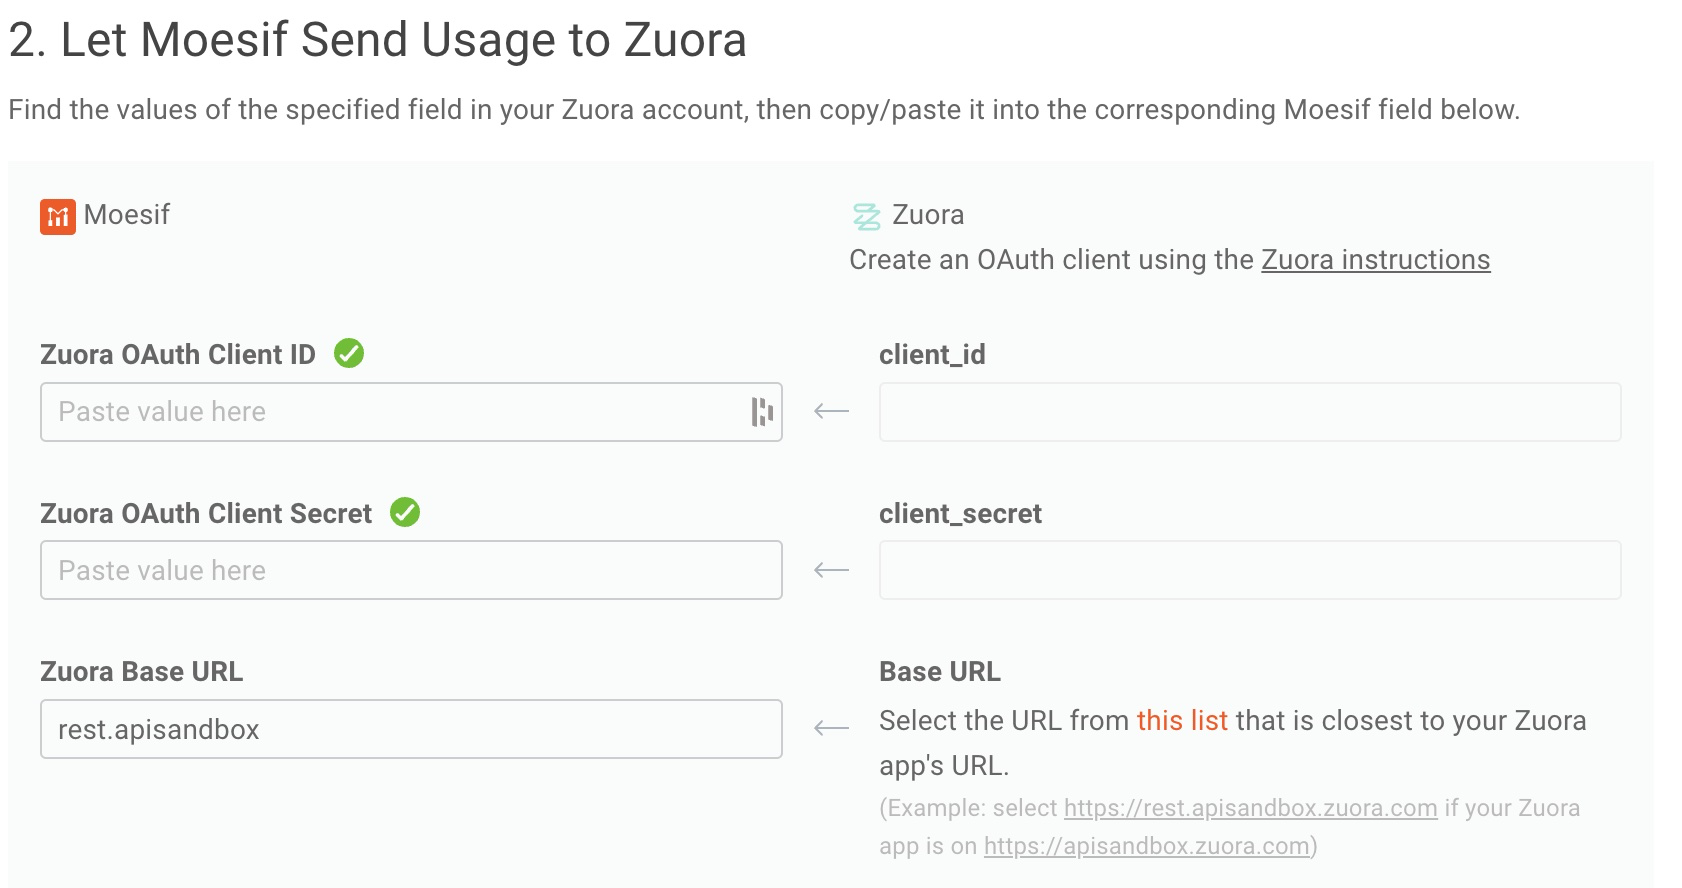
2. Set the Base URL
You will also need to set your Zuora base URL from the list available on Zuora’s website.
The Zuora Base URL is rest.{{your Zuora app URL prefix}} . In the example below, the prefix is apisandbox so the Base URL to enter is rest.apisandbox.

3. Set the Id Mapping
The Id Mapping Configuration enables you to specify the correct Zuora customer account field that contains the Moesif Company Id. Moesif will use this to link your Customer Accounts in Zuora with Companies in Moesif. By default this is account.id, but you’ll likely need to modify this unless you use Zuora’s default customer account ids to identify customers on your API. Typically, this is a metadata field added to the Zuora Customer Account object like company_id or tenant_id.
Correct linking of Moesif companies to Zuora accounts is required for metered billing to function.
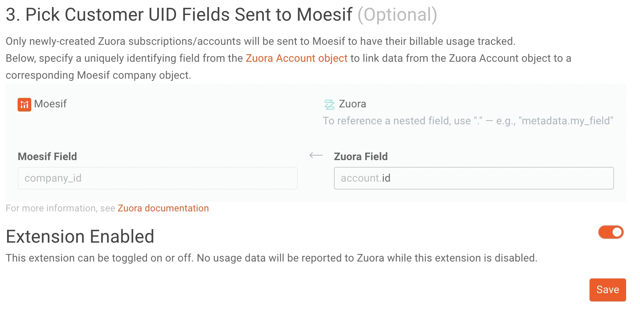
It’s important to remember that the values you see under the Moesif Field should be what you are mapping to in Zuora through this configuration. This is how usage is synced for the user/company.
Create a new Billing Meter
Once you are done, you can continue with creating your billing meter. Ensure you select Zuora as the Billing Provider and then select the Plan and Price you’d like the usage to be linked to.
