Saved Cohorts
This document explains user and company cohorts in the Moesif’s User and Company Analytics suite.
Moesif supports cohorts for both Users and Companies. Unless this document states explicitly, it uses the term user to represent both Users and Companies for simplicity.
A saved cohort represents a dynamic list of users or companies that match some specific criteria. That criteria can consist of specific user or company properties, or based on what the user or company performs in terms of API calls and custom actions. Because of the dynamic nature of these lists, Moesif continuously updates them in the background automatically.
Here some examples of cohorts:
- Users who are exceeding rate limits in the last 24 hours
- Users who accessed your API with over 10 distinct IP addresses per hour
- Companies who have unpaid invoices
Saved cohorts serve as powerful tools in analyzing customers and APIs. You can use them as targeting criteria through Moesif in many ways. For example:
- Trigger behavioral emails to warn customers of issues like rate limits.
- Block API abusers and threats from accessing your API.
- Dynamically sample customers based on their behavior.
Before You Start
Events may take up to 20 minutes to show up in the user analytics screens. If your data has not appeared, make sure you wait until Moesif has completed the instrumentation process and loaded the data.
Creating a Cohort
You can create a cohort in several ways.
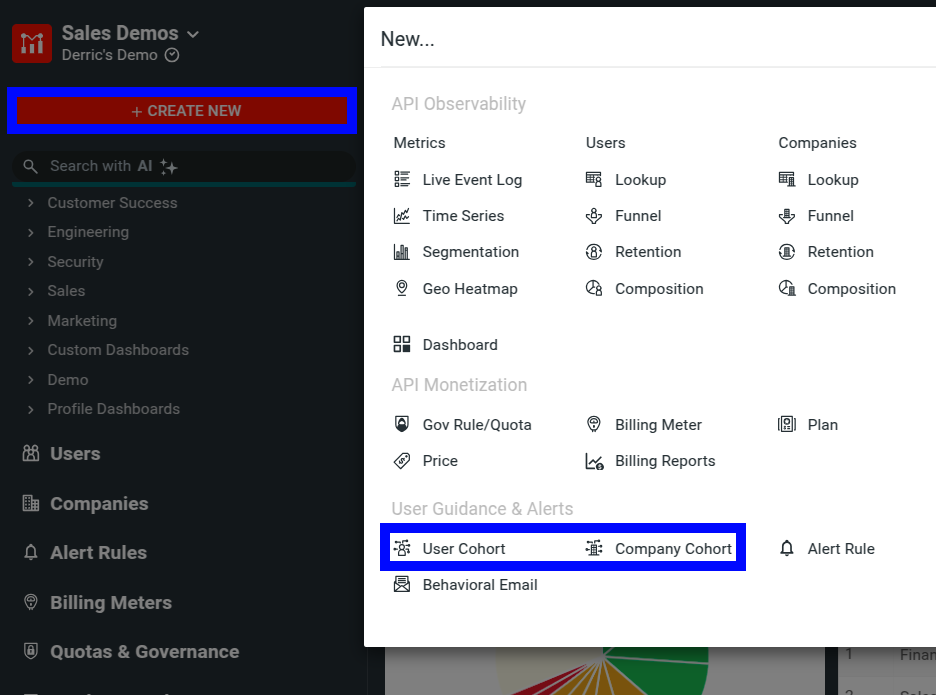
From the Create New Dialog
- Log into Moesif Portal.
- Select + Create New in the navigation menu.
- Select User Cohort or Company Cohort.
From Users or Companies Screen
- Log into Moesif Portal.
- Select Users or Companies and then select User Cohorts or Company Cohorts in the navigation menu.
- Select + Cohort in the Users or Companies screen that appears.
From a Lookup or Composition Analysis Screen
- Go to the Lookup analysis screen or Composition analysis screen.
- Define the filters and criteria for your Lookup or Composition analysis.
- Select Create Cohort.
Example
Cohorts support filtering on both user and company fields along with the events that a user or company performs. Event fields also support how often the user or company performs events within a period.
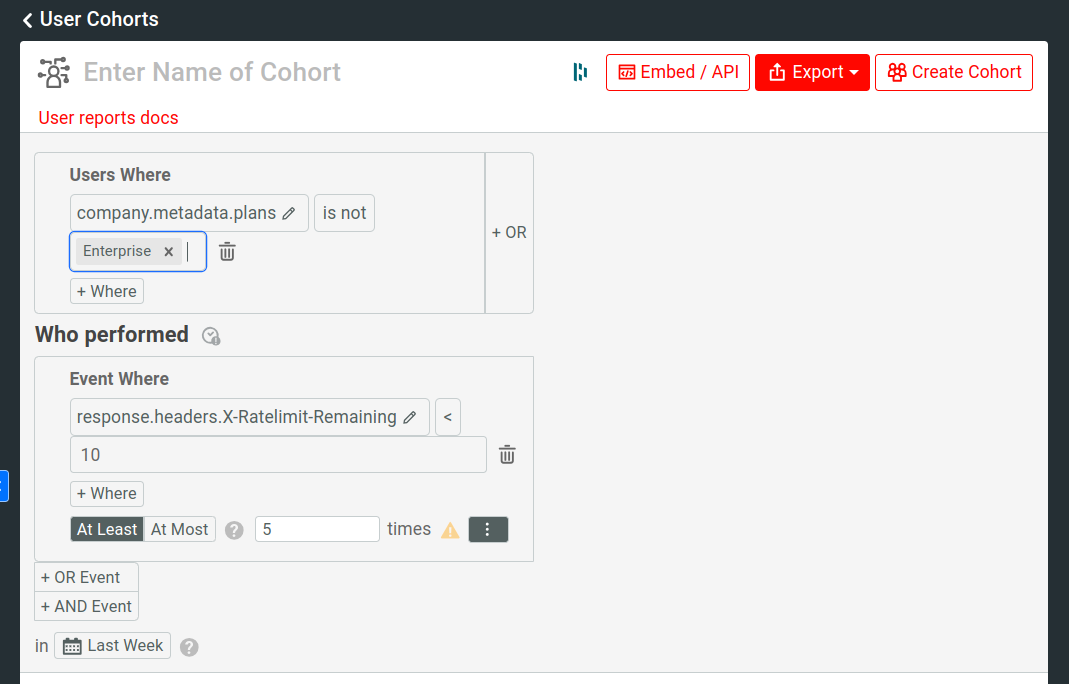
For eample, let’s say an API has a response header that keeps track of rate limits. Therefore, you can create a cohort for users who were close to API rate limits at least 5 times in the last 24 hours.
To do so, we follow these steps:
- Add an event filter
Response.Headers.X-Ratelimit-Remaining < 10. - Select At Least and then enter the number
5. These specify the measurement policy of the number of times the event occurs. - Select Last Week as the time period.
After defining these criteria, you can see a preview of all users that match your criteria in tabular format. You can go further with your criteria and add more filters. For example, you can add a user filter to only include your non-Enterprise plan users.
Finally, enter a name for your cohort. Then select Create Cohort. A confirmation dialog appears. Select Create Cohort again to create the cohort.
Filtering on Event Time
You can specify the period of time for your event filter criteria. For example, if you want to create a behavioral cohort for all users who performed an event in the last month, select Last Month from the time span dropdown menu.
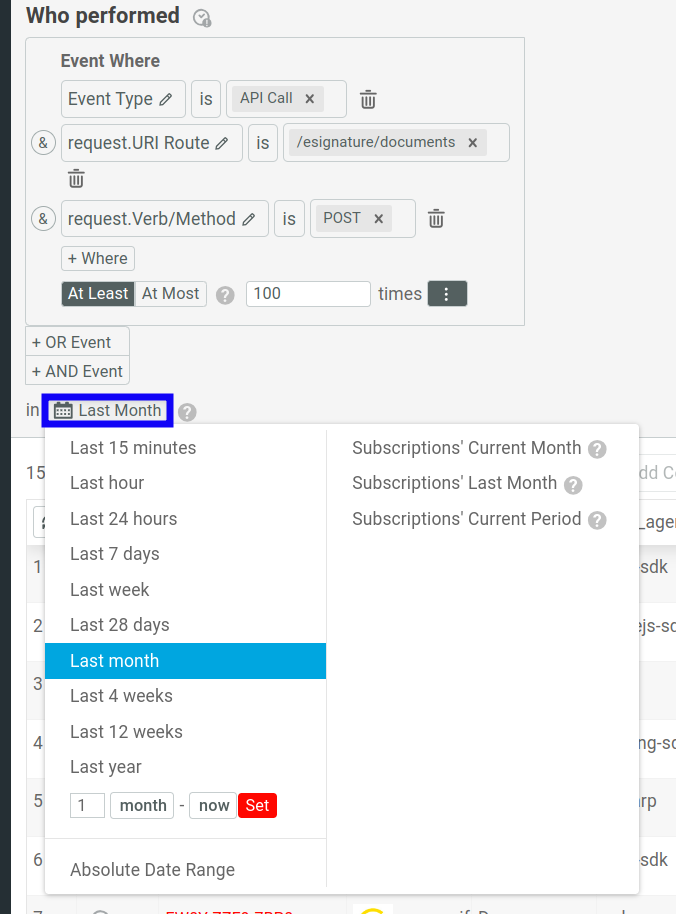
If you want more precise control, use the relative date range or absolute date range options.
The cohort may take up to 15 minutes to process before Moesif adds the matching users or companies to automation workflows like Behavioral Emails and sampling.
Filtering Based on Billing Period or Term For Companies
You can also filter events based on billion period or term of companies by selecting one of these values from the time span dropdown:
- Subscriptions’ Current Month
- Includes events that have occurred in the subscription’s current monthly billing period. For billing periods longer than a month, Moesif only looks at the current month.
- Subscriptions’ Last Month
- Includes events that have occurred in the subscription’s last monthly billing period that has already passed. For billing periods longer than a month, Moesif only looks at the current month.
- Subscriptions’ Current Period
- Includes events that have occurred in the subscription’s current billing period. For quarterly or yearly billing periods, this option shows all of the events within those time periods. For monthly billing periods, it shows the same results as the Subscriptions’ Current Month option.
If you’re using Moesif for API monetization, these options can help you implement powerful governance rules from cohorts that control access to your API based on your customers’ subscription terms. For example, you may create a governance rule where a customer’s subscription tier only allows them to consume 10,000 API calls per month. By selecting the Subscriptions’ Current Month option, you can create a cohort to make sure that customers stay within their limits during their monthly billing periods.
Accessing saved cohorts
To access the saved cohorts, select Users or Companies and then select User Cohorts or Company Cohorts in the navigation menu.
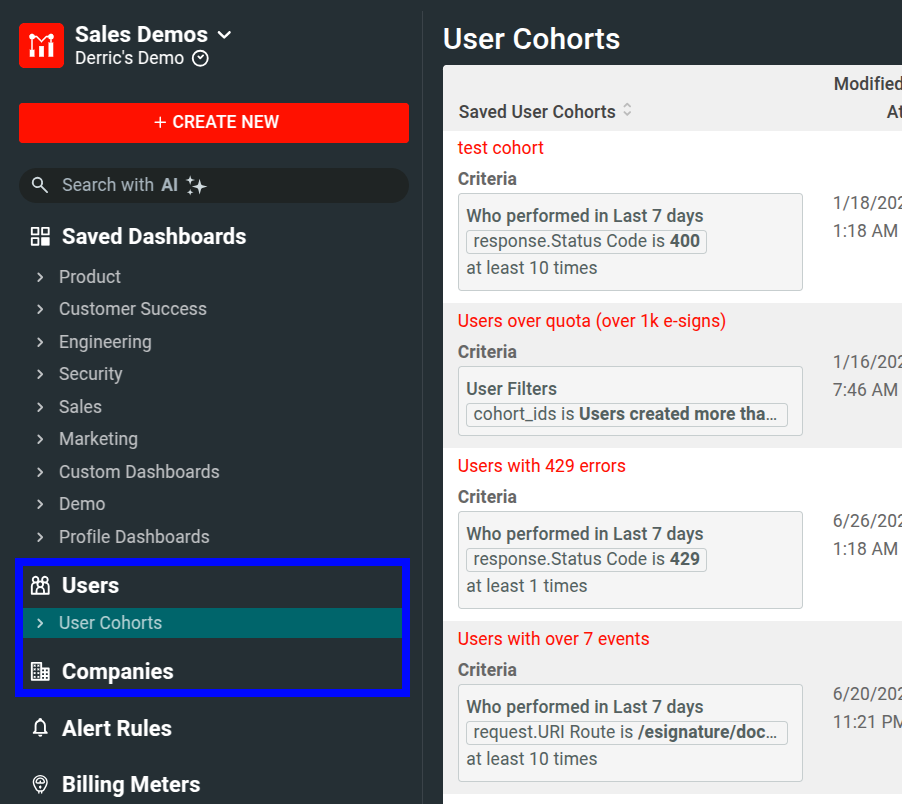
Select a cohort name to open the edit screen for that cohort. From there, you you can make edits to the cohort and then select Save Cohort to save it.
Using cohorts
You can use cohorts across different features and tools in Moesif, specially the automation features like Behavioral Emails.
For example, you can set up a recurring email that reminds users they have rate limit issues. The earlier cohort example created a cohort that defines users who’ve reached their rate limits. When you create a behavioral email, you can select that cohort as the email recipient.
Advanced Features
Numeric Aggregations
Besides equality, event fields also support aggregations and computations methods like averaging, summation, and so on. For example, you can create a cohort of users who’s average latency goes over 1 second.
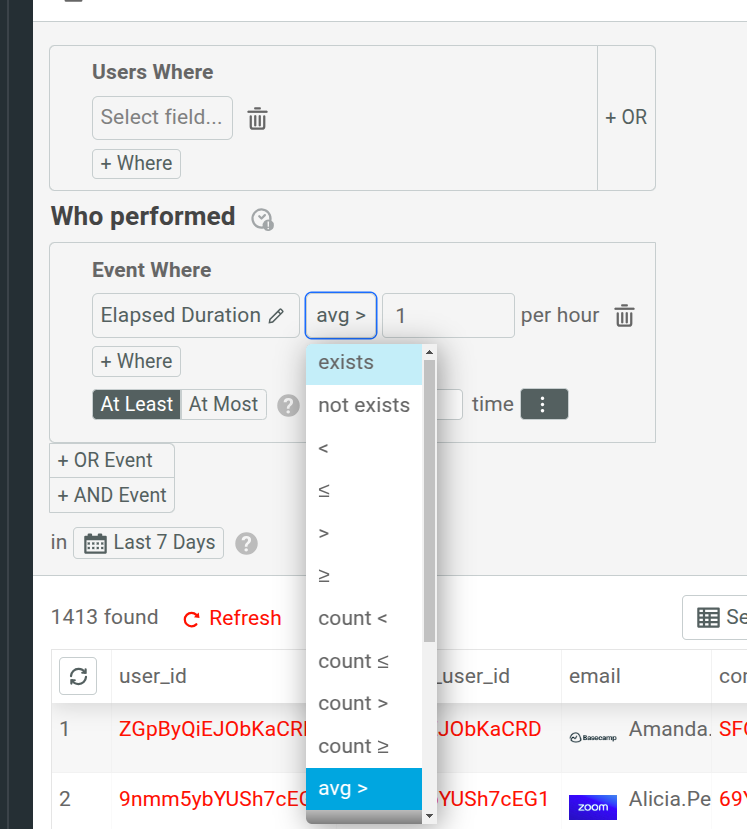
After selecting the event field, the Select operator… field lists all the available computation methods available to you for that field.
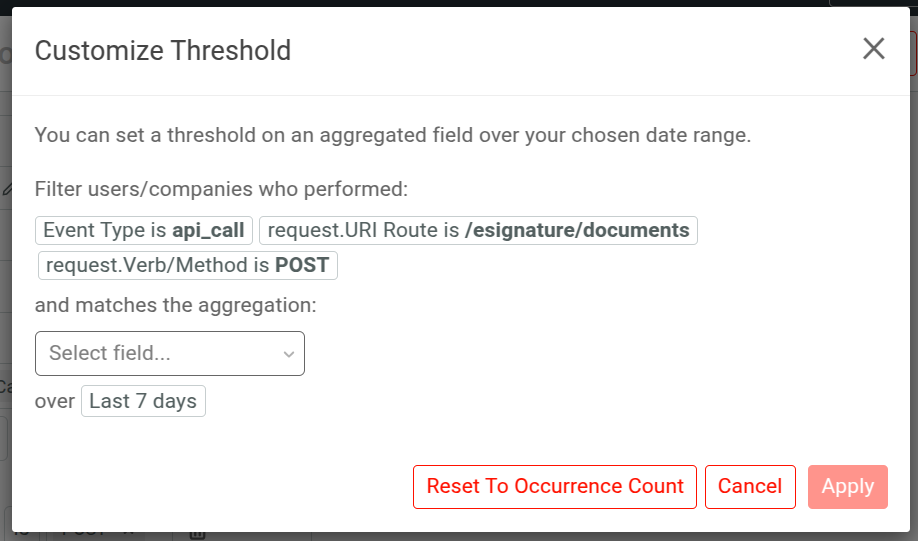
You can also specify how Moesif quantifies events by defining the threshold on a custom aggregated field. The default aggregation takes into account the number times an event occurs. But you can specify a custom one by selecting ⋮ Customize Threshold.
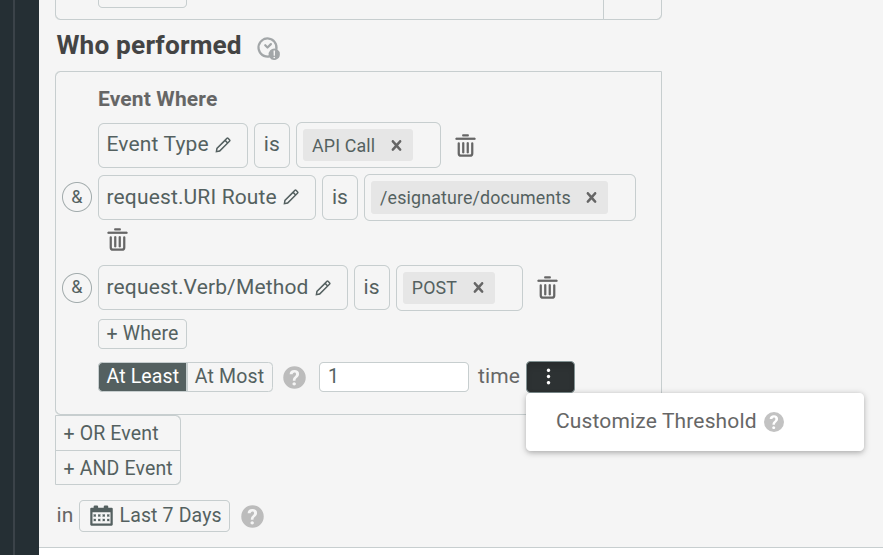
In the dialog that appears, specify your custom aggregation and then select Apply. If you want to go back to the default, select Reset to Occurrence Count.
Grouping filters
You can also group filters together, enabling order of operations and logic among the filters. To chain filters together, use the Where, OR, and AND clauses.
For example, let’s say you want to match users who fall into one of these criteria:
- Received
500 Internal Server Errorstatus code only when they placed a buying order. - Made an explicit API call to decline.
You can think about combining event filters in two ways:
- Customers who performs an event matching both X AND Y, in a single event.
- Customers who performs an event matching X AND an event matching Y. This means multiple events.
Filters within the same group matches against the same event. Moesif outlines the group in a box in the UI. Separate groups match against separate events.
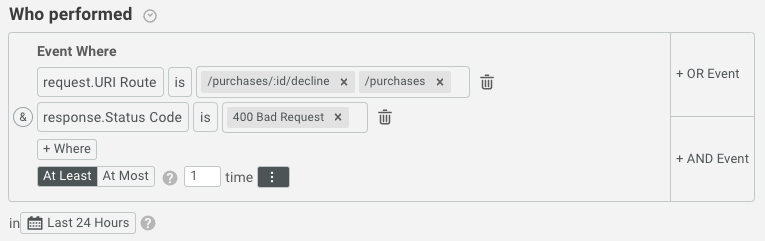
1. Customers Who Perform an Event Matching Both X AND Y
To find a single event that matches multiple criteria, make sure to keep the properties in the same group. Remember that Moesif outlines the group in a box in the UI.
For example, you may want to display all users who made an API call that returned 400 Bad Request error response AND the route of that API call was either /purchases/:id/decline OR /purchases. This means matching multiple properties of the same event. Therefore, the query looks like this:
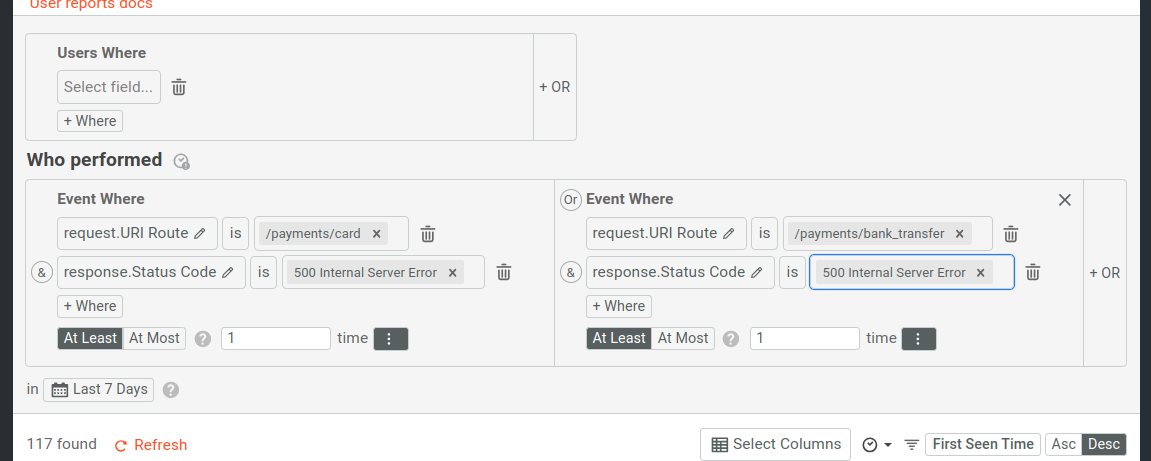
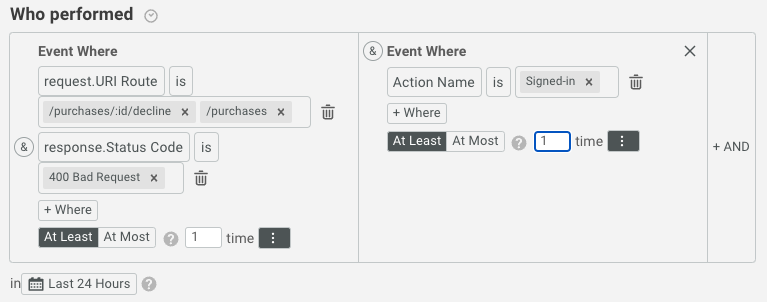
2. Customers Who Perform Event Matching X AND an Event Matching Y
If you want to match across independent events a user performs, add multiple OR or AND condition boxes. Each filter box then contains the filters for each individual event criteria.
For example, you may want to match against both an API Call and an Action. Let’s say you want to show all users who fall into the following criteria:
- Made API calls to either
/purchases/:id/declineOR/purchases_URI route that returned200 OKresponses. - AND performed a custom action where
Action NameisSigned-In.
The query for this looks like the following:
Select Fields to Display
To display more data fields in the Cohort data table, select Select Columns and specify the fields. For example, you can select Geo IP.Country as your custom field. Now you can see the respective countries of the matching customers in the Cohort table.
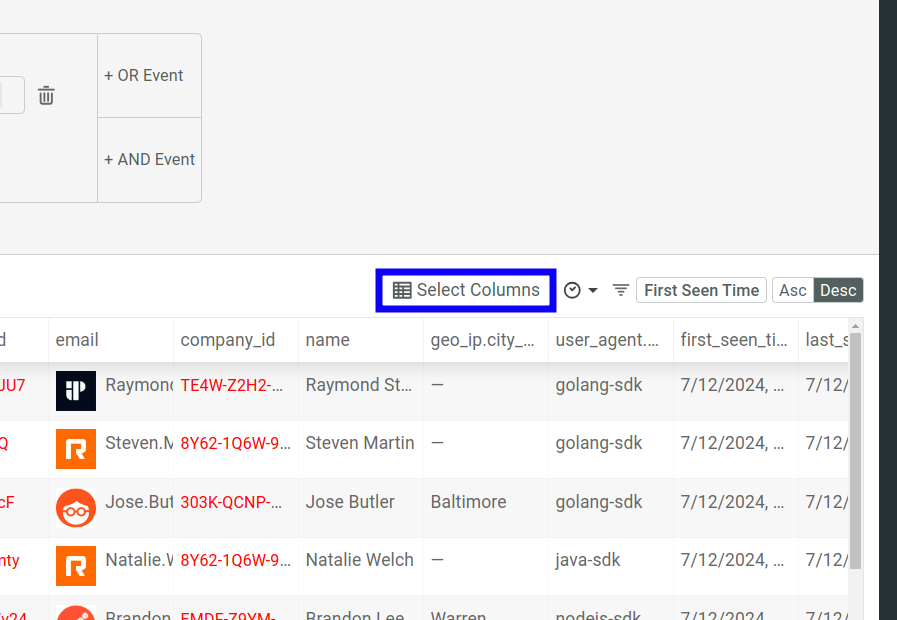
Any columns you add to the table also appears in a bulk export.
Custom Column
You can also add a custom column containing calculated data from the table by selecting Add equation.
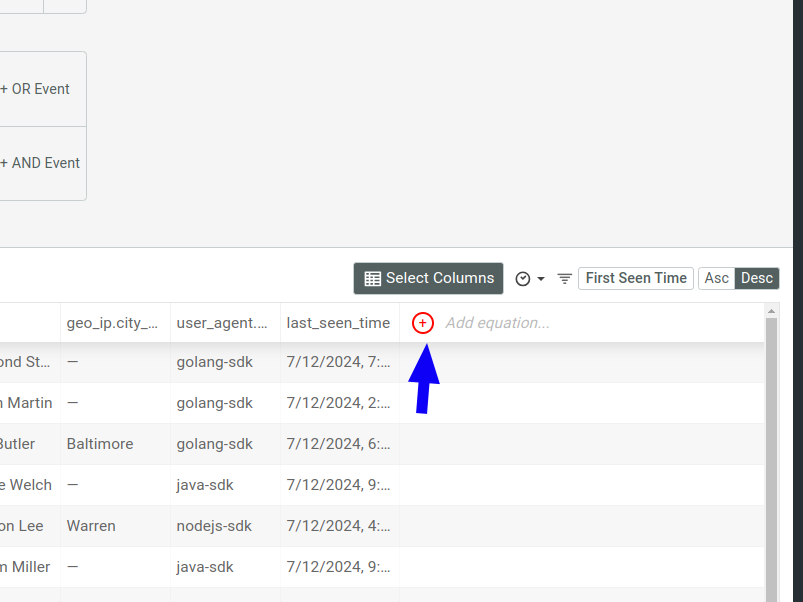
A modal then appears where you need to enter the details of your custom column formula.
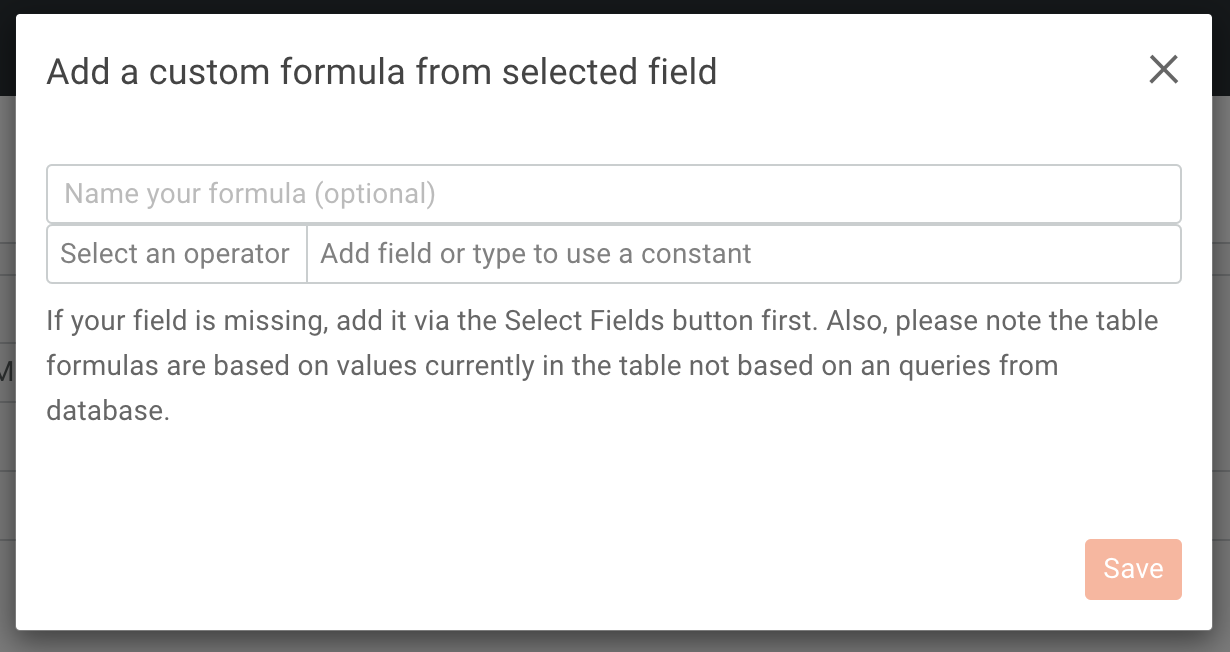
The formula details include the following:
- An optional name for your formula.
- An operator that for the calculation method.
- Fields or constant values as operands.
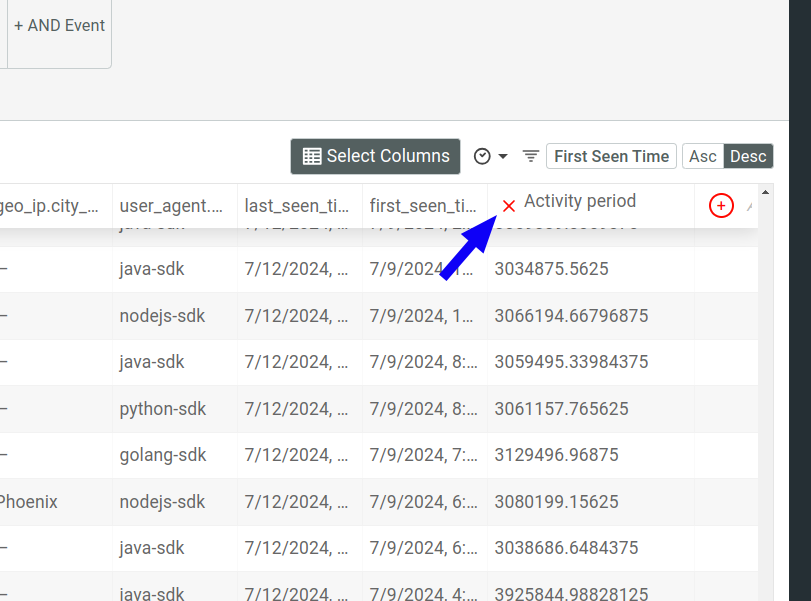
For example, the following formula calculates the difference between the first and the last seen times for customers. This data now appears in the column Activity Period in the Cohort data table.
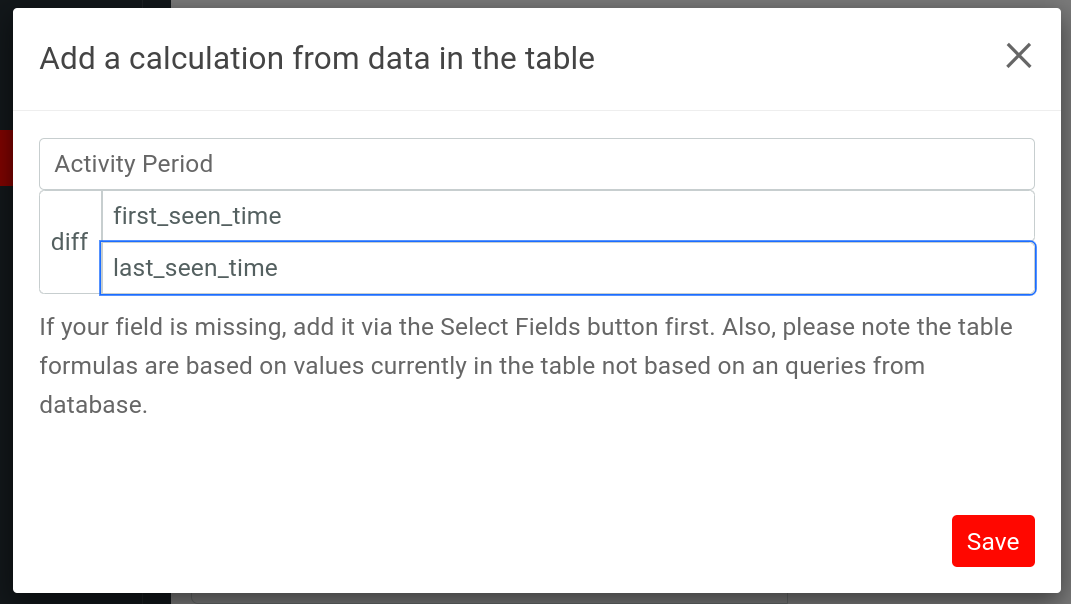
If your field is missing, add it via the Select Fields button first. Also, please note the table formulas are based on values currently in the table not based on an queries from database.
Deleting a Custom Column
To delete a custom column, select X in the column header.
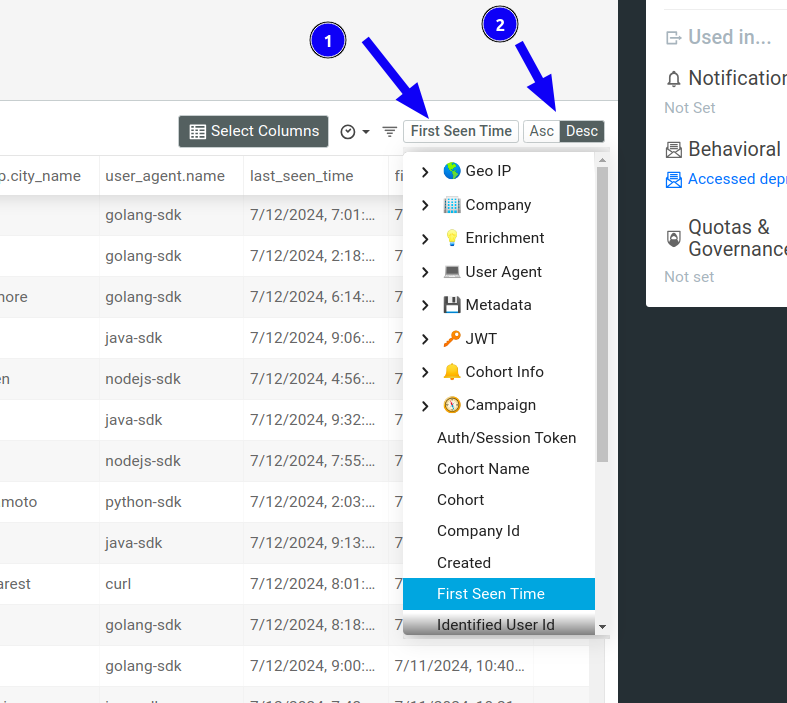
Sorting the Results
- Select the field you want to sort on.
- Select the sort direction, ascending or descending.
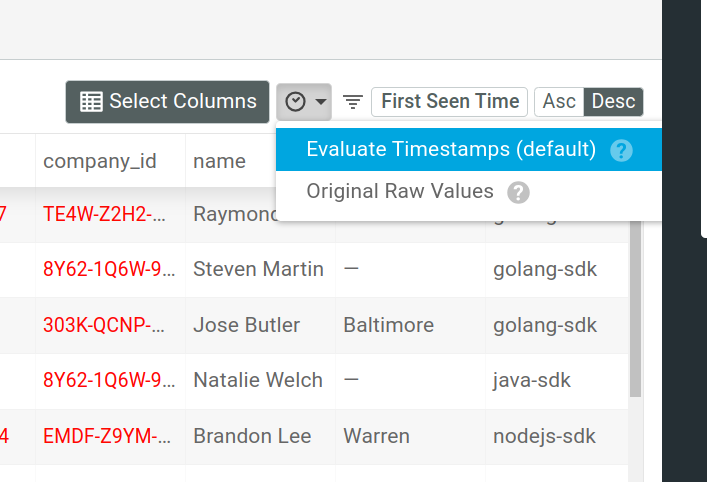
Timestamp Values
In the Cohort data table, Moesif parses the timestamps into human-readable format in your timezone. To display the raw timestamp values in ISO 8601 format instead, select Original Raw Values.
Exporting Cohort Data
Bulk Export is an enterprise feature that provides direct access to your data stored in Moesif. It allows you to efficiently retrieve hundreds of millions of User and Company data from Moesif and quickly load them into data warehouses like Snowflake, Redshift, and BigQuery.
You can use Bulk Export both from Moesif UI in the browser and Moesif Management API. Using the Management API, you can set up recurring bulk exports for different use cases—for example, a data pipeline that feeds your data in Moesif into a data warehouse like BigQuery.
Supported Export File Types
Moesif supports the following file types for bulk export:
- CSV
- CSV files have some of the widest support for many of your favorite tools. This makes it ideal for exporting user and company data to your CRM and more.
- JSON
- JSON has become a standard for parsing data quickly for scripting purposes. Many fields in Moesif are deeply nested, making JSON an ideal choice.
- Parquet
- Parquet is an open source column-oriented data format that can make analysis on a subset of columns faster when compared to loading the entire file in memory. Your schema is directly embedded in the file. This can help SQL warehouse-like tools that require strict schema enforcement.
Filters for Exported Data
Bulk exports adhere to any filters that you have applied to define the cohort. Make sure you apply the filters you require before exporting.
Export Cohort Data from Moesif Portal
To export Cohort data from Moesif Portal, follow these steps:
- Open the Cohort you want to export.
- Select Export and then select Bulk Export.
- Specify the email address where you want Moesif to send the export file.
- Select the export file format.
- Select the fields you want to include in the export.
- Select Start Export.
The time it takes to export your data depends on the number of customers that match the cohort and the number of fields you select.
Export Cohort Data using Moesif Management API
If you want to trigger export jobs using Moesif Management API, contact your account manager or reach out to support for instructions.
Fields Selection
If you don’t want to include all data fields of the matching customers in the bulk export, specify the fields you want before selecting Bulk Export. Otherwise, select All Fields in the Bulk Events Export dialog.