How to Implement a Usage-Based Revenue Share Model in Moesif
Overview
This tutorial demonstrates how to implement a usage-based revenue share model in Moesif using billing meters and scripted fields. Instead of billing customers by raw API call count, you’ll learn how to meter metrics that reflect real business value—such as order volume, data transfer amount, or service-specific actions.
This guide is ideal for teams looking to launch or scale a usage-based pricing strategy where revenue is shared with partners or internal stakeholders. It assumes you already have Moesif set up and events flowing in.
Background
Many SaaS companies and API-first platforms are shifting toward usage-based pricing models (also known as consumption-based pricing model, pay-as-you-go, or metered pricing) where customers pay based on how much of a product or service they actually consume. When you’re powering a developer marketplace or enabling third-party integrations, the requirements more specifically shifts towards sharing revenue based on that usage-based model.
Traditional flat-rate pricing models or static tiering break down when business models involve resellers, partners, or platform contributors. You need a way to measure exchanged values—not just the number of API calls—and calculate revenue share transparently for each actor in your ecosystem. For example, if your API processes $100,000 worth of transactions for a partner, your platform might be entitled to a 10% commission. But how do you meter that in a scalable, flexible, and auditable way?
Moesif’s Billing Meters and Scripted Fields allow you to implement usage-based revenue share models directly in Moesif. You don’t need to rewrite backend services or deploy custom billing infrastructure. You can calculate dynamic usage metrics, apply per-event revenue share logic, and export clean summaries to your billing provider or internal finance team.
What are Scripted Fields?
A scripted field in Moesif allows you to create a custom field using a script. The script, written in MoesifFieldScript (MSF), a domain-specific language, retroactively computes the custom field from other fields in your API requests and responses using formulas, arithmetic, and conditional expressions. For example, the following script calculates a 10% commission on every event that includes the order_amount field in the request body.
[request.body.order_amount|0] * 0.10
Moesif evaluates these scripts on each API event.
Objectives
By the end of this tutorial, you’ll be able to:
- Build a billing meter that aggregates usage metrics per customer, like order amount, data volume, or call type.
- Create Scripted Fields to apply dynamic business logic like revenue share percentages or tiered usage pricing.
- Define a flexible usage-based billing model that aligns with how your customers or partners derive value from your API.
- Test and verify your setup using real API event data in Moesif.
- (Optionally) Connect your meters to a billing provider like Stripe or Chargebee to automate invoicing and billing.
Before You Start
This tutorial assumes you’ve met the following prerequisites:
- You have an active Moesif account and have integrated Moesif with your API gateway or backend using one of the supported integrations.
- Your API events include a field to identify the customer or partner—for example,
company_id. - API event data contains a field representing billable metric, for example:
request.body.order_amountresponse.headers.Content-Length
- You have access to the Moesif dashboard to create Billing Meters and Scripted Fields.
- (Optional) You have a metered product or price set up in Stripe, Chargebee, or a custom billing provider through webhooks. You may have also set up reporting-only billing meters that only tracks and meters usage
Step 1: Identify the Metric That Reflects Revenue Share
First, you need to clearly define what business activity you’re monetizing. Unlike other models, usage-based revenue share models depend on identifying a metric that actually correlates with the value your API delivers or the revenue it helps generate.
Why Choosing the Right Metric Matters
The metric underpinning your pricing model dictates the model’s quality. A poor metric might cause various issues:
- Underestimate value—for example, treating all API calls equally, even though some trigger high-value outcomes
- Overcomplicate billing
- Break down in edge cases—for example, missing data or data inconsistency across tenants
Avoid fields that fluctuate for technical reasons, like response time or request size. Also avoid metrics that don’t clearly map to customer value, such as low-level system counters or internal IDs.
On the other hand, a good metric brings compelling benefits:
- Aligns with how your customers derive value from the product or service
- Reflects actual usage aligned with customer usage patterns that you can reliably measure
- Provides a fair basis for automated billing or revenue share payout
This is especially important in models where customers pay based on outcomes—like transaction volume, storage used, or data delivered—rather than simple activity.
Example Usage Metrics for Revenue Sharing
Moesif supports any metric that can extract or derive from API request and response data. The following table illustrates some pricing examples that map well to usage-based revenue share models, especially in modern SaaS market and AI-driven platforms:
| Business model | Metric to meter | API event data example |
|---|---|---|
| Marketplace API | Order value | response.body.order_amount |
| Ad delivery API | Revenue per impression | metadata.ad_revenue |
| AI/ML inference API | Compute time or token count | response.body.inference_ms, metadata.tokens_used |
| Data enrichment API | Rows processed | response.body.record_count |
| Fintech API platform | Transaction volume | request.body.transaction_value |
Criteria for a Good Revenue Share Metric
Ask these questions to validate your choice:
- Is it present on every relevant API event?
- Partial or missing data increases billing risk. Use fallback defaults in scripts if needed.
- Can you parse it from the event data?
- Moesif lets you reference headers, bodies, and metadata fields—but they must be consistently structured.
- Does it directly map to the value exchanged?
- A metric like order amount is stronger than raw event count if you charge based on deal size.
- Can you aggregate it meaningfully over time?
- Your billing meter will roll up the value monthly (or another interval), so make sure the metric scales cleanly.
Event Data in Moesif
Moesif captures API event data, including API calls and custom actions like user signups, with full context. Moesif organizes the data in categories so you easily use them to define event filters, metrics, and more.
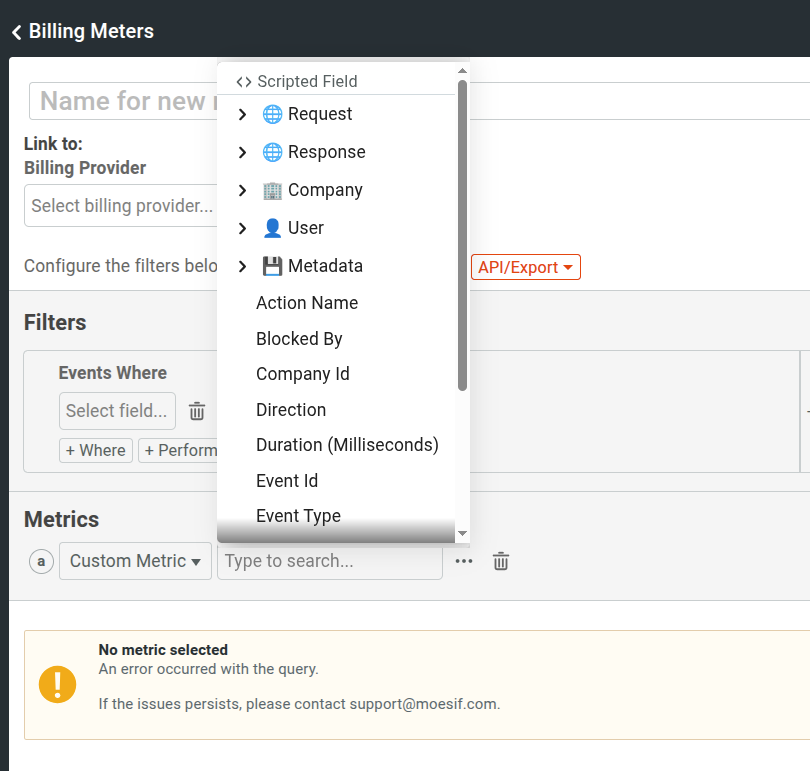
By selecting the Request and Response elements, you can access all their associated data, like payload, headers, user agent, and more.
Step 2: Create the Billing Meter
-
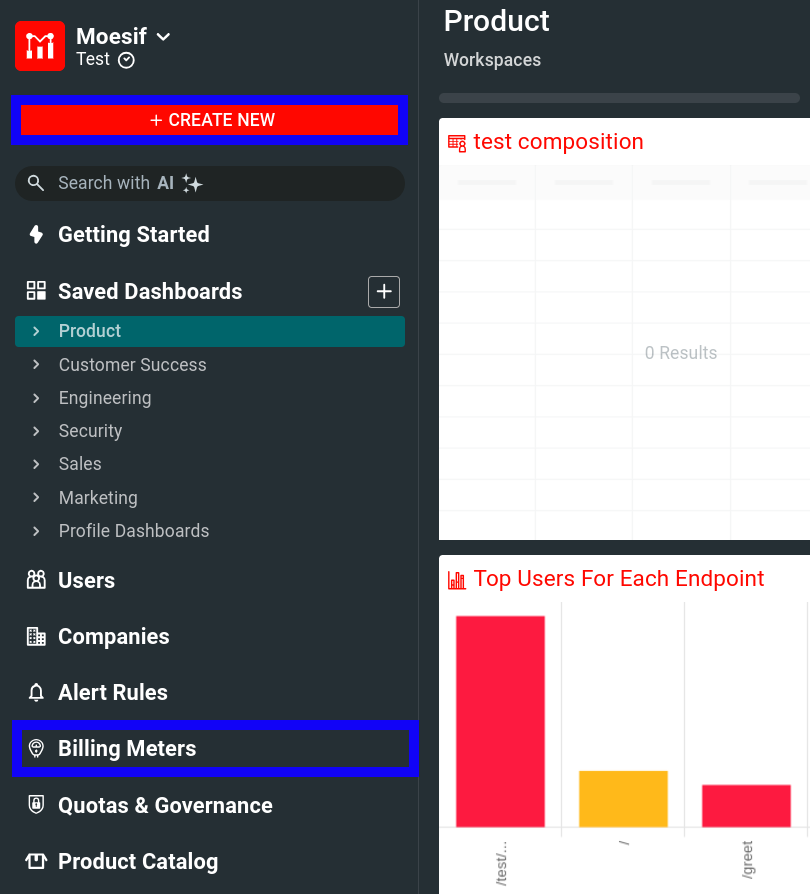
Select Billing Meters menu item in the navigation menu and then select + Add Billing Meter.
Alternatively, select + Create New in the navigation menu and then select Billing Meter from the API Monetization section.![How to create a new Billing Meter in Moesif. Creating a new Billing Meter in Moesif.]()
-
Fill out the billing meters details:
-
Enter your billing meter’s name.
-
Specify billing provider information. You can select from one of the billing providers which includes custom webhooks for custom billing systems. You may also choose to set up a reporting-only billing meter that only tracks and meters usage but doesn’t integrate with any billing systems.
-
In the Filters pane, define the criteria Moesif should follow to include API events that count towards your billable metric. For example:
-
Only include events where
Request.URI Routeis/orders/complete -
Include only successful transactions by specifying
Response.Status Codeequal to200 OKor201 Created. -
Only include events from specific partners—for example,
Metadata.partner_id
Keep filters precise—every event that passes will contribute to your metered totals
-
-
-
In the Metrics pane, define the metric to bill on using scripted fields.
Step 3: Create a Scripted Field for the Billable Metric
-
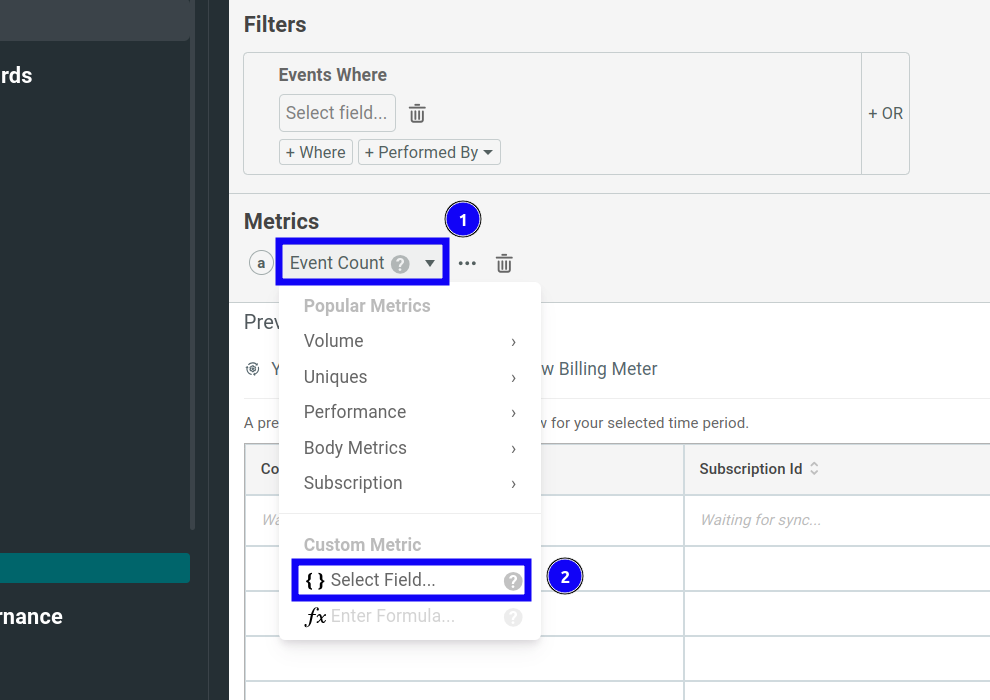
In the Metrics pane, the default billable metric is Event Count. Select it and then select { } Select Field.
![Choosing a scripted field as the custom metric to bill on in the Billing Meter metrics list. Choosing a custom metric and then the scripted field option.]()
-
Select <> Scripted Field from the list.
-
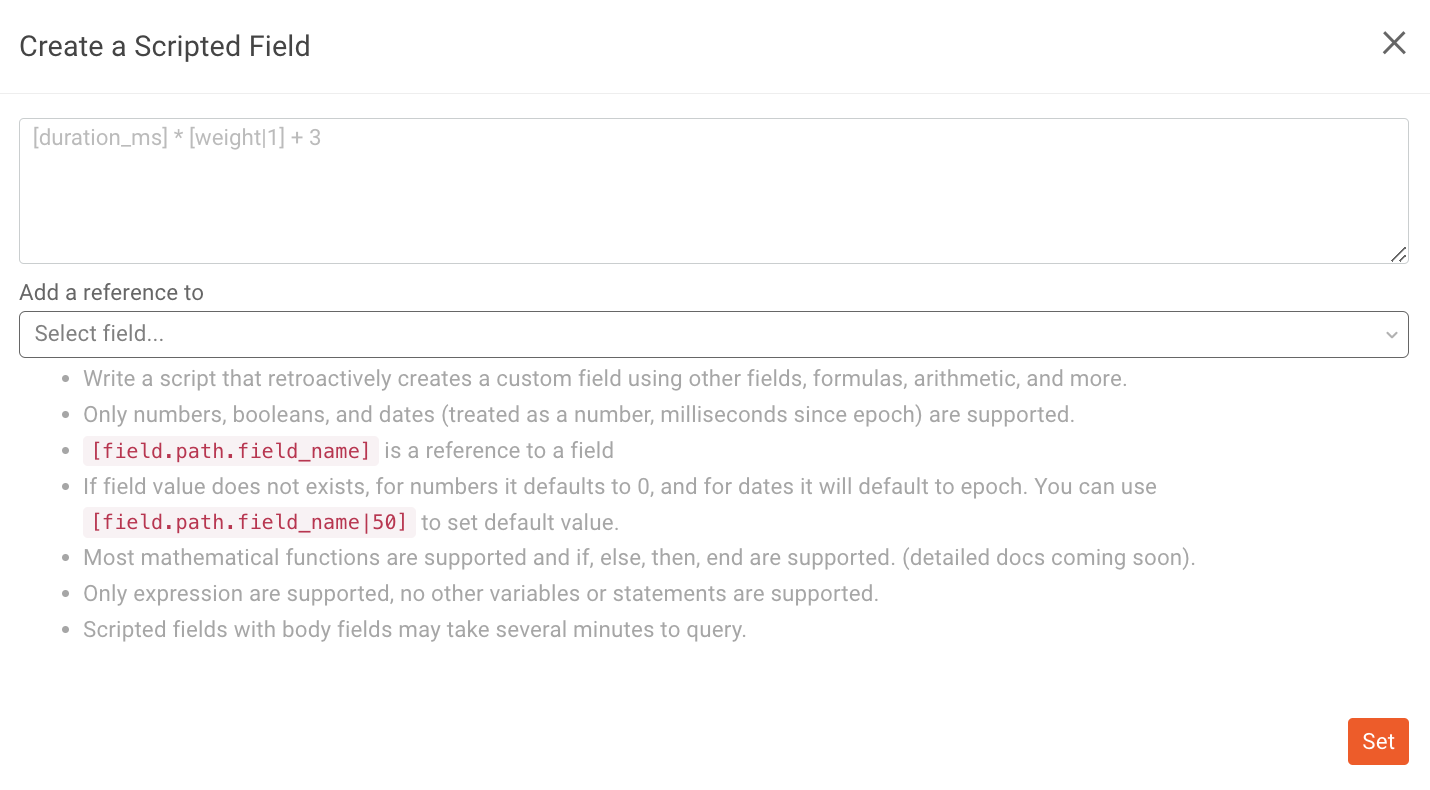
Write the script and then select Set.
![Creating a new scripted field. 'Create a Scripted Field' dialog in Moesif.]()
The field list following the text box where you write the script contains the existing fields so that you can easily reference them in your script.
Example Scripts for Revenue Share Logic
Depending on your business model, here are some common logic patterns for your script. Some scripts provide default values with the syntax field|field_default_value to accurately handle events that don’t contain the field.
- Percentage-Based Commission
-
[response.body.order_amount|0] * 0.10Use this when you take a percentage cut of a transaction, like 10% of every order.
- Usage-Weighted Charges
-
[metadata.tokens_used|0] * 0.002Use this when you base the revenue share on a unit multiplier—for example, $0.002 per token in an AI API.
- Partner-Specific Rate
-
[response.body.order_amount|0] * [metadata.partner_rate|0.15]Use this when the commission rate is dynamic and included in the event payload or metadata.
These expressions return a numeric value per event, which Moesif aggregates per customer by your billing meter.
Step 4: Test the Billing Meter
After filling in all the details, select Create to finish creating the billing meter. Moesif then prompts you to test the meter. You can also select Test Meter to start the process manually. See Testing Billing Meters for instructions.
Testing allows you to debug and fine-tune the logic without deploying code changes or waiting for a billing cycle to complete. You can validate the accuracy of your billing meter and that it works perfectly with its billing provider, filters, billing criteria, and events.
What to Look For During Testing
To make sure your scripted field and meter configuration are accurate, here are some cases we recommend you double-check during testing:
| What to check | What to confirm |
|---|---|
| Field access | Script pulls data from the correct path. |
| Default handling | Missing fields fallback safely. |
| Correct filtering | Meter includes only intended event types. |
| Output sanity | Values are correct and align with the transaction—for example, a $100 order yields $10 commission. |
Common Mistakes
- Forgetting to use default values with
field|default_field_value. - Causes scripts to fail or produce null if data is missing on some events
- Overly broad filters
- Leads to metering of unintended traffic like health checks, retries, or internal-only routes
- Script returns cost, but billing system expects usage
- If your script computes the dollar amount, make sure your product price is $1 per unit. Otherwise, you’ll charge incorrectly.
Step 5: Analyze and Monitor Customer Usage
Once you’ve validated your billing meter and made it live, you can begin using Moesif to track, audit, and operationalize the revenue share model over time. In Moesif, usage-data and the corresponding revenue amounts become first-class analytics. This means your platform team, finance team, or even external partners can interpret billing behavior in a transparent, audit-friendly way. You have more means to achieve predictable revenue streams.
For example, in each billing meter, you can find the detailed usage statistics in the Synced Usage pane.
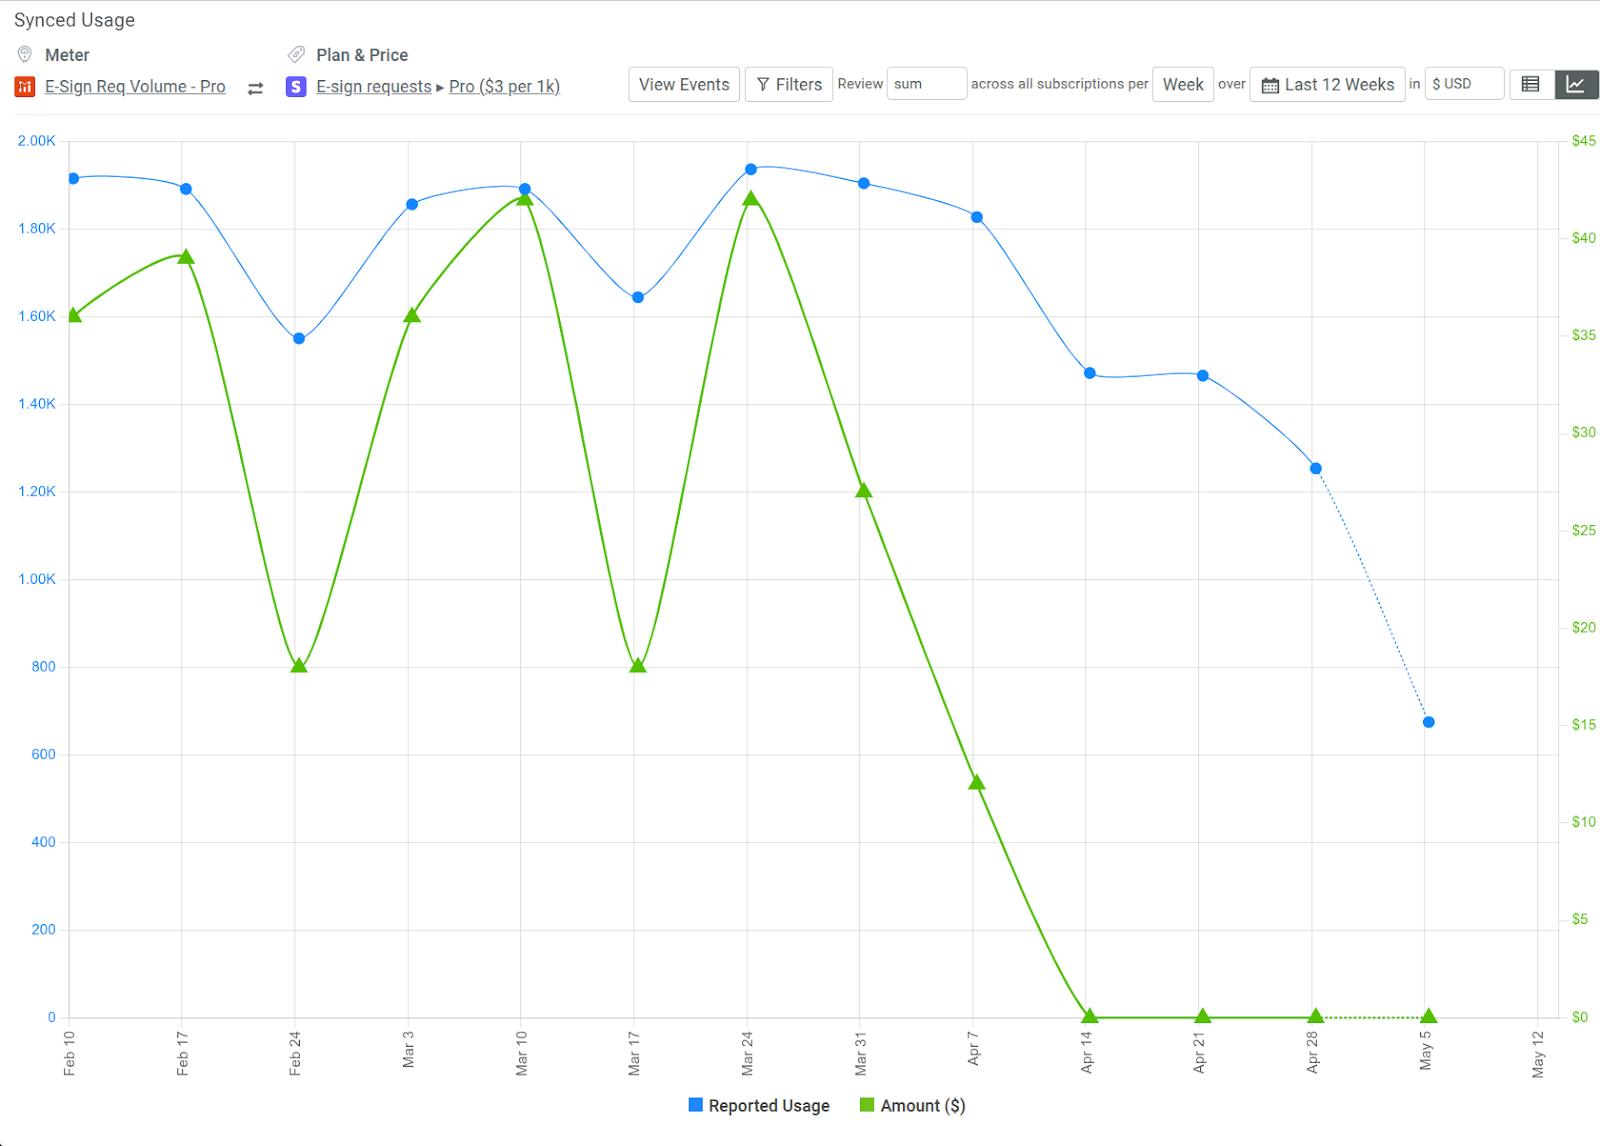
You can filter, see corresponding events that generated revenue, specify the time period, and choose a tabular view of the data.
You can also use Billing Report Metrics to understand customer usage and associated revenue over time. Billing Report Metrics also allow you to export raw billing report metrics data in JSON and CSV formats. This allows you to leverage this data in internal systems and external workflows, like integrating with analytics tools or data warehouses for financial modeling.
Next Steps
- Leverage Moesif’s Embedded Templates or Behavioral Emails to keep your partners abreast of usage and revenue in real time.
- Duplicate your existing billing meter and modify your scripted field to run simulations and tests like:
- Higher or lower commission rates
- Per-unit price adjustments
- New usage-based billing models
- Analyze your customers through powerful analytics like funnels, customer retention, and more.
- Set up monitoring and alerts in conjunction with API product and customer analytics to track adoption, detect anomalies, and iterate on your pricing structure.
